Advertisement
+7
--
+
....
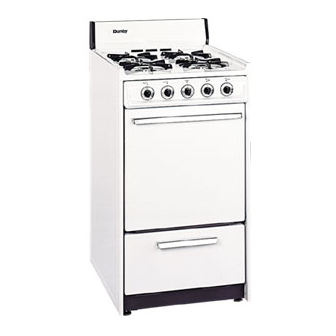
This manual contains information for:
, Important Safeguards
• Installation
• Use and Care
Certain
ranges come equipped
with special features.+ Determine
from a study of
your range which of the instructions
given in this booklet pertain to your range.
This booklet gyves valuable
instructions covering
the installation,
adjustment
and
use of your range,
HOW
TO OBTAIN
SERVICE
AND!OR
PARTS
When
your range does not operate
in accordance
with the instructions
in the
manual,
you should contact
the dealer in the immediate
vicinity
for service.
Or,
the purchaser
may contact the service organization
noted on the warranty,
IMPORTANT
'TO THE OWNEROFTHE
RANGE:
Retain IhJs owner's manual for futumreference.
TO THE INSTALLER:
Leave this owner's
maauat
with Ike range,
Read and Save These Instructions
Advertisement
Table of Contents

Subscribe to Our Youtube Channel
Related Manuals for Danby DGR546W


Summary of Contents for Danby DGR546W
- Page 1 ..This manual contains information for: , Important Safeguards • Installation • Use and Care Certain ranges come equipped with special features.+ Determine from a study of given in this booklet pertain to your range. your range which of the instructions This booklet gyves valuable instructions covering the installation,...
-
Page 2: Table Of Contents
Range Record in the space provided b_]ow the Model No+ and Seria! No. of this a,pptiance. These numbers are found oct the serial plate located below the 1)ft-up c gokto _. Model No+ Ty?e_Number Serial No+ Purchase Date+ Record these n_mhers foE future use. - Page 3 READ ALL IMPORTANT SAFEGUARDS AND ALL INSTRUCTIONS BEFORE USING THE APPLIANCE. Remove all tape and packaging wrap before using the oven. If any glue remains, touch the residue with the stgcky s_de of the tape akeady removed, or use a cloth soaked with robbing alcohol Use caution...
- Page 4 IMPORTANT SAFEGUARDS, Continued • Do not allow children to climb or play around the range, The weight of a child oft an open overt door may cause the range to tip, resulting Jn serious burrts oz other iajuD: • USER SERVICING: De not repair or replace any part...
- Page 5 IMPORTANT SAFEGUARDS, Continued • Use only dry potholders, Wet or damp pothoiders on hot surfaces could result in burns fi'om steam. Do not tot the potholde.r touch hot heatin_ areas. Do not use a towel or other bulky cloth instead of a potholder, , Use proper flame size, Adjust flame size so it does not extend beyond the edge of the utensil...
- Page 6 IMPORTANT SAFEGUARDS, Continued • Do not use the broiler pan wilhout its insert. The broiler pan and its in_ert aIlow dripping fat oi' grease to drain and be kept away fro.m the high heat of the broiler° Do not cover the insert with foil. Exposed Fat or _rease could Jgnhe.
-
Page 7: Energy Saving Ideas
ENERGY-SAVING IDEAS Surface Cooking Use lids when sudace cooking A lid traps steam and uses it to speed up the cooking process. If you have a pressure cooker or vegetabte steamer, use it, You'll waste fewer v[lanfin5, save time and cut energy cosls, Use medium-weight, flat bottomed pans that match the flame size, Choose pans made of... -
Page 8: Installation Instructions
INSTALLATION INSTRUCTIONS Be sure appliance is properly installed m_d grounded by a qualified teel_niclau. It is the responsibility of Ihe technician to make certain lhat your raage is properly installed. Situations caused by improper installation are not covered under the wart'artty. Aay expenses incurred due to such situations will not be paid by the manufacturer... - Page 9 GAS CONNECTIONS (All Units) Have the dealer where you purchase _,our new range install it or have him recommend qualified installer, InstaJLation must confom't with local codes, in the absence of local codes, the installation must conform with the National Fuel Gas Code, ANSI Z223.1.
- Page 10 BACKGLIARD INSTALLATION INSTRUCTIONS Ranges A. Remove main top. B. Prace the backguard on top of end panels at lhe rear of range C, Conttect the "disconne, ct plug", for power to backguard if equipped _ith electrical features, See No, 1, D.
-
Page 11: Wall Clearances
WALL CLEARANCES All units m_st be installed in accordance to mintmum rear and side wall clearance and clearances extended vertically above cooking top which are stated on tile serial plate. (The serial plate is tocaled below the cooktopJ ANY OPE/_INGS IN 7HE WALL BEHIND THE UNIT AND IN THE FLOOR UNDER... -
Page 12: Alignments And Adjustments
ALIGNMENTS AND ADJUSTMENTS Installation tl is the respousibility of the i_sta]ter to make ee_in that the range, is properly adjusted at the time of installation. Situalions caused by imlPml_r adjustments or improper installation are. not covered under the warranty. Any incurred due to such expenses... - Page 13 2. Top Pilot, (Gas) The top burner punts on floor mounted rQnges can be adjusted by a screw located the back of' the thennDstal at the pilot filter. Adjust the pilol flame until there is only a tip of yellow on the flame. Pilots are constant bur_[ng..
- Page 14 ALIGNMENTS AN D ADJUSTMENT, Continued Keep appliance area dear and free from combustible materials, gastflhle, and other tlammable vapors and liquids. Do not obstruct the flow of air tlmt is necessary for combustion ventilation. 3. Top Burner Valves Adjusted by Ihe opening o: tightening of the orifice hood which is located on the valve where it attaches to the top burner: \Vhen for L.Pgas the.
- Page 15 ALIGNMENTS AND ADJUSTMENTS, Continued If lhe humor is too high (make sur_ burner is coo]), push it down. Supply enough force with the palm o[ your hand to accomplish this adjustment. To raise, pull up on the bun_er support at the center of the support. 4.
- Page 16 ALIGNMENTS AND ADJUSTMENTS, Continued Ovens with Pilotless Electric Ignition: Free-Standing Ranges Ranges equipped with the spark ignition system will ba_'e an that has a oven pilot ignitor "flame sensing" feature (hat automatically stops the sparking once the ovet_ pilot gas is ignited.
- Page 17 ALIGNMENTS AND ADJUSTMENTS, Continued IF THE OVEN BURNER DOES NO]" IGNITE WITHIN 20 TO SECONDS AFTER PILOT IS LIGHTED, TURN OVEN TEMPERATURE CONTROL TO OFF AND WAlT FOR POWER TO BE RESTORED, DO N(Yl" ATTEMPTTO RELIGHT THE PILOTAGAtN. If the oven does not function properly when the power is re_tored, or at any oflter lime, call a serviceman to determine...
- Page 18 OPERATION OF RANGE Using Your Range The range may have only part of the features described within this martt_aL If ),our range has some features which me not covered in this manual, _b_e features _ili be covered other enclosed ][teratu_. Top Burner Operallon Note: When belling...
- Page 19 Baking When baking follow the recipe i_structions. Use correct ingredients, measure them carefufl:r; and use Ihe correct type and size _tensil suggestect [n the recipe, Remember preheat properly, Avoid frequetlt opening of the oven door during preheating and baking. +,\_en baking cakes in _lass baking dishes, lower the oven temperature 25°F to prevent browning oF the bottom and sides before lt_e top becomes...
- Page 20 Toprotoct t heovenboltomsurface, place, a piece of aluminum foil slightly larger than the baking dish on the rack below to catch any boilovers. It should not con_pletely cover the rack as this would cause uneven heat in the oven, Aluminum fall should not be placed on theo'¢en bottom.
-
Page 21: Optional Equipmem
OPTIONAL EQUIPMENT Continuous Cleaning Feature If your o_,erthas the continuous cleaning fealute, it will ha_e a dull gtay finish with white speckles thai has l_en b|erLdextw_th a special catalyt[c material (]f file oven has a glossy finish, Jt is standard pon:e]aia enamel without the continuous cleaning featu_.) Bejbre Using }bur Oven-Read These hzstruetions... - Page 22 OPTIONAL EQUIPMENT, Continued Backguard and Control Panel Features Electrical Grounding lnstractions: 3his appliance, whert equipped with I 01 " ' electdcal equipment, has a thtee-pron_, gI"oundmg ping for your protection and should be plugged directly into a properfy grounded receptable, Do not cut or remove ground...
-
Page 23: Cleaning Ihe Range
CLEANING THE RANGE Always keep cleaning materials mad chemicals in a safe place and away from children. Know what you m'e using. Make sure all parts of the range are COOL before cleaning, sure to replace the parts correctly_ Knobs Pull for, yard on the knobs Io remove them, Wash _n a water solution with a mild detergent mix. - Page 24 CLEANING THE RANGE, Continued Products of combustion from the top pilots as well as certain atmospheric conditions create an oxidation reaclion on the uttdetside of the top. This ,.viii appear as rust or in the form of a reddish brown deposit.
-
Page 25: Lift-Off Doors
LIFT-OFF DOORS Locking rnechan_sm lever To unlock apply force Lift-Off Oven Door (onsome models) (On some modets) but it Js heavy. You may need help OVen door ['emo'_,'flbie removing and repl acing the door. To remove the tloo_ open it to the full open position. Raise the locking mechanism app]yin_... -
Page 26: Trouble Shooting Guide
TROUBLE SHOOTING GUIDE CAIJSE CORRECTION PROBleM _. Pilot 3 sore, a, Re%hi pilot. ]. fiurfare bsraer falls Iolight. b. Compeer_ange to wall o_tIet, b_ Raog_ not oonn_cted to check cb.cuk breakeror [use power sltppty (Solid Slate IgnilJ_t), C. Have se_icem_n rat_ burner. c:, Burr Jnc_rfecffyrated d Clean ports _n properposkion... - Page 27 NOTES...
-
Page 28: Wiring D_Agmm
WIRING DIAGRAM FOR GAS RANGES WITH ELECTRICALEQUIPMENT iiiiiiiiiiiiii illlllllllll ¥ "1P" ".P" "--¥ "gP" _4_ "_ s'_;_H-_ , s_,TcHEs OVEN USE IHI_; DIAt3F_M FOR IGtlITION LEAD RANGES EQ'UIPPED W'ETHGPJDOlE WA1.L PLUG REFER ONLY TO FEATURES WHICH AIRE EQUIPPED ON YOUR RANGE WAft N IN8 -E U'E, OTRtCA L G ROU tlDIN O INSIRUCTICNS: THIS APPLIANCE...
Need help?
Do you have a question about the DGR546W and is the answer not in the manual?
Questions and answers