NuWave OxyPure - Smart Air Purifier Manual
- Owner's manual (44 pages) ,
- User manual
Advertisement
PRODUCT REGISTRATION
REGISTER NOW for an additional 6 mounths warranty!
As a special thank-you for registering your NuWave unit, you'll automatically receive an additional 6 months added to your limited manufacturer's warranty!*
All you have to do is follow these simple steps.
- Using your smartphone or smart device, scan the QR code located on the unit label on the back of the unit.

- You will be directed to NuWave's product registration page with your unit's unique serial number automatically entered in the appropriate field.
NOTE: If you do not have a web-enabled smart device, simply visit nuwavenow.com/QR and manually enter in your unit's serial number. - Fill out the remaining information and complete the optional survey.
- Once you submit your information, you will receive a confirmation email containing your extended warranty details.

*Register your product within 1 year of date of purchase for a free 6-month extension of your limited warranty.
DOWNLOAD THE QR CODE APP TO YOUR MOBILE DEVICE
- Open your mobile app store (App Store, Google Play).


- Search for "QR code readers."

- Simply download the QR code reader to your phone, open it, scan the code and you are ready to go.
NOTE: You may need to open your downloaded QR code reader each time you want to scan a QR code.


IMPORTANT SAFEGUARDS
HOUSEHOLD USE ONLY • READ ALL INSTRUCTIONS BEFORE USE
READ ALL INSTRUCTIONS

When using the OxyPure, basic safety precautions should always be followed:
![shock hazard]() To protect against risk of electrical shock, DO NOT immerse cord, plug, or any part of the OxyPure unit in water or any other liquids.
To protect against risk of electrical shock, DO NOT immerse cord, plug, or any part of the OxyPure unit in water or any other liquids.- Close supervision is necessary when the OxyPure is used by or near children. The unit is not intended for use by children, persons with reduced physical, sensory, or mental capabilities, or those with lack of expertise or knowledge of this unit.
- Do not operate OxyPure with a damaged cord, plug, after unit malfunctions, is dropped, or damaged in any manner. Contact Customer Service at 1-877-689-2838 or email help@nuwavenow.com for information.
- Discard the protective plastic covering the power plug before use.
- Do not run cord under carpeting. DO NOT cover cord with throw rugs, runners, or other coverings.
- Do not route cord under furniture or appliances. Arrange cord away from high-traffic areas where it will not be tripped over.
- Do not plug OxyPure in outlet or power strip that is being used by other appliances.
- Remove any dust or water from the plug, if needed.
- Set up the OxyPure on flat, stable ground.
- Do not set up where the OxyPure could be pushed, kicked, or tripped over.
- Leave at least 2-3 feet of space between the unit's vents and any walls.
- Do not install the unit near a heating device.
- Do not use in locations exposed to moisture or water.
- Do not use unit near flammable or combustible gases or vapors.
- Do not operate the OxyPure on its side.
- NOT INTENDED FOR OUTDOOR USE.
- Do not place objects on top of the OxyPure.
- Do not sit or stand on or lean against the OxyPure.
![burn hazard]() Alteration or modification of any part of the OxyPure or the use of attachments not recommended by the manufacturer may cause fire, injury, or damage to property.
Alteration or modification of any part of the OxyPure or the use of attachments not recommended by the manufacturer may cause fire, injury, or damage to property.- As with most electrical units, electrical parts are live even when the OxyPure is off. Be sure the unit is unplugged when assembling.
- Do not use the OxyPure in a factory or industrial setting where machine oil may be present in the air.
- Turn the power OFF on the OxyPure before unplugging the unit. Unplug the OxyPure from outlet when not in use, before putting on or taking off parts, when removing or replacing the filters, and before cleaning.
- Turn the power OFF and unplug when the unit is unattended for extended periods.
- FOR HOUSEHOLD USE ONLY.
- Keep manual handy for future reference.
 To protect against risk of electrical shock, DO NOT immerse cord, plug, or any part of the OxyPure unit in water or any other liquids.
 Alteration or modification of any part of the OxyPure or the use of attachments not recommended by the manufacturer may cause fire, injury, or damage to property.
RISK OF ELECTRIC SHOCK:
These servicing instructions are for use by qualified personnel only. To reduce the risk of electric shock, do not perform any servicing other than that is contained in Instructions unless you are qualified to do so.
ADDITIONAL SAFEGUARDS
SEE INSTRUCTIONS BEFORE USE
Electrical Information
A short power-supply cord (or detachable powersupply cord) is provided to reduce the risk resulting from becoming entangled in or tripping over a longer cord. Longer detachable power-supply cords or extension cords are available and may be used if care is exercised in their use. If a longer detachable power-supply cord or extension cord is used:
- The marked electrical rating of the extension cord should be at least as great as the electrical rating of the appliance.
![shock hazard]() The longer cord should be arranged so that it will not drape over the countertop or tabletop where it could be pulled on or tripped over unintentionally. The OxyPure should be operated on a separate electrical outlet from other operating appliances due to wattage limitations. The appliance has a polarized plug (one blade is wider than the other). To reduce the risk of electric shock, this plug is intended to fit into a polarized outlet only one way. If the plug does not fit fully into the outlet, reverse the plug. If it still does not fit, contact a qualified electrician. Do not attempt to modify the plug in any way.
The longer cord should be arranged so that it will not drape over the countertop or tabletop where it could be pulled on or tripped over unintentionally. The OxyPure should be operated on a separate electrical outlet from other operating appliances due to wattage limitations. The appliance has a polarized plug (one blade is wider than the other). To reduce the risk of electric shock, this plug is intended to fit into a polarized outlet only one way. If the plug does not fit fully into the outlet, reverse the plug. If it still does not fit, contact a qualified electrician. Do not attempt to modify the plug in any way.- If the appliance is of the grounded type, the cord set or extension cord should be a grounding-type 3-wire cord.
SAVE THESE INSTRUCTIONS
Read and understand the entire manual before using the OxyPure.
- Do not operate the unit if abnormal sounds or motion is detected.
- If a hard or foreign object comes into contact with fan, do not operate. Turn off and unplug unit.
- Inspect for any loose or missing parts before and after each use. If parts are loose, damaged, or missing, contact Customer Service at 1-877-689-2838 or email help@nuwavenow.com.
- Always use extreme caution when operating the OxyPure or any machinery.
- Children should be supervised to ensure that they do not play with the appliance.
- Do not pull, lift, drag, pick up, or carry the unit by its cord.
- Do not block air inlet or outlet vents.
- Do not operate the OxyPure without a filter.
DO NOT USE THE UNIT FOR OTHER THAN ITS INTENDED USE.
Note: Put the OxyPure on a surface that is horizontal, even, and stable. This appliance is intended for normal household use.
NOTICE: THE FAILURE TO FOLLOW ANY OF THE IMPORTANT SAFEGUARDS, ADDITIONAL SAFEGUARDS, OR THE INSTRUCTIONS FOR SAFE USE IS A MISUSE OF THE OXYPURE THAT CAN VOID YOUR WARRANTY AND CREATE THE RISK OF SERIOUS INJURY.
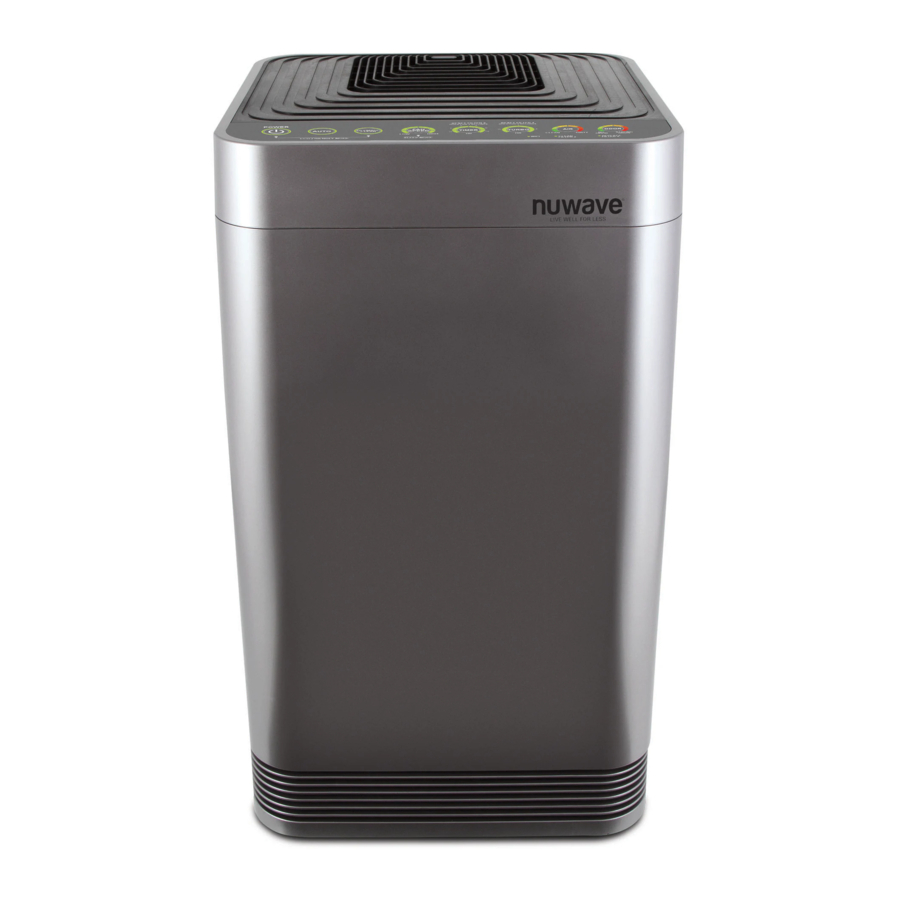
PARTS & ACCESSORIES

- Air Vent
Part #: 47101 - Front Display Touchpad Panel
Part #: 47102 - Handles
- Odor Sensor
- Base
Part #: 47104 - In Flow Vent
- Filter Slot Cover
Part#: 47105 - Wheels
-
- Sensor Cover
Part #: 47106 - Filter Sensor
Part #: 47107
- Sensor Cover
- HEPA/Activated Carbon Combo Filter
Part #: 47108 - Ozone Emission Removal Filter
Part #: 47109 - Bio-Guard Filter
Part #: 47110 - Stainless Steel Pre-Filter
Part #: 47111
To order parts head over to the Replaceable Parts section of this manual or NuWaveNow.com.
INSTRUCTIONS
Do not plug OxyPure in outlet or power strip that is being used by other appliances.
Air Filter Assembly
The OxyPure comes with four different preassembled filters inside the unit. When filters require replacement or cleaning, follow all directions when assembling.
See Cleaning & Maintenance.

The order of the filters inside the OxyPure is as follows:

- Stainless Steel Pre-Filter
- Bio-Guard Filter
- Ozone Emission Removal Filter
- HEPA/Activated Carbon Combo Filter
Filter Functions
Air purifiers are more effective in operation when all windows and doors are closed. Purifies extra-large rooms up to 1,200 sq. ft.
Stainless Steel Pre-Filter
Washable and reusable for up to 20 years.
Captures and collects large particles, pollutants, and allergens including pet hair, dander, and pollen.
Bio-Guard Filter
Washable and reusable for up to 20 years.
8,000V, positive and negative charges capture and trap pollutants as small as 0.09 microns, including bacteria, mold, viruses, smoke, pollen, and allergens.
Ozone Emission Removal Filter
Reusable for up to 20 years. Not washable.
Eliminates ozone emissions and other harmful airborne chemicals.
HEPA/Activated Carbon Combo Filter
Lifespan, 6 months to 1 year. Not Washable.
Captures and traps pollen, allergens, industrial emissions, VOCs including formaldehydes, household fumes, odors and nitrogen dioxides from gas stoves and car exhausts.
WIFI CONNECTION
The OxyPure is equipped with Wi-Fi to operate the unit from any location. To set up and activate the Wi-Fi:
- Download the NuWave Connect app via the Apple Store or Google Play on your smartphone or device and open the app.
- Make sure your phone is connected to your network. Open the app and follow the instructions for the verification process. Once verification is complete, begin adding devices. To add a device tap "+" then select "OxyPure."
- Next, plug the OxyPure into a compatible power outlet. To activate Wi-Fi Pairing Mode, press and hold the power button on the OxyPure for 2 seconds until the light next WIFI begins to rapidly blink at a rate of about 2 blinks per second. Once the Wi-Fi light is rapidly blinking, in the app, tap the Finish Network Configuration button on the bottom of the Add Device page.
- Next, you will be prompted to either connect to your network or confirm your existing network password.
Note: To either connect to or change networks, depending on your phone, you may be removed from the app to complete the network connection. Return back to the NuWave Connect app and continue with the setup process. - When the OxyPure is connected to the Wi-Fi, the light next to "WIFI" will stop flashing and stay continuously lit.
- If the OxyPure did not connect to your network, the WIFI light will turn off. Follow steps 3-4. Make sure to select the proper Wi-Fi network and type the correct password.
| Wi-Fi LED Status Pairing Mode & Standby Mode | |
| Solid Light | The OxyPure is paired with the Wi-Fi and ready to be used. |
| Rapid Blinking Light | The OxyPure is in Pairing Mode. The OxyPure will remain in Pairing Mode for up to 3 minutes, or until your device is paired. |
| Slow Blinking Light | The OxyPure is in Standby Mode. |
| No Light | The OxyPure's Wi-Fi is off. |
Note: If the light on your unit is blinking slower, the unit is in WiFi Standby Mode. To exit Standby Mode and initiate the Pairing Mode, press and hold power for 2 seconds until the WiFi light begins blinking rapidly.
Note: The OxyPure, as with most IoT devices (computing devices), will only connect to a 2.4GHz* network.
- To reset the OxyPure WIFI, press and hold down "Power" for 3 seconds. Follow step 4 above. The OxyPure can now be operated from any location.
*Most routers will broadcast in 2.4GHz. If you need help activating 2.4GHz, contact your ISP (Internet Service Provider).
Power ON/OFF
- Plug in your OxyPure into an outlet. Power will be lit in red and unit will be in standby mode.
- Press Power. Unit will turn on and Power will be lit green.
- Press AUTO. AUTO will illuminate.
- Bars next to AIR and ODOR will illuminate, measuring current air quality.
- The fan will start.
- Press Power again to turn unit off.
- When you select a different mode other than the default "AUTO" before turning off, the unit will run the previously selected mode when it is powered back on.
AUTO
When AUTO function is used, your unit will adjust the fan speed automatically (no time limit).
- Press "AUTO". "AUTO" will be lit.
ULTIMATE CLEAN
When in ULTIMATE CLEAN mode, the unit will automatically adjust to the highest or lowest fan speed based on your air quality (no time limit).
- Press "ULTIMATE CLEAN". ULTIMATE CLEAN will be lit green.
- Press "ULTIMATE CLEAN" to turn off.
SLEEP MODE
When in Sleep Mode the LED lights will be off but the fan will still be active. Adjust the fan speed to your preference prior to going into Sleep Mode.
- Manually adjust FAN SPEED.
- Press and hold "FAN SPEED" for 2 seconds to activate SLEEP MODE.
- Unit will run under the fan speed that was previously selected.
- To turn off Sleep Mode, press any button.
Note: ULTIMATE CLEAN and TURBO will work during Sleep Mode.
FAN SPEED
You can adjust from 6 different speeds (LOW to HIGH).
- Press "FAN SPEED" to adjust.
- To go back to the lowest level of fan speed, continue to press "FAN SPEED" until the first bar is lit.
TIMER
Use the TIMER function to choose the duration of operation.
- Press "TIMER". The bar next to ½ hour will be lit.
- There are 6 preset times to choose from.
- Press "TIMER" to increase time.
- Choose from ½ hour, 1, 2, 4, 8, or 12 hours.
- After pressing "TIMER" six times, all bars will be lit.
Press "TIMER" once more to turn TIMER off.
TURBO
The TURBO function cleans your air using the highest fan speed at selected times.
- Press "TURBO" to adjust from ½ hour, 1, or 2 hours.
- When the selected time has finished, TURBO will shut off automatically.
To go back to the lowest level, continue to press "TURBO" until bar next to ½ is lit.
AIR QUALITY INDICATOR
The OxyPure will automatically measure and display your current air quality in the room.
- The bars will illuminate around "AIR" and "ODOR", indicating the current air quality. Bars will increase and decrease, and are color coded, according to air quality.
CLEAN AND REPLACE FILTER INDICATORS
- The lights next to CLEAN FILTER 2 and REPLACE FILTER 4 will illuminate, indicating that your filters will need to be cleaned or replaced.
- To reset Indicators, see "Resetting the Filter and Air Quality Indicators" in Cleaning & Maintenance.
ADVANCED FEATURES
ULTIMATE CLEAN with TURBO
Cleans at the highest fan speed for ½ hour and will switch to "ULTIMATE CLEAN" mode.
- Press "ULTIMATE CLEAN". ULTIMATE CLEAN will be lit green.
- Press "TURBO". Default is ½ hour and can adjust from 1 to 2 hours.
- Press "TURBO" a fourth time to turn off.
ECO-FRIENDLY MODE
OxyPure will turn on automatically once it detects poor air quality. The fan speed will adjust based on the quality of air.
- Press "POWER" and "ULTIMATE CLEAN" at the same time. POWER will be backlit yellow.
- Press "POWER" and "ULTIMATE CLEAN" again to turn off the Eco-Friendly Mode. "POWER" will no longer be yellow.
TURBO with TIMER
When using TURBO with TIMER the default time is set to 2 hours.
- Press "TIMER" to increase or decrease the time.
- Choose from ½ hour, 1, 2, 4, 8, or 12 hours.
TURBO with AUTO
Use the TURBO function to select desired time limit.
Once time is up, the unit will switch to "AUTO."
- Press "TURBO" to adjust from ½ hour, 1, or 2 hours.
- Press "AUTO".
CLEANING & MAINTENANCE
Your OxyPure can easily be moved from one location to another. Just hold the OxyPure by the handles on each side and roll the unit to the chosen location. The wheels underneath provide extra maneuverability and mobility whenever it's needed.

Before First Use
Wipe Top Vent and In Flow Vent with a slightly damp cloth or paper towel. Dry thoroughly before use.
After Use
Your OxyPure should be cleaned periodically and after excessive use to ensure proper performance and function. To clean the outsides of the OxyPure, use a cloth or paper towel to remove dust and other particles. For tougher buildup, use a damp cloth or paper towel and dry thoroughly.
Cleaning the Top Vent and In Flow Vent
- Use a soft brush to remove dust and debris.
- If needed, use a slightly wet paper towel or damp cloth to remove larger buildup. Do not use any harsh abrasives or cleaning pads on Top Vent or any part of the unit.
Cleaning the Odor Sensor Opening

The Odor Sensor is located on the side corner of the OxyPure toward the top, under the small grill opening.
- Keep Odor Sensor clear of dust and debris using a soft cloth to maintain accurate odor readings.
- DO NOT tamper with Odor Sensor or opening over Sensor. Do not spray inside or near small grill opening over the Odor Sensor. Doing so may cause the Sensor to malfunction and can void your warranty.

DO NOT drop any dust or residue into the OxyPure when cleaning.
The order of the filters inside the OxyPure is as follows (bottom to top):

- Stainless Steel Pre-Filter (washable)
- Bio-Guard Filter (washable)
- Ozone Emission Removal Filter (not washable)
- HEPA/Activated Carbon Combo Filter (not washable)
- The OxyPure should be placed on the floor when assembling the filters.
The CLEAN FILTER 2 indicator will turn blue after 3 to 6 months, indicating the filter should be cleaned for optimal results (Bio-Guard Filter). The CLEAN FILTER 2 indicator will turn red after 6 months of use, indicating the filter needs to be cleaned.
The REPLACE FILTER 4 indicator will turn red when the filter (HEPA/Activated Carbon Combo Filter) needs to be replaced. The filter will last 6 months to 1 year depending on how often the unit is running in its environment.
Changing the Filters
The filters inside the filter slot need to be changed or cleaned on schedule to help your OxyPure maintain optimum, efficient performance.
- Remove Filter Slot Cover in back rear of the OxyPure using its built-in handle.
- Slide out filters that need cleaning or replacing.
- Allow washable filters to dry completely before you reinstall into the unit.
- Never place a wet filter into the OxyPure.
- Filter Slot Cover must be secure or unit will not work.
DO NOT WASH Ozone Emission Removal Filter or HEPA/Activated Carbon Combo Filter. Ozone Emission Removal Filter should be replaced every 20 years. The HEPA/Activated Carbon Combo Filter should be replaced 6 months to 1 year, depending on how often the unit is running in its environment.
Unplug the OxyPure from the power source before inserting or removing any parts or attachments and before cleaning.
Cleaning the Filters

To clean the Bio-Guard Filter:
- Remove filter.
- Spray mild degreaser, let sit for 2-3 minutes.
- Submerge in warm water, shake, remove.
- Repeat process until clean.
- Rinse with warm water.
- Dry completely before use.
The Pre-Filter collects large particles and will need to be cleaned at least once every two months depending on use.
- Use a vacuum or paper towel to remove any dust or lint.
- Clean with warm soapy water.
- Rinse thoroughly and remove any soap particles on the filter.
- Allow filter to dry completely BEFORE placing back into OxyPure (up to 12-24 hours to dry).
Resetting the Filter and Air Quality Indicators
- To reset the Air Quality Indicator for Filter 2, press and hold down "TIMER" for 2 seconds until a beep is heard.
- After a filter is cleaned or replaced and indicator is reset, the first green bar around AIR will be lit.
- To reset the Air Quality Indicator for Filter 4, press and hold down "TURBO" for 2 seconds until a beep is heard.
- After a filter is cleaned or replaced and indicator is reset, the first green bar around ODOR will be lit.
Cleaning the Filter Sensor

The Filter Sensor is located on the back, above the Filter Slot Cover.
- Open the panel (Sensor Cover).
- Using a dry cotton swab or small, soft brush, gently remove any dirt or dust from the Sensor.
- For more buildup on Sensor, wipe with a slightly wet cotton swab.
- Remove any moisture with a dry cotton swab.
- The Filter Sensor requires regular cleaning (approx. every 3 months) for the unit to operate efficiently.
- If your OxyPure is set up in an area with high dust accumulation, more frequent cleaning of the Filter Sensor is needed.
- Do not use the cotton swab on any part or area other than the Filter Sensor.
Cleaning Underneath Top Vent
The Top Vent of your OxyPure can be removed to clean the surface underneath the Top Vent and the inner vent screen.
To clean the surface underneath and inner vent screen:
- Turn the OxyPure off and unplug the unit.
- Lift the Top Vent using the built-in tab.
- Using a dry or slightly wet paper towel, wipe up any dust or accumulated particles off surface and inner vent screen.
To clean the inner wall opposite of the fan or to remove an object that has fallen through the inner vent:
- After removing Top Vent, locate the two screws closest to the end on the inner vent near the grill opening, underneath the main Top Vent. DO NOT unscrew the four outer screws.
![]()
- Use a Phillips screwdriver to loosen the two screws (only).
- Lift up inner vent.
- Only a portion of the inner vent will lift up.
- After cleaning inner wall with a soft cloth or paper towel, reassemble inner vent, retightening the two screws, and replace Top Vent.
- Make sure all parts are secure before plugging OxyPure back in and turning on again.

Note: DO NOT unscrew the four outer screws located toward the corners. Doing so will void your warranty.
Do not immerse the OxyPure in water. Clean with a damp sponge or cloth and wipe dry.
Make sure all parts and covers are securely attached.

TROUBLESHOOT GUIDE
| Unit does not turn on. |
|
| TIMER does not work when pressed. |
| The unit is not reading the function selected. Press "FAN SPEED" or "AUTO", then press "TIMER". |
| The fans are not blowing. |
|
| Speed of the airflow is not changing when "FAN SPEED" is pressed. |
| Unit may be in manual AUTO mode. Set the OxyPure to other operating mode on the touchpad then press "FAN SPEED". |
| Airflow out of Top Vent is weak. |
| Air filter(s) are dirty. Change or clean the air filters. |
| Unit is producing smoke or odor. |
| Air filter(s) are dirty. Change or clean the air filters. If problem continues, contact Customer Service at 1-877689-2838 or email help@nuwavenow.com. |
| CLEAN and REPLACE FILTER Indicators have not reset after filter(s) has been cleaned or changed. |
|
| ULTIMATE CLEAN does not come on when pressed. |
| The unit is not reading the function selected. Turn the unit ON/OFF by pressing "POWER" twice. |
| POWER is blinking red. |
|
| Odor Sensor is not resetting itself and not clearing all bars. All bars on the control panel are flashing. |
| Contact Customer Service at 1-877-689-2838 or email help@nuwavenow.com. |

Documents / Resources
References
Download manual
Here you can download full pdf version of manual, it may contain additional safety instructions, warranty information, FCC rules, etc.
Advertisement


Need help?
Do you have a question about the OxyPure and is the answer not in the manual?
Questions and answers