HP 4x - Hard Disk Drive Installation Kit Step-by-Step Installation Manual
- Frequently asked questions (4 pages) ,
- Using manual (15 pages)
Advertisement
Introduction
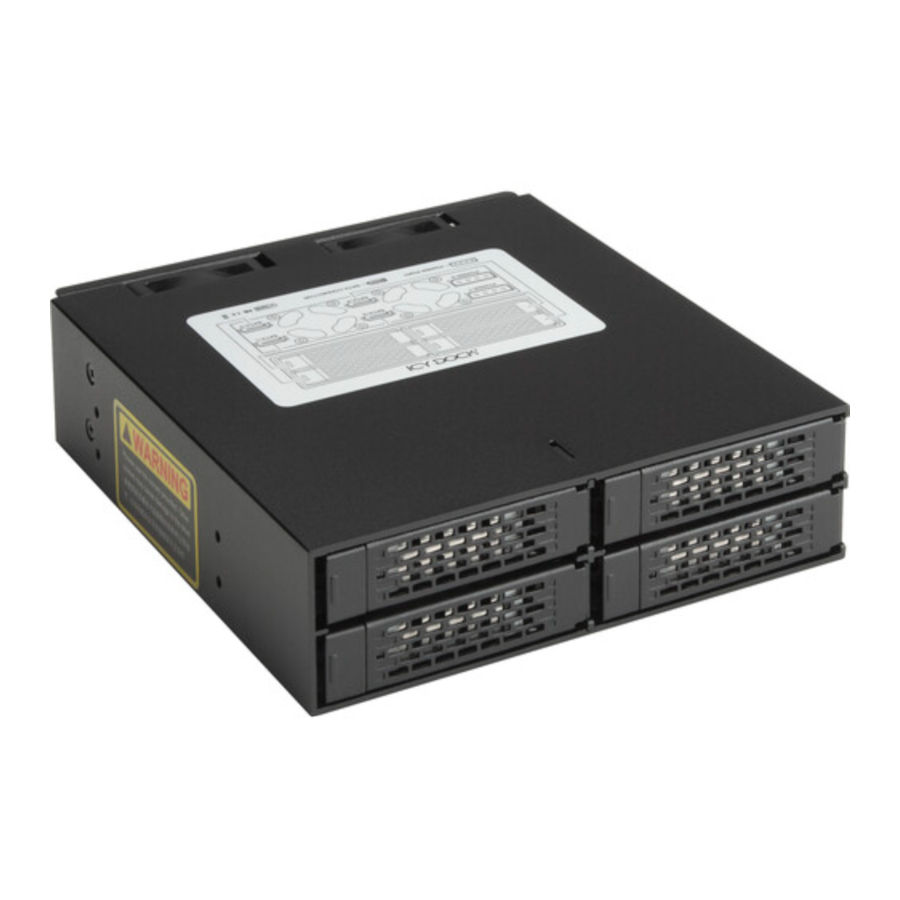
This document describes how to install a small form factor (SFF) hard disk drive (HDD) carrier in the optical disk drive (ODD) bay of the HP Z620 and Z820 Workstations.
Kit contents
- 4x carrier
- 16 counter-sunk screws
- 8 locking screws (not needed on Z620 or Z820)
- Three-way splitter power cable
- Installation instructions (this document)
Required tools
- Phillips screwdriver

These symbols on any surface or area of the equipment indicate the following:
 Presence of a hot surface or hot component. If this surface is contacted, the potential for injury exists. To reduce the risk of injury from a hot component, let the surface cool before touching.
 Presence of an electrical shock hazard. To reduce the risk of injury from electrical shock, do not open any enclosed area marked with this symbol.

Product must always be lifted by two persons to avoid personal injury due to product weight.

To reduce the risk of electric shock or damage to your equipment:
- Do not disable the power cord grounding plug. The grounding plug is an important safety feature.
- Plug the power cord in a grounded (earthed) outlet that is easily accessible at all times.
- Disconnect power from the equipment by unplugging the power cord from the electrical outlet.
To reduce the risk of serious injury, read the Safety & Comfort Guide. It describes proper computer setup, posture, health, and work habits for computer users, and provides important electrical and mechanical safety information.
Do not use the front bezel as a handle or lifting point when lifting or moving the computer. Lifting the computer from the front bezel, or lifting it incorrectly, might cause the computer to fall, resulting in possible injury to you and damage to the computer. To properly and safely move the computer, lift from the bottom of the computer.

Static electricity can damage the electronic components of the computer or optional equipment. Before beginning this procedure, ensure that you are static-free by briefly touching a grounded metal object.
To prevent damage to the computer, observe the following Electrostatic Discharge (ESD) precautions while performing the system parts removal and replacement procedures:
- Work on a static-free mat.
- Wear a static strap to ensure that any accumulated electrostatic charge is discharged from your body to the ground.
- Create a common ground for the equipment you are working on by connecting the static-free mat, a static strap, and peripheral units to that piece of equipment.
Preparing for installation
- If you need help preparing the computer for this installation, refer to the:
- Removal and replacement videos for your computer at http://www.hp.com/go/sml or
- Maintenance and Service Guide.
- Power down the computer, then disconnect the power cord.
- Power down all external devices, then disconnect them from the computer.
- Remove the side access panel.
NOTE: Install the SFF hard disk drives in the in the lower ODD bay first. - If necessary, remove the ODD filler tray.
- Lift and hold the green release lever for the optical bay (1) while sliding the ODD filler tray out of the bay (2).
- When the rear of the tray is near the edge of the bay, release the latch, but continue to slide the tray outward.

Removing the ODD filler tray
- If an optical disk drive is present, remove it.
- Disconnect the power cable and data cable from the rear of the ODD.
- Lift and hold the green release lever for the optical bay while sliding the ODD out of the bay. When the rear of the ODD is near the edge of the bay, release the latch, but continue to slide the drive outward.

Installing the SFF hard drives in the 4x carrier
NOTE: The HP Z820 Workstation supports two 4x carriers (eight SFF hard drives). The HP Z620 Workstation supports one 4x carrier (four SFF hard drives).
- To install the SFF drives into the carrier, follow directions provided by manufacturer. Install the SFF drives, starting at the upper row, then the lower row, moving left-to-right.

Order of SFF drive install - Install up to four SFF drives in each carrier.

Installing 4x carrier in ODD bay
- Before installing the carrier into the workstation ODD bay, attach the power cables to the back of the 4x carrier and to the workstation power cable.
- Attach the power cables to support the drives in the carrier, as needed. The upper plug on the 4x carrier (1), supports the upper row of drives, and the lower plug (2) supports the lower row of drives.

Power cables installation order - Plug the female ends of the power cables (1) and (2) into back of the carrier, and male end of the power cable (4) to the workstation power cable. The remaining power connector (3) is not used.

Attaching power cables - Plug the end of the carrier power cable (4) into the workstation power cable (5).
NOTE: When installing the 4x carrier in the ODD bay, install in the lower bay first.

Connecting power cables
- Attach the power cables to support the drives in the carrier, as needed. The upper plug on the 4x carrier (1), supports the upper row of drives, and the lower plug (2) supports the lower row of drives.
- Lift and hold the green release lever for the optical bay (1) while sliding the 4x carrier into the bay (2) until an audible click sounds.

Installing the 4x carrier - Attach the SATA cables to the rear of the carrier. Attach the upper row first, then the lower row, moving from right-to-left.

Attaching SATA cables


Reassembling the computer
- Reinstall the side access panel.
- Reconnect power to the computer and all external devices.
- Restore power to the computer and all external devices.
© 2012 Hewlett-Packard Development
Company, L.P.

Documents / ResourcesDownload manual
Here you can download full pdf version of manual, it may contain additional safety instructions, warranty information, FCC rules, etc.
Download HP 4x - Hard Disk Drive Installation Kit Step-by-Step Installation Manual
Advertisement


Need help?
Do you have a question about the 4x and is the answer not in the manual?
Questions and answers