WESTEK TE02DHB, TE22DHB - Indoor 1-Outlet Digital Timer Manual
- Instruction manual & warranty (2 pages)
Advertisement
FEATURES
- 20 programmable ON/OFF settings per week
- 12 hour AM/PM & 24 hour display
- Programmable in 1 minute interval
- Random ON/OFF Feature (2~30 minutes of programmed time)
- Manual Override Button: select temporary for one program period, or permanent override.
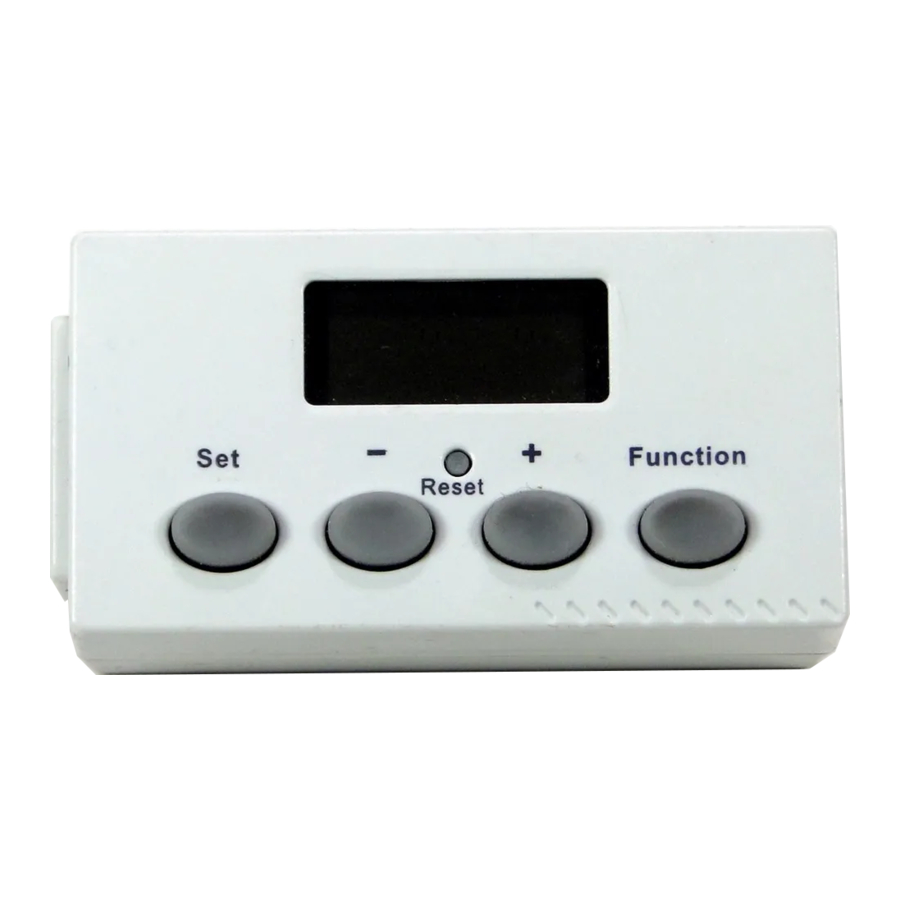
KEY FUNCTIONS

- SET: set time and confirm the program setting
- [+] / [–]: increase or decrease digit in setting
- FUNCTION: change output state to ON/OFF and set program
- RESET: initialize or reset unit
CLOCK TIME SETTING
- Press SET button for 3 seconds. Week digits will flash on display.
- Using [+] or [–] buttons set the correct week. Week day will increase or decrease continuously if [+] or [–] buttons are depressed for more than 1 second.
- Press SET button again to set Hour. Hour digits will flash on display.
- Using [+] or [–] buttons to set correct hours. Hour will increase or decrease continuously if [+] or [–] buttons are depressed for more than 1 second.
- Press SET button again to set Minutes. Minute digits will flash on display.
- Using [+] or [–] buttons set the correct Minutes. Minute will increase or decrease continuously if [+] or [–] buttons are depressed for more than 1 second.
- Press [–] button for 3 seconds to choose 12 hour AM/PM or 24 hour display.
- Press [+] button for 3 seconds to set Daylight Saving Time, 'DST' will appear on display. Press again to cancel.
PROGRAMMING OF SWITCHING TIMES (ON/OFF)
- Press FUNCTION button 5 times until 'PROG 1 ON' appears on display and flashes.
- Press the SET button, using [+] or [–] buttons to set the Day(s) of first program.
- Press the SET button, using [+] or [–] buttons to set the hour of the first On program.
- Press the SET button, using [+] or [–] buttons to set the minutes of the first ON program.
- Press the SET button, "1 on" will flash. Press [+]. "1 off" will now flash.
- Repeat steps 2-4 above to set the corresponding OFF time for Program 1.
Note: Pressing and holding [+] or [–] buttons will rapidly increase or decrease time settings.
Note: Pressing [+] or [–] buttons simultaneously cancels current setting. - Repeat steps 2-5 to set ON/OFF times for additional programs (up to 20 total programs per week).
- After all programs have been set, press FUNCTION button to return to "current time" screen.
- If programming is interrupted for more than 10 seconds while setting timer, until will automatically exist setting mode. Preset time will be preserved.
Note1: Programming of switching times (ON/OFF) will not work properly if 'PROG ON' overlaps with 'PROG OFF'.
RANDOM ON/OFF SECURITY FEATURE
Press FUNCTION button until 'RND' digits flash on display, press SET button to enter Random Mode. 'RND' will appear on display. Programmed ON/OFF time will randomly fluctuate in a range of 2~30 minutes.
Repeat the operation above to cancel 'RND' function
COUNT DOWN ON/OFF SETTING
- Press FUNCTION button 6 times until 'CTD' and 'ON' digits flash on display.
- Press SET button,'ON' digits will flash on display, use [+] or [–] to set hours.
- Press SET button, use [+] or [–] to set minutes.
- Press SET button, use [+] or [–] to set seconds.
- Press SET to initiate countdown sequence. Device will turn on, screen will indicate AUTO ON, and remaining time will be shown on screen.
When countdown reaches 0:00:00, device will turn off.
Press FUNCTION button to check current time
Note: Countdown function overrides all others. Exit Countdown mode before using other functions.
MANUAL OVERRIDE SETTING
Use Function button to toggle settings.
On: Device is On, will not be subject to programmed settings.
Off: Device is Off, will not be subject to programmed settings.
Auto On: Device is currently On, will run settings as programmed.
Auto Off: Device is currently Off, will run settings as programmed.
RESET BUTTON
Press RESET button. Timer will resume in default status.
IMPORTANT SAFETY PRECAUTIONS
- Use indoors only.
- Keep device out of the reach of children.
- Do not plug this timer into another timer switch.
- Do not plug any device performing mechanical movement directly into timer.
- Do not insert needles or any other metal objects into mains outlet.
- Avoid moisture, extreme temperatures, shock and vibration.
- Do not open timer. Repairs must be performed by authorized service personnel only.
- To clean casing and display use a soft cloth. Do not use chemical or scouring agents. Do not submerge in water.
RATINGS
120VAC, 60Hz
5A, Resistive or General Purpose
240W Tungsten
Back-up Battery: Rechargeable
Limited One Year Warranty
AmerTac™ warrants this product to be free from defects in material and workmanship for a period of one year from the date of purchase. AmerTac's obligations are limited to repairing or replacing any defective unit and are effective only if such units are returned within one year of the purchase date to AmerTac, 250 Boulder Drive, Breinigsville, PA 18031. Warranty void if damage is due to misuse or improper installation. In no circumstance will AmerTac be liable for consequential or incidental damages relating in any way to this product.
Questions? 201.934.3224
©2010 AmerTac™
250 Boulder Drive
Breinigsville, PA 18031
www.amertac.com

Documents / Resources
References

Download manual
Here you can download full pdf version of manual, it may contain additional safety instructions, warranty information, FCC rules, etc.
Download WESTEK TE02DHB, TE22DHB - Indoor 1-Outlet Digital Timer Manual
Advertisement


Need help?
Do you have a question about the TE02DHB and is the answer not in the manual?
Questions and answers