Sunbeam Pie Magic PM4210 - Snack Size Pie Maker Manual
- Instruction booklet (20 pages) ,
- User manual (16 pages)
Advertisement
Sunbeam's Safety Precautions
SAFETY PRECAUTIONS FOR YOUR SUNBEAM PIE MAGIC.
- Use well away from walls and curtains.
- Ensure the Sunbeam Pie Magic is placed on a flat and stable surface during operation.
- Do not immerse or drop the Sunbeam Pie Magic in water or in any other liquid.
- Do not allow the internal components of the Sunbeam Pie Magic to get wet at any time.
- Do not overfill your pie cases or have excess liquid ingredients. This will result in overflow from the pie maker. Pie filling is hot and can scald.
Sunbeam is very safety conscious when designing and manufacturing consumer products, but it is essential that the product user also exercise care when using an electrical appliance. Listed below are precautions which are essential for the safe use of an electrical appliance:
- Read carefully and save all the instructions provided with an appliance.
- Always turn the power off at the power outlet before you insert or remove a plug. Remove by grasping the plug - do not pull on the cord.
- Turn the power off and remove the plug when the appliance is not in use and before cleaning.
- Do not use your appliance with an extension cord unless this cord has been checked and tested by a qualified technician or service person.
- Always use your appliance from a power outlet of the voltage (A.C. only) marked on the appliance.
- This appliance is not intended for use by persons (including children) with reduced physical, sensory or mental capabilities, or lack of experience and knowledge, unless they have been given supervision or instruction concerning use of the appliance by a person responsible for their safety.
- Children should be supervised to ensure that they do not play with the appliance.
- The temperature of accessible surfaces may be high when the appliance is operating.
- Never leave an appliance unattended while in use.
- Do not use an appliance for any purpose other than its intended use.
- Do not place an appliance on or near a hot gas flame, electric element or on a heated oven.
- Do not place on top of any other appliance.
- Do not let the power cord of an appliance hang over the edge of a table or bench top or touch any hot surface.
- Do not operate any electrical appliance with a damaged cord or after the appliance has been damaged in any manner. If damage is suspected, return the appliance to the nearest Sunbeam Appointed Service Centre for examination, repair or adjustment.
- For additional protection, Sunbeam recommend the use of a residual current device (RCD) with a tripping current not exceeding 30mA in the electrical circuit supplying power to your appliances.
- Do not immerse the appliance in water or any other liquid unless recommended.
- Appliances are not intended to be operated by means of an external timer or separate remote control system.
- This appliance is intended to be used in household and similar applications such as: staff kitchen areas in shops, offices and other working environments; farm houses; by clients in hotels, motels and other residential type environments; bed and breakfast type environments.
If you have any concerns regarding the performance and use of your appliance, please visit www.sunbeam.com.au or contact the Sunbeam Consumer Service Line.
Ensure the above safety precautions are understood.
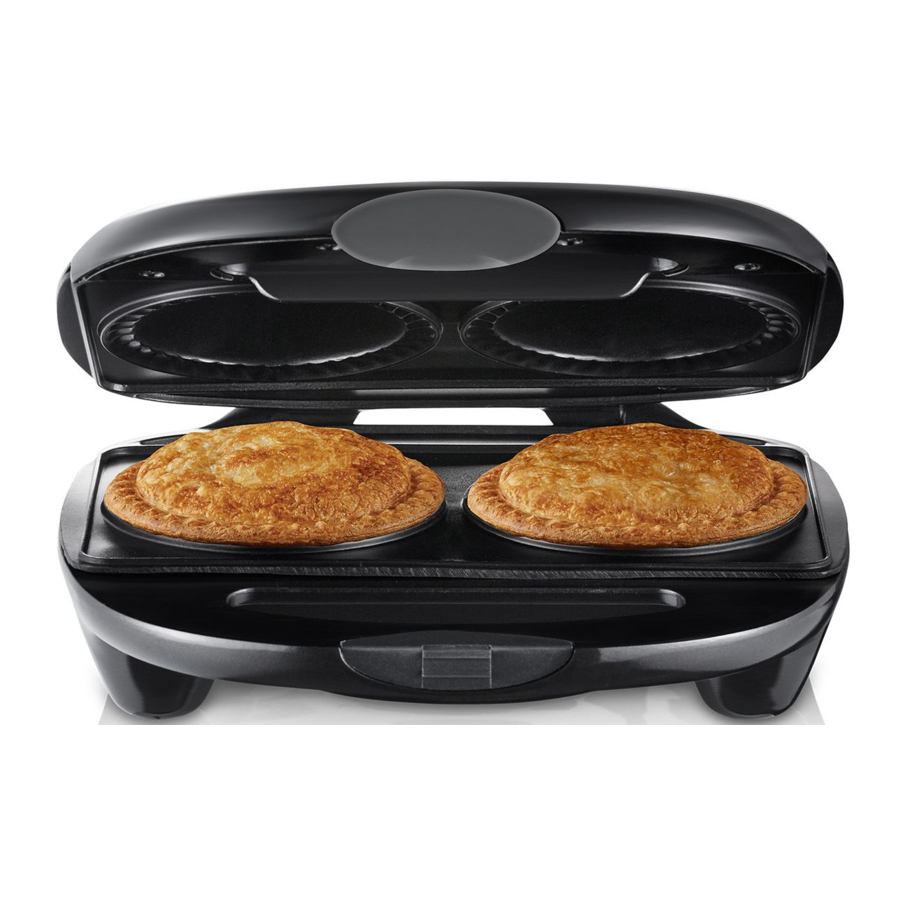
Features of your Sunbeam Pie Magic

Deep-dish, non-stick plates.
Makes generous, high-top pies with extra filling. The two non-stick plates are easy to clean and allow the pies to be easily removed from the pie maker. You can make up to two perfect pies every time.
Edge crimper.
Seals the pies perfectly and gives them a decorative trim.
Power ON light.
Indicates that the pie maker is on and heating.
Securing latch.
Holds the pie maker closed to seal the pies.
Rubber feet.
Holds the pie maker firmly in place and prevents it from scratching the benchtop.
Pastry cutters.

The cutters are for cutting the pastry tops and bases of your pies. The small (104mm) cutter is for the pastry top and the large (122mm) cutter is for the pastry base.
 Hot Surfaces Do Not Touch
This symbol indicates, temperature of accessible surfaces may be high when the appliance is operating and for some time after use.
An Introduction to your Sunbeam Pie Magic
Now you and the whole family can make golden brown, crispy pies at home, using your choice of delicious and imaginative fillings.
You will be amazed at the variety of pies you can make - chicken, beef, pork, vegetable and seafood pies; as well as fruit and sweet pies.
You can also use it to heat up frozen and thawed, cooked pies.
With your Sunbeam Pie Magic, you can turn any ingredients, left-overs or canned food into delicious pies – great for appetisers, meals, desserts, supper or snacks.
Make perfect pies every time... it's magic!
Before using your Sunbeam Pie Magic
Before using your Sunbeam Pie Magic for the first time, the non-stick plates must be seasoned to protect the non-stick surface.
Plug the power cord into a 230/240 volt power outlet and turn the power ON. Preheat the pie maker for 5 minutes. Season the plates by applying a thin coat of cooking oil onto the surface and rub in with paper towelling.
Alternatively add oil to paper towelling and rub over the cooking plates.
After this initial seasoning, there is no need to season the plates after each use as the pastry leaves the plates slightly seasoned.
Note: When using your Sunbeam Pie Magic for the first time, you may notice a fine smoke haze being emitted. This is normal and is due to the initial heating of the internal components.
Heading Making pies in your Sunbeam Pie Magic
What type of pastry can be used?
There is a wide selection of ready rolled pastry available in your supermarket freezer, such as shortcrust, puff, butter puff and wholemeal pastry. These pastries give great results and are handy to keep in your freezer.
We recommend using Puff Pastry for the top combined with a Shortcrust Pastry for the base.
However, shortcrust pastry or puff pastry can be used for both the tops and bases of your pies.
For a light and more buttery taste, use butter puff pastry for your pastry top, combined with a shortcrust pastry for your base. This combination is ideal for desserts. Homemade pastry can also be used.
Preheat the Pie Magic for 5 minutes, and defrost your frozen ready rolled pastry while preparing your pies.
Cutting the pastry.
Use the special pie cutter provided to cut the pastry tops and bases for your pies. The small cutter is for the top and the large cutter is for the base. See Figure 1.

To cut your pastry pieces, position the cutter on a flat sheet of pastry and cut by pressing down into the pastry. Ensure the cut is smooth around the edges.
Note: For best results, frozen pastry should be used as soon as it is just thawed.
Forming the pastry.
Using both hands, overlap the pastry slits by approximately 15mm. See Figure 2. Press the slits gently to ensure they join properly.

Continue overlapping pastry slits until a pastry base is formed. See Figure 3.

Place the pastry base in the preheated pie maker and carefully press into the base. See Figure 4.


Only touch the pastry as the pie maker will be very hot.
Adding the filling.
Any ingredients you have in your kitchen, left-overs and canned food make tempting pie fillings.
Pre-cook your pie fillings, particularly if using fresh meat or vegetable ingredients. Ingredients such as fruit and canned food can be used without pre-cooking.
Ensure all ingredients are cut into small and even pieces to allow them to heat through.
Note: Do not use liquid ingredients such as sauces, gravies and custard on their own or in large amounts, as they will overflow and make the pastry soggy. Always combine with solid ingredients. Also do not use hot fillings as the pastry base will become soggy.
Spoon your pre-cooked filling into the pastry base. Use a level ¹/³ metric cup of filling, per pie. Do not overfill your pies.

Do not overfill your pie cases or have excess liquid ingredients (sauces, gravies, custards). This will result in overflow from the pie maker. Pie filling is hot and can scald.
Cooking the pies.
Place the pastry tops over the filling and close the lid. Cook the pies for approximately 5-6 minutes. If you prefer extra browning, we recommend you cook for 8 minutes.
During cooking, open the pie maker slowly and carefully, as excess pie filling may overflow and can scald.
Tip: Fruit or vegetable fillings won't take as long to heat and cook through as meat fillings.
Note: During cooking you may notice a whistling sound. This is due to steam escaping from the pies.
Remove your pies using a plastic utensil. DO NOT USE METAL UTENSILS AS THESE WILL SCRATCH THE NON-STICK SURFACE. Wipe the plates clean after making each pie.
Using left-over pastry.
Make more pies, garnishes and decorations with the left-over pastry.
Lightly knead the left-over pieces into a ball and roll out to approximately 3mm thick.
Hint: It is easier to roll pastry between 2 sheets of grease proof paper.
To make garnishes and decorations, cut the pastry into any shape, such as leaves.
Place the shape on the pastry top before closing the lid.
Note: It is recommended that only shortcrust ready rolled pastry be re-rolled. Also, keep the pastry covered to prevent drying and cracking.
Pre-cutting pastry.
Pastry can be pre-cut and stored in the freezer so that anyone can make pies at their convenience. After cutting up the pastry, separate each piece with a layer of plastic. Cover completely with plastic and return to the freezer.
Using bread.
Bread can be used as a substitute for pastry. The best results are achieved using sandwich bread. Avoid using toast style bread as it is too thick.
Cut the pie tops and bases using the cutter and trim the crusts.
Spread one side of the bread with butter or margarine. Make the pies as previously instructed, with the buttered side of the bread on the outside to prevent sticking. Cook for 6 minutes.
Hint: Avoid using liquid fillings as they tend to make the bread soggy.
Note: When using a non-pastry base in your pie maker it will be necessary to season the plates with a little oil, butter or margarine each time to prevent sticking.
Defrosting and reheating pies
Defrosting.
Room temperature: pies will defrost in approximately 1 hour.
Microwave oven (700W): defrost each pie for approximately 5 minutes on defrost setting.
Reheating.
Pie maker: Preheat the pie maker for 5 minutes (or until the light goes off).
Thawed pies – heat for approximately 6-8 minutes.
Do not heat frozen pies in the pie maker.
During cooking, open the pie maker slowly and carefully, as excess hot pie filling may overflow and can scald.
Oven: Preheat oven to 180ºC.
Frozen pies – heat for 40-45 minutes.
Thawed pies – heat for 15-20 minutes.
Microwave oven (700W): Cook on high for approximately 2 minutes per pie after defrosting.
Note: The pastry will be soft and moist.
Care and Cleaning
Pie Filling Quantity
Use a level ¹/³ metric cup of filling, per pie.
Do not overfill. Use a level ¹/³ metric cup.

Do not overfill your pie cases or have excess liquid ingredients (sauces, gravies, custards). This will result in overflow from the pie maker. Pie filling is hot and can scald.
All the pie fillings should be used with a pastry base to make the pies.
Always use a plastic utensil to lift the pies from the pie maker.
Do not use metal utensils as these will scratch the non-stick surface.
To clean after use.
Always turn the power OFF and remove the plug before cleaning.
Do not immerse the pie maker in water or any other liquid.
Do not use abrasives or metal scourers as they will scratch the non-stick plates and the exterior surface.
To clean the non-stick plates.
Wipe over the plates with a dampened cloth.
To clean the exterior.
Wipe over with a dampened cloth and polish with a soft dry cloth.
To clean cooked on stains.
Should your pie maker require additional cleaning of stubborn build up and stains, the following cleaning method is recommended:
Combine 2 tablespoons of bicarbonate or baking soda with water to make a paste.
Turn the power OFF and remove the plug. Ensure the cooking plates are cool.
Using a damp cloth, wipe the mixture on the cooking plates. Allow to stand for 1-2 hours.
Using a damp cloth, gently polish off the mixture to remove all residue.
Before using the pie maker again, re-season the non-stick surface by applying a little oil, and wiping clean with paper towel.

Documents / ResourcesDownload manual
Here you can download full pdf version of manual, it may contain additional safety instructions, warranty information, FCC rules, etc.
Download Sunbeam Pie Magic PM4210 - Snack Size Pie Maker Manual
Advertisement


Need help?
Do you have a question about the Pie Magic PM4210 and is the answer not in the manual?
Questions and answers