Table of Contents
Advertisement
Advertisement
Table of Contents

Subscribe to Our Youtube Channel
Related Manuals for Husqvarna VIKING Onyx 15


Summary of Contents for Husqvarna VIKING Onyx 15
- Page 1 User’s Guide K E E P I N G T H E W O R L D S E W I N G ™...
- Page 2 IMPORTANT SAFETY INSTRUCTIONS When using an electrical appliance, basic safety precautions should always be followed, including the following: Read all instructions before using this sewing machine. Keep the instructions at a suitable place close to the machine. Make sure to hand them over if the machine is given to a third party.
- Page 3 • The foot control is used to operate the machine. Never place other objects on the foot control. • Do not use the machine if it is wet. • If the LED lamp is damaged or broken, it must be replaced by the manufacturer or its service agent or a similarly qualified person, in order to avoid a hazard.
-
Page 4: Table Of Contents
TABLE OF CONTENTS INTRODUCTION SEWING Intended Use ................... 1 Sewing ....................19 Machine Overview ................. 1 Start to Sew – Straight Stitch ............19 Needle Area Overview ..............2 Change Sewing Direction ............20 Top of Machine ................2 Finish Sewing ................20 Accessories .................. -
Page 5: Introduction
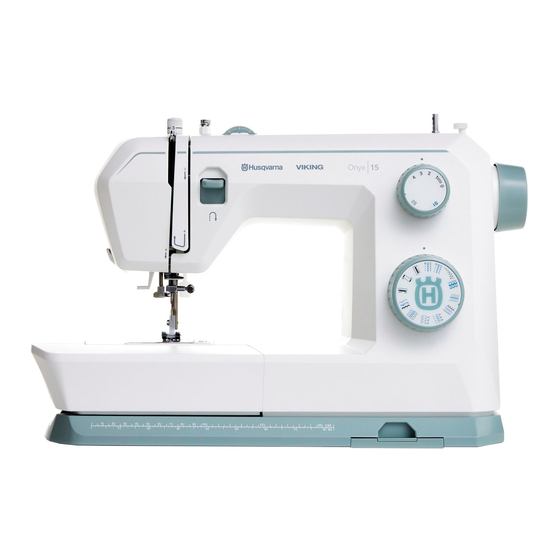
Introduction INTRODUCTION INTENDED USE Optimal use and maintenance are described in these instructions. This product is not intended for industrial or commercial use. Additional assistance, by region, may be found online at www.husqvarnaviking.com MACHINE OVERVIEW 1. Feed Teeth Lever — move from side to side to engage or 8. -
Page 6: Needle Area Overview
NEEDLE AREA OVERVIEW 1. Needle Plate — provides a flat area around presser foot for sewing. Guidelines indicate various seam allo- wances used to guide fabric while sewing. 2. Feed Teeth — feed the fabric under the presser foot when sewing. 3. -
Page 7: Accessories
ACCESSORIES 1. Screwdriver 2. Felt pad (x2) 3. Seam ripper/brush 4. Bobbins (x4) 5. Spool cap large 6. Spool cap small 7. Edge/Quilting guide 8. Auxiliary spool pin INCLUDED ACCESSORIES (NOT PICTURED) • Needles • Foot control • Power cord PRESSER FEET Utility Foot A Attached on the machine upon delivery. -
Page 8: Accessory Tray
Blind Hem Foot D This foot is used for blind hem stitches. The inner edge of this foot guides the fabric. The right toe of the foot is designed to ride along the hem edge. Zipper Foot E This foot can be snapped on either to the right or to the left of the needle. This makes it easy to sew both sides of the zipper. -
Page 9: Stitch Overview (Model Onyx 15)
INTRODUCTION STITCH OVERVIEW (MODEL ONYX 15) Utility Stitches The stitches described in the below chart are utility stitches, used mainly for utility sewing. When sewing, use a thread tension between 3–5. Always test sew on a piece of scrap fabric, and adjust the tension if necessary. Application The basic stitch used for sewing. -
Page 10: Stitch Overview (Model Onyx 25)
INTRODUCTION STITCH OVERVIEW (MODEL ONYX 25) Utility Stitches The stitches described in the below chart are utility stitches, used mainly for utility sewing. When sewing, use a thread tension between 3–5. Always test sew on a piece of scrap fabric, and adjust the tension if necessary. Application The basic stitch used for sewing. -
Page 11: Sewing Guide Reference Chart
Sewing Guide Reference Chart Consult the Sewing Guide Reference Chart for a fast and easy way to select the best stitch, stitch length, stitch width (Onyx 25), thread tension, pre- sser foot and presser foot pressure for your sewing technique and fabric. Model Onyx 15 Model Onyx 25 Recommended Settings - Overview... -
Page 12: Preparations
PREPARATIONS PREPARATIONS UNPACKING THE MACHINE After lifting the machine out of the box and removing all pac- king material and the plastic bag, wipe the machine, particular- ly around the needle and needle plate to remove any oil before sewing. Note: Your sewing machine is adjusted to provide the best stitch result at normal room temperature. -
Page 13: Free Arm / Removable Accessory Tray
PREPARATIONS FREE ARM / REMOVABLE ACCESSORY TRAY Store presser feet, bobbins, needles and other accessories in the accessory tray so that they are easily accessible. Keep the accessory tray on the machine to provide a larger, flat work surface. Use the free arm to facilitate sewing trouser legs and sleeve hems. -
Page 14: Spool Pin
SPOOL PIN Your machine has two spool pins, a main spool pin and an auxiliary spool pin. The spool pins are designed for all types of thre- ad. The main spool pin is adjustable and can be used both in a horizontal position (the thread reels off the spool) and a vertical position (the thread spool rotates). -
Page 15: Bobbin Winding
BOBBIN WINDING 1. Place the thread spool on the spool pin. Slide a spool cap thread end, and press the foot control to start winding. firmly against the spool. After a few turns, take your foot off the foot control to stop winding. -
Page 16: Threading The Upper Thread
THREADING THE UPPER THREAD Important! Make sure that the presser foot is raised and the 4. Bring the thread from the right into the take-up lever (D) needle is in its highest position by turning the handwheel and down in the left-hand threading slot, into the lower toward you. -
Page 17: Needle Threader
NEEDLE THREADER The built-in needle threader allows you to thread the needle quickly and easily. The needle must be in its highest position to use the built-in needle threader. Turn the hand wheel towards you until the needle is in its highest position. It is also recommended that you lower the presser foot. -
Page 18: Selection Guide - Needle Size, Fabric, Thread
Important Needle Information Change the needle often. As a general rule, need- les should be changed every 6-8 hours of actual stitching time. Always use a straight needle with a sharp point and make sure the point is not bent or damaged (A). A damaged needle (B) can cause skipped stitches, breakage or snapping of the thread. -
Page 19: Thread Tension
THREAD TENSION To set the thread tension, turn the dial on top of the machine. Depending on the fabric, thread, etc, the tension may need to be adjusted. For the best stitch appearance and durability, make sure the needle thread tension is correctly adjusted. For general sewing, the threads evenly meet between the two layers of fabric (A). -
Page 20: Changing The Presser Foot
CHANGING THE PRESSER FOOT 1. Make sure the needle is in the highest position. Pull the presser foot towards you. 2. Line up the cross pin on the foot with the gap in the pre- sser foot ankle. Press back until the foot snaps into place. Note: If you find it difficult to place the presser foot in the correct position, keep the release button pressed while lowering the presser foot. -
Page 21: Operating Your Machine
OPERATING YOUR MACHINE OPERATING YOUR MACHINE SELECT A STITCH Model Onyx 15 Model Onyx 25 A. Reverse sewing lever C. Stitch length dial B. Stitch width dial (model Onyx 25) D. Stitch selector dial The stitch selector dial is used to select the stitch you want to sew. The dial can be turned to the left or to the right. For sewing the grey stitch patterns Turn the Stitch Selector Dial until it clicks in place under the dot directly above the dial on the machine. -
Page 22: Stitch Width Dial & Stitch Length Dial
STITCH WIDTH DIAL & STITCH LENGTH DIAL Function of stitch width dial (model Onyx 25) The maximum zigzag stitch width for zigzag stitching is 6mm; however, the width can be reduced on any pattern. The width increases as you move zigzag dial from "0" - "6". (1) Function of stitch length dial while zigzag stitching Set the Stitch Selector Dial to zigzag. -
Page 23: Sewing
SEWING SEWING SEWING Next to each stitch or sewing technique described in this section of the manual is a chart showing the recommended settings and presser foot. See sample of the chart to the right. Note: Some fabrics have a lot of excess dye which can cause discoloration on other fabric but also on your sewing machine. -
Page 24: Change Sewing Direction
CHANGE SEWING DIRECTION To change sewing direction, stop the machine and lower the needle. Raise the presser foot. Pivot the fabric around the needle to change sewing direction as desired. Lower the presser foot and continue sewing in the new direction. FINISH SEWING Press and hold the Reverse lever and sew a few stitches in reverse when you reach the end of the seam. -
Page 25: Multi-Step Zigzag Stitch
MULTI-STEP ZIGZAG STITCH Multi-step zigzag stitch is used to overcast raw edges. Make sure the needle pierces the fabric on the left side and overcasts the edge on the right side. The stitch can also be used as a stretch stitch to allow seams to stretch when sewing knit fabrics. -
Page 26: Closed Overlock Stitch
CLOSED OVERLOCK STITCH The closed overlock stitch can be used for sewing medium to heavier weight stretch fabrics. Use this stitch to hem stretch fabrics (A) and for belt loops (B). Fold a hem to the wrong side and stitch with closed over- lock stitch from the right side. -
Page 27: Darning And Mending
DARNING AND MENDING Repair Large Holes To cover large holes, it is necessary to sew a new piece of fabric onto the damaged area. Baste the new piece of fabric onto the damaged area on the right side of the fabric. Set up for zigzag Sew over the fabric edges with the zigzag or the multi-step zigzag stitch. -
Page 28: Standard Buttonhole (Model Onyx 15)
STANDARD BUTTONHOLE (MODEL ONYX 15) The fabric should be interfaced and/or stabilized where buttonholes are to be sewn. It is suggested to hold fabric slightly when sewing buttonholes. Prepare the Buttonhole Set up for buttonhole Measure diameter and thickness of the button and add 3mm (1/8”) for bartacks to obtain correct buttonhole length. -
Page 29: Standard Buttonhole (Model Onyx 25)
STANDARD BUTTONHOLE (MODEL ONYX 25) Sew buttonholes perfectly sized for your button. The fabric should be interfaced and/or stabilized where buttonholes are to be sewn. 1. Mark the start position of the buttonhole on the fabric (A). Set up for buttonhole 2. -
Page 30: Sew Zippers
SEW ZIPPERS The Zipper Foot can be attached on either the right or the left of the needle, making it easy to sew both sides of the zipper. To sew the right side of the zipper, attach the foot in the left 1.5-3 presser foot position (A). -
Page 31: Maintenance
MAINTENANCE MAINTENANCE CLEANING THE MACHINE EXTERIOR To keep your sewing machine operating well, clean it often. No lubrication (oiling) is needed. Wipe the exterior surface of your machine with a soft cloth to remove any dust or lint built up. REMOVING THE NEEDLE PLATE AND CLEANING THE BOBBIN AREA Raise the needle and turn off the machine. -
Page 32: Troubleshooting
In this troubleshooting guide you will find solutions to the problems you may have with your machine. For further information please contact your local authorized HUSQVARNA® VIKING® retailer who will be happy to help you. Thread Loops on Underside of Fabric... -
Page 33: Fabric Puckers
Check that the bobbin winding spindle has been fully engaged before starting to wind. Solution: Possible cause: Bobbin is winding sloppily because thread end not held at beginning of winding process. Solution: Before starting to wind, hold the thread tail (coming out of the bobbin) securely, allow the bobbin to partially fill, then stop to trim the thread tail close to the bobbin. -
Page 34: The Needles Breaks
Use bobbins that are the same style as those that come with the machine – don’t substitute. Solution: The Needles Breaks Possible cause: Bent, dull or damaged needle. Solution: Discard needle, insert new needle. Possible cause: Wrong size needle for fabric. Insert appropriate needle for fabric type. -
Page 35: Thread Bunching At Beginning
Thread Bunching at Beginning Possible cause: Top and bobbin threads have not been properly placed underneath presser foot before starting to sew. Solution: Ensure that both the top thread and the bobbin thread are under the presser foot and toward the back before starting to sew. Possible cause: Sewing was started with no fabric under the presser foot. -
Page 36: Service
SERVICE Have Your Sewing Machine Serviced Regularly by Your Local Authorized Retailer! If you have followed this troubleshooting information and still have problems, contact your retailer. It may be helpful to bring the fabric, thread and stabilizer you are using with you. If you have a stitch out that shows the problem, please bring that as we- ll.A sewing sample will often give better information than words and help your technician diagnose the problem. -
Page 37: Intellectual Property
ONYX, VIKING, and KEEPING THE WORLD SEWING & Design are trademarks of KSIN Lu- xembourg II, S.a.r.l. HUSQVARNA, and the “crowned H-mark” are trademarks of Husqvarna AB. All trademarks are used under license by VSM Group AB. Please note that on disposal, this product must be safely recycled in accordan- ce with relevant National legislation relating to electrical/electronic produ- cts. -
Page 38: Technical Specification
Technical Specification Household Sewing Machine Sewing Speed Rated Voltage Presser Foot Rise Height 6.5mm 750 ± 50rpm 240 V/50Hz, 230 V/50Hz, 220 V/50- 60Hz, 127 V/60 Hz, 120 V/60 Hz, 100V/50-60Hz Protection class: Stitch Width Stitch Length II (Europe) 0-5.0mm (model Onyx 15) 0-4.0mm (model Onyx 15) 0-6.0mm (model Onyx 25) 0-4.0mm (model Onyx 25) -
Page 39: Importer To The Uk
Importer to the UK: MANUFACTURER VSM UK VSM Group AB, SVP Worldwide Ravensbank House, Ravensbank Drive Soldattorpsgatan 3, SE-55474 Jönköping, SWEDEN North Moons Moat, Redditch. B98 9NA, United Kingdom... - Page 40 www.husqvarnaviking.com...
Need help?
Do you have a question about the VIKING Onyx 15 and is the answer not in the manual?
Questions and answers
What size bobbin does the Viking Onyk 15 take?
Ordered bobbins. They thread different. Do I have the correct one? Onyx 25