Table of Contents
Advertisement
Available languages
Available languages
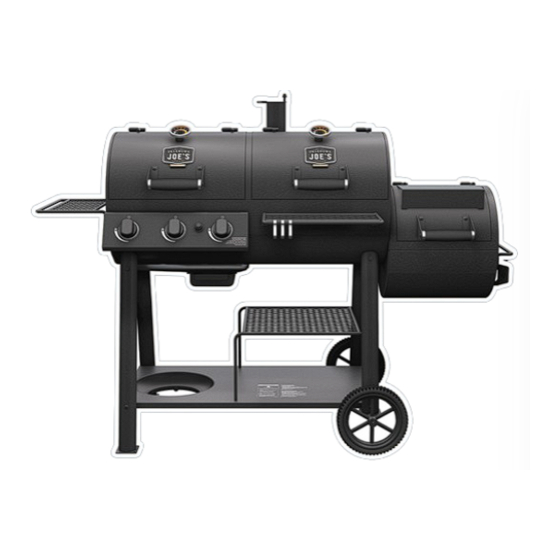
MODEL NUMBER
NUMÉRO DE MODÈLE
24203004
ASSEMBLY GUIDE
GUIA DE MONTAJE
SERIAL NUMBER:
NÚMERO DE SERIE:
______________________________________
See rating label on grill for serial number.
El número de serie se encuentra en la etiqueta
deespecificaciones de la parrilla.
DATE PURCHASED:
FECHA DE COMPRA:
______________________________________
Tools Needed for Assembly:
2 Adjustable Wrenches
Phillips Screwdriver
Herramientas necesarias para el armado:
2 Llaves regulables
Destornillador Phillips
Need Help? Visit Oklahomajoes.com for video assembly tips. If you'd rather - you can call us at 1-800-318-7744
Necesita ayuda? Visite Oklahomajoes.com para obtener consejos sobre el montaje de videos. Si prefiere, puede llamarnos al 1-800-318-7744
PN: 42805717 • 10/03/2023
Advertisement
Table of Contents

Related Manuals for oklahoma joes CANYON COMBO 24203004


Summary of Contents for oklahoma joes CANYON COMBO 24203004
- Page 1 MODEL NUMBER NUMÉRO DE MODÈLE 24203004 ASSEMBLY GUIDE GUIA DE MONTAJE SERIAL NUMBER: NÚMERO DE SERIE: ______________________________________ See rating label on grill for serial number. El número de serie se encuentra en la etiqueta deespecificaciones de la parrilla. DATE PURCHASED: FECHA DE COMPRA: ______________________________________ Tools Needed for Assembly:...
-
Page 2: Important Safety Information
D A N G E R IMPORTANT SAFETY INFORMATION If during operation the flames go out (You smell gas or THIS INSTRUCTION MANUAL CONTAINS IMPORT- cannot see the flame) ANT INFORMATION NECESSARY FOR THE PROPER 1. Turn the burner controls OFF ASSEMBLY AND SAFE USE OF THE APPLIANCE. -
Page 3: Installation Safety Precautions
ity to carry oxygen. Low blood oxygen levels can result in tion to this assembly will void your warranty and loss of consciousness and death. create the risk of a gas leak and fire. Use only • See a doctor if you or others develop cold- or flu-like authorized replacement parts supplied by manufac- symptoms while cooking or in the vicinity of this appliance. - Page 4 windows, or screened openings are not consid- C A U T I O N ered as permanent openings. 3. An appliance is considered to be outdoors if in- Read and follow all safety statements, assembly in- structions, and use and care directions before attempt- stalled with shelter no more inclusive than within ing to assemble and cook.
- Page 5 shown). Do not store an LP cylinder in enclosed IMPORTANT SAFETY INFORMATION spaces such as a carport, garage, porch, covered patio or other building. Never leave an LP cylinder inside a vehicle which may become overheated by the 1. A minimum clearance of 36 inches (1 meter) from combustible sun.
-
Page 6: Lp Cylinder Filling
LP (Liquefied Petroleum Gas) • LP gas is nontoxic, odorless and colorless when produced. For Your Safety, LP gas has been given an odor (similar to rotten cabbage) so that it can be smelled. • LP gas is highly flammable and may ignite unex- pectedly when mixed with air. - Page 7 LP Cylinder Exchange Connecting Regulator to the LP Cylinder Many retailers that sell grills offer you the option 1. LP cylinder must be properly secured onto grill. of replacing your empty LP cylinder through an ex- (Refer to assembly section.) change service.
-
Page 8: Safety Tips
WARNING WARNING • Outdoor gas appliance is not intended to be installed in or • Do not use grill until leak-tested. on a boat. • If a leak is detected at any time, STOP! Turn off gas at source and correct leak. •... -
Page 9: Match-Lighting
Ignitor Lighting WARNING • Do not lean over grill while lighting. 1. Turn gas burner control valves to (off). For Safe Use of Your Grill and to Avoid Serious Injury: 2. Open lid during lighting or re-lighting. • Do not let children operate or play near grill. 3. - Page 10 Burner Flame Check C A U T I O N • Remove cooking grates and heat tents. Light burners, rotate Cylinder valve must be oriented as shown once tank is knobs from HIGH to LOW. You should see a smaller flame in attached.
-
Page 11: Spider Alert
Cleaning the Burner Assembly CAUTION Follow these instructions to clean and/or replace parts of burner assembly or if you have trouble igniting grill. 1. Turn gas off at control knobs and LP cylinder. SPIDER ALERT! 2. Remove cooking grates and heat tents. 3. -
Page 12: Grill Maintenance
more of the coals are ashy gray. Using caution, ar- GRILL MAINTENANCE range the hot coals on your charcoal grate based on your desired method of cooking. Here are a few steps you can take to adjust the temperature of your fire: 1. -
Page 13: Cooking Tips
Poultry COOKING TIPS Cook all poultry to minimal safe internal temperature of 165° F (74° C). You may wish to cook poultry to a higher temperature Building Your Fire for personal preference. 1. Stack charcoal briquettes or wood into a pyra mid-shaped pile on top of the charcoal grate or Cooking on your new grill is a hands-on experience, ash pan. -
Page 14: Información De Seguridad Importante
INFORMACIÓN DE SEGURIDAD IMPORTANTE P E L I G R O Si durante el funcionamiento las llamas se apagan (huele a gas o ESTE MANUAL DE INSTRUCCIONES CONTIENE IMPOR- no puede ver la llama) TANTE INFORMACIÓN NECESARIA PARA EL CORRECTO 1. - Page 15 EL NO LEER NI SEGUIR LAS INSTRUCCIONES niveles bajos de oxígeno en la sangre pueden provocar la pérdida del conocimiento y la muerte. PARA ENCENDER EL CARBÓN PUEDE RESUL- Consulte a un médico si usted u otras personas TAR EN LESIONES PERSONALES GRAVES O desarrollan síntomas de resfriado o gripe mientras DAÑOS A LA PROPIEDAD.
- Page 16 uso exclusivo en los Estados Unidos. No modi- fique para su uso en cualquier otro lugar. La mod- ificación resultará en un peligro para la seguridad. Este aparato de gas para cocinar al aire libre solo debe usarse al aire libre y no debe usarse en un edificio, garaje o cualquier otra área cer- rada;...
-
Page 17: Uso Y Cuidado
requiere cuidado y mantenimiento regular para prolongar la vida P R E C A U C I Ó N útil de su artefacto. Si el aparato se almacena al aire libre durante Lea y siga todas las indicaciones de seguridad, instrucciones de la lluvia o períodos de alta humedad. -
Page 18: Precauciones De Seguridad Para La Instalación
Llenado de cilindros de gas LP Válvula del cilindro de gas LP • Utilice solo distribuidores autorizados y con experiencia. Tapa de • El distribuidor de gas LP debe purgar el cilindro nuevo antes de seguridad llenarlo. • El distribuidor NUNCA debe llenar el cilindro de gas LP más del 80 % de su capacidad. - Page 19 I N SPEC T BEFORE YO U CO NNE CT! L P g a s c y l i n d e r r u b b e r s e a l i n s p e c t i o n . •...
- Page 20 Conexión del regulador al cilindro de gas LP Cambio del cilindro de gas LP 1. El cilindro de gas LP debe ser asegurado adecuadamente en la • Muchos minoristas que venden parrillas ofrecen la opción de parrilla. (Consultar la sección de montaje). sustituir el cilindro de gas LP vacío mediante un servicio de intercambio.
-
Page 21: Consejos De Seguridad
ADVERTENCIA ADVERTENCIA • No utilice la parrilla hasta que haya sido probada para • El aparato a gas para exteriores no está pensado para descartar fugas. instalarse en o sobre un barco. • Si en cualquier momento detecta una fuga, PARE. Cierre •... - Page 22 Encendido del arrancador ADVERTENCIA • No se incline sobre la parrilla cuando la esté encendiendo. 1. Gire las válvulas de control del quemador de gas hacia la Para el uso seguro de su parrilla y para evitar dirección de apagado (off). lesiones serias: 2.
- Page 23 Control de la llama del quemador P R E C A U C I Ó N • Retire las rejillas de cocción y las barras de sabor. Encienda La válvula del cilindro debe estar orientada como se los quemadores, gire las perillas de ALTO a BAJO. Deberá muestra una vez que el tanque esté...
- Page 24 Limpieza del conjunto del quemador PRECAUCIÓN Siga estas instrucciones para limpiar y/o reemplazar piezas del conjunto del quemador o si tiene problemas para encender la parrilla. 1. Coloque todas las perillas de control y el cilindro de gas LP ¡ALERTA DE ARAÑAS! en la posición de off.
-
Page 25: Consejos De Cocina
PREPARACIÓN PARA USAR SU PARRILLA CONSEJOS DE COCINA Cómo alimentar su fuego Antes de cocinar con su parrilla, deben seguirse cuidadosamente los siguientes pasos para el curado, acabado y sazonado del acero interior. 1. Apile las briquetas de carbón o la madera en una pila en forma No seguir estos pasos puede dañar el acabado y/o impartir sabores de pira en la parte superior de la rejilla para carbón o el reciíente metálicos a sus primeras comidas. -
Page 26: Seguridad De Los Alimentos
USO DE LA PARILLA Una parrilla de carbón exitosa depende de un buen fuego. La regla general para saber cuándo las brasas están listas para asar a la parilla es asegurarse de que el 80 por ciento o más de las brasas estén gris ceniza. Tenga cuidado, coloque los carbones calientes en la parrilla de carbón en base a su método deseado de cocción. - Page 27 HARDWARE LIST • LISTA DE HARDWARE 1/4-20 x 1/2” HEX FLANGE SCREW TORNILLO DE BRIDA HEXAGONAL 1/4-20 x 1/2” HEX SCREW TORNILLO HEXAGONAL 1/4-20 x 3” HEX SCREW TORNILLO HEXAGONAL 1/4-20 FLANGE NUT TUERCA DE BRIDA 1/4-20 x 1/2” SHOULDER BOLT PER- NO DE HOMBRO 5/16-18 x 3/4”...
-
Page 28: Replacement Parts List
REPLACEMENT PARTS LIST Description Description SMOKER CHAMBER ASSEMBLY SPRING F/ SMOKE STACK COVER, F/ PROBE OPENING CAP NUT, F/ SMOKE STACK LID , F/ SMOKER CHAMBER GREASE TRAY LOGO PLATE GREASE CUP LID HARDWARE (SET OF 2) FIREBOX TOP MAIN BURNER FIREBOX LID ELECTRODE, SHORT WIRE WARMING PLATE F/ FIREBOX... -
Page 29: Lista De Piezas De Repuesto
LISTA DE PIEZAS DE REPUESTO Llave Cant. Descripción Llave Cant. Descripción CONJUNTO DE LA CÁMARA DEL AHUMADOR MUELLE para PILA DE HUMO CUBIERTA, para APERTURA DE SONDA TUERCA DE SEGURIDAD, PARA PILA DE HUMO TAPA , Para CÁMARA DE AHUMADOR BANDEJA DE GRASA PLACA CON LOGOTIPO TAZA DE GRASA... - Page 30 REPLACEMENT PARTS DIAGRAM • DIAGRAMA DE PIEZAS DE REPUESTO 47, without 12 OK LAHO M AJ O ES. CO M...
- Page 31 ASSEMBLY / ASAMBLEA C A U T I O N THIS UNIT IS HEAVY! DO NOT attempt to assemble without a helper. CET APPAREIL EST LOURD! NE PAS essayer de se réunir sans aide. • Some parts may contain sharp edges – especially as noted in each assembly step! Wear protective gloves if necessary. •...
- Page 32 ASSEMBLY / ASAMBLEA • Install the 4 leg bolts F x 4 loosely. Do not tight- en bolts until step 5. • Instale los 4 pernos de las patas sin apretar. No apriete los pernos hasta el paso 5. C x 4 D x 4 OK LAHO M AJ O ES.
- Page 33 ASSEMBLY / ASAMBLEA K x 2 L x 2 OK LAHO M AJ O ES. CO M...
- Page 34 ASSEMBLY / ASAMBLEA B x 2 C A U T I O N • For your safety. be sure to securely tighten all 4 leg bolts BEFORE Step 6. • Por tu seguridad. asegúrese de apretar firmemente los 4 pernos de las patas ANTES del paso 6 OK LAHO M AJ O ES.
- Page 35 ASSEMBLY / ASAMBLEA OK LAHO M AJ O ES. CO M...
- Page 36 ASSEMBLY / ASAMBLEA B x 4 D x 4 B x 4 D x 4 OK LAHO M AJ O ES. CO M...
- Page 37 ASSEMBLY / ASAMBLEA B x 4 D x 4 F x 8 G x 8 H x 8 J x 8 OK LAHO M AJ O ES. CO M...
- Page 38 ASSEMBLY / ASAMBLEA A x 2 E x 2 D x 2 Do not lift unit with ash drawer handle! C A U T I O N ¡No levante la unidad con la manija del ceni- P R E C A U C I Ó N cero! OK LAHO M AJ O ES.
- Page 39 ASSEMBLY / ASAMBLEA B x 2 D x 2 OK LAHO M AJ O ES. CO M...
- Page 40 ASSEMBLY / ASAMBLEA A x 4 OK LAHO M AJ O ES. CO M...
- Page 41 ASSEMBLY / ASAMBLEA √ OK LAHO M AJ O ES. CO M...
- Page 42 ASSEMBLY / ASAMBLEA M x 1 20 20 N x 1 OK LAHO M AJ O ES. CO M...
- Page 43 ASSEMBLY / ASAMBLEA OK LAHO M AJ O ES. CO M...
- Page 44 ASSEMBLY / ASAMBLEA Tank Orientation ● Orientación del tanque Top View - Cutaway Vista superior - Corte √ C A U T I O N P R E C A U C I Ó N AV E R T I R Cylinder valve must face as shown once tank is attached.
-
Page 45: Troubleshooting
DANGER: If a gas leak cannot be stopped, or a fire occurs due to gas leakage, call the fire department. Possible Cause Prevention/Solution Emergencies Gas leaking from LP •Mechanical failure due to rusting or •Replace LP cylinder. cylinder. mishandling. •Improper installation, connection not Gas leaking between •... - Page 46 Troubleshooting (continued) Problem Possible Cause Prevention/Solution Burner(s) will not light PIEZO PUSH-BUTTON AND ROTARY: using ignitor. •Push-button sticks at bottom. •Replace ignitor. •Sparking between ignitor and electrode. •Inspect wire insulation and proper connection. Replace ignitor wires / electrode assembly if insulation is broken. Burner(s) will not •See “GAS ISSUES:”...
- Page 47 Resolución de problemas (continuación) Problema Causas probables Medidas de prevención / solución El quemador o los BOTÓN PULSADOR PIEZOELÉCTRICO quemadores no se Y GIRATORIO: encienden al usar el • El botón pulsador se pega en el fondo. • Cambie el encendedor. encendedor.
- Page 48 Resolución de problemas (continuación) Problema Causas probables Medidas de prevención / solución El quemador o los BOTÓN PULSADOR PIEZOELÉCTRICO quemadores no se Y GIRATORIO: encienden al usar el • El botón pulsador se pega en el fondo. • Cambie el encendedor. encendedor.
-
Page 49: Limited Warranty
LIMITED WARRANTY This warranty only applies to units purchased from an authorized retailer. Manufacturer warrants to the original consumer-purchaser only that this product shall be free from defects in workmanship and materials after correct assembly and under normal and reasonable home use for the periods indicated below beginning on the date of purchase*. -
Page 50: Garantía Limitada
GARANTÍA LIMITADA Esta garantía solo se aplica a las unidades compradas en un minorista autorizado. El fabricante únicamente garantiza al comprador-consumidor original que este producto estará libre de defectos materiales y de materiales después de corregir el montaje y bajo uso doméstico normal y razonable durante los periodos indicados a continuación a partir de la fecha de la compra*. - Page 51 PRODUCT REGISTRATION / REGISTRACIÓN DEL PRODUCTO / PRODUCT REGISTRATION / REGISTRACIÓN DEL PRODUCTO / ENREGISTREMENT DU PRODUIT ENREGISTREMENT DU PRODUIT Two convenient ways to register your product: Deux manières pratiques d’enregistrer votre produit: Dos maneras convenientes de registrar su producto: Online En ligne @ https://www.oklahomajoes.com/product-registration/...
- Page 52 So, how did it go? Share your awesome cooking experience with everyone! We are live on all the social media sites! Join the community! Entonces, ¿cómo te fue? ¡Comparte tu increíble experiencia culinaria con todos! ¡Estamos en vivo en las redes sociales! ¡Únete a la comunidad! ©2023 Char-Broil, LLC.
Need help?
Do you have a question about the CANYON COMBO 24203004 and is the answer not in the manual?
Questions and answers