Table of Contents
Advertisement
Quick Links
Product Guide
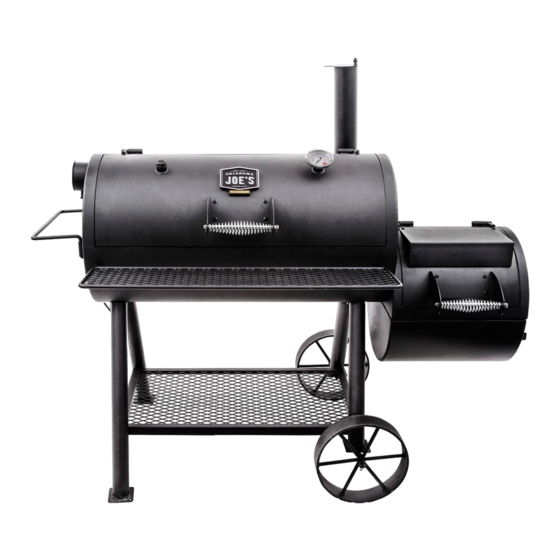
Model 09201555-05
Longhorn Smoker
Tools needed for assembly:
Pliers
Adjustable wrenches
IMPORTANT: Fill out the product record information below.
Serial Number
Date Purchased
CAUTION:
Read and follow all safety statements, assembly
instructions, and use and care directions before
attempting to assemble and cook.
INSTALLER/ASSEMBLER:
Leave this manual with consumer.
CONSUMER:
Keep this manual for future reference.
WARNING:
CARBON MONOXIDE HAZARD
Burning charcoal indoors can kill you. It gives off
carbon monoxide, which has no odor. NEVER burn
charcoal inside homes, vehicles, or tents.
The following are trademarks registered by W.C. Bradley Co. in the U.S. Patent and Trademark Office: Char-Broil®; America's Legendary Barbeque Company®; American Gourmet®; Bandera®; BrushHawg®; CB940®;
Char-Diamonds®; Char-Broil Charcoal/Gas®; DiamondFlame®; Everybody Grills®; Everybody Outside®; FastStart®; Fireball®; Firenzy®; FlavorMaster®; Grill2Go®; Grill2Go® Express®; Grill Lovers®; H20 Smoker®;
Keepers of the Flame®; New Braunfels Smoker Company®; Oklahoma Joe's®; Patio Bistro®; Patio Caddie®; Patio Kitchen®; Precision Flame®; Quantum®; Santa Fe®; Sear and Grill®; Sierra®; Signature Series®; The
Big Easy®; The Minute Grill®; Trentino®; Wild West Tradition®; and the following marks:
The following are trademarks of W.C. Bradley Co.: Commercial Series™; Designer Series™; Grill2Go® Advantage™; Longhorn™; Double Chef™; QuickSet™; Ready When You Are™; Hog and Yard Bird™; You Bring the
Party™; SureFire™; Universal Grill Parts™ TEC™ is a trademark of Tec Infrared Grills.
Protected under one or more of the following U.S. Patents: 4,989,579; 5,421,319; 5,458,309; 5,579,755; 5,996,573; 6,114,666; 6,135,104; 6,209,533; 6,279,566; 6,331,108; 6,484,900; 6,526,876; 6,595,197; 6,640,799; 6,640,803; 6,729,873; 6,739,473; 6,749,424;
6,863,100; 6,935,327; 6,951,213; 6792,935; 7,047,590; D364,535; D372,637; D373,701; D377,735; D383,035; D397,910; D405,643; D406,005; D406,009 ; D413,043; D413,229; D414,982; D415,388; D416,164; D416,441; D417,587; D417,588; D422,516; D423,876;
D428,303; D430,772; D435,396; D436,004; D438,059; D438,060; D438,427; D439,110; D442,505; D443,179; D443,354; D443,464; D447,384; D447,385; D447,909; D448,610; D448,614; D448,615; D448,616; D448,975; D449,492; D450,544; D451,759; D454,028;
D454,031; D455,205; D455,206; D456,202; D456,222; D456,223; D457,789; D458,520; D458,760; D458,802; D459,088; D459,148 D459,149; D459,161; D459,163; D459,586; D459,943; D460,312; D460,313; D460,318; D461,359; D465,123; D465,693; D466,307;
D466,439; D466,752; D473,414; D474,371; D477,498; D477,501; D477,504; D477,506; D477,746; D478,471; D478,472; D480,914; D491,410; D494,009; D494,413; D498,523; D500,359; D504,048; D530,098; D535,000; Canada: 87,743; 87,744; 97,504; 99,355;
102,037; 104,200; 2,315,567; 2,336,036; France: 010,231; 010,422; 010,590; 010,849; 1,089,646; Germany: 1,089,646; South Korea: 384,565; China: 99,127,066.5; United Kingdom: 2,099,402; 1,089,646. Other Patents Pending. © 2008 W.C. Bradley Company
If you have questions or need assistance during assembly, please call
To insure your satisfaction and for follow-up service, register your appliance online at www.charbroil.com/register
Estimated Assembly Time: 1 Hour
FOR OUTDOOR USE ONLY
WARNING:
Failure to follow all manufacturer's instructions could
result in serious personal injury and/or property
damage.
CAUTION:
Some parts may contain sharp edges – especially as
noted in the manual! Wear protective gloves if
necessary.
CAUTION:
THIS UNIT IS HEAVY! DO NOT attempt to
assemble without a helper.
®
®
1-800-241-7548
.
TM REVISION 00
42804681 - 03/12/10
Advertisement
Table of Contents

Subscribe to Our Youtube Channel
Related Manuals for oklahoma joes 09201555-05


Summary of Contents for oklahoma joes 09201555-05
-
Page 1: Product Record Information
102,037; 104,200; 2,315,567; 2,336,036; France: 010,231; 010,422; 010,590; 010,849; 1,089,646; Germany: 1,089,646; South Korea: 384,565; China: 99,127,066.5; United Kingdom: 2,099,402; 1,089,646. Other Patents Pending. © 2008 W.C. Bradley Company TM REVISION 00 If you have questions or need assistance during assembly, please call 1-800-241-7548 To insure your satisfaction and for follow-up service, register your appliance online at www.charbroil.com/register 42804681 - 03/12/10... -
Page 2: Table Of Contents
TABLE OF CONTENTS WARNING Product Record Information ......1 FAILURE TO READ AND FOLLOW INSTRUCTIONS FOR For Your Safety . -
Page 3: Preparing To Use Your Smoker
Preparing and Using Your Smoker Before cooking with your Smoker, the following steps should be closely followed to both cure the finish and season the interior steel. Failure to properly follow these steps may damage the finish and/or impart metallic flavors to your first foods. -
Page 4: Cooking Tips
COOKING TIPS Building Your Fire Stack charcoal briquettes or wood into a pyramid-shaped pile on top of the charcoal grate or ash pan. We recommend using 4 pounds (approximately 50 - 60 briquettes) to start your fire, adding more as needed. If using lighter fluid, saturate the charcoal briquettes with lighter fluid and let it soak in for approximately 5 minutes. -
Page 5: Smoker Maintenance
GRILL MAINTENANCE Frequency of cleanup is determined by how much your smoker is used. Make sure coals are completely extinguished before cleaning inside of smoker. Inside surfaces may be cleaned with a strong solution of detergent and water applied with a scrub brush. Thoroughly rinse with water and allow to air dry before using again. If a bristle brush is used to clean any of the grill cooking surfaces, ensure no loose bristles remain on cooking surfaces prior to grilling. -
Page 6: Limited Warranty
LIMITED WARRANTY LIMITED WARRANTY This warranty only applies to units purchased from an authorized retailer. Manufacturer warrants to the original consumer-purchaser only that this product shall be free from defects in workmanship and materials after correct assembly and under normal and reasonable home use for the periods indicated below beginning on the date of purchase*. -
Page 7: Parts List/ Parts Diagram
PARTS LIST Key Qty Description Key Qty Description Wire Fire Grate Front Shelf Assembly Firebox Door Latch Butterfly Damper Assembly Large Porcelain Cooking Grate Temperature Gauge Small Porcelain Cooking Grate Handle Rod Smoke Chamber Assembly Handle Barrel Spring Firebox Assembly Wood Rack Smokestack Assembly Hardware Pack... -
Page 8: Assembly
ASSEMBLY FIRST, GET A HELPER! This unit is heavy and requires a second person for lifting and moving. NEXT, pick a suitable location to work. Open the carton and slit the corners so that the carton lays flat. This will give you a protective surface during assembly. - Page 9 each short leg, slide one onto axle, followed by a wheel, then another . Slide a 7/16” flat washer 7/16” flat washer hitch pin into the hole at the end of the axle. Hitch pin Wheel 7/16” Flat washer 7/16" Flat washer Axle Short leg Hitch pin...
- Page 10 Have one person hold wood rack in position shown while another attaches rack to legs using four 3/8-16x1” hex-head bolts Fully tighten these four bolts. Wood rack MAKE SURE THAT LEG BOLTS ARE TIGHT ENOUGH SO THAT LEGS WON’T SLIP OFF OF POSTS. With the assistance of a helper, roll the unit over the handle brackets and stand it up onto its legs.
- Page 11 Smokestack Attach smokestack to end of smoke chamber by sliding stack into smokestack receiver. While holding the smokestack in a Smokestack vertical position, tighten the 3/8-16x3/4" hex head bolt in the nut that is welded to the smokestack receiver. Smoke Chamber To attach damper to firebox side door, place one 1/4”...
- Page 12 Handle Assembly . . . While holding handle in position between handle brackets, slide rod into one bracket, through handle, and out through other bracket. Secure at each end of rod with hitch pins . Repeat process to assemble firebox handle. Handle bracket Hitch pin Handle...
- Page 13 Install temperature gauge by placing the stem through the hole in the top of the smoke chamber. Thread in place until the text on the face of the gauge is readable in the correct position. Temperature gauge Place two of the smaller wire grates in the bottom of the smoke chamber and one in the bottom of the firebox. Place one large porcelain grate and one small porcelain grate into the smoke chamber and one small porcelain grate into the firebox as shown below.
- Page 14 NOTES...
-
Page 16: Registration Card
REGTEMP REV00...
Need help?
Do you have a question about the 09201555-05 and is the answer not in the manual?
Questions and answers