
Related Manuals for Philips WelcomeEye Lite


Summary of Contents for Philips WelcomeEye Lite
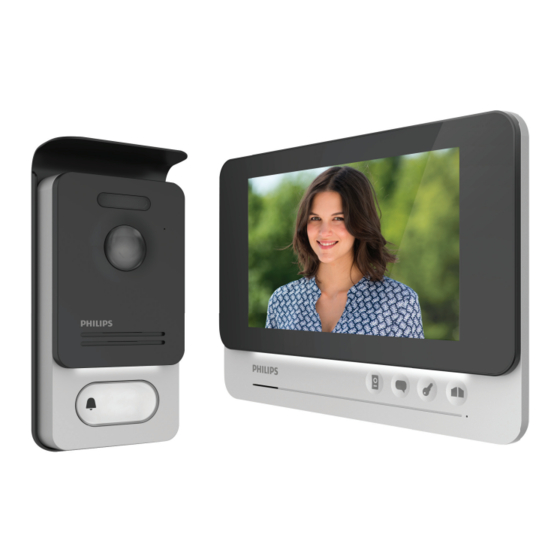
- Page 1 WelcomeEye Lite Videophone User Manual Register your product on www.philips.com/register...
-
Page 3: Table Of Contents
Contents 1. Safety instructions..................2 2. Contents of the kit..................2 3. General information..................3 4. Component names..................3 5. Product installation.................5 5.1. Wiring....................5 5.2. Configuring the intercom..............5 5.3 Monitor installation................6 5.4 Intercom panel installation..............7 6. Monitor interface..................8 6.1. -
Page 4: Safety Instructions
• Specific warnings and warning symbols are given for items where necessary. 2. KIT CONTENTS 2. Wall bracket 1. 7’’ monitor (Lite) 4. Intercom panel 3. Plug-in power supply Philips - Lite - V1... -
Page 5: General Information
For eff ective use, please carefully read this instruction manual. 4. COMPONENT NAMES Monitor: Screen Loudspeaker Microphone DES 9900 VDP Power supply terminal Terminal block for connection block to the intercom panel and accessories Philips - Lite - V1... - Page 6 - When someone presses the call button, the inside monitor rings and the video is displayed. - To change the nameplate label, remove the front cover and unclip the plastic cap behind the label. IP44 Philips - Lite - V1...
-
Page 7: Product Installation
- The opening function is only possible if the video from the respective intercom panel is displayed. 5.2 Configuring the intercom (see Fig. 1) a. Intercom volume settings: Turn the volume control with a Phillips head screwdriver to adjust the intercom volume. Philips - Lite - V1... -
Page 8: Monitor Installation
6 – Connect the two intercom panel wires and the two power supply wires following the wiring diagram. 7 - Position the monitor on the wall bracket. Warning: for this step, do not connect the 230VAC power supply. Philips - Lite - V1... -
Page 9: Intercom Panel Installation
7 – Connect the two wires from the monitor and, if necessary, connect the electric strike plate and the gate (see section 1. Wiring). 8 – Insert the screws and refit the two caps concealing the retaining screws. Philips - Lite - V1... -
Page 10: Monitor Interface
Back: turns the screen off and returns the videophone to standby mode. Next: goes to the next setting or next page. Decrease: decreases the value being adjusted (highlighted). Increase: increases the value being adjusted (highlighted). Philips - Lite - V1... - Page 11 (highlighted). Adjust the settings to your liking using the buttons. To go from one line to the next, use the button. On the last line, the button also allows you to exit the settings menu. Philips - Lite - V1...
-
Page 12: Monitoring Function And Answering A Call
• After two minutes of conversation, the call ends and the screen returns to standby mode. If the conversation ends before the 2-minute timeout, press the button to end the call. The screen returns to standby mode. Philips - Lite - V1... -
Page 13: Technical Specifications
- Dimensions: 142(h) x 210(l) x 15(d) mm Intercom panel: - C-MOS colour sensor 900 TVL - Viewing angle 95°H - Night vision (infrared LEDs) - Strike plate control 12V/1.1A/1s - Gate control: breaking capacity 12V/2A - IP44 - Operating temperature: -20°C/+50°C Philips - Lite - V1... -
Page 14: Faq
• Adjust the settings on the back of the intercom panel is too intercom panel • The volume from the • The microphone hole • Verify and rectify intercom panel is too on the intercom panel is blocked Philips - Lite - V1... -
Page 15: Technical Support - Warranty
Do not use any tool that can conduct voltage (wire brush, sharp tool, etc.) for cleaning. The receipt or invoice is proof of purchase date. Contacts and opening hours of our technical support centres are available if necessary on the website www.philips.com. Philips - Lite - V1... -
Page 16: Safety Precautions
Important : veuillez conserver précieusement cette carte de garantie, ainsi que votre preuve d’achat. Philips and the Philips shield emblem are registered trademarks of Koninklijke Philips N.V. and are used under licence. This product was manufactured and is sold by Avidsen SAS, the sole guarantor of the product. -
Page 17: Fcc/Ce Warning
• Redirect or move the receptor antenna • Increase the distance between the equipment and the receptor • Connect the equipment to a socket belonging to a different circuit from the one to which the receptor is connected Philips - Lite - V1... - Page 18 GB - Alternating Current Koninklijke Philips N.V. Wechselstrom NL - Gelijkstroom I marchi Philips sono marchi registrati di proprietà di Koninklijke Philips PL - Prąd zmienny N.V. IT - Corrente alternata Las marcas registradas de Philips son marcas registradas de Koninklijke...
Need help?
Do you have a question about the WelcomeEye Lite and is the answer not in the manual?
Questions and answers