Siemens SITOP UPS1600 Getting Started
Hide thumbs
Also See for SITOP UPS1600:
- Equipment manual (264 pages) ,
- Manual (232 pages) ,
- Getting started (40 pages)
Table of Contents
Advertisement
Quick Links
SITOP UPS1600 under STEP 7 V13
SITOP UPS1600 under STEP 7
V13
Getting Started
06/2014
___________________
Introduction
___________________
Safety notes
___________________
Description
___________________
Assigning the IP address
___________
Installing and configuring the
SITOP UPS1600 in STEP 7
V13
___________________
Parameterizing the SITOP
UPS1600
1
2
3
4
5
6
Advertisement
Table of Contents

Subscribe to Our Youtube Channel
Related Manuals for Siemens SITOP UPS1600


Summary of Contents for Siemens SITOP UPS1600
- Page 1 ___________________ SITOP UPS1600 under STEP 7 V13 Introduction ___________________ Safety notes ___________________ Description ___________________ Assigning the IP address ___________ Installing and configuring the SITOP UPS1600 under STEP 7 SITOP UPS1600 in STEP 7 ___________________ Parameterizing the SITOP UPS1600 Getting Started...
- Page 2 Note the following: WARNING Siemens products may only be used for the applications described in the catalog and in the relevant technical documentation. If products and components from other manufacturers are used, these must be recommended or approved by Siemens. Proper transport, storage, installation, assembly, commissioning, operation and maintenance are required to ensure that the products operate safely and without any problems.
-
Page 3: Table Of Contents
System overview ........................9 Assigning the IP address ......................11 Installing and configuring the SITOP UPS1600 in STEP 7 V13 ............17 Parameterizing the SITOP UPS1600 ..................... 25 Buffering an S7 IO controller, including the I/O when the power fails ........25 Switching off the UPS when the power fails by a user program .......... -
Page 5: Introduction
Operating instructions and manuals for SITOP are available in the Internet: Operating instructions/manuals (http://www.siemens.de/sitop/manuals) SITOP power supply homepage General news about our power supplies is available in the Internet at the SITOP home page (http://www.siemens.de/sitop). SITOP UPS1600 under STEP 7 V13 Getting Started, 06/2014... -
Page 6: Additional Documentation
Introduction 1.3 Additional documentation Additional documentation Further information is available in the following documents: ● UPS1600 and UPS1100 manuals ● IO controller manual ● STEP 7 V13 manual SITOP UPS1600 under STEP 7 V13 Getting Started, 06/2014... -
Page 7: Safety Notes
EN50272-2) must be observed for the storage, assembly and operation of the lead accumulators. It must be ensured that the battery location is suitably ventilated. Potential ignition sources must be separated by at least 50 cm. SITOP UPS1600 under STEP 7 V13 Getting Started, 06/2014... -
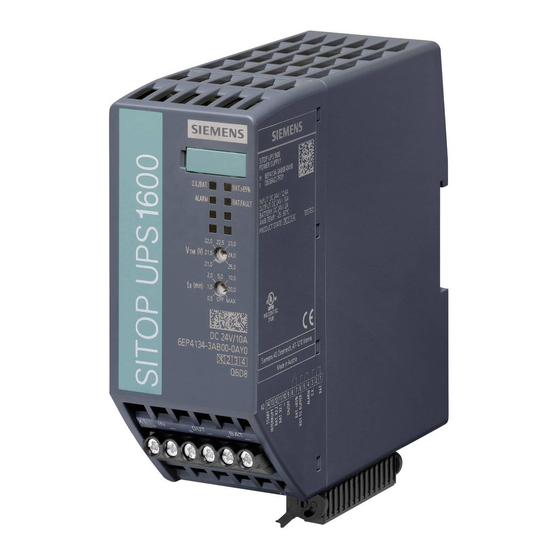
Page 9: Description
Application The principal tasks that you can perform with the SITOP UPS Management: ● Connecting the uninterruptible SITOP UPS1600 power supply to the IO controller S7 ● Configuring the SITOP UPS1600 uninterruptible power supply ● Protecting a computer or a computer network using the uninterruptible power supply ●... -
Page 11: Assigning The Ip Address
SITOP UPS1600 interface is described using the Primary Setup Tool. General information The Primary Setup Tool is a Siemens product that is free of charge and which is used to identify and configure network-conform devices. You can download the Primary Setup Tool under (http://support.automation.siemens.com/WW/view/en/19440762). - Page 12 1. Called the Primary Setup Tool. 2. In the Primary Setup Tool select the menu command "Settings > Set PG/PC Interface...". 3. In the dialog box "Set PG/PC Interface", select the "Access Path" tab. SITOP UPS1600 under STEP 7 V13 Getting Started, 06/2014...
- Page 13 Assigning the IP address 4. From the interfaces listed, select the Ethernet interface with which SITOP UPS1600 is connected, and confirm with "OK". SITOP UPS1600 under STEP 7 V13 Getting Started, 06/2014...
- Page 14 6. From the search results, select the SITOP UPS1600. The SITOP UPS1600 is displayed as "DC-UPS:" with its MAC address and IP address. 7. Open the menu of the SITOP UPS1600 in the tree view and select "Incl. Ethernet interface".
- Page 15 If required, select the checkbox "Use router" and enter the IP address of the router. 10. Select the SITOP UPS1600 in the tree view. The configuration can only be loaded to the device if the SITOP UPS1600 has been selected at the upper level.
- Page 16 11. In the Primary Setup Tool, select the menu command "Module > Download", to load the configuration to the SITOP UPS1600. You have assigned an IP address to the SITOP UPS1600, and you can now communicate with the SITOP UPS1600.
-
Page 17: Installing And Configuring The Sitop Ups1600 In Step 7 V13
Installing and configuring the SITOP UPS1600 in STEP 7 V13 To use the SITOP UPS1600, it must be assigned as IO device to an IO controller (S7 PLC). The SITOP UPS1600 in the project can also be equipped with one or more SITOP UPS1100 battery modules. - Page 18 Installing and configuring the SITOP UPS1600 in STEP 7 V13 5. Drag and drop the UPS1600 into the work cell of the network view. The UPS1600 is visible in the work cell. 6. Save your project. The UPS1600 is integrated in the project.
- Page 19 Installing and configuring the SITOP UPS1600 in STEP 7 V13 Assigning the UPS1600 to the S7 IO controller 1. Keeping the mouse key pressed, drag a connection from the green input symbol of the UPS1600 to the green input symbol of the S7 IO controller in which the PROFINET cable to the UPS1600 is inserted.
- Page 20 Installing and configuring the SITOP UPS1600 in STEP 7 V13 3. Click in the work cell of the device view on the UPS1600. 4. In the inspector window click on the "Properties" and "General" tab. 5. Click on the symbol to open the "Profinet interface [X3]".
- Page 21 Installing and configuring the SITOP UPS1600 in STEP 7 V13 6. Select the "Ethernet address", enter the required IP address and the PROFINET device name of the UPS1600 into the appropriate entry fields. 7. Save your project. The UPS1600 is now assigned to the S7 IO controller and integrated in the project.
- Page 22 Installing and configuring the SITOP UPS1600 in STEP 7 V13 Integrating the SITOP UPS1100 battery module 1. Ensure that you are in the device view. 2. Navigate to below the task card "Hardware catalog" in the palette "Catalog" to the required UPS1100 battery module.
- Page 23 Installing and configuring the SITOP UPS1600 in STEP 7 V13 6. Check whether the "SITOP UPS 1100 battery" option field is activated. Activate it if it is deactivated. 7. Select the appropriate entries in the drop-down lists "Module" and "Number of modules".
-
Page 25: Parameterizing The Sitop Ups1600
Parameterizing the SITOP UPS1600 The following examples show you how the uninterruptible SITOP UPS1600 power supply is parameterized: ● Buffering an S7 IO controller, including the I/O when the power fails ● Switching off the UPS when the power fails by a user program Parameterizing the uninterruptible SITOP UPS1600 power supply for additional tasks, please refer to the UPS1600 Manual. - Page 26 If the checkbox "Buffering allowed" is not selected, independent of the following entries, there is no buffering. 6. For "Connection threshold", enter the voltage value, which, when it is fallen below the UPS, starts to buffer. SITOP UPS1600 under STEP 7 V13 Getting Started, 06/2014...
- Page 27 Parameterizing the SITOP UPS1600 6.1 Buffering an S7 IO controller, including the I/O when the power fails 7. Enter the buffer time in "Buffer time". 8. Enter "Additional buffer time after PC shutdown". SITOP UPS1600 under STEP 7 V13 Getting Started, 06/2014...
- Page 28 9. Under "Stop buffering voltage" enter the battery voltage value where buffering should be stopped – or accept the standard value of 18.50 Volt. 10. Deactivate the checkbox "Enable reset". 11. Save your project. 12. Load the parameters into the S7 IO controller. SITOP UPS1600 under STEP 7 V13 Getting Started, 06/2014...
-
Page 29: Switching Off The Ups When The Power Fails By A User Program
6.2 Switching off the UPS when the power fails by a user program Switching off the UPS when the power fails by a user program To switch off the UPS when the power fails, Siemens provides the FB160 function block in the Internet under address (http://support.automation.siemens.com/WW/view/en/78817848). - Page 30 1. Open STEP 7 V13 and change to the project view. 2. Open a global library under task card "Libraries". The dialog box "Open global library" is opened. SITOP UPS1600 under STEP 7 V13 Getting Started, 06/2014...
- Page 31 3. Under "Search in" select the storage location of the code block package that has been downloaded, select library "UPS1600 library TIA Portal V12" and open this. 4. The library is loaded. The library is installed and displayed under the palette "Global libraries". SITOP UPS1600 under STEP 7 V13 Getting Started, 06/2014...
- Page 32 > UPS1600 function blocks (TIA V13)" and depending on the S7 IO controller being used, select the appropriate function block folder: – IO controller S7-300/400: "STEP 7 function blocks (S7-300/400)" – IO controller S7-1200/1500: "STEP 7 function blocks (S7-1200/1500)" SITOP UPS1600 under STEP 7 V13 Getting Started, 06/2014...
- Page 33 FB1600 is called within organization block OB1. Note Ensure that the update cycle of the organization block being used has a direct influence on the update time of the function block. SITOP UPS1600 under STEP 7 V13 Getting Started, 06/2014...
- Page 34 "UPS1600 [FB160] in an empty network of block main [OB1] and drop it there. The "Call options" dialog box opens. 2. Under "Name", select the entry "UPS1600_iDB" and confirm the call options. SITOP UPS1600 under STEP 7 V13 Getting Started, 06/2014...
- Page 35 Variable in the symbol table UPS1600 parameters Information Address area in the following example UPS_Buffer_mode buffer mode Buffer mode/ %IB 257 normal mode UPS_Ready_for_buffering ready for buffering Ready for buffering / %IB 258 not ready SITOP UPS1600 under STEP 7 V13 Getting Started, 06/2014...
- Page 36 You can find additional information on the I/O address area of the UPS1600 in the UPS1600 Manual. Procedure 1. Under project navigation, in folder "PLC variables > UPS1600 Tag table", open the variable table "Tag table UPS1600". SITOP UPS1600 under STEP 7 V13 Getting Started, 06/2014...
- Page 37 – UPS_Ready_for_buffering – UPS_New_alarms_pending – UPS_battery_charge_level 3. Save the project and load the parameters into the S7 IO controller. When the power fails, the user program now switches off the UPS. SITOP UPS1600 under STEP 7 V13 Getting Started, 06/2014...
Need help?
Do you have a question about the SITOP UPS1600 and is the answer not in the manual?
Questions and answers