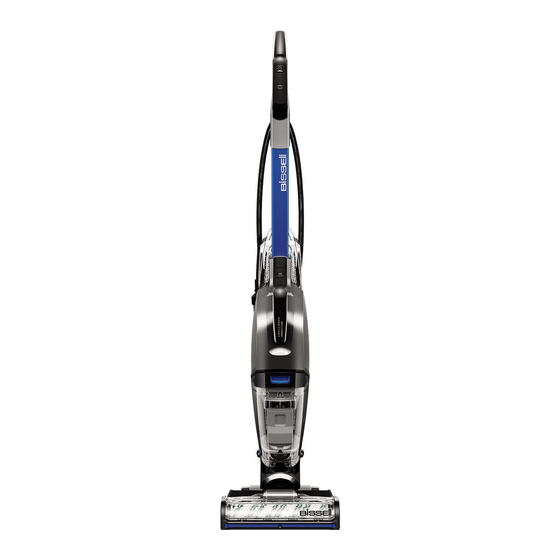
Bissell CROSSWAVE HYDROSTEAM Manual

All-in-one multi-surface cleaner

Advertisement

CROSSWAVE® HYDROSTEAM™
ALL-IN- ONE MULTI-SURFACE CLEANER
MODELS 3517F, 3527H (PROFESSIONAL)
What's in the Box? ............................................. 3
Assembly ............................................................... 3
Changing the Brush Roll .................................4
Filling the Formula Tank .................................. 5
Controls and Cleaning Modes ....................... 6
Cleaning Your Floors ........................................ 7
Sanitising Hard Floors ...................................... 7
Product Overview
1. Upper Handle
2. Fingertip Controls
3. Solution and Steam Spray Trigger
4. Clean Water Tank
5. Clean Out Cycle Button
6. Dirty Water Tank Removal Button
7. Dirty Water Tank with Filter and Strainer
8. Control Panel
9. Brush Roll Window
Emptying the Dirty Water Tank ................... 8
Using the Clean Out Cycle ............................. 8
After-Cleaning Care .......................................... 9
Storing Your Machine ....................................... 9
Troubleshooting ................................................ 10
Limited Warranty ...............................................11
2
5
6
8
9
1
3
4
7

Advertisement

Table of Contents
loading

Summary of Contents for Bissell CROSSWAVE HYDROSTEAM

  • Page 1: Table Of Contents

    CROSSWAVE® HYDROSTEAM™ ALL-IN- ONE MULTI-SURFACE CLEANER MODELS 3517F, 3527H (PROFESSIONAL) What’s in the Box? ..........3 Emptying the Dirty Water Tank ....8 Assembly ............... 3 Using the Clean Out Cycle ......8 Changing the Brush Roll .........4 After-Cleaning Care .......... 9 Filling the Formula Tank ........
  • Page 2 Use warm water, temperature up accompanying documents means to 60°C. that used electrical and electronic Use only BISSELL® cleaning formulas products should not be mixed with intended for use with this machine. general household waste. For proper Allow parts to dry.
  • Page 3: What's In The Box

    Handle Brush Roll(s) Trial Formula(s) Clean-Out and Storage Tray Assembly Go to global.BISSELL.com for assembly videos. 1. Insert handle into machine. 2. Insert clean water tank into 3. Wrap cord. To easily back of machine. unwrap, turn the Quick Release™ Cord Wrap down.
  • Page 4: Changing The Brush Roll

    Changing the Brush Roll Visit global.BISSELL.com to purchase additional brush rolls. Multi-Surface Brush Roll Wood Floor Brush Roll Area Rug Brush Roll PET Multi-Surface Brush Roll Microfibers mop and Soft-touch microfibers Bristles work on area nylon bristles help gently clean sealed hard...
  • Page 5: Filling The Formula Tank

    Certain trademarks used under license from The Procter & Gamble Company or its affiliates. WARNING To reduce the risk of fire and electric shock due to internal component damage, use only BISSELL cleaning fluid intended for use with the appliance.
  • Page 6: Controls And Cleaning Modes

    SteamWash™ Mode Power through tough, stuck-on messes on hard floors with the power of HydroSteam™ Technology. Hard Floor Mode Clean everyday messes on sealed hard floors such as tracked-in mud, spilled cereal and milk, coffee, and cooking splatters. 6 global.BISSELL.com...
  • Page 7: Cleaning Your Floors

    3. With the trigger released, remove surface dirt and debris. visibly wet with formula for move machine back and forth To sanitise: Hold the trigger to five minutes. May require to extract solution. apply solution to floor. additional wet passes. global.BISSELL.com 7...
  • Page 8: Emptying The Dirty Water Tank

    2 fluid ounces of FreshStart™ will light up blue when ready. formula to the Clean Out Tray. WARNING To reduce the risk of fire, electric shock or injury, turn power OFF and disconnect plug from electrical outlet before performing maintenance or troubleshooting. 8 global.BISSELL.com...
  • Page 9: After-Cleaning Care

    After-Cleaning Care For more helpful maintenance tips, check out global.BISSELL.com. 1. Remove brush roll following 2. Remove machine from tray 3. Empty dirty water tank and steps on page 3. Pull brush roll and wipe excess water or dirt. strainer following steps on tab and place in tray to dry.
  • Page 10: Troubleshooting

    Handle not installed properly. Reinstall handle and push down until it clicks into place. Drips on Cleaning with water only. Add BISSELL cleaning formula to tank. the floor Holding the trigger after cleaning pass. Release the trigger to stop dispensing solution and steam, during making forward and backward passes to suction excess water.
  • Page 11: Limited Warranty

    You can find out about your legal rights and remedies by contacting Except as set out below, BISSELL and its distributors are not liable for any your local consumer advice service. Nothing in this warranty will replace loss or damage that is not foreseeable or for incidental or consequential or lessen any of your legal rights or remedies.
  • Page 12 But wait, there’s more! Join us online for a complete guide to your new product, including troubleshooting, parts and more. Go to global.BISSELL.com. INFO VIDEOS PARTS ©2023 BISSELL Inc. All rights reserved. Part Number 1639803 08/23 v2...

This manual is also suitable for:

3517f3527h

Table of Contents