Table of Contents
Advertisement
Quick Links
Owner's
Manual
P
®
16=0
ELECTRmC START
42"
OWE
6 SPE5
TRANSAXLE
LAWN
Model No.
917.270631
o Safety
o Assembly
Operation
o Maintenance
o Repair Parts
CAUTION:
Read and follow all
Safety Rules and Instructions
before operating this equip-
ment.
For answers to your questions
about this product, Call:
1=800=659-5917
Sears Craftsman
Help Line
5 am - 5 pm, Mort - Sat
Sears, Roebuck and Co., Hoffman
Estates, IL 60179
Advertisement
Table of Contents

Related Manuals for Craftsman EZ3 917.270631


Summary of Contents for Craftsman EZ3 917.270631
- Page 1 Safety Rules and Instructions before operating this equip- ment. Sears, Roebuck and Co., Hoffman ® For answers to your questions about this product, Call: 1=800=659-5917 Sears Craftsman Help Line 5 am - 5 pm, Mort - Sat Estates, IL 60179...
- Page 2 Sears will replace the battery at no charge. In-home warranty service on your Craftsman riding equipment the date of purchase. Please contact your nearest service center. After 30 days from the date of purchase, warranty service is available ment to your nearest Sears Service Center.
- Page 3 . Turn off blades when not mowing o Stop engine before removing grass catcher or unclogging chute. o Mow only in daylight or good artificial light. o Do not operate the machine while under the influence of alcohol or drugs. o Watch for traffic when operating crossing roadways.
- Page 4 Never make adjustments or repairs with the engine running. Grass catcher components are subject to wear, damage, and deterioration, which could expose moving parts or allow objects to be thrown. Frequently check components and replace with ,, Be sure the area is clear of other people before mowing.
- Page 5 CASE SIZE: U1R 27-35 FT, LBS. BLADE BOLT TORQUE: CONGRATULATIONS on your purchase of a Craftsman Tractor. It has been designed, engineered and manufactured to give you the best possible dependability and performance.Should you experience any problem you cannot easily remedy, please contact your nearest Sears Authorized Service Center.
- Page 6 PARTS BAG CONTENTS SHOWN FULL SRZE (1) Large Flat Washer (1) Hex Bolt 3/8-16 x 1 (1) Lockwasher (1) Hex Bolt 5/16-18 5/I6-18x 1-1/4 (1) Locknut (1) Shoulder Bolt 5/16-18 (1) Washer 17/32 x 1-3/16 x 12 Gauge (1) Knob (2) Hex Bolts 1/4-20 x 3/4 (2) Hex Nuts 1/4-20 (2) Washers...
- Page 7 PARTS BAG CONTENTS SHOWN FULL SiZE (2) Screws #10 x 5/8 (2) Weld Nuts Parts packet separately in carton Seat Video Cassette Mulcher Plate Steermg Wheel Parts Bag Steering Boot Manual (2) Lock Washers (2) Washers 3/16 x 3/4 x 16 Gauge Parts Bag contents not shown full size (2) Latch Hook Assemblies...
- Page 8 Your new tractor has been assembledat the factory with exception of those parts left unassembledfor shipping purposes. To ensure safe and proper operation of your tractor all parts and hardware you assemble must be tightened securely_Use the correct tools as necessary to insure proper tightness. Review the video cassette before you begin. TOOLS REQUIRED ASSEMBLY A socket wrench set will make assembly...
- Page 9 HOW TO SET UP YOUR TRACTOR CONNECT BATTERY ,_CAUTION: Do not short battery termi- nals by allowing a wrench or any other object to contact both terminals at the same time. Before connecting battery, re- move metal bracelets, wristwatch bands, rings, etc.
- Page 10 Hook Points Weld Nut From Down The Top Lock Weld Washer' Nut. Latch'\_ Lock Washer Washer Washer Mulcher Plate Deflector Shield TO CONVERT TO BAGGING DISCHARGING Simply remove mulcher plate and store in a safe place. "four mower is now ready for discharging or installation of optional grass catcher accessory.
- Page 11 These symbols may appear on your tractor or in literature supplied with the product. Learn and understandtheir meaning. CAUTION BATTERY WARNING ENGINE OIL PRESSURE ENGINE ON MOWER CHOKE FUEL NEUTRAL ATTACHMENT REVERSE CLUTCH ENGAGED ATTACHMENT CLUTCH DISENGAGED DANGER, KEEP HANDS AND FEET AWAY REVERSE FORWARD GI k...
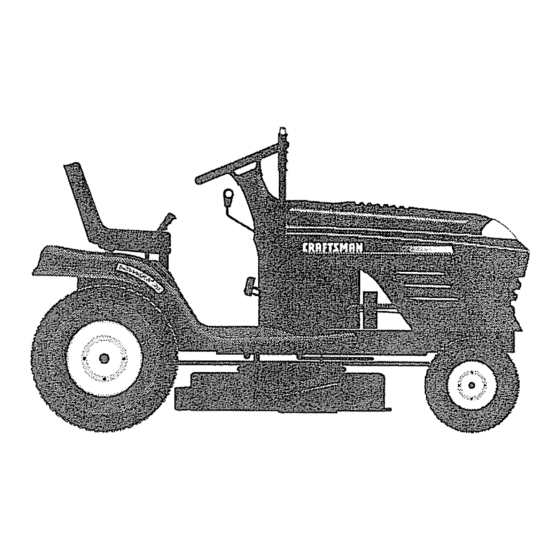
- Page 12 KNOW YOUR TRACTOR READ THIS OWNER'S MANUAL TRACTOR Compare the illustrations with your tractor to familiarize various controls and adjustments. Save this manual for future reference_ Ammeter Clutch Lever ThrottteChoke Control Clutch/Brake Pedal Our tractors conform to the safety standards ATTACHMENT CLUTCH LEVER:...
- Page 13 The operation Of any tractor can result in foreign objects thrown into the eyes, which can result in severe eye damage° Always wear safety glass- es or eye shields while operating ments or repairs. spectacles, or standard safety glasses. HOW TO USE YOUR TRACTOR Your tractor is equipped with an operator presence sensing...
- Page 14 , For' best cutting performance, over 6 inches in height should be mowed twice_ Make the first cut relative- ly high; the second to desired height. TO OPERATE MOWER "{our tractor is equipped with an operator presence sensing switch. Any attempt by the operator to leave the seat with the engine running and the attachment engaged will shut off the engine.
- Page 15 See Storage Instructionsfor additional information. Neveruse engine or carbure- tor cleaner productsin the fuel tank or per- nent damage may occur. CAUTION; Fill to bottom of gas tank filler neck. Do not overfill. Wipe off any spilled oil or fuel. Do not store, spill or use gasoline near an open flame.
- Page 16 MULCHING IVIOWnNG TiPS IMPORTANT: For best performance, keep mower housing free of built-up grass and trash. Clean after each use. o The special mulching blade will recut the grass clippings many times and reduce them in size so that as they fall onto the lawn they will disperse into the grass and not be noticed.
- Page 17 CUSTOMER RESPONSiBILITiES MA,.TE.A.OE SO.EOULE As.Each,. ou COMPLETE E.ViOE it91 ... i i!,, i_, _ ... ch_k BrakeOperation ... 6/ Check Tire Pressure Check Operator Presence !n...}.erlock Systems Check for Loose Fasteners =Sharpen/Replace Mower Blades c Lubr,co,,onCha ...' Check B.a..t.te.ry Level Clean Battery Terminals/Recharge...
- Page 18 TRACTOR Always observe safety rules when per- forming any maintenance. BRAKE OPERATION If tractor requires more than six (6) feet stopping distance at high speed in highest gear, then brake must be adjusted. (See "TO ADJUST BRAKE" in the Service and Adjustments section of this manual).
- Page 19 , Rinse the battery with plain water and dry. , Clean terminals and battery cable ends with wire brush until bright, , Coat terminals with grease or petroleum jelly° , Reinstall battery (See "CONNECT TERY" in the Assembly section of this manual).
- Page 20 o Reinstall cartridge, nut, precleaner, cover and securewith knob(s). iMPORTANT: Petroleum solvents, such as kerosene, are not to be used to clean the cartridge. They may cause deterioration of the cartridge. Do not oil cartridge. Do not use pressurized air to clean or dry car- tridge_ Cover Knob...
- Page 21 ,_kCAUTION: Before performing any service or adjustments: o Depress clutch/brake pedal fully and set parking brake. , Place gearshift lever in neutral (N) position. ° Place attachment clutch in "DISENGAGED" o Turn ignition key "OFF" and remove key. o Make sure the blades and all moving parts have completely - Disconnect spark plug wire from spark plug and place wire where it cannot come in contact with plug.
- Page 22 TO LEVEL MOWER HOUSING Adjust the mower while tractor is parked on level ground or driveway. Make sure tires are properly inflated (See "PROD- UCT SPECIFICATIONS" on page 5 of this manual). If tires are over or underinflated, you will not properly adjust your mower. sIDE-TO-SIDE ADJUSTMENT o Raise mower to its highest position.
- Page 23 BELT INSTALLATION o install new belt in reverse order of removal. Mandrel Pulley TO ADJUST BRAKE "{our tractor is equipped with an adjustable brake system which is mounted on the right side of the transaxle. If tractor requires more than six (6) feet stopping distance at high speed est gear, then brake must be adjusted.
- Page 24 TO ADJUST STEERING WHEEL ALIGN- MENT If steering wheel crossbars are not hod- zontal (left to right) when wheels are posi- tioned straight forward, remove steering wheel and reassemble per instructions the Assembly section of this manual. FRONT WHEEL TOE-IN/CAMBER The front wheel toe-in and camber are not adjustable on your tractor: If damage has occurred to affect the front wheel toe-in or...
- Page 25 TO REPLACE HEADLIGHT BULB o Raise hood. o Pul! bulb holder out of the hole in the backside of the grill o Replace bulb in holder and push bulb holder securely back into the hole in the backside of the grill° o Close hood.
- Page 26 ADJUST CARBURETOR NOTE: The carburetor on this engine is low emission° it is equipped with an idle fuel adjusting needle with a limiter cap, which allows some adjustment limits allowed by the cap. Do not attempt to remove the lirniter cap. The limiter cap cannot be removed without breaking the adjusting needle_ The carburetor...
- Page 27 Immediately prepare your tractor for stor- age at the end of the season or if the trac- tor will not be used for 30 days or more. ,_kCAUTION: Never store the tractor with gasoline in the tank inside a building where fumes may reach an open flame or spark.
- Page 28 TROUBLESHOOTtING CHART CAUSE o Out of fuel. ° Engine not "CHOKED" properly. o Engine flooded. o Bad spark plug. • Dirty air filter. o Dirt,./fuel filter. ° Water in fuel. o Loose or damaged wiring. • Carburetor ment. = Engine valves out of adjustment.
- Page 29 TROUBLESHOOTING CHART PROBLEM -CAUSE Engine clicks but o Loose or damaged wiring. will not start o Faulty solenoid or starter° (cont'd) Loss of power o Cutting too much grass/too fast. o Throttle in "CHOKE" posi- tion. ° Build-up of grass, leaves and trash under mower.
- Page 30 TROUBLESHOOTING CHART PROBLEM CAUSE Poor cut - uneven grass, leaves, and trash around mandrels. (cont'd) Obstruction Mower blades will mechanism. not rotate Worn/damaged drive belt. Frozen idler pulley. Frozen blade mandrel. , _,, ,,,,,_ ... Poor grass dis- ° Engine speed too slow. charge o Travel speed too fast.
- Page 31 TRACTOR SCHEMATIC ltt ° °'° olIIo O_,4g FUSE 30 AMP, AMMETER (OPTIONAL) t ... WHrt'E ',©, oM_, CLUTCH 1 BRAKE (PEDAL UP) IGNITION SWITCH (OPTIONAL) t ... FUEL SHUT-OFF YOUR TRACTOR IS EQUIPPED WITH A SPECIAL ALTERNATOR THE LIGHTS ARE NOT CONNECTED BATTERY, OWN ELECTRICAL...
- Page 32 TRACTOR - - MODEL NUMBER 917.270631 ELECTRICAL...
- Page 33 Switch Ign 4 Pos 124211X Nut Ignition 141226 Cover Sw Key Blk 1 25 Text SLT 109310X Key Ign Molded Craftsman 156442 Harness Ign Man Ct Am Hm 97 Bolt Blko Fin Hex 1/4-20 Uric x 1/2 71110408 Cover Terminal Red...
- Page 34 TRACTOR - - MODEL NU_,/IBER 917.27G631 CHASSIS AND ENCLOSURES ... i4o-_"3...
- Page 35 TRACTOR CHASSIS AND ENCLOSURES PART NO.. 160392 140356 17490612 STD551025 155272 161917X013 STD533710 155927 145660 155934X010 17490608 144983X558 126938X 19131312 STD541437 145198X558 155217 151287X558 139976 17490508 139686 139887 73800400 19091416 145201 161464 145202 STD522507 STD533707 154798 STD541437 158418 156095 164966 154207 156524 5479J...
- Page 36 TRACTOR - - MODEL NUMBER 917.279631 GROUND DRIVE...
- Page 37 TRACTOR GROUND DRIVE PART DESCRIPTION Transaxle (See Breakdown) Dana Model 4360-128 146682 Spring Return Brake Tia Zinc t23666X Pulley Transaxle 18/20" tires 12000028 Ring Retainer # 5100-62 121520X Strap Torque 30 Degrees 17490512 Screw Thdrol 5/t6-18 x 3/4 TYT t54792 Rod Shifter Fender STLT STD5612t0 Pin Cotter 1/8 x 1 Cad...
- Page 38 TRACTOR- = MODEL NUMBER 917.270631 STEERING ASSEMBLY _""_...
- Page 39 TRACTOR STEERING ASSEMBLY PART 139768 154427 156483 157473 6266H 121748X 192720 t 6 12000029 3366R 156438 STD551137 154779 73901000 t56546 57079 124035X 126684X 71200410 127501 154406 t26847X t36874 19131416 17490612 STD561210 130465 155099 152927 139769 19133808 STD541537 t00711L 145054 12t749X 153720 121232X 6855M...
- Page 40 TRACTOR - - MODEL NUMBER 917.270631 ENGINE OPTIONAL EQUIPMENT Spark Arrester...
- Page 41 TRACTOR ENGINE PART 162157 1772O41O 137352 272293 13280324 13200300 STD551237 159880 137180 t09202X 15899O 123487X 17490512 137040 t24028X 17490412 19091416 STD55t131 71070512 17490620 12886'1 NOTE: All component dimensions given in US, inches 1 inch = 25,,4 mm - - MODEL NUMBER 917.270631 DESCRIPTION...
- Page 42 TRACTOR ;EAT ASSEMBLY PART DESCRIPTION Seat 3350 Blk/blk Craftsman 140122 140551 Bracket PntPivot Seat (blk) BoltFin Hex 3/8-16uncX 1 STD523710 Washer 13/32 X 3/4 X 10 Ga 19131610 145006 Clip Push in Hinged STD541437 Nut Hex Lockw/Ins3/8-16 Unc 124181X SpringSeat Cprsn 2 250 Blk Zi...
- Page 43 Decal, Hood Rh 163202 Decal, Hood Lh 273832 Decal, Fender 133644 Decal, Maint Customer Sears 163203 Decal, Deck Mower EZ Mulch 163204 Decal, Fender Craftsman 156439 Decal, Fender Danger 163207 Decal, Fender WHEELS & TIRES 4,10 -- MODEL NUMBER 917.270631...
- Page 44 TRACTOR - - MODEL NUMBER 917.270631 LIFT ASSEMBLY 161718 13 __...
- Page 45 TRACTOR LIFT ASSEMBLY PART 159460 159471 105767X 12000002 19211621 120183X I25631X 122365X 139865 139866 STD624008 127218 73350800 130171 73680800 139868 163552 140302 73540600 NOTE: AIt component dimensions given in U S inches t inch = 25.4 mm - - MODEL NUMBER 917.27(}631 DESCRIPTION Washer Asm Inner Spring W/Plunger...
- Page 46 TRACTOR MOWER DECK - - MODEL NUiVIBER 917.270631 "'-40 21 22...
- Page 47 TRACTOR MOWER DECK PART DESCRIPTION 144393 Mower Housing STD533t07 Bolt 138017 Bracket Assembly, Sway Bar, Front 138440 Bracket Assembly, Sway Bar STD624008 Retainer Spring t30832 Arm, Suspension, Rear 850857 Bolt, Hex 3/8-24 x 1.25 Grade 8 STD551!37 Washer, Lock 140296 Washer, Hardened 134149 Blade, Mulching...
- Page 48 TRACTOR - - MODEL NurvIBER 917.270631 DANA TRANSAXLE - - MODEL NUMBER 4360-128 !2 9 4.3=...
- Page 49 TRACTOR DANATRANSAXLE - - MODEL NUMBER 4360-128 PART NO.. DESCRIPTION 160955 Housing, Upper 2274J Screw, Tapping, 1/4-20 X ..734 134400 Bali, Detent 105904X Spring, Detent 160940 Screw, Tapping, No. 10-24 X ,482 I38235 Assy, Kit, Shifter I08727X V-Ring 148266 Bearing, Flange 148269 Seal, Oil 2225J...
- Page 50 TRACTOR - - MODEL NUMBER 917.917.270631 BRIGGS & STRATTON ENGINE-MODEL NUMBER 28U707, TYPE NUMBER 1174-E1 _614 "_"REQUIRES SPECIALTOOLS TO INSTALL. SEE REPAIR INSTRUCTION MANUAL. 868A...
- Page 51 TRACTOR BR_GGS & STRATTON ENGINE-MODEL NUMBER 28U707, TYPE NUMBER 1174-E1 106 987 95 117 121 CARBURETOR OVERHAUL KIT ... _123 _r REQUIRES SPECIAL TOOLS TO INSTALL SEE REPAIR JNSTRUCTfON MANUAL - - MODEL NUMBER 917.270631 _/_A 1033 VALVE OVERHAUL KIT ,4--1 987®...
- Page 52 TRACTOR - - MODEL NUMBER 917.917.270631 BRIGGS & STRATTON ENGINE-MODEL NUMBER 28U707, TYPE NUMBER 1174-E1 634A 868 868A 171 _ I S2S 358 GASKET SET _524 977 CARBURETOR GASKET SET 305_ 1006...
- Page 53 TRACTOR - - MODEL NUMBER 917.917.270631 BRIGGS & STRATTON ENGINE-MODEL NUMBER 28U707, TYPE NUMBER 1174-E1 MANUALJ t058 OWNIER'S 729A...
- Page 54 TRACTOR - - MODEL NUMBER BRIGGS & STRATTON ENGINE-MODEL NUMBER 28U707, TYPE NUMBER 1174-E1 PART DESCRIPTION 496412 CytinderAssembly 399265 Bearing, Cylinder 391086 Seal, Oil 494238 Base, Engine 495858 Head, Cylinder 273280 Gasket, CyiinderHead 495735 Breather Assembly 27803 Gasket, Valve Cover 94621 Screw, Sems 281246...
- Page 55 TRACTOR - BRIGGS & STRATTON ENGINE-MODEL PART DESCRIPTION 810068 Screw, Set 496280 Housing, Blower 94786 Screw, Hex, Head, Blower Housing Mounting 225020 Shield, Cylinder 94930 Screw, Cylinder Shield 497595 Motor, Starter 497602 Bolt, Thru 497608 Brush Set 495859 Armature, Magneto 94731 Screw, Sems, Armature Mounting...
- Page 59 SUGGESTED GUIDE FOR SIGHTING SLOPES FOR SAFE OPERATION SIGHTING "" "- _CUT q GUIDE SIGHT AND HOLD THIS LEVEL WITH SKY LINE OR TREE. 15 o MAX. greater than 15 ), never across the face. Make turns gradu- Operate your Tractor up and down the face of slopes (not ally to prevent tipping or loss of control.
- Page 60 For the repair or replacement parts you need delivered directly to your home Call 7 am - 7 prn, 7 days a week ! =SG0=366=PART (1-800-366-7278) Para ordenar piezas con entrega a domicilio- 1-800-659-7084 For in-house major brand repair service Call 24 hours a day, 7 days a week 1°800=4=REPAIR (1-800-473-7274)
Need help?
Do you have a question about the EZ3 917.270631 and is the answer not in the manual?
Questions and answers