Table of Contents

Subscribe to Our Youtube Channel
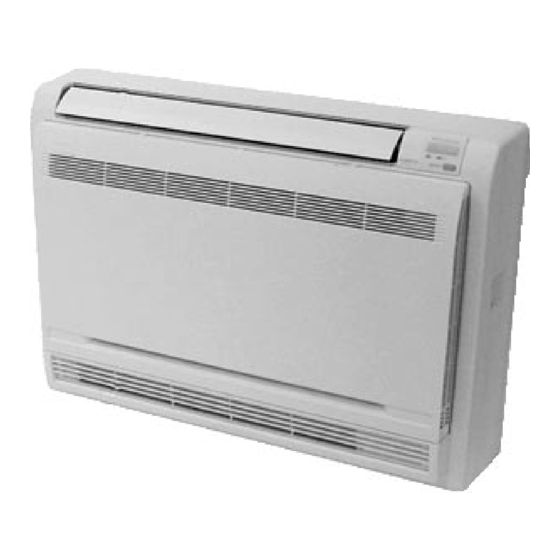
Related Manuals for Hokkaido HFII 351 XR


Summary of Contents for Hokkaido HFII 351 XR
- Page 1 CONSOLE TYPE AIR CONDITIONERS (MONOSPLIT SYSTEMS, AIR-TO-AIR, HEAT PUMP) USER'S MANUAL "Commercial DC Inverter" Models HFII 351 XR HFII 531 XR WARNING! PLEASE READ CAREFULLY THIS MANUAL BEFORE OPERATING YOUR NEW AIR CONDITIONER - 1 -...
-
Page 2: Table Of Contents
Table of Contents GENERAL INFORMATION ...................... 3 SAFETY PRECAUTIONS ......................6 OUTLINE OF INDOOR & OUTDOOR UNITS .................11 LED INDICATORS ON INDOOR UNIT .................. 12 IR REMOTE CONTROLLER ....................13 HEAT, COOL, FAN MODES ....................17 DRY MODE ..........................18 AUTO MODE .......................... -
Page 3: General Information
GENERAL INFORMATION Outline of specific features ECO-FRIENDLY REFRIGERANT R410A As R410A refrigerant contains no chlorine, it does not damage ozone. POWER CONTROL THROUGH "DC INVERTER" Power is supplied according to real needs of comfort, thus permitting a sure energy saving. INFRARED REMOTE CONTROLLER All available functions of the air conditioner can be set by using the infrared remote controller, whose LCD panel immediately shows the operating parameters. - Page 4 GENERAL INFORMATION THERMOSTAT UNDER MICROCOMPUTER CONTROL The thermostat being controlled by microcomputer allows remarkable energy saving and provides more comfort, as the room temperature is checked with the greatest precision. INDOOR FAN AUTOMATIC SPEED CONTROL The airflow from the Indoor Unit can be controlled step by step, on the basis of the difference between the room temperature and the set temperature.
- Page 5 GENERAL INFORMATION Recommended operating conditions In order to obtain the Unit's best performances, it is recommended its use under the following conditions: HFII 351XR Model: 0°C to 43°C Outdoor temperature: HFII 531XR Model: -15°C to 43°C Room temperaure: 17°C to 32°C COOLING OPERATION CAUTION: Room relative humidity should be less than 80%.
-
Page 6: Safety Precautions
SAFETY PRECAUTIONS Before starting the air conditioner, please read carefully the information in this "USER'S MANUAL". The User's Manual contains very important suggestions relatied to installation, operation and maintenance of the air conditioner and concerning your personal safety. The Manufacturer accept no responsibility for the damages that may arise due to non- observance of the instructions listed in this "USER'S MANUAL". - Page 7 SAFETY PRECAUTIONS • Strictly observe the instructions provided in this Manual. • The air conditioning system contains inside its refrigerant circuit the R410A gas under pressure. Never disconnect refrigerant pipes or connection joints. • Never perform any handling on Outdoor Unit service valves or on Indoor Unit’s unions.
- Page 8 SAFETY PRECAUTIONS Installation Never try to install this Unit by yourself, i.e. without the support of Tachnical Personnel. Never try to reapir the Unit by yourself. The Unit's components can be reached only by opening or removing the covering panels, and this involves exposure to high voltage. Even by disconnecting power supply, it is not always possible to avoid the risk of electric shocks.
- Page 9 SAFETY PRECAUTIONS Always observe the operating precautions listed in the following tables. In this way, correct operation and safeguard of people, animals and objects inside the air-conditioned room will be ensured. WARNING Use the correct voltage and frequency for power Do not insert the air conditioner's plug into multiple supply.
- Page 10 SAFETY PRECAUTIONS CAUTION Ventilation should be operated when using Do not use sprayers near the air conditioner and at the same time the air conditioner and gas do not spray anything towards the appliance. burners.Insufficient ventilation may cause lack of oxygen. Do not place burners near the airflow of air Do not expose plants or animals to the direct airflow of the air conditioner.
-
Page 11: Outline Of Indoor & Outdoor Units
OUTLINE OF INDOOR & OUTDOOR UNITS INDOOR UNIT OUTDOOR UNIT INDOOR UNIT OUTDOOR UNIT Air flow louver (at air outlet) Connecting pipe Air inlet Air inlet (with air filter in it) Air outlet Installation part IR Remote Controller Display panel Drain pipe NOTE: The Figure has the only purpose to show the User how to operate for a correct use of the appliance. -
Page 12: Led Indicators On Indoor Unit
LED INDICATORS ON INDOOR UNIT The electronics of the air conditioner is able to diagnose eventual malfunctions which can be interpreted by the 3 LED indicators on the Indoor Unit's frontal panel. According to the state of each indicator (ON, flashing, OFF), the Authorized Technical Service is able to detect the common type of anomalies. -
Page 13: Ir Remote Controller
IR REMOTE CONTROLLER Buttons' outline TEMP TEMP To decrease set To increase set temperature by steps temperature by of 1°C. steps of 1°C. FAN SPEED To select fan speed MODE SET TEMPERATURE C) according to the following At each press of this sequence: button, operation mode AUTO - LOW - MED - HIGH... - Page 14 IR REMOTE CONTROLLER LCD panel outline AUTO COOL HIGH HEAT TIMER ON/OFF DIGITAL Display: It displays set temperature, and eventually TIMER settings. In FAN mode, temperature is not displayed. TRANSMISSION Indicator: This symbol lights up each time the remote controller sends signals to the Indoor Unit. OPERATION Indicator: This symbols lights up when the air conditioner is started.
- Page 15 IR REMOTE CONTROLLER Installation & correct use of remote controller LED Display Signal receiver & LED Display Signal receiver Max. allowed distance: 8 metres 1) Make sure the 2 batteries (“AAA” type, 1.5V) are fully charged and correctly fitted in the special slot on the remote controller, by respecting the polarity marked on the remote controller itself.
- Page 16 IR REMOTE CONTROLLER Batteries' replacement If after the transmission of a signal by remote controller the confirmation sound emitted by the Indoor Unit's buzzer is no more heard, or the indicator on remote controller's display does not light up, batteries must be replaced.
-
Page 17: Heat, Cool, Fan Modes
HEAT, COOL, FAN MODES COOL, HEAT, FAN Modes Connecting/operating the air conditioner Connect the air conditioner to the power source: the “OPERATION” LED on Indoor Unit’s panel will start SET TEMPERATURE C) flashing. AUTO Select your desired operation mode by pressing COOL HIGH “MODE”... -
Page 18: Dry Mode
DRY MODE DRY Mode “DRY” mode is a Cooling mode with low fan speed, in which the refrigerant flow through indoor heat exchanger is compatible with low fan speed, so as to permit the condensation of room humidity without changing of air SET TEMPERATURE C) temperature. -
Page 19: Auto Mode
AUTO MODE AUTO mode When “AUTO” mode is selected, the air conditioner automatically chooses the suitable operation settings according to room temperature and eventually to the SET TEMPERATURE C) temperature set by the User. The four possible options are among: “COOL”, “DRY”, AUTO “HEAT”, “FAN”. -
Page 20: Timer Function
TIMER FUNCTION TIMER ON (Programmed start) TIMER function allows you to program the start and/or stop of the air conditioner according to your needs. SET TEMPERATURE C) Connecting the air conditioner Connect the air conditioner to the power source: the AUTO “OPERATION”... - Page 21 TIMER FUNCTION TIMER OFF (Programmed stop) TIMER OFF function will allow you to set programmed stop time for the air conditioner. In this way, the appliance will automatically stop at your desired time. SET TEMPERATURE C) Connecting/operating the air conditioner AUTO Connect the air conditioner to the power source: the COOL...
- Page 22 TIMER FUNCTION TIMER ON/OFF Mode (Programmed Start/Stop) TIMER ON/OFF (or TIMER OFF/ON) function allows you to set the automatic start/stop or stop/start of the air conditioner at your desired time. SET TEMPERATURE C) Connecting/operating the air conditioner AUTO Connect the air conditioner to the power source: COOL HIGH “OPERATION”...
-
Page 23: Eco" (Energy Saving) Mode
"ECO" (ENERGY SAVING) MODE ECONOMIC Mode Connecting/operating the air conditioner Connect the air conditioner to the power source: “OPERATION” LED on Indoor Unit’s panel will start SET TEMPERATURE C) flashing. AUTO COOL HIGH Select your desired operation mode by pressing HEAT “MODE”... -
Page 24: Powerful" Mode
"POWERFUL" MODE POWERFUL “Mode” Outline of “Powerful” mode “Powerful” function allows you to reach your desired temperature in a short time. “POWERFUL” button on remote controller, corresponding to this function, is active only in “COOL” and “HEAT” SET TEMPERATURE C) modes. -
Page 25: Selecting The Air Outlet Direction
SELECTING THE AIR OUTLET DIRECTION Air outlet selector Air outlet selector allows you to choose the air outlet direction. To reach the selector, you need to open the Indoor Unit's frontal panel. WARNING Before opening the frontal panel, switch off the air conditioner and disconnect it from the power source. - Page 26 SELECTING THE AIR OUTLET DIRECTION Airflow supply with standard setting of outlet selector: Operation Circumstance Description Air is supplied through the uppper Dry mode Always outlet only. When set temperature has been reached, or if Air is supplied through the uppper outlet only.
-
Page 27: Adjusting The Airflow Direction
ADJUSTING THE AIRFLOW DIRECTION Vertical adjustment By pressing "AIR DIRECTION" button, it is possible to select and fix the position of air outlet louver. The recommended positions for the different operation modes are shown by the following Figures: Heat mode Cool / Dry modes In "HEAT"... - Page 28 ADJUSTING THE AIRFLOW DIRECTION Horizontal adjustment it is also possible to adjust the horizontal airflow direction. Move manually the knobs on left and right sides: Horizontal airflow adjustement can be carried out by hand only. Horizontal automatic swinging of the flaps is not available. - 28 -...
-
Page 29: Emergency Operation & Test Switch
EMERGENCY OPERATION & TEST SWITCH "MANUAL" button OPERATION IN EMERGENCY MODE: If you have lost the remote controller or its batteries are exhausted, the air conditioner can be started by pressing once "MANUAL" button on the Indoor Unit's frontal panel. The air conditioner will start operating in the Emergency running "AUTO"... -
Page 30: Ordinary Maintenance And Advice For Use
ORDINARY MAINTENANCE AND ADVICE FOR USE Indoor Unit's cleaning WARNING Before starting any kind of ordinary maintenance: 1 - Stop the appliance by pressing "ON/OFF" button on remote controller; 2 - Move the circuit breaker to "OFF" or "0" position; 3 - Pull the plug out of the power socket;... - Page 31 ORDINARY MAINTENANCE AND ADVICE FOR USE Removing and cleaning the air filters Open the Indoor Unit's frontal panel by sliding towards the centre the buttons on left and right sides (see Fig. 1). Fig.1 Lightly press the claws on left and right sides of the filter, then take out the filter by pulling it upwards (Fig.
- Page 32 ORDINARY MAINTENANCE AND ADVICE FOR USE Cleaning of the air filter: Filter's outside part Clean the air filter by using a vacuum cleaner, or wash it with water. If the dust accumulation is too heavy, please use a soft brush and mild detergent to clean it.
- Page 33 ORDINARY MAINTENANCE AND ADVICE FOR USE At the beginning of season When restarting the air conditioner after a long time, or at the beginning of the season, please carry out the following procedure: Do not obstruct the air inlet and outlet Check if any objects obstruct the airflow at the air inlet and outlet on Indoor and Outdoor Units.
- Page 34 ORDINARY MAINTENANCE AND ADVICE FOR USE At the end of season At the end of the season or in case you foresee not to use the air conditioner for a long time, please carry out the following procedure: Dry the Unit Operate the air conditioner in "COOL"...
- Page 35 ORDINARY MAINTENANCE AND ADVICE FOR USE Suggestions for economical use Select a suitable temperature value • In Heating mode, avoid to set too high temperature value. °C • In Cooling mode, avoid to set too low temperature values. Often clean the air filters •...
-
Page 36: Troubleshooting
TROUBLESHOOTING Following symptoms are not air conditioner's troubles The following table shows a series of seeming malfunctions. Please check the following items before calling the Authorized Technical Service. WHAT HAPPENS REASON • If "OPERATION" LED on Indoor Unit lights up, it is normal that the system does not immediately restart. - Page 37 TROUBLESHOOTING Problems deriving from the remote controller Before starting troubleshooting, please perform the following checks: It is not possible to change the settings while the air conditioner is operating WHAT HAPPENS CHECK POSSIBLE REASON When operating in "AUTO" mode, the Check if "AUTO"...
- Page 38 TROUBLESHOOTING Problems and possible solutions The following table shows a series of problems and their possible reasons and solutions. Compiere le verifiche descritte prima di richiedere l’intervento dell’Assistenza Tecnica. PROBLEM REASONS SOLUTIONS • Power failure. • Wait for the comeback of power. •...
-
Page 39: Automatic Restart After A Power Failure
TROUBLESHOOTING Table of Error Codes on Indoor Unit OPERATION TIMER PRE-DEF Malfunction of HFII 351 XR Malfunction of HFII 531 XR Indoor Unit Indoor Unit Room temperature sensor Room temperature sensor is abnormal is abnormal Evaporator sensor Evaporator sensor is abnormal... - Page 40 We TERMAL Srl - 14, Via della Salute - 40132 Bologna - Italy DECLARE under our sole responisibility that HOKKAIDO products Indoor Units: • HFII 351 XR • HFII 531 XR Outdoor Units: • HCKI 351 XR • HCKI 531 XR conform with the following directives: •...
- Page 41 NOTES...
- Page 42 NOTES...
- Page 43 NOTES...
- Page 44 TERMAL Srl 14, Via della Salute 40132 Bologna - Italy Tel. +39.051.41.33.111 Fax +39.051.41.33.112 www.termalgroup.com Due to on-going technological development of the products by the Manufacturer, we reserve the right to vary the technical specifications at any time without notice.
Need help?
Do you have a question about the HFII 351 XR and is the answer not in the manual?
Questions and answers