Table of Contents
Advertisement
Available languages
Available languages
Quick Links
EN: This product is only suitable for well insulated rooms or occasional use. DE: Dieses Produkt ist nur für gut isolierte Bereiche oder gelegentliche
Verwendung geeignet. FR: Ce produit convient uniquement à des endroits bien isolés ou pour un usage occasionnel. IT: Questo prodotto è adatto solo
per spazi ben isolati o per uso occasionale. ES: Este producto sólo es adecuado para espacios bien aislados o un uso ocasional. NL: Dit product is
uitsluitend geschikt voor goed geïsoleerde ruimten of voor sporadisch gebruik. PL: Produkt ten jest odpowiedni wyłącznie do dobrze odizolowanych
miejsc lub do okazjonalnego użytku. NO: Dette produktet egner seg kun for godt isolerte rom eller sporadisk bruk. RO: Acest produs este adecvat
exclusiv spaţiilor bine ventilate sau utilizării ocazionale. CZ: Tento výrobek je vhodný pouze do dobře izolovaných prostor nebo k příležitostnému
použití. DK: Dette produkt er kun egnet til velisolerede rum eller lejlighedsvis brug. PT: Este produto somente é adequado para espaços bem isolados
ou uso ocasional. SE: Denna produkt är endast avsedd för välisolerade utrymmen eller tillfällig användning. FI: Tämä tuote soveltuu ainoastaan hyvin
eristettyihin tiloihin tai satunnaiseen käyttöön. SK: Tento výrobok je vhodný len pre dobre izolované priestory alebo na občasné použitie. SI: Ta izdelek
je primeren le za dobro izolirane prostore ali za občasno uporabo. HR: Ovaj proizvod je pogodan samo za dobro izolirane prostore ili povremenu
upotrebu. HU: Ez a termék csak jól szigetelt terekhez vagy eseti használatra alkalmas
The product complies with the European Safety Standards and the European Standard Electromagnetic Compatibility (EMC) These cover the
essential requirements of EEC Directives
VERDI
VER20
NL
EN
DE
FR
IT
PL
08/52899/0
Issue 4
OCN 11088
Advertisement
Table of Contents

Related Manuals for Dimplex VERDI VER20


Summary of Contents for Dimplex VERDI VER20
- Page 1 VERDI VER20 EN: This product is only suitable for well insulated rooms or occasional use. DE: Dieses Produkt ist nur für gut isolierte Bereiche oder gelegentliche Verwendung geeignet. FR: Ce produit convient uniquement à des endroits bien isolés ou pour un usage occasionnel. IT: Questo prodotto è adatto solo per spazi ben isolati o per uso occasionale.
- Page 2 DE ............................ 1 NL ............................ 8 GB ..........................14 FR ..........................20 IT ............................ 27 PL ..........................34...
- Page 3 Fig. 1 Fig. 2 Fig. 3 Fig. 4a Fig. 4...
- Page 4 Fig. 5 Fig. 5a Fig. 5b Fig. 6 Fig. 7 Fig. 8...
- Page 5 Fig. 9 Fig. 10 Fig. 11 Fig. 12 Fig. 13 Fig. 14...
- Page 6 Fig. 15 Fig. 16 Fig. 17...
- Page 7 Dimplex Verdi VER20 Einführung Lesen Sie dieses Handbuch sorgfältig durch, um Ihr Produkt sicher installieren, verwenden und warten zu können. Wichtige Sicherheitshinweise Beachten Sie bei der Verwendung elektrischer Geräte die nachfolgenden, grundlegenden Sicherheitshinweise, um Feuer, Stromschläge oder Verletzungen zu vermeiden: 1.
-
Page 8: Allgemeine Informationen
Allgemeine Informationen Verwenden Sie in dem Gerät nur entkalktes Wasser. Dieses Gerät ist freistehend und wird normalerweise vor einer Wand aufgestellt. Stellen Sie sicher, dass das Gerät auf einem ebenen Untergrund steht. Obwohl diese Heizung den Sicherheitsnormen entspricht, empfehlen wir nicht, das Gerät auf tiefen Teppichen oder Langhaarläufern zu verwenden. - Page 9 Schließen Sie den Netzstecker an eine 16 Amp/230 V Steckdose an. Stellen Sie sicher, dass das Netzkabel an der Rückseite des Ofens rechts oder links angeschlossen ist, je nach Position der Steckdose, und dass das Kabel nicht unter dem Ofen eingeklemmt ist, um Schäden am Kabel zu vermeiden. Gerät noch nicht einschalten.
-
Page 10: Allgemeine Hinweise
ein. Drehen Sie Regler „C“ vollständig nach rechts (Höchsttemperatur), um den Raum schnell aufzuheizen. Wenn der Raum die gewünschte Temperatur erreicht hat, drehen Sie den Temperaturregler langsam zurück, bis Sie ein Klickgeräusch hören. Der Ofen wird die Raumtemperatur auf dem eingestellten Pegel halten. Hinweis: Falls sich Ihr Ofen bei niedriger Temperatureinstellung nicht einschaltet, kann dies daran liegen, dass die Raumtemperatur über der Thermostateinstellung liegt. - Page 11 Das Wasser sollte durch einen herkömmlichen Haushaltswasserfilter gefiltert werden. Der Filter muss regelmäßig ausgetauscht werden. 6. Schrauben Sie die Kappe wieder zu; dabei nicht überdrehen. 7. Setzen Sie den Tank mit der Kappe nach unten und der flachen Seite nach außen wieder in die Wanne ein. (Abb. 8.
-
Page 12: Zusätzliche Informationen
Luftfilter 1. Heben Sie das Brennstoffbett vorsichtig heraus und setzen es auf den Boden. 2. Schieben Sie den Luftfilter vorsichtig nach oben aus der Plastikhalterung heraus. (Siehe Abb. 16) 3. Spülen Sie den Filter über dem Waschbecken vorsichtig mit Wasser ab. Trocknen Sie ihn mit einem Handtuch ab, bevor Sie ihn wieder einsetzen. - Page 13 Störbehebung Problem Ursache Behebung Der Flammeneffekt Netzstecker ist nicht angeschlossen. Prüfen Sie, ob der Netzstecker richtig an der schaltet sich nicht ein. Steckdose angeschlossen ist. Niedriger Wasserstand. Prüfen Sie, ob der Wassertank voll und Wasser in der Wanne ist. Der Niederspannungsverbinder ist nicht Der Verbinder muss richtig angeschlossen richtig angeschlossen.
- Page 14 Dimplex Verdi VER20 Inleiding Lees aub deze informatiegids zorgvuldig door om uw product veilig te kunnen installeren, gebruiken en onderhouden. Belangrijk Veiligheidsadvies Bij het gebruik van elektrische toestellen moeten altijd elementaire voorzorgen worden genomen om het risico op vuur, elektrische schok of persoonlijk letsel te verminderen, met inbegrip van wat...
-
Page 15: Algemene Informatie
Algemene Informatie Gebruik enkel ontkalkt water in dit toestel. Dit model is ontworpen om vrijstaand te worden gebruikt en wordt gewoonlijk tegen een muur geplaatst. Verzeker er u altijd van dat het apparaat op een vlak oppervlak staat. Hoewel deze verwarmer voldoet aan de veiligheidseisen, raden wij niet aan hem te gebruiken op hoogpolig tapijt of karpetten met lange haren. - Page 16 De Transducer (Omvormer) Unit + de Lampen verbinden 1. Maak de twee rode knoppen los door ze 90 graden te draaien (Afb.2). 2. Trek het mondstuk van de opvangbak uit (Afb. 3). 3. Steek de lampen in de lamphouders (Afb.4), waarbij u voorzichtig de pinnetjes in de gaatjes steekt (Afb. 4a). 4.
-
Page 17: Algemene Tips
1. De controleknop voor de vlam ‘D’ (Afb.10) kan omhoog en omlaag worden gedraaid om een meer realistisch effect te bekomen. 2. De vlammen lijken meestal realistischer als de vlamcontrole laag wordt gedraaid. 3. Geef de vlamgenerator enige tijd om te reageren op de veranderingen die u maakt. 4. -
Page 18: Bijkomende Informatie
plaats (Afb. 4 en 4a). 8. Herplaats de opvangbak, het mondstuk, het waterreservoir en het vuurbed. SCHOONMAKEN Waarschuwing– Druk de schakelaar ‘A’ in de ‘OFF’ (0) (uit) positie (Afb.10) en trek de stekker uit het stopcontact vooraleer u de haard schoonmaakt. Wij raden aan om de volgende onderdelen eens om de twee weken schoon te maken, speciaal in gebieden met hard water: Waterreservoir, Opvangbak, Mondstuk, Reservoirdop en afdichting, Luchtfilter. -
Page 19: Problemen Oplossen
UK: GB 2402206, GB 2460259, GB 2460453, GB 2418014, GB 2465738, GB 2449925, GB 2465537, GB 2455277, GB1020534.2, GB1020537.5, GB1110987.3 Verenigde Staten: US 7967690, US 2010299980, US 2011062250, US 2008028648, US 13/167,042 Rusland: RU2008140317 Europa: EP 2029941, EP 2201301, EP 2315976, EP 1787063, EP07723217.1 , EP11170434.2, EP 11170435.9 China CN 101883953, CN 200980128666.2, CN 101057105, CN 101438104 Australië: AU 2009248743, AU 2007224634 Canada: CA 2725214, CA 2579444, CA 2645939... -
Page 20: Warning! This Appliance Must Be Earthed
Dimplex Verdi VER20 Introduction Please read this information guide carefully to be able to safely install, use and maintain your product. Important Safety Advice When using electrical appliances, basic precautions should always be followed to reduce the risk of fire, electrical shock and injury to persons, including the following: OVERHEATING WARNING: In order to avoid overheating, do not cover the heater. -
Page 21: General Information
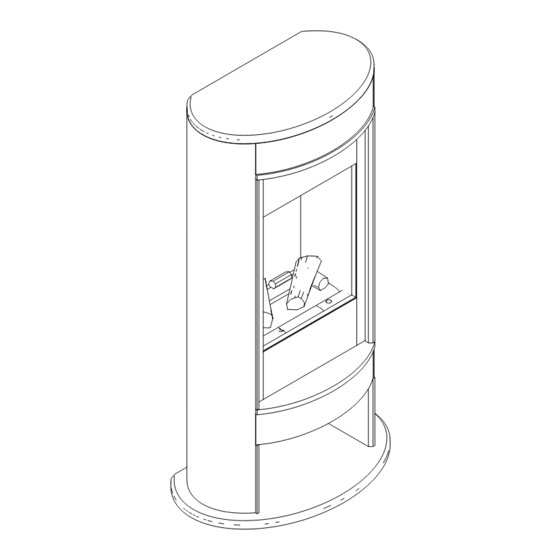
General Information Only use decalcified water in this appliance. This model is designed to be free standing and is normally positioned near a wall. Always ensure that the appliance is sitting on a level surface. Although this heater complies with safety standards, we do not recommend its use on deep pile carpets or on long hair type of rugs. -
Page 22: Manual Controls
2. Lift out the Sump Nozzle (Fig 3) 3. Insert lamps into lamp holders (Fig 4), carefully locating the pins into the holes (Fig 4a) 4. Push lamps firmly into place 5. Place the Transducer Unit into the sump and join the cable to the connector on the sump (Fig 5) 6. -
Page 23: Remote Control Operation
GETTING THE DESIRED FLAME EFFECT 1. The flame control knob ‘D’ (Fig.10) may be turned up or down to give a more realistic effect. 2. Generally the flames appear more realistic when the flame control is turned down. 3. Give the flame generator time to react to changes you may make. 4. -
Page 24: Additional Information
CLEANING Warning – Always press Switch ‘A’ to the ‘OFF’ (0) position (Fig.10) and disconnect from the power supply before cleaning the fire. We recommend cleaning the following components once every 2 weeks, particularly in hard water areas:- Water Tank, Sump, Nozzle, Tank cap and seal, Air filter. For general cleaning use a soft clean duster –... -
Page 25: Troubleshooting
United States US 7967690, US 2010299980, US 2011062250, US 2008028648, US 13/167,042 Russia RU2008140317 European EP 2029941, EP 2201301, EP 2315976, EP 1787063, EP07723217.1 , EP11170434.2, EP 11170435.9 China CN 101883953, CN 200980128666.2, CN 101057105, CN 101438104 Australia AU 2009248743, AU 2007224634 Canada CA 2725214, CA 2579444, CA 2645939 International Patent Application WO 2006027272 South Africa ZA 200808702... - Page 26 Dimplex Verdi VER20 Introduction Veuillez lire ce guide d'information attentivement afin de pouvoir installer, utiliser et entretenir votre produit en toute sécurité. Avis de sécurité important Lorsque vous utilisez des appareils électriques, les précautions essentielles doivent toujours être suivies afin de réduire le risque d'incendie, d'électrocution et de blessure, y compris les précautions suivantes : 1.
-
Page 27: Informations Générales
Informations générales Utilisez uniquement de l'eau décalcifiée dans cet appareil. Ce modèle est conçu d'être sur pied et placé normalement près d'un mur. Assurez-vous toujours que l'appareil est installé sur une surface plane. Bien que cet appareil de chauffage soit conforme aux normes de sécurité, nous ne recommandons pas son utilisation sur les moquettes à... -
Page 28: Commandes Manuelles
Branchez le câble d'alimentation à une prise de 16A/230V. Assurez-vous que le câble d'alimentation sort du dos de la cheminée par le côté droit ou gauche pour arriver jusqu'à la prise d'alimentation et qu'il n'est pas coincé sous la cheminée pour qu'il ne soit pas endommagé. N'allumez pas encore l'appareil. -
Page 29: Entretien
jusqu'à ce que vous entendiez un clic. L'appareil de chauffage gardera la température de la pièce au niveau choisi. Note : Il peut arriver que l'appareil ne réagisse pas lorsque le thermostat est réglé à un niveau bas, c'est parce que la température de la pièce est plus haute que le niveau défini. -
Page 30: Changement D'ampoule
8. Remettez doucement la couche de charbon en place. (Fig. 9) 9. Mettez le bouton « A » sur « ON » ( I ). (Voir Fig. 10) CHANGEMENT D’AMPOULE Si l'effet de flamme et de fumée paraît gris ou sans couleur, il est possible qu'une ou plusieurs ampoules sont mortes. Selon ce qui suit, vous pouvez vérifier s'il s'agit bien d'une panne d’ampoule. -
Page 31: Informations Supplémentaires
5. Replacez la couche de charbon. Informations supplémentaires SERVICE APRÈS-VENTE Votre produit est garanti pendant deux ans suivant la date de l'achat. Pendant cette période, nous nous chargeons de réparer ou d'échanger le produit gratuitement (sauf les ampoules & les pièces suivant disponibilité) sous réserve que le produit a été... -
Page 32: Dépannage
Dépannage Symptôme Cause Action corrective L'effet de flamme ne La fiche secteur n'est pas branchée. Vérifiez si la fiche est correctement branchée démarre pas. dans la prise murale. Niveau d'eau faible. Vérifiez si le réservoir d'eau est plein et s'il y a de l'eau dans le collecteur. - Page 33 Dimplex Verdi VER20 Introduzione Leggete attentamente questa guida informativa per essere in grado di installare, usare e fare manutenzione con sicurezza al vostro prodotto. Importante avviso di sicurezza Quando utilizzate apparecchi elettrici, dovreste sempre rispettare precauzioni di base per ridurre il rischio di incendi, shock elettrici e ferite a persone, incluse le seguenti: 1.
-
Page 34: Informazioni Generali
Informazioni generali Usate solo acqua decalcificata in questo apparecchio. Questo modello è progettato per essere indipendente e normalmente posizionato vicino ad un muro. Assicuratevi sempre che l'apparecchio sia posizionato su un pavimento in piano. Anche se questo apparecchio rispetta gli standard di sicurezza, non raccomandiamo il suo uso su tappeti di pile alti o su altri tappeti a pelo lungo. - Page 35 parte frontale nell'angolo di destra o sinistra a seconda della posizione della presa, e che non sia incastrato sotto il caminetto poiché in questo modo potrebbe essere danneggiato. Non accendete ancora l'apparecchio. Collegate l'unità trasduttore e le lampade 1. Rilasciate le due linguette rosse girandole di 90 gradi. (vedete fig. 2) 2.
-
Page 36: Consigli Generali
INTERRUTTORE TERMICO DI SICUREZZA Un interruttore termico di sicurezza è incorporato nel termoventilatore per prevenire danni causati dal surriscaldamento. Questo può succedere se l'uscita del calore viene ostruita in qualche modo. Se l'interruttore scatta, scollegate il calorifero dalla presa e lasciatelo stare almeno dieci minuti prima di ricollegarlo. Prima di riaccendere il calorifero, rimuovete qualunque ostruzione che possa restringere l'uscita del calore, quindi continuate con il normale utilizzo. -
Page 37: Informazioni Aggiuntive
CAMBIARE LE LAMPADE Se l’effetto fiamma e fumo appare grigio o senza colore il problema potrebbe essere che una o più lampade si sono fulminate. Potrete controllare le lampade come segue: 1. Lasciando acceso l’effetto fiamma, estraete il pozzetto e il serbatoio dell’acqua. 2. - Page 38 BREVETTO / APPLICAZIONE DEL BREVETTO I prodotti all'interno della gamma Optimyst sono coperti da uno o più dei seguenti brevetti e applicazioni di brevetto. Gran Bretagna GB 2402206, GB 2460259, GB 2460453, GB 2418014, GB 2465738, GB 2449925, GB 2465537, GB 2455277, GB1020534.2, GB1020537.5, GB1110987.3 Stati Uniti US 7967690, US 2010299980, US 2011062250, US 2008028648, US 13/167,042 Russia RU2008140317...
-
Page 39: Risoluzione Dei Problemi
Risoluzione dei problemi Sintomo Causa Azione correttiva L'effetto fiamma non La spina non è inserita. Controllate che la spina sia inserita si attiva. correttamente nella presa. Basso livello dell'acqua. Controllate che il serbatoio dell'acqua sia pieno e che ci sia acqua nel pozzetto. Connettore a basso voltaggio collegato in Controllate che il connettore sia inserito maniera errata. - Page 40 Dimplex Verdi VER20 Wstęp Przeczytaj uważnie tę instrukcję, aby w bezpieczny sposób zainstalować, używać i konserwować swój produkt. Ważne zalecenia dotyczące bezpieczeństwa Podczas używania urządzeń elektrycznych zawsze należy przestrzegać podstawowych środków bezpieczeństwa, aby ograniczyć ryzyko pożaru, porażenia elektrycznego oraz obrażeń osób. Są to: 1.
-
Page 41: Informacje Ogólne
Informacje ogólne W tym urządzeniu można stosować wyłącznie przefiltrowaną wodę. Zawsze należy upewnić się, że urządzenie znajduje się na równej powierzchni. Grzejnik spełnia odpowiednie normy bezpieczeństwa, jednak nie zaleca się ustawiania go na dywanach z długim włosiem ani grubych chodnikach. Uwaga: w przypadku używania kominka w miejscu o bardzo niskim poziomie hałasu, może być... - Page 42 Podłączanie przetwornika i lamp 1. Zwolnić dwie czerwone klapki, przekręcając je o 90 stopni (Rys. 2). 2. Podnieść dyszę zbiornika odpływowego (Rys. 3). 3. Włożyć lampy w uchwyty (Rys. 4), delikatnie umieszczając styki w otworach (Rys. 4a). 4. Docisnąć dobrze lampy. 5.
-
Page 43: Obsługa Pilota
UZYSKANIE ZAMIERZONEGO EFEKTU PŁOMIENIA 1. Pokrętło sterowania płomieniem „D” (rys. 10) można obracać w górę lub w dół, aby zapewnić bardziej realistyczny efekt. 2. Zazwyczaj płomienie wyglądają bardziej realistycznie, gdy pokrętło sterowania płomieniem jest ustawione na niski poziom. 3. Wygenerowanie wprowadzonych zmian płomienia może wymagać czasu. 4. -
Page 44: Dodatkowe Informacje
Zalecamy czyszczenie następujących części co 2 tygodnie, szczególnie w przypadku twardej wody: Zasobnik wody, zbiornik odpływowy, dysza, korek i uszczelka zasobnika, filtr powietrza. Do czyszczenia należy używać łagodnego środka czyszczącego – nie wolno używać środków o właściwościach ściernych. Aby usunąć kurz i kłaczki z kratki wylotowej wentylatora grzejnika, od czasu do czasu należy oczyścić ją odkurzaczem z założoną końcówką... -
Page 45: Rozwiązywanie Problemów
Korea: KR 20080113235 Japonia: JP 2009529649 Brazylia BR P10708894-9 Indie: IN 4122/KOLNP/2008 Nowa Zelandia: NZ 571900 Rozwiązywanie problemów Objaw Przyczyna Środki zaradcze Nie uruchamia się efekt Niepodłączona wtyczka przewodu zasilającego. Sprawdzić, czy wtyczka jest dobrze podłączona płomienia. do gniazda elektrycznego. Niski poziom wody.
Need help?
Do you have a question about the VERDI VER20 and is the answer not in the manual?
Questions and answers