Table of Contents
Advertisement
Quick Links
Advertisement
Table of Contents

Subscribe to Our Youtube Channel
Related Manuals for Omron BP7110VA


Summary of Contents for Omron BP7110VA
- Page 1 ® INSTRUCTION MANUAL Upper Arm Blood Pressure Monitor Model BP7110VA 5674596-8C...
-
Page 2: Table Of Contents
Table of Contents Introduction ....................3 Important Safety Information ................4 1. Know Your Monitor ................9 2. Preparation ..................15 3. Using the Monitor.................17 4. Error Messages and Troubleshooting..........24 5. Maintenance ..................27 6. Specifications..................30 7. FCC Statement ..................32 8. Limited Warranty..................33 9. Guidance and Manufacturer’s Declaration...........35... -
Page 3: Introduction
Safety Instructions This instruction manual provides you with important information about the OMRON BP7110VA Blood Pressure Monitor. To ensure the safe and proper use of this monitor, READ and UNDERSTAND all of these instructions. If you do not understand these instructions or have any questions, contact 1-800-634-4350 before attempting to use this monitor. -
Page 4: Important Safety Information
Important Safety Information Read the Important Safety Information in this instruction manual before using this monitor. Follow this instruction manual thoroughly for your safety. Keep for future reference. For specific information about your own blood pressure, CONSULT WITH YOUR PHYSICIAN. Indicates a potentially hazardous situation which, if not Warning avoided, could result in death or serious injury. - Page 5 • This product contains small parts that may cause a choking hazard if swallowed by infants, toddlers and children. AC Adapter Handling and Usage • DO NOT use the AC adapter if this monitor or the AC adapter cable is damaged.
- Page 6 • Ensure that this monitor has acclimated to room temperature before taking a measurement. Taking a measurement after an extreme temperature change could lead to an inaccurate reading. OMRON recommends waiting for approximately 2 hours for the monitor to warm up or cool down when the...
- Page 7 • DO NOT crease the arm cuff or the air tube excessively. • DO NOT fold or kink the air tube while taking a measurement. This may cause an injury by interrupting air flow. • To unplug the air plug, pull on the plastic air plug at the base of the tube, not the tube itself.
- Page 8 Battery Handling and Usage • DO NOT insert batteries with their polarities incorrectly aligned. • ONLY use 4 “AA” alkaline or manganese batteries with this monitor. DO NOT use other types of batteries. DO NOT use new and used batteries together. DO NOT use different brands of batteries together.
-
Page 9: Know Your Monitor
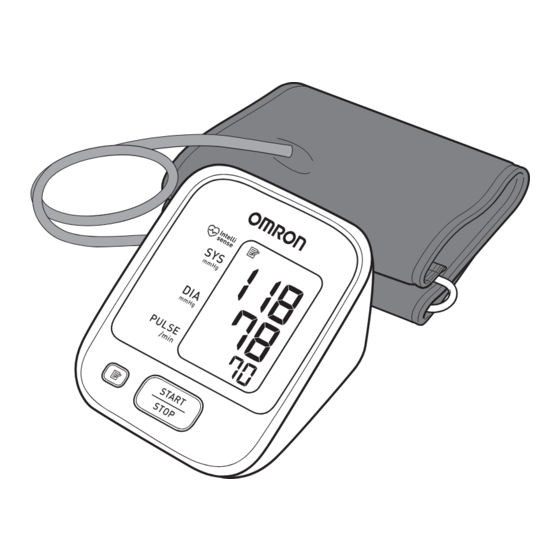
1. Know Your Monitor Contents: Monitor, 2 arm cuffs (Wide-Range D-Ring/Small D-Ring), AC adapter, storage case, instruction manual, quick start guide Monitor: Front of the monitor Back and left side of the monitor Bottom of the monitor A. Display D. Air jack B. - Page 10 Arm cuff: There are 2 cuffs included in this unit. Check your upper arm circumference and use one of the cuffs listed below. Upper arm circumference Upper arm circumference Small D-Ring Cuff: 7" - 9" (17-22 cm) Wide-Range D-Ring Cuff: 9" - 17" (22-42 cm) G.
- Page 11 Display: J. Memory symbol O. Irregular heartbeat symbol K. Systolic blood pressure P. Movement error symbol L. Diastolic blood pressure Q. Pulse display / Memory number M. Low battery symbol R. Deflation symbol N. Heartbeat symbol (Flashes during measurement.)
- Page 12 1.1 Display symbols Irregular Heartbeat Symbol ( Normal Heartbeat When the monitor detects an irregular Pulse rhythm two or more times during the measurement, the irregular heartbeat Blood pressure symbol will appear on the display with Irregular Heartbeat the measurement values. An irregular Short Long heartbeat rhythm is defined as a rhythm Pulse...
- Page 13 Movement Error Symbol ( The movement error symbol is displayed if you move your body during the measurement. Please remove the arm cuff, and wait 2 - 3 minutes. Take another measurement, remain still during measurement. Classification of BP (Blood Pressure) ACC/AHA 2017 Hypertension guidelines define categories of BP in adults as below.
- Page 14 1.2 Blood Pressure Measurement Tips To help ensure an accurate reading, follow these directions: • Stress raises blood pressure. Avoid taking measurements during stressful times. • Measurements should be taken in a quiet place. • It is important to take measurements at the same times each day. Taking measurements in the morning and in the evening is recommended.
-
Page 15: Preparation
2. Preparation 2.1 Battery Installation 1. Remove the battery cover. 2. Insert 4 “AA” batteries as indicated in the battery compartment. Note: • 4 “AA” batteries are not included in this unit. 3. Replace the battery cover. Note: • When the low battery symbol ( ) appears on the display, turn the monitor off, then replace all batteries at the same time. - Page 16 2.2 Using the AC Adapter Note: • Make sure not to place your monitor in a location where it is difficult to plug and unplug the AC adapter. • We recommend keeping batteries in your monitor at all times, even if you choose to use the AC adapter.
-
Page 17: Using The Monitor
3. Using the Monitor 3.1 Applying the Arm Cuff Remove tight-fitting or thick clothing from your arm Caution while taking a measurement. There are 2 cuffs included in this unit. To determine your arm size, use a cloth tape measure and place midway between your elbow and your shoulder around the circumference of your upper arm. - Page 18 2. Wrap the arm cuff firmly in place around your left upper arm. The bottom edge of the arm cuff should be 0.5 inch (1 to 2 cm) above 0.5 inch the elbow. Air tube is on the inside of (1 - 2 cm) your arm and aligned with your middle finger.
- Page 19 • The blood pressure can differ between the right arm and the left arm, and the measured blood pressure values can be different. OMRON recommends to always use the same arm for measurement. If the values between both arms differ substantially, please check with your physician which arm to use for your measurements.
- Page 20 3.2 How to Sit Correctly To take a measurement, you need to be relaxed and comfortably seated, under comfortable room temperature. Avoid bathing, drinking alcohol or caffeine, smoking, exercising or eating 30 minutes before taking a measurement. • Sit in a chair with your legs uncrossed and feet flat on the floor.
- Page 21 3.3 Taking a Measurement Note: • To stop the measurement, press the START/STOP button once to deflate the arm cuff. • Remain still and quiet while taking a measurement. 1. Press the START/STOP button. The arm cuff will start to inflate automatically. START INFLATING COMPLETED...
- Page 22 2. Remove the arm cuff. 3. Press the START/STOP button to turn the monitor off. The monitor automatically stores the measurement result in its memory. It will automatically turn off after 2 minutes. Note: Wait 2-3 minutes before taking another measurement. Waiting between measurements allows the arteries to return to the condition prior to taking a measurement.
- Page 23 To Delete All the Values Stored in Memory 1. Press the button, while the memory symbol appears. 2. While holding the button down, press the START/STOP button for more than 3 seconds. Note: You cannot partially delete the values stored in memory.
-
Page 24: Error Messages And Troubleshooting
4. Error Messages and Troubleshooting If any of the below problems occur during measurement, check to make sure that no other electrical device is within 12 inches (30 cm) of the monitor. If the problem persists, refer to the table below. - Page 25 Error Display Cause Solution Insert the plug securely. Air plug disconnected. Refer to section 3.1. Apply the arm cuff tighter. Arm cuff is applied too loosely. Refer to section 3.1. Replace the arm cuff with a new Air is leaking from the arm cuff. one.
- Page 26 Error Display Cause Solution Device error. Contact Customer Service. 4.2 Troubleshooting Problem Cause and Solution Replace all batteries with new ones. No power. Check the battery installation for proper placement of the battery polarities. No display appears on the monitor. Refer to section 2.1.
-
Page 27: Maintenance
5. Maintenance 5.1 Maintenance To protect your monitor from damage, please follow the directions below: • Changes or modifications not approved by the manufacturer will void the user warranty. DO NOT disassemble or attempt to repair this monitor or other components. This may cause an Caution inaccurate reading. - Page 28 3. Place your monitor and other components in the storage case. Do not store your monitor and other components: • If your monitor and other components are wet. • In locations exposed to extreme temperatures, humidity, direct sunlight, dust or corrosive vapors such as bleach. •...
- Page 29 5.5 Optional Medical Accessories Small D-Ring Cuff Wide-Range D-Ring Cuff Arm circumference Arm circumference 7" - 9" (17 - 22 cm) 9" - 17" (22 - 42 cm) Model: CD-CS9 HEM-CS24-Z Model: CD-WR17 HEM-RML31-Z AC Adapter Model: HEM-ADPTW5 HHP-AM01-Z...
-
Page 30: Specifications
6. Specifications Model BP7110VA HEM-7123-AZVA Display LCD digital display Cuff pressure range Pressure: 0 to 299 mmHg Measurement range Pressure: 20 to 280 mmHg Pulse: 40 to 180 beats / min. Pressure: ± 3 mmHg Accuracy Pulse: ± 5% of display reading... - Page 31 Contents Monitor, 2 arm cuffs (Wide-Range D-Ring/Small D-Ring), AC adapter (HEM-ADPTW5), storage case, instruction manual, quick start guide Applied part Type BF (arm cuff) Protection against Internally powered ME equipment (When using only batteries) electric shock Class II ME equipment (AC adapter) Note: •...
-
Page 32: Fcc Statement
7. FCC Statement FCC CAUTION Changes or modifications not expressly approved by the party responsible for compliance could void the user’s authority to operate the equipment. Note: This equipment has been tested and found to comply with the limits for a Class B digital device, pursuant to part 15 of the FCC Rules. -
Page 33: Limited Warranty
8. Limited Warranty Your BP7110VA Automatic Blood Pressure Monitor, excluding the arm cuffs and AC adapter, is warranted to be free from defects in materials and workmanship appearing within 2 years from the date of purchase, when used in accordance with the instructions provided with the monitor. - Page 34 SOME STATES DO NOT ALLOW THE EXCLUSION OR LIMITATION OF INCIDENTAL OR CONSEQUENTIAL DAMAGES, SO THE ABOVE LIMITATION OR EXCLUSION MAY NOT APPLY TO YOU. This warranty provides you with specific legal rights, and you may have other rights that vary by jurisdiction. Because of special local requirements, some of the above limitations and exclusions may not apply to you.
-
Page 35: Guidance And Manufacturer's Declaration
Important information regarding Electromagnetic Compatibility(EMC) BP7110VA manufactured by OMRON HEALTHCARE Co., Ltd. conforms to IEC60601-1-2:2014 Electromagnetic Compatibility (EMC) standard. Further documentation in accordance with this EMC standard is available at OmronHealthcare.com/emc. Refer to the EMC information for BP7110VA on the website. - Page 36 OMRON HEALTHCARE Co., Ltd. 53, Kunotsubo, Terado-cho, Muko, Kyoto, 617-0002 JAPAN Distributed by: OMRON HEALTHCARE, INC. 2895 Greenspoint Pkwy. Hoffman Estates, IL 60169 USA OmronHealthcare.com © 2021 OMRON HEALTHCARE, INC. Made in Japan...
Need help?
Do you have a question about the BP7110VA and is the answer not in the manual?
Questions and answers