Advertisement
Table of Contents
Advertisement
Chapters
Table of Contents

Related Manuals for RKS TNT-5


Summary of Contents for RKS TNT-5
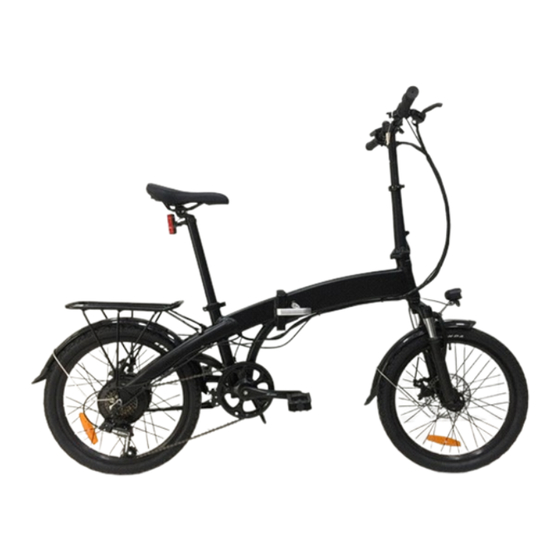
- Page 1 TNT-5 USER MANUAL www.rksmotor.eu...
- Page 2 PREFACE Dear Users; Our company makes RKS brand electric scooter become a kind of environmental protection type leisure traffic tool instead of walk with elegant, beautiful shape and modern luxurious feeling by virtue of novel management model, abundant technical force, perfect quality system, first-class workmanship equipments and an excellent professional team of technology.
- Page 3 TNT-5 WARNING Persons less than 16 years old (include 16 years old) are not allowed ride e-bikes This is normal Folding electric bicycle,this one is with LCD display,...
- Page 4 TNT-5 CONGRATULATIONS First of all, congratulation on your purchasing of our electric bicycle(or pedelec), which is carefully designed and manufactured under strict quality control according to the current European standard EN 15194:2017 Please read this instruction manual carefully and thoroughly before riding, as it contains sufficient information, which is very important in safety, maintenance and simple assembly.
-
Page 5: Table Of Contents
TNT-5 MANUAL FOR MECHANICAL PARTS Contents 1. Conditions for Riding This Electric Bicycles 2. Selection and Set-up 3. Safe Cycling and Safety Tips 4. Routine Maintenance Check and Lubrication 5. Assembly Instructions 1.Conditions for Riding this Electric Bicycles This electric bicycle is designed for riding on a road or a paved surface where the tires do not lose ground contact, and this electric bicycle must be under proper maintained according to the instruction of this manual. -
Page 6: Selection And Set-Up
TNT-5 MANUAL FOR MECHANICAL PARTS 2.Selection and Set-up 2.1 Saddle and Handlebar Stem Adjustment The seat can be easily moved either up or down. Adjust the seat to keep the rider's knee maintaining a slight bend when his foot is in the lowest pedaling position(refer to fig. 3). Handlebar stem is approximately on the same level as... -
Page 7: Safe Cycling And Safety Tips
TNT-5 MANUAL FOR MECHANICAL PARTS WARNING If your seat post is not inserted up to the minimum insertion mark, the seat post may break (refer to fig. 5) Once the saddle is at the correct height, make sure the seat post should be up to its minimum insertion mark. - Page 8 TNT-5 MANUAL FOR MECHANICAL PARTS Wheels run true and hub bearings are correctly adjusted; Ÿ Wheels are properly secured and locked to frame/fork; Ÿ Tires are in good condition and inflated to correct pressure Ÿ Pedals are securely tightened to pedal cranks Ÿ...
-
Page 9: Routine Maintenance Check And Lubrication
TNT-5 MANUAL FOR MECHANICAL PARTS Warning of Wet Weather Riding: No brakes work as well under wet or icy conditions as they do under dry conditions. The braking distance in wet weather would be longer than those in dry, and you should take special precautions to assure safe stopping. - Page 10 TNT-5 MANUAL FOR MECHANICAL PARTS To keep the electric bicycle functioning well, the following routine maintenance and lubrication is necessary for you Half Yearly Remove and clean, lubricate chain, derailleur gears and all cables. Check and replace as required. Wash cycle weekly with warm soapy water...
- Page 11 TNT-5 MANUAL FOR MECHANICAL PARTS A - Headset B - Mudguards O - Bottom Bracket Remove, clean and regrease bearing Check the mudguards are clean and Clean,regrease yearly checking for yearly, checking if replacements tight. Ensure the mudguards are wear.
- Page 12 TNT-5 MANUAL FOR MECHANICAL PARTS E-Battery light (front and rear) L-Cranks S-Pedals Ensure the front and rear battery Grease bearing monthly, check Lightly oil bearings monthly light are secure and undamaged. that axle bolts and cotterpin bolts Replace if neccesary.
-
Page 13: Assembly Instructions
TNT-5 MANUAL FOR MECHANICAL PARTS 5. Assembly Instruction Here is some important information for electric bicycles assembly, which is very useful for your maintaining your electric bicycle, and especially helpful when you purchase our e-bikess which is partly assembled and packed in a carton. - Page 14 TNT-5 MANUAL FOR MECHANICAL PARTS sufficient depth so that the minimum insertion line is no longer showing. 6. When you are satisfied with the height of the seat post, close the seat post quick release lever. The tightness of the lever is adjusted by rotating the adjustment nut opposite the quick release lever.
- Page 15 TNT-5 MANUAL FOR MECHANICAL PARTS Based on the situation of standard handlebar stem, please follow the instruction below: 1. Push the handlebar stem into the fork tube (head of the frame ) to the minimum height line that is marked on the side of the handlebar stem.
- Page 16 TNT-5 MANUAL FOR MECHANICAL PARTS Step 4 Attaching Pedals(refer to fig. 11) : 1. The pedals are marked with either a “R” or “ L” on the threaded end of the pedal axle. 2. Screw the pedal marked ”R” into the right side of the crank assembly (chain side of electric bicycles). Turn the (by hand) in the clockwise direction.
- Page 17 TNT-5 MANUAL FOR MECHANICAL PARTS Step 5 Brake Adjustments The brake on your electric bicycle should have been adjusted correctly in our factory, however, as cables do stretch, it is important to check the adjustment of your brakes after your first riding. Most brakes will need some adjustment after being used a few times.
- Page 18 TNT-5 MANUAL FOR MECHANICAL PARTS a. Brake Lever and Brake Pad Travel Adjustment You can alter the amount of braking pressure by altering the travel of the brake lever and by the proximity of the brake pads to the brake disc.
- Page 19 TNT-5 MANUAL FOR MECHANICAL PARTS Once the correct amount of travel has been reached, center the brake caliper on the disc by adjusting screw C (fig.15). When the brake pads are centered on the disc the wheel should spin freely, though may be a slight amount of noise until the pad bed in.
- Page 20 TNT-5 MANUAL FOR MECHANICAL PARTS Step 6 Derailleur Gears Maintenance and Adjustment To ensure that your derailleur gear works efficiently and to prolong its life, it must be kept clean and free from excessive dirt built up and should be properly lubricated.
- Page 21 TNT-5 MANUAL FOR MECHANICAL PARTS Rear Derailleur Adjustments: Move the shifter all the way forward (toward seat) and with the chain on the smallest rear sprocket and largest front sprocket, check for cable slack at point “B” . If there is slack, loosen the cable nut or screw, pull on the cable end with pliers and retighten the cable nut or screw while pulling cable taut(tightening torque: 5-7N.m or 4-5foot.lbs)
- Page 22 TNT-5 MANUAL FOR MECHANICAL PARTS Step 7: Tighten the front and rear hubs nuts securely.(Tighten torque: about 30 N.m for front wheel, about 25 to 30 N.m for rear wheel )Before riding, lift the front of the bicycle so that the front wheel is off the ground and give the top of the tire a few sharp downward strikes.
- Page 23 TNT-5 MANUAL FOR ELECTRIC PARTS The model instructed in this manual is made with “start aid”. This electric assistance system will help riders to save their energy, while they enjoy their easy sports. Here is the function of so-called “start aid”: when you long press the down button for display for seconds, the bike can be started at speed of 6 km/h.
-
Page 24: Operation
TNT-5 MANUAL FOR ELECTRIC PARTS Be aware of traffic conditions Ÿ Parents need to ensure their children are supervised when riding any bicycle equipment. Ÿ Have your bike serviced only by local authorized bicycle shops. Regular servicing will ensure a better and safe Ÿ... - Page 25 TNT-5 MANUAL FOR ELECTRIC PARTS a super high efficient electric hub motor and controller with pedal assistance system, to make easy biking. The above mentioned equipment will ensure high safe riding with excellent performance. It is important for you to learn the following guideline in order to get the best possible experience with your electric bicycle.
- Page 26 TNT-5 MANUAL FOR ELECTRIC PARTS 2.2.2 For electric bikes with this integrated battery, please note there is one charger plug outside too,this is for charging battery too,pls check below picture where the plug locates: Pls make sure this battery plug is closed after full charge.The controller...
- Page 27 TNT-5 MANUAL FOR ELECTRIC PARTS 2.2 You can take out the battery and charge at home by below steps: A. Open the folding device. B.Unlock the battery with the black key...
- Page 28 TNT-5 MANUAL FOR ELECTRIC PARTS C. Take out the battery. To make the battery working well, pls charge the battery once a month if you don't use it for long time.
- Page 29 TNT-5 MANUAL FOR ELECTRIC PARTS 2.4 Functions of the display Pls refer to below LCD display,there are three buttons one the left,from up to down,top button is for up,mid button is for Mode,the bottom button is for down. 2.4.1 Press mode button for seconds until you see the screen is turned on as below picture shows: 2.4.2.
- Page 30 TNT-5 MANUAL FOR ELECTRIC PARTS 2.5 Advantages of a Lithium Battery Your electric bicycle is equipped with high quality lithium batteries, which are light and create no pollution to the environment, as a typical green energy source. As well as the above features, the lithium batteries have the following...
-
Page 31: Using And Maintaining The Electric Hub Motor
TNT-5 MANUAL FOR ELECTRIC PARTS 2.6.4 To finish charging, you must disconnect the charger input plug first from the AC outlet, and after that, disconnect the charger output plug from the battery .Finally, close the cover on the charging socket and... - Page 32 TNT-5 MANUAL FOR ELECTRIC PARTS Using and Maintaining the Battery Charger. Before charging the battery, please read the bike owner's maual and the charger manual accompanied with your bike, if any. Also, please note the following points regarding battery charger.
-
Page 33: Maintaining The Controller
TNT-5 MANUAL FOR ELECTRIC PARTS natural over discharge; 2. Never use any metals directly to connect the two poles of the battery, otherwise, the battery will be damaged due to short circuit. 3. Never put the battery near to fire or heating it. -
Page 34: Simple Trouble Shooting
TNT-5 MANUAL FOR ELECTRIC PARTS 5.Simple Trouble shooting. The information below is for purpose of explanation, not as a recommendation for user to carry out repair. Any remedy outlined must be carried out by a competent person who is aware of the safety issues and sufficiently familiar with... - Page 35 TNT-5 MANUAL FOR ELECTRIC PARTS Trouble Description Troubleshoting Method Possible Causes Charging time is not enough Please charge the battery according After the main battery the instruction Chapter 3.3 switching on, the motor does not generate The environment temperature is so In winter or under 0°C,you'd better...
- Page 36 TNT-5 MANUAL FOR ELECTRIC PARTS Trouble Description Troubleshoting Method Possible Causes Environment temperture is 40°C and Charge the battery in an area under After charging 4-5 above. 40°C, or according to this instruction hours more, the charge chapter 3.5 indicator LED is till red,...
-
Page 37: Diagram And Specification
MANUAL FOR ELECTRIC PARTS Diagram and Specification Here are the main technical specification details regarding the bike. RKS reserve the right , without further notice, make modifications to the product. For further advice, please contact your vendor. Electric Circuit Diagram 1 (P111) - Page 38 TNT-5 MANUAL FOR ELECTRIC PARTS I. Motor 3 phase wire is connected II. Motor III. Power wire is connected with the with motor 1. Red(+5V) power 1. Green(motor HA) 2. Yellow(motor HB) 1. Red (+5V) 2. Yellow(motor HB) 3. Green(motor HA) 2.
- Page 39 TNT-5 MANUAL FOR ELECTRIC PARTS Electric Circuit Ciagram 2(P103,P112,P123)
- Page 40 TNT-5 MANUAL FOR ELECTRIC PARTS I. Motor 3 phase wire is connected II. Motor III. Power wire is connected with the with motor 1. Red(+5V) power 1. Green(motor HA) 2. Yellow(motor H3) 1. Red (+5V) 2. Yellow(motor HB) 3. Green(motor H2) 2.
- Page 41 TNT-5 MANUAL FOR ELECTRIC PARTS...
- Page 42 TNT-5 MANUAL FOR ELECTRIC PARTS I. Motor wire is connected with motor II. Power wire is connected with the III. power 1. Green(motor HA) 1.Yellow(displayer signal ZF) 1. Red(36) 2.Green(displayer signal IL) 2. Yellow(motor HB) 3.Blue(lock wire) 2. Black(ground) 3. Blue(motor HC) 4.Black(-)
- Page 43 TNT-5 MAIN TECHNICAL SPECIFICATION SHEET Here are some general technical Data for electric bikes: Max mum Speed W th Electr c Ass stance 25 km/h Over Current Protect on Value 18 + 1A (Under 36V); Under Voltage Protect on Value 31V : 0.5V (Under Rated 36V)
- Page 44 TNT-5 MANUAL FOR ELECTRIC PARTS Purchase Record Card F ll n mmed ately and reta n as a record of your purchase * Please reta n your sales rece pt for any poss ble warranty cla ms Your Name: Address:...
- Page 45 Manufacturer Kuba Otomotiv Insaat Sanayi ve Ticaret A.S Kozluca Mahallesi 34007 Nolu Sokak No:52 SAHINBEY-GAZIANTEP / TURKEY www.rksmotor.eu RKS; reserves the right to process the product specifications, color and permits.
Need help?
Do you have a question about the TNT-5 and is the answer not in the manual?
Questions and answers
How do I or can I get access to the battery
To access the battery on the RKS TNT-5, follow these steps:
1. Open the folding device.
2. Unlock the battery using the black key.
3. Take out the battery.
If not using the battery for a long time, charge it once a month to maintain its performance.
This answer is automatically generated