Advertisement
Quick Links
Advertisement

Related Manuals for RKS MC3


Summary of Contents for RKS MC3
- Page 1 USER MANUAL www.rksmotor.eu...
- Page 3 TABLE OF CONTENT About Th s Manual 1. Why You Should Read Th s Manual? 2. Warn ng, Important Safety Informat on D agram 1. Parts’ D agram w th Parts Name 2. W r ng D agram Operat ng Instruct on 1.
- Page 4 ABOUT THIS MANUAL WHY YOU SHOULD READ THIS MANUAL Th s manual s wr tten to help you to get the best performance, comfort, enjoyment and safety when r d ng your new E-B ke. The manual descr bes spec fic care and ma ntenance procedures that help protect your warranty and ensure years of trouble free use.
- Page 5 Always Wear a Helmet! Helmets s gn ficantly reduce the poss b l ty and sever ty of head njur es. Always wear a helmet that compl es w th your state laws when r d ng the E-B ke. Check w th your local pol ce department for requ rements n your commun ty.
- Page 6 Keep Your E-B kes n Safe Cond t on Check cr t cal safety equ pment before each and every r de. Know the Law Cycl sts are requ red to follow traffic rules. Add t onally, some commun t es regulate the use of motor zed b cycles regard ng m n mum age requ rements and necessary equ pment.
- Page 7 WARNING Persons less than 16 years old (include 16 years old) are not allowed ride e-bikes for handle panel, it may vary from model to model, such as LCD and LED panels in different design and function, and its user's manual may be provided separately, accompanied with your bike.
- Page 8 Congratulat ons First of all, congratulation on your purchasing of our electric bicycle (or pedelec), which is carefully designed and manufactured under strict quality control according to the current European standard EN15194:2017 Please read this instruction manual carefully and thoroughly before riding, as it contains sufficient information, which is very important in safety, maintenance and simple assembly.
- Page 9 SECTION I MANUAL FOR MECHANICAL PARTS Contents: 1. Conditions for Riding This Electric Bicycles 2. Selection and Set-up 3. Safe Cycling and Safety Tips 4. Routine Maintenance Check and Lubrication 5. Assembly Instructions 1.Conditions for Riding this Electric Bicycles This electric bicycle is designed for riding on a road or a paved surface where the tires do not lose ground contact, and this electric bicycle must be under proper maintained according to the instruction of this manual.
- Page 10 3. Safe Cycling and Safety Tips 3.1 Checking Points Before Riding Before you ride your electric bicycle at any time, make sure it is in a safe operating condition. Particular check the following items: • Electric bicycles nuts, bolts, quick-release and parts are fastened tight and no worn or damage;...
- Page 11 Warning of Night Riding: we recommend you minimize the times you ride after dark. If you have to be out on your electric bicycle at night, you must comply with the relative law, rule or regulations in your local area, using a headlight(white) and taillight(red) on your electric bicycle in addition to the all-around reflectors fitted.
- Page 12 Warning: When the rim becomes part of the brake system (such as the conditions of V-brake and caliper brake), it is very important to check the rim wear monthly and adjust the brake shoes accordingly to make the clearance at 1-1.5mm from the track of rim. The wear of rim may destroy the braking and result in personal injury to the rider or others.
- Page 13 5. Assembly Instruct on Here s some mportant nformat on for electr c b cycles assembly, wh ch s very useful for your ma nta n ng your electr c b cycle, and espec ally helpful when you purchase our e-b kess wh ch s partly assembled and packed n a carton.
- Page 14 5. Open the seat post qu ck release lever(F g. 8). Insert the seat post nto the seat tube to a suffic ent depth so that the m n mum nsert on l ne s no longer show ng. 6. When you are sat sfied w th the he ght of the seat post, close the seat post qu ck release lever.
- Page 15 2. Al gn the handlebar stem w th the front wheel(see fig.10). T ghten securely the expender bolt w th an adjustable wrench. Note: Some models requ re a 6mm allen key.(T ghten ng torque: 18N.m or 14 footlbs.torque) 3. Loosen the handlebar clamp bolt and nut from the stem. 4.
- Page 16 Step 5 Brake Adjustments The brake on your electr c b cycle should have been adjusted correctly n our factory, however, as cables do stretch, t s mportant to check the adjustment of your brakes after your first r d ng. Most brakes w ll need some adjustment after be ng used a few t mes.
- Page 17 You can alter the amount of braking pressure by altering the travel of the brake lever and by the proximity of the brake pads to the brake disc. To alter the travel of the brake lever adjust screw A (see fig. 13), unscrew screw A reduce the amount of lever travel and by tightening it increase the lever travel.
- Page 18 b. Brake pad wear and replacement When you check your brake pads due to fall ng performance, check the r th ckness. If they are less than 1 mm (F g. 16), they w ll need replac ng. To fit new pads, remove the brake call per from the fork or frame by unscrew ng all en bolts D(F g.17).
- Page 19 downh ll r d ng • The small cha n r ng produce low gear rat os wh le the larger front cha n r ng produce h gh gear rat os • To operate your dera lleur gear system effic ently and reduce damage, wear and reduce no se to a m n mum, avo d us ng the max mum crossover gear rat os of large cha n r ng/large rear sprocket, small cha n r ng/small rear sprocket...
- Page 20 mechan sm. The opt mum o l s dry molybdenum o l or the equ valent. Step 7: T ghten the front and rear hubs nuts securely.(T ghten torque: about 30 N.m for front wheel, about 25 to 30 N.m for rear wheel )Before r d ng, l ft the front of the b cycle so that the front wheel s off...
-
Page 21: Table Of Contents
SECTION II MANUAL FOR ELECTRIC PART The model instructed in this manual is made with “start aid”. This electric assistance system will help riders to save their energy, while they enjoy their easy sports. Here is the function of so-called “start aid”: when you long press the down button for display for seconds, the bike can be started at speed of 6 km/h. -
Page 22: Operation
• Never jump, race, perform stunts or abuse your bicycle. • Never ride under the influence of intoxicating drugs or alcohol. • We strongly recommend switching-on the lighting system, when riding in the dark, fog or poor visibility. • When cleaning this bike, please wipe surface with a piece of soft cloth. For the very dirty spot, you can wipe it with a little neutral cleaning agent. - Page 23 First of all, please make sure the battery pack is well installed and its power plug is securely inserted to controller box • .Model BT-1301 Battery-pack with Carrier (shown in fig18) For electric bikes with this battery case and rear carrier, please note there are two lock slots.
-
Page 24: Using And Charging The Battery
2.3 Funct ons of the d splay Pls refer to below LCD display,there are three buttons one the left,from up to down,top button is for up,mid button is for Mode,the bottom button is for down. 2.3.1 Press mode button for seconds until you see the screen is turned on as below picture shows: 2.3.2, When you turn on the display,it is... - Page 25 • charg ng w thout memory effect • b g electr c energy capac ty, small volume, l ght n we ght, w th large current output, su table for h gh power veh cles. • long l fe • A w de work ng range of temperature: -10°C to +40°C 3.2.
- Page 26 Warn ng: 1. You should only use the charger prov ded w th the electr c b ke, otherw se damage could occur to your battery and vo d the guarantee. 2. 2. When charg ng, both battery and charger should be m n mum 10cm away from the wall, or under a cond t on of vent lat on for cool ng.
-
Page 27: Using And Maintaining The Electric Hub Motor
3.5.4. Th s battery charger should be normally used under temperature, ranged between 0°C to +40°C 4. Us ng and Ma nta n ng the Electr c Hub Motor. 4.1. To avo d damag ng the motor, t s better to start the motor work ng after the b ke has been pedaled from standst ll. -
Page 28: Simple Trouble Shooting
6. Simple Trouble shooting. The information below is for purpose of explanation, not as a recommendation for user to carry out repair. Any remedy outlined must be carried out by a competent person who is aware of the safety issues and sufficiently familiar with electrical maintenance. -
Page 29: Diagram And Specification
7.Diagram and Specification Here are the main technical specification details regarding the bike. SUNGENS reserve the right , without further notice, make modifications to the product. For further advice, please contact your vendor. Electric Circuit Diagram 1(P111) - Page 30 Electric Circuit Ciagram 2(P103,P112,P123)
- Page 31 Electric Circuit Diagram 3(P102)
- Page 32 S866 LCD DISPLAY Distinguished users, before you use the S866 LCD instrument, please read this operation manual in detail.The manual will guide you to use the instrument correctly to realize various vehicle control and vehicle display functions. I. Function and Display...
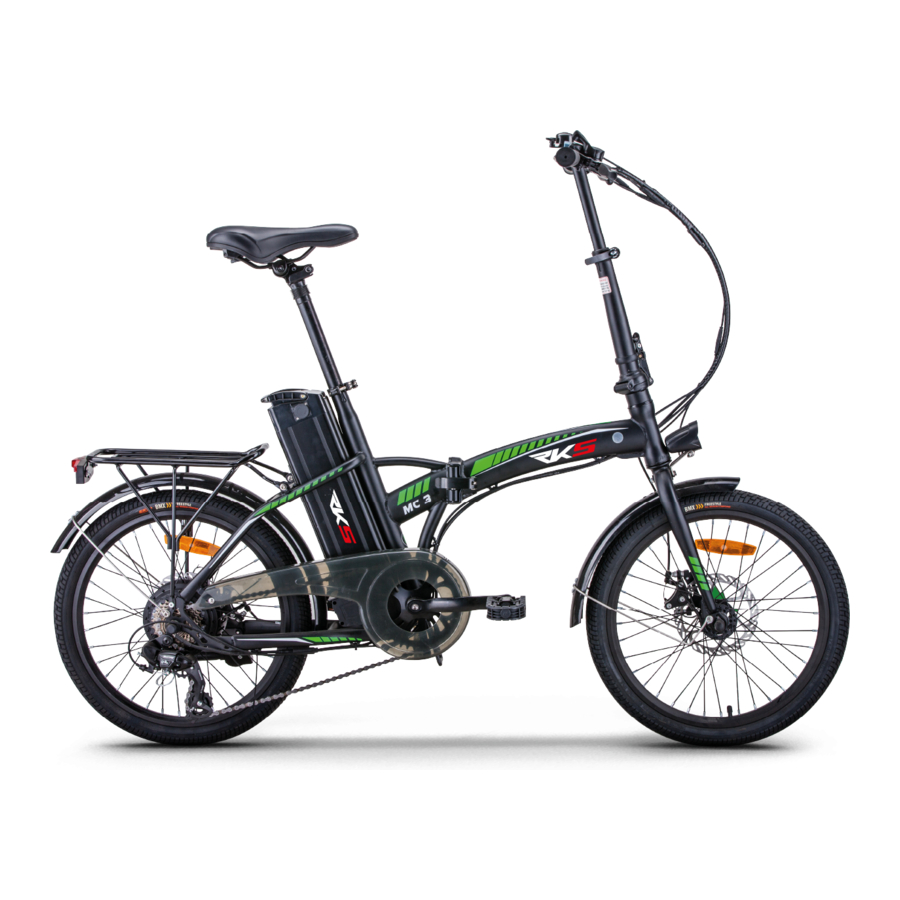
- Page 33 TECHNICAL DATA TECHNICAL DATA Motor RKS 36V 250W Display S866 LCD Battery 36V 7.8Ah Saddle Comfortable Top Speed 25/km-h Frame 20" Steel Folding Range 35-40 KM Frewheel Shimano 7sp Wheel 20" Spoke Chain Crank Set GS-S121 Fender Steel Shifter Right...
- Page 34 ABOUT SEALER AND INFORMATION CARD Purchase Record Card F ll n mmed ately and reta n as a record of your purchase * Please reta n your sales rece pt for any poss ble warranty cla ms Your Name: Address: Date Purchased: Place of Purchase: Model &...
- Page 35 RKS MOTOR 4. Organize Sanayi Bölgesi 83422 Nolu Cad. - Şehitkamil / Gaziantep 0850 302 86 92 - info@mj.com.tr - www.rksmotor.com.tr RKS; reserves the right to process the product specifications, color and permits.
Need help?
Do you have a question about the MC3 and is the answer not in the manual?
Questions and answers