Advertisement
Quick Links
Advertisement

Subscribe to Our Youtube Channel
Related Manuals for Pelgrim OKW597


Summary of Contents for Pelgrim OKW597
- Page 1 OKW597 Manual...
-
Page 2: Table Of Contents
Electric oven Dear customer! We sincerely thank you for your purchase. We believe you will soon fi nd ample evidence that you can really rely on our products. To make the use of the appliance easier, we attach these comprehensive instruction manual. The instructions should aid you in getting familiar with your new appliance. -
Page 3: Important Warnings
Important warnings • The appliance may only be connected to the power mains by a service technician or other qualifi ed expert. • Unprofessional tampering and repairs may result in serious physical injury and damage to the appliance. The repairs may only be carried out by the service personnel or an authorized technician. -
Page 4: Appliance Description
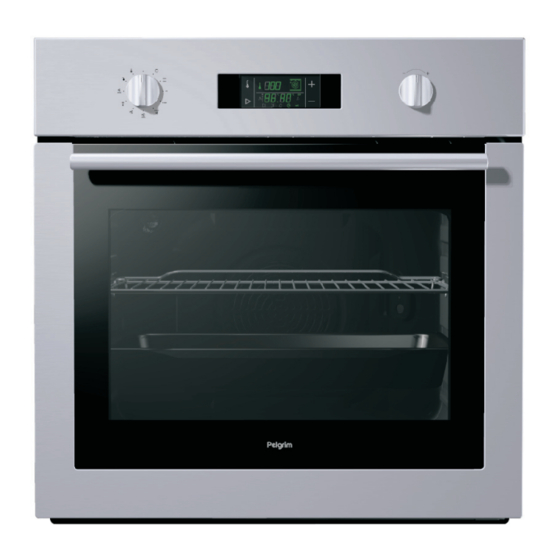
Appliance description The fi gure represents one of the appliance models. Since a group of appliances to which these instructions apply, have different features, the instruction manual may describe functions and equipment that may not be available in your appliance. 1. - Page 5 Cooling fan Cooling fan The appliance features a built-in cooling fan which cools the appliance housing and control panel. Extended operation of Extended operation of After the oven is switched off, the cooling fan continues to the cooling fan the cooling fan operate for a while in order to additionally cool down the appliance.
-
Page 6: The Oven
The oven Before using the oven Before using the oven • Remove all accessories from the oven and clean them with for the fi rst time for the fi rst time warm water and a conventional detergent. Do not use abrasive cleaning aids. - Page 7 • When the appliance is connected to the power supply or after a power failure, the word “META” or “GLAS” is fi rst displayed for a short while; then, the display fl ashes for some time. In order to enable the operation of the oven, use the (C) and (D) sensor keys to set the time of day.
- Page 8 Setting the cooking time With this program mode, the duration of oven operation is set (cooking time). Maximum setting allowed is 10 hours. • Press the (A) sensor key to select the symbol (1). Use the (C) and (D) sensor keys to set the duration / cooking time. •...
- Page 9 • Turn on the oven (set the selector knob and cooking temperature). At the corresponding time, the oven starts operating automatically (the symbol (2) goes off upon the start of operation), and switches off when the set cooking time has elapsed. An intermittent beep will sound, which can be stopped by pressing any key;...
- Page 10 set, the oven will operate as usually; however, no changes to the settings will be possible. Display dimmer Between midnight and 6 AM, the display automatically lights with less intensity, if no timer function is set. Deleting the timer settings - All timer settings can be deleted any time by pressing the (C) and (D) sensor keys simultaneously and holding them for three seconds.
- Page 11 indicating the operation of the heaters. • When the set temperature is reached, the symbol (9) will go off, and a short beep will sound. • During cooking, the temperature is maintained by occasional activation of the heaters; each time this happens, the symbol (9) appears.
- Page 12 The oven may be The oven may be Oven lighting operated in the following operated in the following With some models, there are two interior lighting lamps: one on modes modes the upper part of the back wall, and the other, additional lamp on middle of the right side wall.
- Page 13 Hot air and lower heater With this operation mode, the lower heater and the hot air fan operate simultaneously. This is particularly convenient for making pizza. Also ideal for moist or heavy pastry, fruit cakes made of leavened dough, short pastry, or cheesecakes. Hot air With this operation mode, the round heater and the fan operate simultaneously.
- Page 14 Turning off the oven Turning off the oven After the end of cooking process, rotate the selector knob to the “zero” position. This will also interrupt and delete all timer functions (see the section “Setting the timer functions”); the timer will switch to time of day / clock display.
- Page 15 Telescopic pull-out Telescopic pull-out Telescopic (pull-out or, retractable) guides are installed for the guides (depending on guides (depending on second, third, and fourth level. They are installed on the left and the model) the model) right side wall of the oven interior at three levels. Pull-out levels consist of (depending on the model): - three guides that can be pulled out partially, - one guide that can be pulled out completely and two that can...
- Page 16 Fat fi lter (depending on Fat fi lter (depending on The fat fi lter installed on the back oven interior wall protects the model) the model) the fan, round heater, and the oven from impurity, particularly spattering fat. When cooking meat, we recommend using the fat fi...
-
Page 17: Food Preparation
Food preparation Baking pastry Baking pastry • For baking pastry, use the . mode of operation. (Oven operation with the selected mode, or system, depends on the appliance model). • When baking pastry, always remove the fat fi lter. Instructions •... - Page 18 • When baking several types of pastry simultaneously, there will be a signifi cant amount of vapor in the oven, resulting in accumulation of condensate on the oven door. Tips on baking pastry Is the pastry completely done? Use a wooden stick to pierce the pastry at the highest point. If there are no traces of dough when the stick is removed, the pastry is done.
- Page 19 Pastry baking table for combined upper and lower heater or hot air operating mode Type of pastry Guide Temperature Guide Temperature (°C) Cooking (from the (°C) (from the time bottom) bottom) (minutes) Sweet pastry Marble cake, ring cake 160-170 150-160 50-70 Rectangle-shaped cake 160-170...
- Page 20 Settings table for baking pastry with hot air and lower heater Type of pastry Guide (from the bottom) Temperature (°C) Cooking time (minutes) Cheesecake (750g cheese) 150-160 65-80 - short pastry Pizza * - leavened dough 200-210 15-20 Quiche Loraine - short crust dough 180-200 35-40 Apple pie with icing - leavened...
- Page 21 Meat cooking table for upper/lower heater combination or with hot air Type of meat Weight Guide (from Tempera- Guide (from Tempera- Cooking bottom) ture (°C) bottom) ture (°C) time (min.) Beef Beef roast 1000 190-210 180-190 100-120 Beef roast 1500 190-210 170-180 120-150...
- Page 22 Grilling and browning Grilling and browning • When grilling meat, you should be particularly careful. The high temperatures and infra heater heat the grid and other parts of the oven to very high degrees; use protective kitchen gloves and special meat tongs. •...
- Page 23 Cooking table - Large grill Type of food Weight Guide Temperature Temperature Cooking time level (from (°C) (°C) (min) bottom) Meat and sausages 4 beef loin chops, rare 180g/pc 14-16 4 beef loin chops, medium “ 16-20 4 beef loin chops, well done “...
- Page 24 Cooking table - grill Food type Weight (g) Guide Temperature Temperature Cooking time level (from (°C) (°C) (min.) bottom) Meat and sausages 2 beef loin stakes, well done 180g/pc 18-21 2 cutlets 20-22 2 pork neck steaks 180g/pc 18-22 4 grill sausages 100g/pc 11-14 4 toasted sandwiches...
- Page 25 • Set the operation mode selection knob to the desired cooking mode. We recommend using the upper and lower heater mode. The oven starts to operate. • During cooking, the rising temperature in the core of the food is constantly displayed. Until the temperature reaches 30°C, the display reads (“--”).
- Page 26 Preservation table Food to be preserved Quantity After appearance Standing time of bubbles (in the oven T=170-180°C, until (min) boiling / bubbling (min.) Fruit Strawberries 6x1 liter approx. 40-55 turn off Stone fruit 6x1 liter approx. 40-55 turn off Apple puree 6x1 liter approx.
-
Page 27: Cleaning And Maintenance
Cleaning and maintenance Do not use a steam cleaner or a high-pressure steam cleaner to clean the appliance. Before you start cleaning the appliance, disconnect it from the power mains and let it cool down. Appliance housing front Clean the surfaces with liquid non-abrasive detergents intended for smooth surfaces, and a soft cloth. - Page 28 Cleaning Cleaning Oven • The oven can be cleaned in conventional manner (with detergents, oven spray), but only when it is very dirty and when the stains are particularly stubborn. • For regular cleaning of your oven (after each use), the following procedure is recommended: rotate the operation mode selection knob to the position .
- Page 29 Cleaning the oven interior ceiling (only with some models) • To facilitate cleaning of the oven interior upper wall, some appliances feature a foldable upper infra heater. • Before lowering the heater, the cooker must be disconnected from the power mains by removing the fuse or tripping the main switch.
- Page 30 Removing wire guide racks To facilitate cleaning of the oven interior side walls, the wire guide rack can be removed. • Hold the guide rack by its lower end and rotate it inwards; then, remove them from the holes on the upper side. •...
- Page 31 Removing and inserting the oven door with a single-axis hinge Completely open the oven door and rotate the attachment clips completely backwards (Figure 1). • Slowly close the door until the clips are pressed against the supports / seats. At approximately 15° (relative to the closed door position), pull the door slightly upward and pull them out of the both hinge supports on the appliances (Figure 2).
- Page 32 Oven bulb (only with some models) Oven bulb is considered a replacement ware part and is not covered by the warranty. Replace the bulb with a new one with the following specifi cations: socket E 14, 230 V, 25 W, 300°C. •...
-
Page 33: Special Warnings And Error Reporting
Special warnings and error reporting During the warranty period, any repairs may only be performed by service technicians authorized by the appliance manufacturer. Before starting the repair, the appliance must be disconnected from the power mains by removing the fuse or by removing the mains cord from the wall outlet. Unauthorized tampering and repairs may cause the risk of electric shock and short circuit;... -
Page 34: Instructions For Installation And Connection
Program timer display • There was a power supply failure, or your cooker was just connected to is blinking the power mains. All set times have been deleted. • Set the time of day to enable operation of the appliance. •... - Page 35 Installation Installation • Veneer or other fi nish of the furniture the appliance is being built into should be processed with heat-resistant glue (100°C); otherwise, high temperatures may cause them to deform. • Before installing the appliance, remove the back wall from the piece of kitchen furniture the appliance is being built into, along the entire length of the cutout.
- Page 36 Connection Connection The appliance may only be connected to the power mains by an authorized service technician or a registered electrician! Incorrect connection may result in damage to or destruction of respective parts of the appliance; in such cases, the warranty is void. •...
-
Page 37: Technical Characteristics
Technical characteristics Rating plate A Serial number B Code C Model D Type E Trademark F Technical information G Compliance indications / symbols WE RESERVE THE RIGHT TO MAKE ANY CHANGES THAT DO NOT AFFECT THE FUNCTIONALITY OF THE APPLIANCE. - Page 40 The appliance identifi cation card is located on the bottom of the appliance. Stick the appliance identifi cation card here. When contacting the service department, have the complete type number to hand. You will fi nd the addresses and phone numbers of the service organisation on the guarantee card. 287969/en (01-10)
Need help?
Do you have a question about the OKW597 and is the answer not in the manual?
Questions and answers