
Related Manuals for Pride Mobility Jazzy Select Series


Summary of Contents for Pride Mobility Jazzy Select Series
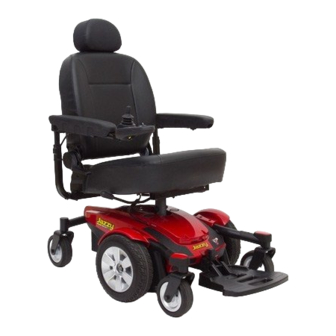
- Page 1 Owner’s Manual Including Models: Jazzy Select, Jazzy Select 6, and Jazzy Select 6 with Power Seat...
-
Page 2: Safety Guidelines
On the product, this icon is represented as a black symbol with a red circle and red slash. Intended Use The intended use of the Pride Mobility Products device is to provide mobility to persons limited to a seated position that have the capacity of operating a powered wheelchair. Regarding Devices for Prescription Use... -
Page 3: Language Usage
Jazzy Select Series www.pridemobility.com... -
Page 4: Purchaser's Agreement
I . I N T R O D U C T I O N SAFETY WELCOME to Pride Mobility Products (Pride). The power chair you have purchased combines state-of-the-art components with safety, comfort, and styling in mind. We are confident that these design features will provide you with the conveniences you expect during your daily activities. -
Page 5: I I . S A F E T Y
Place unit on level ground and stand to one side when changing from drive mode to freewheel mode or freewheel mode to drive mode. Unlocked and in freewheel mode Indicates UNOCCUPIED power chair securement points. Class II Equipment Manufactured in Power Chair information label Jazzy Select Series www.pridemobility.com... -
Page 6: General Guidelines
„ Check battery charge. See VI. “Batteries and Charging.” „ Ensure the manual freewheel levers are in drive mode before sitting on the power chair. NOTE: If you discover a problem, contact your authorized Pride Provider for assistance. www.pridemobility.com Jazzy Select Series... -
Page 7: I I I . Y O U R P O W E R C H A I R
8. Front Riggings (Foot Platform Shown) 3. Seat Base 9. Drive Wheel 4. Controller 10. Seat Release Lever 5. Top Shroud 11. Rear Caster Wheels 6. Main Circuit Breaker Figure 1. The Jazzy Select Series Power Chair (Jazzy Select 6 Shown) Jazzy Select Series www.pridemobility.com... - Page 8 I I I . Y O U R P O W E R C H A I R Identification Key 1. Rear Shroud 5. Front Anti-Tip Wheels 2. Seat Post 6. Controller Connector 3. Front Cover 7. Rear Caster Wheels 4. Main Circuit Breaker Figure 2. The Jazzy Select Power Base www.pridemobility.com Jazzy Select Series...
- Page 9 I I I . Y O U R P O W E R C H A I R Identification Key 1. Rear Shroud 5. Front Anti-Tip Wheels 2. Seat Post 6. Controller Connector 3. Front Cover 7. Rear Caster Wheels 4. Main Circuit Breaker Figure 3. The Jazzy Select 6 Power Base Jazzy Select Series www.pridemobility.com...
- Page 10 1. Rear Shroud 5. Front Caster Wheels 2. Power Seat Actuator 6. Controller Connector 3. Front Cover 7. Rear Caster Wheels 4. Main Circuit Breaker Figure 4. The Jazzy Select 6 with Power Seat Power Base www.pridemobility.com Jazzy Select Series...
-
Page 11: Electrical Components
Power Module: Provides connection between the joystick module and the motors, batteries, and off-board charger. Identification Key 1. Battery Connectors 4. Motor Connectors 2. Controller Power Module 5. Main Circuit Breaker 3. Controller Connector Figure 5. Jazzy Select Series Electrical Components (Jazzy Select 6 Shown) Jazzy Select Series www.pridemobility.com... - Page 12 I I I . Y O U R P O W E R C H A I R Identification Key 1. Battery Connectors 4. Motor Connectors 2. Controller Power Module 5. Main Circuit Breaker 3. Controller Connector Figure 6. Jazzy Select 6 with Power Seat Electrical Components www.pridemobility.com Jazzy Select Series...
-
Page 13: Manual Freewheel Levers
WARNING! Do not use the freewheel lever handles as tie-down points to secure this product. Identification Key Identification Key 1. Freewheel Lever 1. Freewheel Lever FREEWHEEL LEVER FREEWHEEL LEVER Figure 7. Drive Mode (Drive Engaged) Figure 8. Freewheel Mode (Drive Disengaged) Jazzy Select Series www.pridemobility.com... -
Page 14: I V. A S S E M B L Y
4. Plug the controller harness into the connector on Figure 9. Seat and Controller Assembly the power base. See figure 2, 3 or 4. www.pridemobility.com Jazzy Select Series... - Page 15 6. Plug the controller harness into the connector on the power base. See figure 4. NOTE: Refer to V. “Comfort Adjustments” for more information on controller installation and adjustment. Jazzy Select Series www.pridemobility.com...
- Page 16 I V. A S S E M B L Y Identification Key 1. Wire Ties DISENGAGED 2. Seatback Release Lever ENGAGED Figure 11. Seat Latch Safety Figure 12. Jazzy Select 6 with Power Seat Controller Routing www.pridemobility.com Jazzy Select Series...
-
Page 17: Seat Height Adjustment
Your authorized Pride Provider has evaluated your power chair and made any necessary adjustments to suit your specific requirements. Do not change your seating configuration without first contacting Pride Mobility Products or your authorized Pride Provider. -
Page 18: Comfort Adjustments
0.75 in. (19 mm). Always check to be sure this system is operating properly before using your power chair. Identification Key 1. Joystick 4. Actuator Light 2. On/Off Key 5. Actuator Key 3. Horn Key Figure 14. VR2 6-key Controller and Keypad www.pridemobility.com Jazzy Select Series... -
Page 19: Seatback Angle Adjustment
1. Lift the armrest straight up so that it is perpendicular to the floor. 2. Loosen the jam nut. See figure 15. 3. Turn the adjusting screw to raise or lower the front of the armrest. 4. Tighten the jam nut to lock the adjusting screw into place. Jazzy Select Series www.pridemobility.com... -
Page 20: Controller Position
8. Tighten the setscrew to secure the controller. 9. Route the controller harness along the seat frame and secure with wire ties. See figure 9 or 12. 10. Plug the controller into the power base. See figure 2, 3 or 4. www.pridemobility.com Jazzy Select Series... - Page 21 1. Foot Platform Bracket screw. 2. Hardware 2. Turn the adjustment screw to raise or lower the 3. Adjustment Screw front of the foot platform. Figure 17. Select 6 and Select 6 with Power Seat Foot Platform Adjustment Jazzy Select Series www.pridemobility.com...
-
Page 22: Swing-Away Footrests
1. Remove the two adjustment screws from the side of each leg rest extension. 2. Slide the leg rest up or down to the desired length. 3. Reinstall the two adjustment screws. Figure 19. Elevating Leg Rests www.pridemobility.com Jazzy Select Series... -
Page 23: Positioning Belt
MANDATORY! Inspect the positioning belt for loose parts or damage, including tears, worn spots, bent hardware, damaged latch mechanisms, dirt or debris, before each use of the power chair. If you discover a problem, contact your authorized Pride Provider for maintenance and repair. Jazzy Select Series www.pridemobility.com... -
Page 24: Charging The Batteries
Refer to the manual supplied with the battery charger for more information. www.pridemobility.com Jazzy Select Series... -
Page 25: Batteries And Charging
14 hours and operate your power chair again. The batteries will now perform at over 90% of their potential. 4. After four or five charging cycles, the batteries will top off at 100% charge and last for an extended period. Jazzy Select Series www.pridemobility.com... -
Page 26: Frequently Asked Questions (Faqs)
NOTE: Keep your batteries fully charged and avoid deeply discharging your batteries. Refer to the manual supplied with the battery charger for charging instructions. Pride recommends charging your batteries for at least 48 continuous hours once per month to improve battery performance and battery life. www.pridemobility.com Jazzy Select Series... - Page 27 NOTE: The useful life of a battery is quite often a reflection of the care it receives. Jazzy Select Series www.pridemobility.com...
- Page 28 What about shipping? If you wish to use a freight company to ship your power chair to your final destination, repack your power chair in the original shipping container, if possible, and ship the batteries in separate boxes. www.pridemobility.com Jazzy Select Series...
- Page 29 „ Use a rubber conditioner on the tire sidewalls to help preserve them. WARNING! Never use a rubber conditioner on the tread area of the tires; doing so may make the tires slippery and cause your power chair to skid. Jazzy Select Series www.pridemobility.com...
-
Page 30: Care And Maintenance
3. Slowly push the joystick forward until you hear the electric brakes click. Immediately release the joystick. You must be able to hear each electrical brake operating within a few seconds of joystick movement. Repeat this test three times, pushing the joystick backward, then left, and then right. www.pridemobility.com Jazzy Select Series... -
Page 31: Monthly Checks
ABS plastic body shroud that allows it to be easily wiped clean with a damp cloth. WARNING! Never use any chemicals to clean a vinyl seat, as they may cause the seat to become slippery or dry out and crack. Use soapy water and dry the seat thoroughly. Jazzy Select Series www.pridemobility.com... - Page 32 WARNING! Make sure both the nut and washer are reinstalled and tightened properly. 13. Reinstall the hub cap, if equipped. 14. Inflate the pneumatic tire to the psi/bar/kPa air pressure rating indicated on each tire. 15. Remove the power chair from the base support. www.pridemobility.com Jazzy Select Series...
-
Page 33: Battery Replacement
NOTE: When installing the rear shroud, make sure that the controller and power seat harnesses are routed through the notch in the right side of the front cover. 18. Charge the batteries. See VI. “Batteries and Charging.” Jazzy Select Series www.pridemobility.com... - Page 34 + = POSITIVE (RED) TERMINAL POST CONNECTION - = NEGATIVE (BLACK) TERMINAL POST CONNECT RED WIRE TO RED POSITIVE (+) TERMINAL POST. CONNECT BLACK WIRE TO BLACK NEGATIVE (-) TERMINAL POST. Figure 24. Battery Installation (Seat Removed for Clarity—Select 6 Shown) www.pridemobility.com Jazzy Select Series...
-
Page 35: Corrective Maintenance
Disconnect both batteries before load testing and follow the directions that come with the load tester. If either one of the batteries fails the load test, replace both of them. If your power chair still does not power up, contact your authorized Pride Provider. Jazzy Select Series www.pridemobility.com... - Page 36 N O T E S www.pridemobility.com Jazzy Select Series...
- Page 37 N O T E S Jazzy Select Series www.pridemobility.com...
- Page 38 N O T E S www.pridemobility.com Jazzy Select Series...
- Page 40 B.V. (Authorised EU Representative) 182 Susquehanna Avenue De Zwaan 3 Exeter, PA 18643-2694 1601 MS Enkhuizen Canada The Netherlands 5096 South Service Road www.pride-mobility.nl Beamsville, Ontario L0R 1B3 Italy Australia Via del Progresso-ang. Via del Lavoro 20-24 Apollo Drive Loc. Prato della Corte Hallam, Victoria 3803 00065 Fiano Romano (RM) www.pridemobility.com.au...
Need help?
Do you have a question about the Jazzy Select Series and is the answer not in the manual?
Questions and answers
How do you determine the correct manual?
To determine the correct manual for the Pride Mobility Series, refer to the specific model name of your power chair (e.g., Jazzy Select, Jazzy Select 6, or Jazzy Select 6 with Power Seat). Then, access the latest/current version of the manual on the manufacturer's website, as the manual may be updated and vary slightly from the product due to changes.
This answer is automatically generated
Is there a power button?
Yes, the Pride Mobility Jazzy Select Series has a power button labeled as the On/Off Button, which turns the controller on and off.
This answer is automatically generated
Can I buy a jazzy manual
@Mary nerison
Can I buy a hard copy of the jazzy manual
Where do I find the model/serial number plate on the power chair