Table of Contents
Advertisement
Quick Links
Advertisement
Table of Contents

Related Manuals for Omnilux MINI


Summary of Contents for Omnilux MINI
- Page 1 Blemish Eraser User Guide...
- Page 2 It is mandatory that users of this device read and comprehend all information in this User Guide prior to use of the Omnilux™ Mini Blemish Eraser device. You must follow all the instructions in the User Guide. Please contact us if you have any comments about the Blemish...
-
Page 3: Table Of Contents
USER GUIDE Contents Who should use the Blemish Eraser device ..... Device Description ........... . Intended Use . -
Page 4: Who Should Use The Blemish Eraser Device
OMNILUX™ MINI BLEMISH ERASER Before using the Blemish Eraser device you must carry out a sensitization test and wait 6 hours. Who should use the Blemish Eraser device Thank you for choosing the Blemish Eraser device. The Blemish Eraser device is suitable for persons ≥14 years of age who are suffering from mild to moderate acne vulgaris. -
Page 5: Device Description
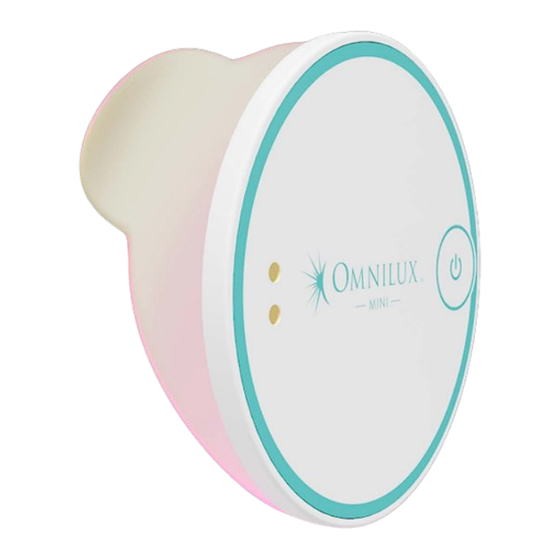
USER GUIDE Suitable for the Acne type Description Blemish Eraser device Severe acne the Blemish Many pimples Eraser device or spots, many is NOT indicated for pus-filled spots. severe acne. Some nodules. Please consult your Many whiteheads doctor for a more or blackheads appropriate treatment Whiteheads or... - Page 6 OMNILUX™ MINI BLEMISH ERASER The Blemish Eraser device is a silicone flexible patch containing LEDs. The LEDs generate the light. The LEDs produce blue (415nm ± 10nm) and red (630nm ± 10nm) light in the visible spectrum. The device works through a non-thermal mechanism called endogenous photodynamic therapy.
-
Page 7: Intended Use
USER GUIDE Hydroxide, Sodium Hyaluronate, Salicylic Acid and Pentaerythritol Tetrakis. You are supplied with a set of 14 adhesive hydrocolloid patches for treatment, one of which must be used to carry out a Photosensitivity patch test before starting your treatment course. The equipment is not used to make measurements of any sort, or to draw any conclusions regarding the indication to treat. - Page 8 OMNILUX™ MINI BLEMISH ERASER • DO NOT use the Blemish Eraser device if you are pregnant, planning on becoming pregnant or breastfeeding. The Blemish Eraser device has NOT been tested on pregnant or breast- feeding women and therefore the risk to the foetus, neonate or pregnant women is unknown.
-
Page 9: Warnings
USER GUIDE • DO NOT use device if you suffer from any photosensitive disorder (sensitization to light). If you use the Blemish Eraser device and you suffer from a photosensitive disorder, you may cause a severe skin reaction. • DO NOT use device if you are taking any medication that can cause photosensitivity. - Page 10 OMNILUX™ MINI BLEMISH ERASER • DO NOT over flex the Blemish Eraser device. Although it is flexible, it is not designed to withstand excess bending or folding. • Keep the Blemish Eraser device away from Sharp Objects. • DO NOT use the Blemish Eraser device in any way that is not exactly as specified in this User Guide.
-
Page 11: General Safety
USER GUIDE • NEVER use the Blemish Eraser device near water or where water can be spilt onto the equipment. DO NOT use the Blemish Eraser device if you think it has come into contact with water. • Keep the Blemish Eraser device away from HOT surfaces or direct sunlight. -
Page 12: Precautions
OMNILUX™ MINI BLEMISH ERASER Precautions • DO NOT stare directly at the LED light source. • DO NOT use the Blemish Eraser device without a hydrocolloid. • The Blemish Eraser device cannot be used in charging mode. • Unplug The 2-pin charging cable from the USB charging port when not in use. -
Page 13: Risks And Benefits
USER GUIDE high quality, CE certified USB charging socket or adapter to avoid the risk of fire and burns. • DO NOT subject the Blemish Eraser device to heavy shocks to avoid risk of damage to the device, if you damage the device, do not use it any longer. -
Page 14: Potential Benefits
OMNILUX™ MINI BLEMISH ERASER Potential Benefits People who have undergone a course of 4 weekly treatments for 6 weeks using the Blemish Eraser device report a reduction in mild to moderate acne vulgaris. First Time Setup Unpacking and charging The Blemish Eraser... -
Page 15: Charging Status Of The Blemish Eraser Device
USER GUIDE 4. When fully charged the battery will deliver 3-4 treatments before recharging. The lifetime of the Lithium battery can be maximized by allowing it to fully charge and then fully discharge during regular use. 5. Always ensure the LED device is fully charged before commencing a treatment session. - Page 16 OMNILUX™ MINI BLEMISH ERASER Remove one of the adhesive hydrocolloid patches from its packaging. See the “How to use the Hydrocolloids” section for a step-to-step guide to using the hydrocolloids. Unpeel the device side of the backing paper off the adhesive hydrocolloid patch.
-
Page 17: Using The Blemish Eraser Device
USER GUIDE Using the Blemish Eraser device Regarding electromagnetic compatibility (EMC) and electromagnetic fields (EMF), in and around the home environment the Blemish Eraser device should be kept away from radio frequency (RF) equipment to avoid interference. Treatment Recommendations: For the treatment of mild to moderate acne vulgaris the best results are seen by treating for 4 days a week for 6 weeks. - Page 18 OMNILUX™ MINI BLEMISH ERASER aligns with the shape of the Blemish Eraser device. Press down across the entire surface of the adhesive hydrocolloid patch. Peel the face side of the backing paper from the adhesive strip. Using a mirror position the Blemish Eraser device over the treatment area.
-
Page 19: How To Use The Hydrocolloid Patches
USER GUIDE How to use the Hydrocolloid Patches SIDE ONE - TO FACE SIDE ONE - TO DEVICE SIDE ONE - TO FACE SIDE ONE - TO DEVICE Step Peel the device side of the hydrocolloid patch. � FACE SIDE DEVICE SIDE Step-to-step diagram for using the Hydrocolloids... - Page 20 OMNILUX™ MINI BLEMISH ERASER Step Step Once secured to the device, peel the Attach it to the face side of the hydrocolloid patch. � LED device. � Step Once secured to the device, peel the face side of the hydrocolloid patch. �...
- Page 21 area. � USER GUIDE Step Press firmly on the face in the desired treatment area. � Re-order Refill packs of adhesive Hydrocolloid patches can be purchased from www.omniluxled.com Part number Description Quantity HCC01 The Blemish Eraser 20 pcs per Box device adhesive hydrocolloid patches...
-
Page 22: Care And Maintenance
OMNILUX™ MINI BLEMISH ERASER Care and Maintenance • The lifetime of the Lithium battery can be maximized by allowing it to fully charge and then fully discharge during regular use. • Store the Blemish Eraser device at room temperature in dry conditions. -
Page 23: Disposal/Recycling
USER GUIDE • DO NOT use water to clean the Blemish Eraser device. • DO NOT use the device if you think it has come into contact with water. Disposal/Recycling DO NOT dispose of the Blemish Eraser device or charging cable at a domestic waste facility. The adhesive hydrocolloid patch can be disposed of in general household waste. - Page 24 OMNILUX™ MINI BLEMISH ERASER Problem Possible Cause Action When the Blemish Insufficient battery Connect the 2-pin connection Eraser device is to complete a cable to the port on the upper switched on the treatment. side of the LED device. Insert the...
-
Page 25: Labeling
If the actions suggested fail to fix the problem, or the problem reoccurs, and the Blemish Eraser device is within the warranty period please return to your place or purchase or contact the Omnilux Customer Service email: info@omniluxled.com • DO NOT attempt to investigate any further. -
Page 26: Explanation Of Symbols
OMNILUX™ MINI BLEMISH ERASER • Storage and Transport Humidity: 20% to 85% without condensation • Mains Electrical Input for charging: Any USB A Charger (5V) • IP25 Explanation of symbols There are several safety warnings on the Blemish Eraser device and associated packaging and in the User Guide. - Page 27 USER GUIDE Manufacturer. Date of manufacture. Keep dry. Serial number. Model Number for the device - TN2197 Batch Code. Unique device identifier. The Blemish Eraser device is a Medical Device. Made in China. Keep away from direct sunlight. Shows the lower and upper temperature limits. Shows the lower and upper humidity limits.
-
Page 28: Warranty
Product shall not be disposed of with normal household waste (2012/19/EU). Input- 5V (USB A). Australian sponsor details (AUS only) Warranty Please register your warranty at www.omniluxled.com Standard Warranty: Under normal use this product is guaranteed for 2 years after its original purchase date against manufacturing defects in materials or workmanship. - Page 29 iSMART Developments Ltd or its authorised distributors shall not be responsible for any incidental, special or consequential damages resulting from the use of this product. All implied warranties, including but not limited to implied warranties of fitness and merchantability are limited in duration to one year from date of original purchase.
Need help?
Do you have a question about the MINI and is the answer not in the manual?
Questions and answers