
Related Manuals for Bimar VSL1320


Summary of Contents for Bimar VSL1320
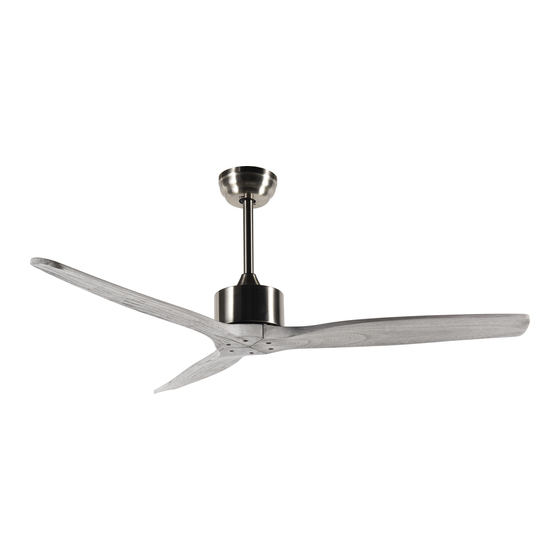
- Page 1 LIBRETTO ISTRUZIONI INSTRUCTION BOOKLET VENTILATORE DA SOFFITTO CEILING FAN type VSL1320 ( mod. KBS-5209 1/40...
-
Page 2: Avvertenze Generali
Questo simbolo vi invita a leggere attentamente queste istruzioni prima dell’uso dell’apparecchio, ed eventualmente informare terzi, se necessario. Conservare il libretto per ulteriori consultazioni e per l’intera durata di vita dell’apparecchio. Se nella lettura di queste istruzioni d’uso alcune parti risultassero difficili nella comprensione o se sorgessero dubbi, prima di utilizzare il prodotto contattare l’azienda all’indirizzo scritto in ultima pagina. - Page 3 Esempi di apparecchi per ambiente domestico sono apparecchi per tipiche funzioni domestiche, usati in ambito domestico, che possono essere utilizzati per tipiche funzioni domestiche anche da persone non esperte: - in negozi, uffici e altri luoghi di lavoro similari; - in aziende agricole o similari; - da clienti di alberghi, motel e altri ambienti di tipo residenziale;...
- Page 4 • Non usare l’apparecchio in presenza di sostanze o vapori infiammabili (alcool, insetticidi, benzine) o in ambienti particolarmente polverosi. • Non posizionare oggetti sulle pale o entro la loro area di azione. • Qualsiasi modifica venga apportata all'apparecchio o hai suoi elementi di fissaggio compromette la sicurezza e farà...
-
Page 5: Installazione
INSTALLAZIONE • L'installazione dell'apparecchio deve essere eseguita da personale professionalmente qualificato. • Dopo aver tolto l’imballaggio, assicurarsi dell’integrità dell’apparecchio; in caso di dubbio non utilizzarlo e rivolgersi a personale professionalmente qualificato. Gli elementi d’imballaggio (sacchetti di plastica, polistirolo espanso, chiodi, ecc.) non devono essere lasciati alla portata di mano di bambini in quanto potenziali fonti di pericolo, ma vanno smaltiti secondo le norme vigenti negli appositi contenitori per la raccolta differenziata. - Page 6 sacchetto, che per le misure ridotte è privo di marcatura, va smaltito in conformità alle disposizioni del Comune. • Prima di collegare l’apparecchio controllare che: a) i valori di tensione riportati sulla targa dati corrispondano a quelli della rete elettrica b) l'impianto elettrico a cui l'apparecchio verrà...
- Page 7 Per il montaggio e fissaggio dell’apparecchio, procedere nel modo seguente e prendere come riferimento le figure: Soffitto in legno Accertarsi che la superficie sia stata ignifugata, e che la Staffa di Fissaggio venga assicurata a travi, o a travetti. Disattivare la linea elettrica di servizio tramite l’interruttore magnetotermico.
- Page 8 Infilare il supporto dell’asta (se precedentemente sfilato o non presente) in maniera che sia posizionato sul lembo alto (estremità tre fori), poi la calotta superiore (2) e la calotta inferiore (4); inserire i cavetti elettrici attraverso la cavità dell'asta. I fili vanno inseriti dal basso verso l'alto.
- Page 9 Allentare le due viti per il bloccaggio della calotta superiore. Abbassare la calotta inferiore fino in fondo. Inserire l’estremità semi-sferica dell’asta nella staffa attraverso lo spazio predisposto: allineando il dentello presente sulla staffa alla corrispettiva sede presente nell’estremità semisferica, verificare che i fili elettrici (sia dell’asta e della staffa di fissaggio) siano orientati in modo da non ostacolare l’operazione.
- Page 10 Effettuare le connessioni elettriche rispettando le indicazioni riportate nello schema di collegamento. Per i collegamenti dei cavi utilizzare la morsettiera della piastra di fissagio rispettando le polarità. Collegare tutti i cavi di messa a terra giallo/verde al cavo di messa a terra dalla linea dell’abitazione.
- Page 11 Sollevare la calotta, allineare le asole a mo’ di serratura con le viti della staffa di fissaggio (1) e ruotare in senso antiorario fino bloccaggio. Verificare che ventilatore sia saldamente fissato al soffitto, prima di procedere a qualsiasi operazioni di accensione. Assemblaggio - fissaggio delle pale Installare la pala rispettando l’indicazione alto basso (vedi etichetta) e allineare i fori con le...
- Page 12 PER AZIONARE IL VENTILATORE, PER PRIMA REGOLARE IN POS “ I “ (ACCESO) L’INTERRUTTORE A PARETE. Le funzioni del ventilatore si controllano e si regolano col telecomando in dotazione oppure con la APP tramite smartphone o assistente vocale (compatibile con Amazon Alexa e Google Assistant).
- Page 13 ①, ②, …⑥ Intensità. I tasti regolano la ventilazione (6 intensità): 1= velocità minima , 6= massima. Modalità: il ventilatore quando si accende parte dalla modalità normale cioè la ventilazione è costante all’intensità selezionata. Se viene premuto il tasto “ ”...
- Page 14 • Assicurarsi che lo smartphone sia connesso alla stessa rete WiFi alla quale successivamente il dispositivo sarà associato, attivare anche la connessione del Bluetooth. Prima Installazione/Configurazione 1.1 Installare l’applicazione “BIMAR Live Smart” tramite Google Play (Android) o da AppStore (iOS), oppure scansionare il codice QR qui presente. Per Android Per iOS 1.2 Al termine dell’installazione, icona dell’applicazione...
- Page 15 - premere la scritta “Ottieni il codice di verifica”, aspettare qualche istante e successivamente inserire il codice ricevuto nella parte “Codice di verifica” tramite il vostro indirizzo email di registrazione (eventualmente controllare anche nella cartella Posta indesiderata, se non viene ricevuto nella cartella Posta in Arrivo).
- Page 16 WI- connettere alla rete “Bimar Live Smart xxx” o “Smart Life xxx” e poi premere “connettere ora”. Nel caso le operazioni sopra descritte non procedano correttamente, necessità resettare il ventilatore, operando in questo modo: togliere l’alimentazione tramite l’interruttore magnetotermico, lasciare scollegato l’appareccchio 30 secondi.
- Page 17 Il dispositivo è compatibile con i controlli vocale di Amazon Alexa, Google Assistant. Aprire APP corrispondente/collegare la Skill (assicurarsi che l’account e password utilizzati corrispondano a quelli dell’applicazione “Bimar Live Smart” oppure “Smart Life”) e seguire le impostazioni. Google Home: alcuni comandi vocali base sono: “OK Google”...
- Page 18 Modalità: il ventilatore quando si accende parte dalla modalità normale cioè la ventilazione è costante all’intensità selezionata. Se viene premuto il tasto “ ” si attiva la modalità “Natural”: la ventilazione alterna le velocità in modo schematico, come immagini raffigurate nel capitolo precedenti.
-
Page 19: Pulizia E Manutenzione
Su questa pala, riposizionare la clip in più punti (dal centro verso l’estremità), per individuare il punto che elimina l’oscillazione. Sulla superficie della pala vicino alla clip incollare il contrappeso in dotazione, rimuovere la clip e testare nuovamente il ventilatore. Se dovesse ancora oscillare aggiungere un altro contrappeso. - Page 20 PROBLEMA CAUSA POSSIBILE RIMEDIO Apparecchio Mancanza Controllare l’interruttore generale funziona corrente dell’impianto o il collegamento elettrico sbagliato. Trasmettitore ricevitore Premere il tasto “ ”per cinque abbinati secondi circa, la spia verde si illumina, udirete un segnale acustico “Beep”, successivamente udirete n.2 “Beep” rapidi e rilasciare il tasto.
-
Page 21: General Warnings
Please read these instructions carefully before using the appliance, and instruct other persons using it, too, when necessary. Keep booklet Hndy for further use. If when reading this instructions manual certain parts should remain difficult to understand, or if there is any confusion, contact the company indicated on the last page before using the product. - Page 22 • farm houses • by clients in hotels, motels and other residential type environments • bed and breakfast type environments • Do not use the device at room temperatures above 40 °C. • This appliance can be used by children aged from 8 years and above and persons with reduced physical, sensory or mental capabilities or lack of experience and knowledge if they have been given supervision or instruction concerning use of the appliance in a...
-
Page 23: Installation
INSTALLATION • Installation must be performed by qualified personnel. • After removing the packing materials, check the integrity of the appliance; if you are unsure, do not use it and ask for qualified professional help. The packing materials (plastic bags, polystyrene foam, nails, etc.) must be kept out the reach of children because they are potential sources of danger, but must be disposed of in accordance with regulations in the appropriate containers for recycling. - Page 24 • Before connecting the appliance, check: a) that the voltage values shown on the data plate correspond to those of the electricity supply network b) the electrical system to which the appliance will be connected must: - Conform to current standards - Have cables with an adequate diameter for the power consumption - Have effective grounding and be in accordance with the applicable electrical safety standards: in case of doubt, request an accurate check from professionally qualified...
- Page 25 Wooden ceiling Make sure the surface has been fireproofed, and that the Mounting Bracket is secured to beams, or joists. Turn off the service power line using the circuit breaker. 3) Using the Mounting Bracket (1) as a guide, mark the points where the holes for the 4 self-tapping screws will be drilled.
- Page 26 Thread the rod support (if previously removed or not present) so that it is positioned on the top flap (end three holes), then the top cap (2) and bottom cap (4); insert the electrical leads through the rod cavity. The wires should be inserted from the bottom upwards.
- Page 27 Loosen the two screws securing the top cap. Lower the bottom cap all the way down. Insert the semi-spherical end of the rod into the bracket through the space provided: align the notch on the bracket with the corresponding slot in the semi- spherical end, and check that the electrical wires (both of the rod and of the mounting bracket) are positioned so as not to obstruct operation.
- Page 28 Establish the electrical connections according to the indications given in the connection diagram. Use the terminal block on the mounting plate for cable connections, observing polarity. Connect all yellow/green ground wires to the ground wire from the house line. Make sure that no wires are outside the terminal block.
- Page 29 Assembly - fastening the blades Install the blade according to the high-low indication (see label) and align the holes with the screws with their washers, then tighten. to ensure they are locked. Repeat this operation for each blade. TO OPERATE THE FAN, FIRST SET THE WALL SWITCH TO POSITION " I " (ON). Fan functions are controlled and adjusted with the included remote control or the app via smartphone or voice assistant (compatible with Amazon Alexa and Google Assistant).
- Page 30 ①, ②, …⑥ Intensity. The buttons adjust the ventilation (6 intensities): 1= minimum speed , 6= maximum speed. Mode: The fan starts in normal mode when switched on, i.e. ventilation is constant at the selected intensity. If the " " button is pressed, it switches to "Natural" mode: the ventilation alternates speeds in a schematic manner, as shown below, for example: “6”...
- Page 31 Make sure that the smartphone is connected to the wi-fi network to be used for the appliance. First Installation/Setup 1.1 Install the "BIMAR life Smart" App via Google Play (Android) or AppStore (iOS), or scan the QR code provided here.
- Page 32 2. Pairing the device with your smartphone Press the button “ ” for about five seconds, the green light turns on, you will hear a “Beep”, then you will hear 2 quick “Beeps” and release the button. 2.2 Insert the plug into the socket, press the “ ”...
- Page 33 "Beep" fast and release the button. Access smartphone WI-FI settings and connect to the “Bimar Live Smart xxx” or “Smart Life xxx” network, then press "connect now". If the operations described above do not work properly, the fan must be reset as follows: switch off the power supply via the circuit breaker, and leave the appliance disconnected for 30 seconds.
- Page 34 The device is compatible with Amazon Alexa and Google Assistant voice controls. Open the corresponding App/connect the Skill (make sure that the account and password used are the same as those of the “Bimar Live Smart” app) and follow the settings. Google Home: some basic vocal commands are: “OK Google”...
- Page 35 If the " " button is pressed, it switches to "Natural" mode: the ventilation alternates speeds in a schematic manner, as shown below paragrah on the remote control. If the “ ”button is pressed, it switches to "Breeze" mode: the ventilation alternates speeds (the selected speed will always switch to the minimum speed), as shown below picture, for example: “3”...
-
Page 36: Cleaning And Maintenance
CLEANING AND MAINTENANCE Attention: before normal cleaning operations, turn the fan off, turn the fan lamp off (if present), and disconnect from mains power by turning off the isolating switch ( pos. 0/OFF). • For cleaning, use a soft, slightly damp cloth; do not use abrasive or corrosive products. - Page 37 PROBLEM POSSIBLE CAUSE SOLUTION Appliance No power Check the master switch or for completely off incorrect wiring. Wall switch is at position “0”, Position the wall switch at the “I”, off. Remote control Connect the receiver and the received not synchronise. remote control: Press the "ON"...
- Page 38 Prescrizioni relative alle informazioni/Information requirements Descrizione/Description Simbolo/ Valore/Value Unità/Unito Symbol Portata massima d’aria/Maximum fan flow 149.42 m³/min rate Potenza assorbita ventilatore/Fan 41.72 power input Valori di esercizio/Service value 3.58 (m³/min)/W Consumo elettrico modo 0.33 “attesa”/Standby power consumption Livello potenza sonora 45.5 dB(A) ventilatore/Fan sound power level...
- Page 39 39/40...
- Page 40 Via G.Amendola, 16/18 25019 Sirmione (BS) – ITALY www.bimaritaly.it Servizio clienti: assistenza.privati@bimar-spa.it VSL1320_I.B._22_rev01 40/40...
Need help?
Do you have a question about the VSL1320 and is the answer not in the manual?
Questions and answers