Table of Contents
Advertisement
Quick Links
Advertisement
Table of Contents

Related Manuals for Mio Combo 5207 LM Series


Summary of Contents for Mio Combo 5207 LM Series
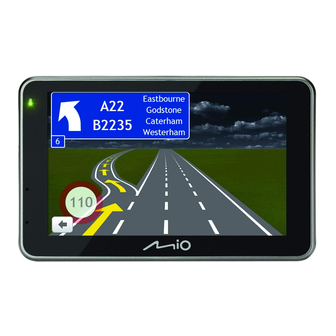
- Page 1 User Manual Combo 5207 LM Series...
-
Page 2: Table Of Contents
Precautions ..................... 5 Declaration of conformity ................6 Getting to know your Mio ..................8 Mounting and charging your Mio in a vehicle ............ 9 Turning on and off ....................11 Resetting the device ..................11 Navigating on the screen ..................12 Inserting a memory card .................. - Page 3 My Subscriptions ..................46 How do I purchase a subscription? ...........46 How do I activate my subscription? ..........46 How do I update subscriptions on my Mio? ........47 How do I recover my subscription? ..........47 My Maps ......................47 How do I download a map update? ..........48...
- Page 4 My Mio ......................61 How do I change the displayed language for MioMore Desktop? 61 How do I install or remove a voice file for my Mio? ....... 61 How do I report mileage? ..............61 How do I backup and restore my Mio? ..........62 How do I recover maps and voice files for my Mio? .......63...
- Page 5 Caring for your Mio ..................68 For more information ..................70 Online support ..................... 70 Mio Advantage ..................... 70...
-
Page 6: Important Safety Information
ƒ Consult your country’s and/or state’s laws regarding operation of a vehicle with any accessories or modifications. ƒ It is your sole responsibility to place, secure and use your Mio in a manner that will not cause accidents, personal injury or property damage. Always observe safe driving practices. -
Page 7: Declaration Of Conformity
About charging ƒ Use only the charger supplied with your device. Use of another type of charger will result in malfunction and/or danger. ƒ This product is intended to be supplied by a LISTED Power Unit marked with “LPS”, “Limited Power Source” and output rated + 5 V dc / 2.0 A”. ƒ... - Page 8 CE Marking. Hereby, Mio declares that this Mio Combo 5207 (Truck) LM is in compliance with the essential requirements and other relevant provisions of Directive 1999/5/EC. WEEE This product must not be disposed of as normal household waste, in accordance with the EU directive for waste electrical and electronic equipment (WEEE - 2002/96/EC).
-
Page 9: Getting To Know Your Mio
❻ ❺ ❹ Name Description Power button Turns your Mio on and off. ❶ Memory card slot Accepts a MicroSD card for recording. You are advised to use a ❷ for recording Class 4 memory card with at least 4GB capacity. -
Page 10: Mounting And Charging Your Mio In A Vehicle
Mounting and charging your Mio in a vehicle ƒ Never mount your device where the driver’s field of vision is blocked. ƒ If the windscreen is tinted with a reflective coating, it may be athermic and impact the GPS reception. In this instance, please mount your device where there is a “clear area”... - Page 11 CAUTION: For optimal performance of the lithium battery: • Do not charge the battery where the temperature is high (e.g. in direct sunlight). • There is no need to fully discharge the battery before charging. You can charge the battery before it is discharged.
-
Page 12: Turning On And Off
Note: The first time you use your Mio, it may take several minutes to establish a GPS connection. When you have a GPS fix, you can start to use your Mio to plan your trip. ƒ While the device is turned ON, press the power button and it will enter a suspended state. -
Page 13: Navigating On The Screen
Navigating on the screen To operate your Mio, touch the screen with your finger (or the stylus that is attached to the back of the device holder). You can perform the following actions: ƒ Tap: Touch the screen once with your finger to open items or select onscreen buttons or options. -
Page 14: Inserting A Memory Card
Inserting a memory card CAUTION: • Do not apply pressure to the centre of the memory card. • Do not insert or remove the memory card when the device is turned on. Hold the card (MicroSD) by the edges and gently insert it into the slot as shown in the illustration. -
Page 15: Main Menu
Search for places, areas and streets to Display the Map screen. help plan your route. Access your saved locations. Configure your Mio to enhance your navigation experience. Start recording the driving conditions Explore the area around your current or display the recording screen. -
Page 16: Navigating Through The Screens
Navigating through the screens ƒ If the Main Menu button appears in the top-right corner of a screen, tapping it returns to the Main Menu immediately. ƒ If the Back button appears in the top-left corner of a screen, tapping it returns to the previous screen. -
Page 17: Navigation
How do I use the FIND wizard? Your Mio is equipped with maps that provide street-level details for door-to-door navigation, including Points of Interest such as accommodation, parking areas, petrol stations, railway stations and airports. The FIND wizard allows you to search the location easily. -
Page 18: How Do I Plan My First Trip
NavPix™?” section. How do I plan my first trip? Using your Mio to plan your first trip is easy. There are several ways to select your destination. Complete the following to navigate to a street address that you know using the FIND address wizard. -
Page 19: How Do I Preview The Destination On The Map
Note: When it is the first time you use FIND wizard, the Select Country screen will appear before the FIND screen. Select your country and then you can start searching location. If needed, you can change the country to search location. To select the other country, tap the National Flag button in the title bar of the Keyboard screen before you search the city. -
Page 20: How Do I Preview A Route
ƒ Tap on a street/area/POI to display the related information of the location near your destination. ƒ Tap the grey arrow icon to return to your current position on the map. ƒ Drag and then tap on the map to select other destinations. The information of the selected street/area/POI near your destination will be displayed. -
Page 21: How Do I View My Route
In the Truck mode, your current position will be displayed with the icon. For Mio Combo 5207 LM: Your Mio comes with pre-activated Truck mode service for one-month free trial. You will be prompted to purchase (from Mio e-shop online) and re-activate the service when the trial period has expired. - Page 22 Item Description Direction and distance of next The direction and distance to your next turn. turn to repeat the vocal instruction. Current route Your current route is highlighted. Current position Your current position is marked with Drive recording Tap to start recording the driving conditions or display the ...
-
Page 23: How Do I View My Route Statistics
How do I view my route statistics? 1. From the Map options screen, tap 2. Tap the tabs in the title bar to view the additional information in the different screens. 3. Your Mio provides information on your: ƒ time to destination ƒ distance to go ƒ... -
Page 24: How Do I Adjust The Volume
How do I adjust the volume? 1. From the Map options screen, tap 2. The volume buttons will be displayed on the Map screen in translucent mode. Note: The volume buttons will automatically disappear after the map is idled for 5 seconds. 3. -
Page 25: Advanced Routing Functions
With LearnMe Pro technology, your Mio includes an intelligent capability that learns and adapts to your personal driving style. Over time, your Mio learns your preferences for road types and driving speeds, turns and more. Your Mio will save the information and provide a more personalised route and accurate time of arrival the next time you plan a trip. -
Page 26: How Do I Edit The Waypoints In The Trip
3. Tap Add. Use the FIND address wizard, Explore map, My Places/Recent Locations menu or Here/Return to start to set the waypoint. 4. When your search is done, tap 5. Complete the following: If you want to… Then… add another waypoint, tap Add. -
Page 27: How Do I Skip A Waypoint During A Multi-Stop Trip
How do I capture a location or a journey? Your Mio has a capture feature which allows you to record GPS co-ordinates of a location, and capture a journey and save them so you can navigate back at a later time. -
Page 28: How Do I Navigate To A Location I Have Captured
1. On the Main Menu, tap 2. Tap the captured destination you want to travel to ( 3. Tap . Your Mio will calculate the route from your current location. How do I navigate to the saved car location? 1. On the Main Menu, tap 2. -
Page 29: How Do I Navigate To A Location I Have Saved
3. Tap the favourite destination you want to travel to. 4. Tap . Your Mio will calculate the route from your current location. How do I navigate to Home? If you have not set an address as Home, the first time you try to navigate to Home you will be prompted to search for an address using the address-entry wizard. -
Page 30: How Do I Navigate To A Recent Place
To navigate to a NavPix™ location, either a GPS fix must have been available when the NavPix™ was taken, or GPS co-ordinates have been added using MioMore Desktop. Note: For more information on importing the NavPix™ to your Mio, refer to the "Photo Album" section in “What is MioMore Desktop?”... -
Page 31: How Do I Edit The Navpix
3. From the list select the album ( ) you want. The album contains your pictures and displays them as thumbnails. : Indicates that the picture is a NavPix™, with embedded GPS co-ordinates. ƒ ƒ Slide Show: Displays all images in the album as a full-screen slideshow. 4. -
Page 32: How Do I Search For A Poi
3. Complete the following: If you want to… Then… calculate the route and start navigating, edit the NavPix™, ƒ To save the location as Home, tap ƒ To rename the title of the NavPix™, tap ƒ To delete the NavPix™, tap explore the map, How do I search for a POI? A POI (Point of Interest) is a named site, feature, landmark or public venue which can be... -
Page 33: How Do I Customise The Categories For Search
3. Tap to scroll up or down the result list. 4. Select the desired item to display the destination screen. 5. Complete the following: If you want to… Then… calculate the route and start navigating, save the location as a favourite, . -
Page 34: How Do I Find A Poi Using The Poi Cluster
ƒ View the information of the selected POI that is shown at the top of the screen. ƒ Tap and drag the map to explore your desired local area. ƒ Tap and drag the map to display a POI Cluster showing POIs in the surrounding area. -
Page 35: How Do I Set My Poi Preferences
Complete the following: If you want to… Then… calculate the route and start navigating, save the location as a favourite, . The location will be saved in My Places immediately. explore the map, How do I set my POI preferences? POIs are grouped into categories. -
Page 36: How Do I Search For A Poi By Type
If you want to… Then… return to the Explore map, Note: Your preferences are automatically saved. How do I search for a POI by type? 1. On the Main Menu, tap 2. Tap 3. Complete the following: If you want to… Then…... -
Page 37: How Do I Search For A Poi By Keyword
6. Complete the following: If you want to… Then… calculate the route and start navigating, save the location as a favourite, . The location will be saved in My Places immediately. explore the map, How do I search for a POI by keyword? Complete the following to navigate to a POI or the street address that you find by keyword. -
Page 38: Recording Your Driving
Recording your driving Precautions and notices ƒ Make sure that no object is blocking the camera lens and no reflective material appears near the lens. Please keep the lens clean. ƒ If the car’s windscreen is tinted with a coating, it may impact the recording quality. ƒ... -
Page 39: Photo Mode
The recording proceeds in a continuous mode and is divided into several temporary video clips (segments). The recording will not stop between video clips. If continuous recording is ongoing but there is not enough space on your memory card, new video clips will replace the old ones. - Page 40 Category Item Description Camera Resolution Sets the image resolution. Quality Sets the video quality. White Balance Sets the white balance setting according to the current lighting environment. Stamp Sets how you want to show the information in the recordings. Photo Resolution Sets the image resolution.
-
Page 41: Customising The System Settings
You can simply tap on the brightness bar so that the screen brightness will be set immediately at the position you tapped. Note: Your Mio can heat up when the brightness scale is set high, therefore, use lower brightness whenever acceptable. - Page 42 Set manual speed alert to select the speed limit or turn it off. enable/disable a visual warning if tap Warn me not to operate my Mio while driving to turn the screen is accessed in a moving it on or off.
- Page 43 If you want to… Then… set the routing preferences, tap Advanced routing to turn the IQ Routes / LearnMe Pro functions on or off. ƒ Use historic traffic speed date: enable/disable the IQ Routes function. ƒ Use learned driver behaviour: enable/disable the LearnMe Pro function.
- Page 44 My Maps If you want to… Then… view the map information, tap Map version to display a list of all maps and the detailed information. select a set of maps to load, tap Map set, then select your preference from the list. check the expiring maps, tap Expiring maps to display a list of maps that are to expire soon.
- Page 45 Start. Spirit to be played, Tap OK. Your Mio will restart. When your Mio is in Shop demo mode, you will see the navigation demonstration of the pre-defined route without having to set a destination.
-
Page 46: What Is Miomore Desktop
5. Follow the on-screen prompts to install MioMore Desktop: 6. Connet your Mio to your computer when prompted. 7. Turn on your Mio, and then select the Computer option from the pop-up message screen. Note: If prompted to update your Mio software, follow the on-screen prompts. -
Page 47: My Subscriptions
8. You are now ready to use MioMore Desktop for your Mio. From now on, you can access MioMore Desktop via: Start > All Programs > Mio > MioMore Desktop. My Subscriptions Your Mio contains pre-loaded subscriptions, such as safety camera and travel book information. -
Page 48: How Do I Update Subscriptions On My Mio
Subscriptions at the bottom-right corner in My Subscriptions to recover all subscriptions. My Maps My Maps allows you to install new maps, remove maps from your Mio and purchase new maps. Note: The downloaded/purchased map (*.iso) from Mio website will be saved on your computer’s map folder (e.g. -
Page 49: How Do I Download A Map Update
Your Mio comes with one or more pre-activated maps. Map files take up space on your Mio’s internal memory. If you do not use a map file, you can remove it to free up space. You can later reinstall it to your Mio if required. -
Page 50: How Do I Remove Maps From My Mio
ƒ When activation has completed, the map will change colour to yellow; continue to step 6. 6. Click the map you want to install to your Mio. The map will change colour to a brighter yellow to indicate it has been selected. To deselect a map, click the map again. -
Page 51: Custom Pois
POI files. These are called custom POIs. Unlike preinstalled POIs, custom POIs can be removed from your Mio and can have audio as well as visual alerts associated with them. To create your POI files, open Microsoft Excel and then enter the POI location details (including lngitude, latitude, name, and description) in separate cells. -
Page 52: How Do I Delete A Custom Poi File/Category From My Mio
6. Click Add to device to add the POI to your Mio. Note: Each file corresponds to a POI category; for example, Hotels.csv will be listed on your Mio as the Hotels category. How do I delete a Custom POI file/category from my Mio? 1. -
Page 53: Photo Album
NavPix™ library on your Mio and the NavPix™ library on your computer. Open MioMore Desktop, and then click Photo Album. Note: Depending on your Mio model, certain Photo Album features may not be available. ... -
Page 54: What Else Can I Do With Pictures And Albums On My Computer
Transfer to your Mio. Click to transfer the selected NavPix™ to your Mio. ƒ If you are viewing NavPix™ in the Mio library this will display as Transfer to your computer. Click to transfer the selected photo(s) to the NavPix™... -
Page 55: Photo Album Preferences
NavPix™, right-click on the desired NavPix™ and select Search for NavPix near this. Photo Album preferences Open MioMore Desktop, and then click MY MIO > Options > Photo Album. Complete the following: If you want to Then…... -
Page 56: Image Search
Photo Album. You can then upload the photo to the Flickr website, transfer photos to your Mio, export pictures to Google Earth or search for other NavPix™ near the longitude and latitude of your NavPix™. -
Page 57: Unlock Features
Unlock Features If you have purchased a map unlock code or subscriptions for your Mio, you have to enter the activation key using the Unlock Features application. Open MioMore Desktop, and then click Unlock Features. Note: Make sure you have an active Internet connection for this feature. -
Page 58: My Places
Connect and Image Search to My Places. Open MioMore Desktop, and then click MY PLACES. Note: Make sure you have an active Internet connection for this feature. Note: You can install a maximum of 99 locations on your Mio via My Places. -
Page 59: How Do I Sort My Place Locations
Locate the file you want to import and then click Open. Note: The supported file format for importing includes: *.KML and *.KMZ. export a location from your Mio to the from the My Places panel, select a location and then computer, click Export. -
Page 60: Trip Planner
If you want to Then… … share the location, click An email will open ready to send to your friends. Your friend will receive the email with links to either save the image or to save the location in My Places in MioMore Desktop. -
Page 61: How Do I Pre-Plan A Route By Search
3. Click Plan Route to calculate your route. The route will be displayed on the map. 4. Click Save this route. The route is saved to the Pre-planned Routes section and your Mio simultaneously. How do I pre-plan a route using the map? 1. -
Page 62: How Do I Edit A Route
Note: Voice files take up space on your Mio’s internal memory. If you do not use a voice file, you can remove it to free up space. You can later reinstall it to your Mio if required. The provided DVD of your Mio is needed while installing the voice file. -
Page 63: How Do I Backup And Restore My Mio
Mio or export data to a report (.csv). Note: To use the Mileage Reporter function of MioMore Desktop, the Mileage recorder option on your Mio must be enabled. For more information, refer to the Route options section in “Customising the system settings.”... -
Page 64: How Do I Recover Maps And Voice Files For My Mio
How do I recover maps and voice files for my Mio? The Smart Recovery application allows you to recover all data to fix your Mio if a problem occurs during operation, including software, maps, voice files, and subscriptions. 1. Make sure you have an active Internet connection and the Installer DVD is inserted into your computer DVD drive. -
Page 65: How Do I Configure Miomore Desktop
When you select this option, every time you open MioMore Desktop, the available service packs and bug fixes will be downloaded from the Mio server and applied to your Mio. change the units of measurement that click General, and then:... -
Page 66: Mivue Manager
MiVue Manager MiVue Manager is a tool for you to view the videos recorded on a MiVue recorder. IMPORTANT! Your computer needs MOV and AVI codecs to play the recording files. Search online to install the required codecs. Note: Not all features are available for every model. Installing MiVue Manager 1. - Page 67 Note: The Map screen may not display when the computer is not connected to the Internet or when your Mivue model does not support the GPS function. Note: G sensor chart displays data in 3-axis waveform about the car’s shift forward/backward (X), to the right/left (Y) and upward/downward (Z).
-
Page 68: Settings Menu
ƒ Click to preview and print the current video image. ƒ Click to back up the selected files to the specified location on your computer. ƒ Click to capture and save the current video image to the specified location on your computer. -
Page 69: Reference
LCD panels may be used to help protect the screen from minor scratches. ƒ Never clean your Mio when it is turned on. Use a soft, lint-free cloth to wipe the screen and the exterior of your Mio. - Page 70 ƒ Do not use paper towels to clean the screen. ƒ Never attempt to disassemble, repair or make any modifications to your Mio. Disassembly, modification or any attempt at repair could cause damage to your Mio and even bodily injury or property damage and will void any warranty.
- Page 71 For more information Online support For 24/7 help and support with Mio products, visit our Technical Support website at: www. mio.com Mio Advantage If you have a faulty product or you would like to speak to a member of our Technical Support team, register your Mio on Mio Advantage to obtain the Technical Support phone numbers for your region.
- Page 72 It is your responsibility to drive within the posted speed limit at all times and to drive in a careful manner. Mio accepts NO liability whatsoever for you receiving any speeding fines or points on your license through using this device.
Need help?
Do you have a question about the Combo 5207 LM Series and is the answer not in the manual?
Questions and answers