Table of Contents
Advertisement
Quick Links
Advertisement
Table of Contents

Related Manuals for Horizon Yacht Charters FP Lucia 40 2020


Summary of Contents for Horizon Yacht Charters FP Lucia 40 2020
- Page 1 Information & operations manual for FP Lucia 40 2020 ‘Nauti Dog’...
- Page 2 Welcome Welcome to Horizon Yacht Charters and your Fountaine Pajot Lucia 40 “Nauti Dog”. We hope you had a pleasant journey and are looking forward to a fantastic holiday and some of the finest sailing in the world here in the British Virgin Islands.
-
Page 3: Table Of Contents
Contents Yacht specifications 12-volt panel and 110-volt breakers Inverter / Charger Engine start procedures Engine checks Generator Air conditioning Instruments VHF procedures 10. Stereo 11. Batteries 12. Anchoring, using the windlass and Electric winch 13. Picking up a mooring buoy 14. -
Page 4: Yacht Specifications
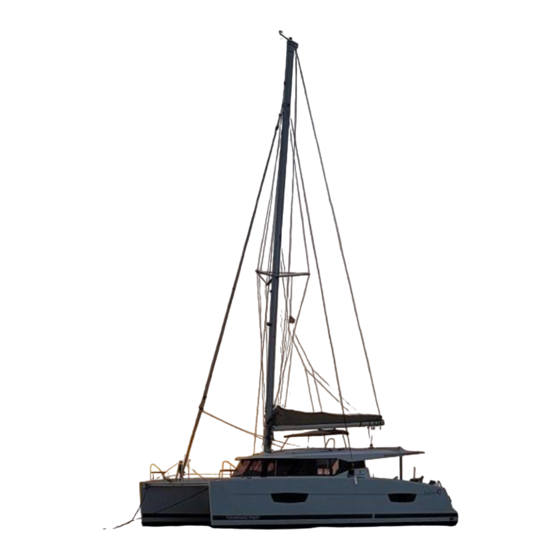
1. Yacht specifications Length 38’ 6” Beam 21’ 9” Draft 3’ 11” Fuel 80 gallons Water 140 gallons Engine 2 x 30 hp Volvo Penta D1-30F Generator Onan 7.5 KW MDKBJ Location of: Fresh water refill (foredeck) Diesel refill (port aft cockpit) Manual bilge pump (stbd aft cockpit) Propane tank (foredeck locker) Windlass breaker (stbd eng compartment) - Page 5 2. 12-volt panel The following list corresponds with the photo below and tells you what each switch does from top to bottom, left column first. Navigation lights Bilge pump – port hull (leave in auto) Steaming lights Bilge pump – stbd hull (leave in auto) Masthead light Bilge pump –...
- Page 6 110v Breakers The 110v breakers are in the port engine compartment The 110-volt outlets will operate whilst you are plugged in to shore power or running the generator. If the outlets do not work, then ensure that the 110v breakers are in the ‘On’...
-
Page 7: Inverter / Charger
3. Inverter / Charger The combined battery charger and inverter are in the stbd engine room. Warning: Leaving the Inverter turned on will severely deplete the house batteries. For that reason, it is better to run the engines at the same time. If you have the Generator running, you do not need to use the Inverter. -
Page 8: Engine Start Procedures
4. Engine start procedure. • Make sure the engine is in neutral. • Press the ON/OFF switch to turn the ignition panel on. • Press the start button until the engine is running. • When the engine is running, check you have water coming out of the exhaust. •... -
Page 9: Engine Checks
5. Daily Engine Checks • Check the oil level using the yellow dip stick located to the right-hand side of the engine. The level should be at least halfway between the empty and full marks. To add oil, open the oil filler cap on the top of the engine. •... -
Page 10: Generator
6. Generator Do not run the generator when underway. Note: There is no Generator / Shore power selector switch. The process is fully automated. Nauti Dog is fitted with its own generator which will run the 110v outlets, the air conditioning and will also charge the batteries in place of the engine. - Page 11 Stopping the generator • Allow the Generator to cool down for 5 mins under no load before shutting it down. • Press and hold the ‘Stop’ button. The generator will shut down. Generator control panel in salon Generator raw water strainer located in port engine room...
-
Page 12: Air Conditioning
6. Air conditioning It is critical that the load is applied to the generator slowly. Air conditioning units must be turned on a few minutes apart to avoid overloading the generator. The air conditioning units will operate when the vessel is plugged in to shore power or when the generator is running. - Page 13 Control operation: The four mode icons indicate the different modes of control: Cool, Moisture, Heat and Aux Heat. Press the Mode icon to select a mode: • Display icons illuminate to indicate the selected mode. • The display locks into the last mode selected after five seconds of activity, they display the room temperature.
- Page 14 Aux Heat: The electric heating system is in operation. If the ambient temperature rises above the set point, the system will not automatically switch to COOL mode. Automatic modes: Switches to cooling or heating as required to satisfy the temperature set-point. When Automatic mode is selected the system provides both heating and cooling, as required.
- Page 15 Bleeding AC unit: Bleeding the unit means letting the air out of the system until there is a steady flow of water to cool unit. On Altair the unit is bled from the AC pump strainer. First turn the unit on to restart the Air conditioning pump. Give the cap on the strainer a few turns counterclockwise until you start hearing air and water coming out the top (do not take the strainer all the way off).
-
Page 16: Instruments
8. Instruments Located at the helm position are 2 Garmin GMI 20 multi units, a Garmin GHC 20 Autopilot, a Garmin Gpsmap 8410 chartplotter and a Garmin GHS 315i VHF handset. located at the nav station is a Garmin GPSmap 8410 Touchscreen Chartplotter and a second Garmin GHS 315i VHF handset. - Page 17 Garmin GMI 20 multi units Depth is read from under the keel Power (Brightness) Double push the Power Return button if display is in dark mode Toggle page Toggle page Menu down Wind Speed and Direction Apparent wind direction True wind angle True wind direction Apparent wind speed True wind speed...
- Page 18 Auto Pilot Actual heading (in standby Heading hold (Auto mode) Pilot is engaged) Intended heading (with maintains your current autopilot engaged) heading without steering the helm. Rudder position indicator Power (Brightness) Stand By (Disengages autopilot) Engage Autopilot Adjust heading (without disengaging autopilot) Chart Plotter To open charts select charts and then Nav.
- Page 19 Auto Guidance will plot a course around land. Please take note that Auto Guidance may plot a course through one of our many No-Go areas. We recommend reviewing and memorizing all the Horizon Yacht Charters No go areas when using the chart plotter. My Vessel (Current Location on Chart Options chart.
- Page 20 Be careful engaging Auto Pilot when doing a Go-To or Auto Guidance. • To stop Go-To hit options. • Navigation options. • Stop Navigation. Auto Guidance may plot a course through many of the Horizon Yacht Charters No-Go areas. Please review our No-Go areas.
- Page 21 9. Fusion Entertainment MS-RA70N Marine Entertainment System with Bluetooth Volume/Select Menu Source Digital display Power Skip Fwd Play/Pause Connecting your device via Bluetooth: Hit the source button and select BT (Bluetooth). The screen should display the select device option. Hit the menu button and select discoverable.
-
Page 22: Vhf Procedures
10. VHF Procedure Distress Send Channel 16 and return to Channel last channel Volume and Squelch Clear: Use to clear alarms Using the VHF radio: Familiarize yourself with the method for switching channels, and with the squelch and volume controls on your radio. Most radios have a button to instantly select Channel 16 –... - Page 23 Channels to use: Hailing and Distress. Contact Horizon Yacht Charters (when in range). Yacht Charter Companies working channel – assigned for yacht breakdown servicing and emergency only. Marinas and Yacht Clubs – for lunch/dinner reservations etc. Ship to Ship – along with Channel 68 and 77 can be used for contact between boats.
- Page 24 How to issue an emergency message Select Channel 16 and press the transmit button on handset. Say slowly and clearly ‘MAYDAY, MAYDAY, MAYDAY, CALLING ALL STATIONS. This is…. (Vessel name) ….’ and repeat vessel name 3 times. Give position – vessel’s position in degrees of latitude and longitude or nautical miles from, and bearing to, a navigational landmark.
-
Page 25: Batteries
11. Batteries Keeping your house batteries charged is essential to ensuring your 12volt systems will work. Fridges, lights, fans, stereos, and Navigation instruments are some of the most important ones and of course using them draws power from your house batteries. If you conserve energy, you will not need to charge as often. - Page 26 Hitting power on the G.P.S menu with take you to this screen. Main/house battery voltage Not Receiving Power from Shore: 1. Check your battery charger breaker is on. 2. Check the cable is plugged in all the way, you should be able to twist the cable clockwise on both ends.
- Page 27 Electric winch breakers are located to the right of the battery switches and windlass breaker.
-
Page 28: Anchoring, Using The Windlass And Electric Winch
12. Anchoring, using the windlass and Electric winches Chain: 210ft Marked: Every 30ft Minimum scope: 5:1 Set in reverse: 1500 Rpms Always use bridle Setting your anchor: Preparation: • Establish a nonverbal communication system between helmsperson and windlass operator, as with the noise of the engine and wind, verbal communication proves difficult. - Page 29 Action: • Always have your engine revs increased to @ 1400 rpms before windlass operator touches the windlass remote. The windlass needs optimum energy to operate correctly. • Nauti Dog has 210 ft of chain, and it is marked every 30 ft. •...
- Page 30 If you have any doubts or concerns, please call Horizon first. Before resetting the breaker, however, ensure that the windlass switch on the 12v panel is switched on and run the engines @1500 rpm for 15 min and try again. After resetting the breaker, if the windlass still refuses to operate, please call horizon.
- Page 31 Electric/Manual winches The main halyard on Nauti Dog is fitted with a halyard hook (top car), see (Pic 1). The looped line (Pic 2) needs to go onto the hook (Pic 3). As the halyard is tensioned the loop on the head of the sail will go to the hook (Pic 4). If it does not engage the hook, then simply grab the luff of the sail and tug down.
- Page 32 Pic 3. Looped line sitting on Halyard hook. Pic 4. Loop not engaging hook.
- Page 33 Electric Winches The right hand of the three winches at the helm can be operated manually or electrically. Extreme care should be taken if using the winch electrically as accidental damage or injury can easily occur. Winch button Electric winch Should the electric winch be overloaded a breaker in the stbd engine compartment will trip.
-
Page 34: Picking Up A Mooring Buoy
Picking up a mooring buoy • Ensure the dinghy painter is tied off short on the bow or amidships and is clear of the prop. • Approach the mooring buoy, keeping the bow into the wind or current, whichever prevails. •... -
Page 35: Bilge Pumps
14 . Bilge Pumps Your yacht is equipped with one manual and four electric bilge pumps. There is an electric pump in each hull and one in each engine compartment. The electric pumps are operated by float switches and are fully automatic (provided that the four switches on the 12v panel are left in the auto position). -
Page 36: Fresh Water Systems
15. Fresh water system Freshwater Seawater Nauti Dog is equipped with a single water tank with a total capacity of 140 gallons, therefore there are no change over valves. Before filling the tanks let the water run from the hose for a while before placing the end into the filler that is located on the foredeck. - Page 37 Gauges: There are no traditional analogue gauges on Nauti Dog. Digital water and fuel gauges can be accessed through either of the two Garmin chart plotters. Simply hit the home icon on the bottom of the screen and select vessel from the list of options. Select Fuel to show both fuel and water gauges.
- Page 38 Battery Gauges Battery Management Fuel and Water Gauges Fuel Gauge Water Gauge...
- Page 39 Main Battery Engine Start Battery Battery Management...
-
Page 40: Heads
16. Heads Nothing is to be put down the head unless it has been digested first. Select Fresh Water or Saltwater using the top switch • Before using it, ensure that there is enough water in the bowl. • If the bowl is empty, hold switch on number 1 or ADD WATER position •... - Page 41 Holding outlet valves: Please open all seacocks to holding tanks when more than one mile from shore and pump them through. Close holding tanks when less than a mile from land. Pump holding tanks through on your last day of charter, prior to returning to the marina. Starboard Holding tank seacock Closed...
-
Page 42: Showers
17. Showers Your yacht has a hot & cold, fresh-water shower in each head and at the deck shower on the port transom. If the engine has been running, the hot water can be very hot – be cautious! To use the showers, the fresh-water pump must be activated on the 12V panel. The head showers drain into a sump box which has an automatic float switch and pump, so the water will be pumped out automatically. -
Page 43: Refrigeration
18. Refrigeration Nauti Dog has two internal 12v refrigerators, a 12v freezer and a small 12v fridge in the cockpit for drinks. These systems are designed to run 24hrs a day if you wish. To ensure that it does not fail there are two things you should do. •... - Page 44 Cockpit drinks cooler Draining the fridge There are no drains for these units.
- Page 45 19. Propane and stove The propane tank is in the central bow locker. To use: • Press the ‘Gas Valve’ switch located on the 12V panel. • To light the stove, turn the relevant knob 90 degrees anti-clockwise, push the knob in and light the burner with the electric igniter button.
- Page 46 Gas safety All our yachts are fitted with propane detectors. The propane ‘sniffer’ has been placed in the bilge (propane is heavier than air and so will sink into the bilge). The detectors are sensitive to several types of gas and will trigger the alarm. The alarm can also be triggered if there is moisture in the bilge.
-
Page 47: Bbq
20. BBQ • When using the BBQ, tie your dinghy off at the side of the yacht, not off the stern. • Never use the BBQ while sailing. • Never use the BBQ on a dock. • Never change propane tanks when using the BBQ. •... -
Page 48: Fire Safety
21. Fire Safety Read instructions on all safety equipment before setting off. Prevention is the best answer to fire safety. • Always switch off the safety solenoid when stove is not in use. • Never leave the stove or oven burning unattended. •... - Page 49 Galley fire: Read instructions on a fire blanket before setting off. • Take the fire blanket out of its container. Ensure hands and limbs are protected from the fire by the blanket. • Carefully lay the blanket over the fire, laying the blanket away from you and keeping yourself protected at all times from the flames.
-
Page 50: Dinghy And Outboard
22. Dinghy & Outboard The driver of the dinghy must be over 18 and must always be wearing the kill cord. Never operate the dinghy under the influence of alcohol or drugs. • Always tow your dinghy at full length while sailing and with the engine leg up as it gives you an extra half knot. - Page 51 Outboard start procedure: 1. Place Kill cord under kill switch (Dinghy driver must always wear the kill cord). 2. Open vent on fuel tank cap (this vent can stay open; it allows air out but will not allow water to go in). The fuel tank is in the dinghy bow locker. The fuel in the tank expands in this climate and if the vent is left closed it can damage the tank and cause a fuel leak.
-
Page 52: Watermaker
23. Watermaker (Please do not run watermaker in Anegada due to water quality) Nauti Dog is fitted with an Aqua-Base Watermaker (65 liters per hour / 17 gallon per hour). Watermaker pressure gauges have already been preset (please do not touch pressure gauges unless asked to do so by a technician. - Page 53 Watermaker in Stbd Engine Room High pressure gauge must be between 40 and 65 bar Low pressure gauge must be between 5 and 10 bar...
Need help?
Do you have a question about the FP Lucia 40 2020 and is the answer not in the manual?
Questions and answers