Advertisement
Available languages
Available languages
Table of Contents
Manuel d'installation V1
Support gamme 033-
VERSION
A VISSER
PAYSAGE
PORTRAIT
PORTRAIT
COULEUR
VESA MIN VESA MAX ORIENTATION
COULEUR
Noir
200x200
600x400
Noir
200x200
400x400
Noir
200x200
400x600
Version sur pied
Version à visser
TAILLE ECRAN POIDS MAX
ECRAN
Paysage
32" - 65"
50kg - 110lbs
Portrait
32" - 65"
50kg - 110lbs
Portrait
32" - 65"
50kg - 110lbs
Kg/Lbs
Advertisement
Table of Contents

Subscribe to Our Youtube Channel
Related Manuals for Kimex 033 Series


Summary of Contents for Kimex 033 Series
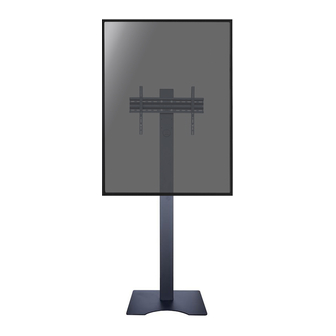
- Page 1 Manuel d'installation V1 Support gamme 033- Version sur pied COULEUR Version à visser VESA MIN VESA MAX ORIENTATION VERSION COULEUR TAILLE ECRAN POIDS MAX A VISSER ECRAN Kg/Lbs Noir Paysage 200x200 600x400 32" - 65" 50kg - 110lbs PAYSAGE Noir 200x200 400x400 Portrait...
- Page 2 KIMEX, de combinaisons non voulues de produits KIMEX. 1. Avant l'utilisation, vérifiez que tous les boulons et écrous sont bien serrés.
- Page 3 Assemblage Fixez le pied (N) ou la version boulonnée (M) au poteau principal (L) à l'aide de 4 vis M8x30 (B). Pour fixer la version boulonnée au sol, consultez un technicien expert. Les vis de fixation au sol ne sont pas fournies. Fixez le SUPPORT VESA POUR ÉCRAN (O) au poteau principal à...
- Page 4 Assemblage Insérez les 2 clips (E) dans les barres de support de l'écran (P) comme indiqué sur l'image. Fixez les 2 BARRES (P) à votre écran à l'aide d'un des jeux de vis suivants : (G), (H) ou (I). Accrochez le moniteur au support VESA (O) tout en appuyant légèrement pour engager les clips. (E).
- Page 5 INSTALLATION INSTRUCTIONS STAND for range 033- FREESTANDING VERSION COULEUR BOLT DOWN VERSION VESA MIN VESA MAX ORIENTATION VERSION COULEUR TAILLE ECRAN POIDS MAX A VISSER ECRAN Kg/Lbs Noir Paysage 200x200 600x400 32" - 65" 50kg - 110lbs PAYSAGE Noir 200x200 400x400 Portrait 32"...
- Page 6 PARTS GB - WARNING During installation, the installation guide and the instructions for use which are supplied with the screen itself must also be consulted. OMB is never responsible for direct, indirect or consequential damages which arise due to incorrect and/or inexpert mounting, mounting on constructions which are not strong enough, modifications, use other than prescribed, overloading, not working in accordance with the instructions...
- Page 7 ASSEMBLY PROCESS Fix the FREESTANDING (N) or BOLT DOWN BASE (M) to the main pole (L) using 4 screws M8x30 (B). To fix the BOLT DOWN version to the floor, consult an expert technician. Floor fixing screws are not supplied. Fix the SCREEN VESA SUPPORT (O) to the main pole using 4x washers (C) and 4x screws (D)
- Page 8 ASSEMBLY PROCESS Insert the 2x SNAP HOOK (E) in the MONITOR HOLDER BARS (P) as indicated in the picture. Fix the 2x MONITOR HOLDER BARS (P) to your screen using one of following screw set: (G), (H) or (I) Hook the monitor to VESA SUPPORT (O) while pressing lightly to engage the SNAP HOOK (E)
Need help?
Do you have a question about the 033 Series and is the answer not in the manual?
Questions and answers