
Subscribe to Our Youtube Channel
Related Manuals for Piscine Solide V35038


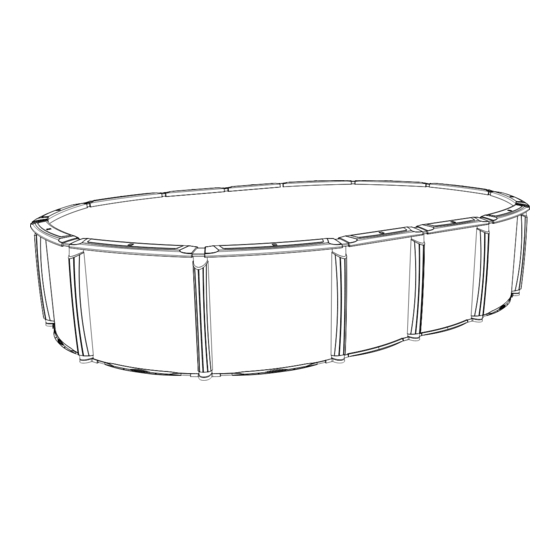
Summary of Contents for Piscine Solide V35038
- Page 1 V35038 INSTALLATION MANUAL BRACELESS OVAL POOLS REV EL ATIO N I MPU L SE PA NACHE TRADIT ION G:\RnD\01-Projets\Révélation\Revelation 15x22light 2D.3dm 12.14...
- Page 3 Above Ground Pool SAfety PleASe reAd before inStAllAtion Failure to heed these warnings can result in permanent injury, warning paralysis From a broken neck, electrocution or drowning. this pool is not designed For diving or jumping! dangerous injury can result, shallow water! your pool contains a large quantity of water, and is deep enough to present inherent dangers to life and health unless the follow- ing safety rules are strictly observed.
- Page 5 GENERAL INSTRUCTIONS - BRACELESS OVAL POOLS Section GROUND PREPARATION PARTS LISTING - EXPLODED VIEW Important Note: Make sure you have all the parts necessary before you start installation. Important Note: Do not throw away the extruded polystyrene sections. PartsListing 1-1 No Diving or Jumping.
- Page 6 GENERAL INSTRUCTIONS - BRACELESS OVAL POOLS Section GROUND PREPARATION PARTS LISTING - CONTENTS 1-2 PartsListing No Diving or Jumping. Observe all Safety Rules...
- Page 7 GENERAL INSTRUCTIONS - BRACELESS OVAL POOLS Section GROUND PREPARATION PARTS LISTING - EXPLODED VIEW Important Note: Make sure you have all the parts necessary before you start installation. Important Note: Do not throw away the extruded polystyrene sections. PartsListing 1-3 No Diving or Jumping.
- Page 8 GENERAL INSTRUCTIONS - BRACELESS OVAL POOLS Section GROUND PREPARATION PARTS LISTING - CONTENTS 1-4 PartsListing No Diving or Jumping. Observe all Safety Rules...
- Page 9 GENERAL INSTRUCTIONS - BRACELESS OVAL POOLS Section GROUND PREPARATION PARTS LISTING - EXPLODED VIEW Important Note: Make sure you have all the parts necessary before you start installation. Important Note: Do not throw away the extruded polystyrene sections. PartsListing 1-5 No Diving or Jumping.
- Page 10 GENERAL INSTRUCTIONS - BRACELESS OVAL POOLS Section GROUND PREPARATION PARTS LISTING - CONTENTS 1-6 PartsListing No Diving or Jumping. Observe all Safety Rules...
- Page 11 GENERAL INSTRUCTIONS - BRACELESS OVAL POOLS Section GROUND PREPARATION PARTS LISTING - EXPLODED VIEW Important Note: Make sure you have all the parts necessary before you start installation. Important Note: Do not throw away the extruded polystyrene sections. PartsListing 1-7 No Diving or Jumping.
- Page 12 GENERAL INSTRUCTIONS - BRACELESS OVAL POOLS Section GROUND PREPARATION PARTS LISTING - CONTENTS 1-8 PartsListing No Diving or Jumping. Observe all Safety Rules...
- Page 13 GENERAL INSTRUCTIONS - BRACELESS OVAL POOLS Section GROUND PREPARATION PARTS LISTING - EXPLODED VIEW Important Note: Make sure you have all the parts necessary before you start installation. Important Note: Do not throw away the extruded polystyrene sections. PartsListing 1-9 No Diving or Jumping.
- Page 14 GENERAL INSTRUCTIONS - BRACELESS OVAL POOLS Section GROUND PREPARATION PARTS LISTING - CONTENTS 1-10 PartsListing No Diving or Jumping. Observe all Safety Rules...
- Page 15 GENERAL INSTRUCTIONS - BRACELESS OVAL POOLS Section GROUND PREPARATION PARTS LISTING - EXPLODED VIEW Important Note: Make sure you have all the parts necessary before you start installation. Important Note: Do not throw away the extruded polystyrene sections. PartsListing 1-11 No Diving or Jumping.
- Page 16 GENERAL INSTRUCTIONS - BRACELESS OVAL POOLS Section GROUND PREPARATION PARTS LISTING - CONTENTS 1-12 PartsListing No Diving or Jumping. Observe all Safety Rules...
- Page 17 GENERAL INSTRUCTIONS - BRACELESS OVAL POOLS Section GROUND PREPARATION PARTS LISTING - EXPLODED VIEW Important Note: Make sure you have all the parts necessary before you start installation. Important Note: Do not throw away the extruded polystyrene sections. PartsListing 1-13 No Diving or Jumping.
- Page 18 GENERAL INSTRUCTIONS - BRACELESS OVAL POOLS Section GROUND PREPARATION PARTS LISTING - CONTENTS 1-14 PartsListing No Diving or Jumping. Observe all Safety Rules...
- Page 19 GENERAL INSTRUCTIONS - BRACELESS OVAL POOLS Section GROUND PREPARATION PARTS LISTING - EXPLODED VIEW Important Note: Make sure you have all the parts necessary before you start installation. Important Note: Do not throw away the extruded polystyrene sections. PartsListing 1-15 No Diving or Jumping.
- Page 20 GENERAL INSTRUCTIONS - BRACELESS OVAL POOLS Section GROUND PREPARATION PARTS LISTING - CONTENTS 1-16 PartsListing No Diving or Jumping. Observe all Safety Rules...
- Page 21 GENERAL INSTRUCTIONS - BRACELESS OVAL POOLS Section GROUND PREPARATION Read all instructions completely before you begin. A. DETERMINE THE LOCATION OF YOUR POOL 1. The Terrain Pay special attention to choosing the right location for your pool: • Choose a large area, as flat and level as possible and well drained.
- Page 22 GENERAL INSTRUCTIONS - BRACELESS OVAL POOLS Section GROUND PREPARATION A. CONT. DETERMINE THE LOCATION OF YOUR POOL 2. Things to Avoid Do not locate your pool near or on any of the following (Images 3a to 3c) • Overhanging tree branches. Overhanging branches •...
- Page 23 GENERAL INSTRUCTIONS - BRACELESS OVAL POOLS Section GROUND PREPARATION A. CONT. DETERMINE THE LOCATION OF YOUR POOL 4. Tools Needed List of required materials • Straight wood plank • Material that provides a permanent base (ex. Crushed stone) • Fine sand (void of debris) •...
- Page 24 GENERAL INSTRUCTIONS - BRACELESS OVAL POOLS Section GROUND PREPARATION B. PREPARE THE FOUNDATION OF YOUR POOL 1. Mark out the Area The next following steps will show you how to mark out the area you need for the oval pool. This marked area will be larger than the pool size itself, but this space is needed.
- Page 25 GENERAL INSTRUCTIONS - BRACELESS OVAL POOLS Section GROUND PREPARATION B. CONT. PREPARE THE FOUNDATION OF YOUR POOL Mark areas along both straight sides of your oval. Use pegs and string as a guide for the can of spray paint to mark straight lines. (Image 5) You now have the space marked out that is needed for your oval pool.
- Page 26 GENERAL INSTRUCTIONS - BRACELESS OVAL POOLS Section GROUND PREPARATION B. CONT. PREPARE THE FOUNDATION OF YOUR POOL Example on how to mark out pool area for an 18 x 33 Please be sure to use your pool’s footprint for your pool size on the last pages of this Section1.
- Page 27 GENERAL INSTRUCTIONS - BRACELESS OVAL POOLS Section GROUND PREPARATION B. CONT. PREPARE THE FOUNDATION OF YOUR POOL 3. Make the area flat and level Remove all the high spots with a shovel, hoe or rake. To make sure your pool is stable, compact the ground well before adding the sand.
- Page 28 GENERAL INSTRUCTIONS - BRACELESS OVAL POOLS Section GROUND PREPARATION C. PRE-ASSEMBLY OF THE T JOINTS (BUTTRESS) 1. Assembling the buttress joints Insert the horizontal sleeves in the buttress joints. Outside of Pool On each side insert two or three (depending Inside of Pool on the side) 6.35 cm (2.5”) mechanical screws (B14x20x212) with nuts (N14x20).
- Page 29 GENERAL INSTRUCTIONS - BRACELESS OVAL POOLS Section GROUND PREPARATION C. CONT. PRE-ASSEMBLY OF THE T JOINTS (BUTTRESS) Insert the three 6.35 cm (2.5”) screws (B14x20x212) Outside of Pool with nuts (N14x20) in the vertical sleeve. (Image 14) Inside of Pool IMPORTANT: If your pool has steel bottom plates, Do not permanently fasten the vertical sleeve with screws.
- Page 30 GENERAL INSTRUCTIONS - BRACELESS OVAL POOLS Section Section GROUND PREPARATION D. GROUND PREPARATION FOR THE BUTTRESS 1. Measuring for the buttress trenches In order to measure where trenches need to be dug for the placement of the buttress, you must first draw a perpendicular line in order to create a perfect 90 degree angle.
- Page 31 GENERAL INSTRUCTIONS - BRACELESS OVAL POOLS Section GROUND PREPARATION D. CONT. GROUND PREPARATION FOR THE BUTTRESS 2. Digging the buttress trenches Odd number of trenches; If your oval pool contains an even number of buttresses, please proceed with next step. If your oval pool contains an odd number, position the buttress temporarily on the straight center line from the middle.
- Page 32 GENERAL INSTRUCTIONS - BRACELESS OVAL POOLS Section GROUND PREPARATION D. CONT. GROUND PREPARATION FOR THE BUTTRESS 3. Install Patio Stones (Blocks) Insert and level two concrete slabs or their equivalent, which should measure about 20 cm x 40 cm x 10cm (8” x 16” x 2”), allowing one of the slabs to extend past the inside end of the T.
- Page 33 GENERAL INSTRUCTIONS - BRACELESS OVAL POOLS Section GROUND PREPARATION D. CONT. GROUND PREPARATION FOR THE BUTTRESS 4. Finish trenches & patio stone installation Continue to finish one by one the remaining trenches with patio blocks for the buttress installation. It is important to finish one side of the oval only.
- Page 34 GENERAL INSTRUCTIONS - BRACELESS OVAL POOLS Section GROUND PREPARATION E. ASSEMBLING THE BUTTRESS STRAPS AND PRESSURE PLATES 1. Assemble the buttress straps and brace Place a steel strap and a pressure plate on the buttress base, 1.14 m (45”) from centre to centre, so the pressure plate will fit perfectly.
- Page 35 GENERAL INSTRUCTIONS - BRACELESS OVAL POOLS Section GROUND PREPARATION E. ASSEMBLING THE BUTTRESS STRAPS AND PRESSURE PLATES Once both sides of the buttresses have been installed perfectly, check that all is measured again perfectly (diagonally and square). (Image 28) Add the remaining straps that join across to other straps.
- Page 37 GENERAL INSTRUCTIONS - BRACELESS OVAL POOLS Section GROUND PREPARATION THE FOLLOWING SECTION CONTAINS YOUR POOL’S FOOTPRINT Footprint 1-1 No Diving or Jumping. Observe all Safety Rules...
- Page 38 GENERAL INSTRUCTIONS - BRACELESS OVAL POOLS Section GROUND PREPARATION OVAL FOOTPRINT - 12 x 19 12'-1 5/16" 2'-2 1/8" 3 places 4'-11 3/4" 6 places 15'-5 15/16" 1-2 Footprint No Diving or Jumping. Observe all Safety Rules...
- Page 39 GENERAL INSTRUCTIONS - BRACELESS OVAL POOLS Section GROUND PREPARATION OVAL FOOTPRINT - 12 x 23 12'-1 5/16" 2'-2 1/8" 4 places 4'-11 3/4" 8 places 15'-5 15/16" Footprint 1-3 No Diving or Jumping. Observe all Safety Rules...
- Page 40 GENERAL INSTRUCTIONS - BRACELESS OVAL POOLS Section GROUND PREPARATION OVAL FOOTPRINT - 15 x 26 14'-10 15/16" 4'-11 3/4" 9 places 18'-3 9/16" 1-4 Footprint No Diving or Jumping. Observe all Safety Rules...
- Page 41 GENERAL INSTRUCTIONS - BRACELESS OVAL POOLS Section GROUND PREPARATION OVAL FOOTPRINT - 15 X 30 14'-10 15/16" 4'-11 3/4" 16 places 18'-3 9/16" Footprint 1-5 No Diving or Jumping. Observe all Safety Rules...
- Page 42 GENERAL INSTRUCTIONS - BRACELESS OVAL POOLS Section GROUND PREPARATION OVAL FOOTPRINT - 18 x 33 17'-11 3/8" 2'-2 1/8" 10 places 4'-11 3/4" 15 places 21'-4" 1-6 Footprint No Diving or Jumping. Observe all Safety Rules...
- Page 43 GENERAL INSTRUCTIONS - BRACELESS OVAL POOLS Section ASSEMBLING THE POOL BASE A. INSTALLATION OF BOTTOM PLATES AND BOTTOM RAILS 1. Bottom plates - STRAIGHT SECTION To install the inferior bottom plate in the straight section, you need to remove the central plate of the bottom plate with a hammer.
- Page 44 IMPORTANT NOTE There are three types of bottom rails; 1- Straight Section 2- Round Section 3- Transition (End of the Straight Section). To differentiate which bottom rail is which; • The Straight Section will measure the shortest in length • The Transition Section will measure longer than the straight section, but shorter than the round section.
- Page 45 GENERAL INSTRUCTIONS - BRACELESS OVAL POOLS Section ASSEMBLING THE POOL BASE A. CONT. INSTALLATION OF BOTTOM PLATES AND BOTTOM RAILS 2. Bottom plates - TRANSITION SECTION Continue the installation of the bottom plates of the transition sections. Insert the end of each bottom rail into the bottom plate.
- Page 46 GENERAL INSTRUCTIONS - BRACELESS OVAL POOLS Section ASSEMBLING THE POOL BASE A. CONT. INSTALLATION OF BOTTOM PLATES AND BOTTOM RAILS 4. Patio Stones (Optional)-ROUND SECTION Concrete patio stones may be placed at the base of each upright of your pool. (Image 8) Each bottom plate will show the location for a patio stone.
- Page 47 GENERAL INSTRUCTIONS - BRACELESS OVAL POOLS Section ASSEMBLING THE POOL BASE A. CONT. INSTALLATION OF OF BOTTOM PLATES AND BOTTOM RAILS 5. Measure the perimeter of your pool Measure the perimeter of your pool and hammer nails into the ground to keep the bottom rails into place.
- Page 48 GENERAL INSTRUCTIONS - BRACELESS OVAL POOLS Section ASSEMBLING THE POOL BASE A. CONT. INSTALLATION OF OF BOTTOM PLATES AND BOTTOM RAILS Spread the sand inside the pool area. Make sure not to spread the sand onto or beyond the bottom rails.
- Page 49 GENERAL INSTRUCTIONS - YARDMORE OVAL POOLS Section ASSEMBLING THE POOL WALL A. SETTING UP THE POOL WALL Do not attempt to install the pool wall in the wind, wait for a calm day. It takes at least 3 people to install the pool wall. 1.
- Page 50 GENERAL INSTRUCTIONS - YARDMORE OVAL POOLS Section ASSEMBLING THE POOL WALL A. CONT. SETTING UP THE POOL WALL 3. Join the ends of the pool wall Line up the holes in the two ends of the pool wall. (Image 4) Now that you have installed the wall you can be faced with three scenarios.
- Page 51 GENERAL INSTRUCTIONS - YARDMORE OVAL POOLS Section ASSEMBLING THE POOL WALL A. CONT. SETTING UP THE POOL WALL To fasten the wall joint, overlap the two steel bars, one on the inside and the other on the outside. Tighten the mechanical screws on the inside and the nuts on the outside.
- Page 52 GENERAL INSTRUCTIONS - YARDMORE OVAL POOLS Section ASSEMBLING THE POOL WALL B. ASSEMBLING THE COVE 1. Make the cove If you are using sand, bank the sand against the wall to form a cove of 3” to 6” (7.5cm to 15cm) high MUST be well and 8”...
- Page 53 GENERAL INSTRUCTIONS - YARDMORE OVAL POOLS Section ASSEMBLING THE POOL WALL B. CONT. ASSEMBLING THE COVE A vacuum cleaner can later be used to remove the air from between the liner and the wall. This technique enables you to remove folds in the liner. However the following precautions should be taken: Do not use an industrial vacuum cleaner which could be too powerful.
- Page 54 GENERAL INSTRUCTIONS - YARDMORE OVAL POOLS Section ASSEMBLING THE POOL WALL C. INSTALL THE POOL LINER 1. Set the liner in place Open the carton. Do not use anything sharp to open the carton. Unpack and unfold the liner and spread it out in the sun to warm it up.
- Page 55 GENERAL INSTRUCTIONS - YARDMORE OVAL POOLS Section ASSEMBLING THE POOL WALL C. CONT. INSTALL THE POOL LINER Please ensure to follow instructions that match the type of liner you may have. 2. Fasten the liner place 2-1. For OVERLAP ONLY (Please see step 2-2.
- Page 56 GENERAL INSTRUCTIONS - YARDMORE OVAL POOLS Section ASSEMBLING THE POOL WALL C. CONT. INSTALL THE POOL LINER After all the wrinkles in the liner are removed, trim any extra length of plastic coping so there is no overlap. (Image 18) Roll up any excess liner hanging below the plastic coping and tape it in place near the top of the pool wall.
- Page 57 GENERAL INSTRUCTIONS - YARDMORE OVAL POOLS Section ASSEMBLING THE POOL WALL C. CONT. INSTALL THE POOL LINER 2-2. For HUNG/J or V-BEAD LINER ONLY (Please see step 2-1. or 2-3. for other liner) With a V-Bead liner you will not use the plastic coping strips that are packed in the parts carton of your pool.
- Page 58 GENERAL INSTRUCTIONS - YARDMORE OVAL POOLS Section ASSEMBLING THE POOL WALL C. CONT. INSTALL THE POOL LINER 2-3. For BEADLOCK/SNAPBEAD LINER ONLY (Please see step 2-1. or 2-2. for other liner) With a snap bead liner you will not use the plastic coping strips that are packed in the parts carton of many pools.
- Page 59 GENERAL INSTRUCTIONS - BRACELESS OVAL POOLS Section ASSEMBLING THE POOL FRAME A. INSTALLATION OF THE UPRIGHTS - ROUND SECTION 1. Install the uprights - round section The wall joint is hidden behind the upright on most pools. This assures that the skimmer and skimmer return holes are not obstructed.
- Page 60 GENERAL INSTRUCTIONS - BRACELESS OVAL POOLS Section ASSEMBLING THE POOL FRAME B. INSTALLATION OF THE STABILIZERS AND TOP PLATES 1. Install stabilizers and top plates Install the stabilizer on the wall while ensuring to leave a gap between each end. You must insert the stabilizer inside the vertical tabs that are at the top of the upright.
- Page 61 GENERAL INSTRUCTIONS - BRACELESS OVAL POOLS Section ASSEMBLING THE POOL FRAME C. INSTALLATION OF TOP LEDGE AND LEDGE COVERS 1. Install top ledge and ledge covers (VHL12x114S) Place top ledges on the wall. Align the holes on the top ledges with those on the top plates. Make sure the space left between each top ledge is uniform all around and that the space in question can be covered by a ledge cover.
- Page 62 GENERAL INSTRUCTIONS - BRACELESS OVAL POOLS Section ASSEMBLING THE POOL FRAME C. CONT. INSTALLATION OF TOP LEDGE AND LEDGE COVERS You must now install the top ledge covers (one on the left side and one on the right side of each top ledge).
-
Page 63: Important Safety Information
GENERAL INSTRUCTIONS - BRACELESS OVAL POOLS Section ASSEMBLING THE POOL FRAME D. FILL YOUR POOL WITH WATER 1. Finish filling the pool Turn off the vacuum and carefully remove it from the pool. Fill the pool with water to 2” (5cm) below the lowest opening. -
Page 65: Pool Maintenance
POOL MAINTENANCE Section MAINTAINING YOUR POOL POOL MAINTENANCE Keep your pool wall and frame clean. Always wash away any deposits of pool chemicals which land on the frame of your pool. Wash periodically with a mild soap solution (no abrasives). At least once a year use a clear non-yellowing household wax on all metal components. -
Page 66: Winterizing Your Pool
POOL MAINTENANCE Section WINTERIZING YOUR POOL WINTERIZING YOUR POOL Along with the cool nights of autumn comes the end of the swimming season. During the winter your pool is subject to more stress than in the summer, and any breakage that is caused by incorrect winter procedures is not subject to any warranty with this company. -
Page 67: Winterizing Instructions
POOL MAINTENANCE Section WINTERIZING YOUR POOL WINTERIZING INSTRUCTIONS For areas where water freezes make sure to follow these instructions before the water is frozen, otherwise do not touch the frozen water, this may damage the pool. Towards the end of the summer season or around mid-August, check for leaks by verifying if the pool’s water level is stable. - Page 68 POOL MAINTENANCE Section WINTERIZING YOUR POOL WINTERIZING INSTRUCTIONS CONTINUED To maintain water quality, use a winter kit which contains an algicide and chlorine especially designed for this purpose. When it’s time for spring cleaning, this will save you hours of work and reduce the cost of chemicals needed to restore your water quality.
- Page 69 POOL MAINTENANCE Section SPRINGTIME CLEANING OF YOUR POOL PREPARING YOUR POOL IN THE SPRING At the end of winter, allow the ice in the pool to thaw completely. When the temperature reaches approximately 10 °C (50 °F), you have to restart your filtration system, since algae and bacterial form more quickly as it gets warmer.
- Page 70 POOL MAINTENANCE Section SPRINGTIME CLEANING OF YOUR POOL PREPARING YOUR POOL IN THE SPRING CONTINUED When the pH and alkaline levels are ideal, apply a shock-treatment or chlorinate your water. Let it filter for 24 hours and again verify both the pH and free chlorine l evels. NOTE: Add chemical products to your pool after sunset, as sunlight rapidly destroys chlorine.
Need help?
Do you have a question about the V35038 and is the answer not in the manual?
Questions and answers