
Related Manuals for Omega OM-90 Series


Summary of Contents for Omega OM-90 Series
- Page 1 Shop online at omega.com e-mail: info@omega.com For latest product manuals: www.omegamanual.info OM-90 SERIES Portable Temperature and Humidity Data Loggers...
-
Page 2: Battery Installation
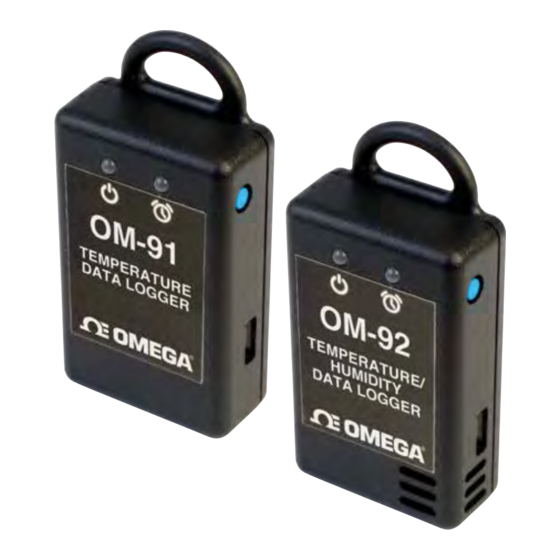
OM‐90 Series Data Loggers Quick Reference Guide (Models OM‐91 & OM‐92) Description The OM‐90 Series are portable, battery operated, temperature and humidity data loggers able to store 65,520 samples of both temperature and humidity along with a time stamp. The data logger runs off of a CR2450 coin cell battery that enables it to run for over 4 years. This Quick Reference Guide gets you started with the logger with the most basic functions to have you up and running with your logger in a matter of minutes. The OM‐90 Series today comes in two versions; OM‐91 is a temperature only version and OM‐92 is a temperature and humidity logger. This quick reference guide applies for both versions. Battery Installation The data logger runs from a standard coin cell battery. We recommend a CR2450 620mAH Coin cell battery. There are different manufacturers but a good one is Panasonic CR‐2450/G1AN. You can find it easily on the web from different places such as www.digikey.com and www2.mouser.com. The key thing is to choose a CR2450 battery with high capacity since this will translate into a longer logger battery life. First remove the data logger cover by unscrewing the two fastener screws (#1 Philips) at the rear of the logger. Revision 1.0.4 Page 2... -
Page 3: Connecting To A Data Logger
Then remove the circuit board from the box (use soft tool or fingernail to remove) Insert a new battery as shown being careful not to touch and exposed electronics in the process. Finally re‐attach the cover and tighten the fastener screws again (be careful not to over tighten). Connecting to a Data Logger To configure or retrieve data from a logger you will need a Windows PC running Windows XP, Windows Vista, Windows 7 or Windows 8. Connect the data logger to your PC using the provided USB cable. Any USB port on the PC can be used. Revision 1.0.4 Page 3... - Page 4 Configuring a Data Logger Installation of the Omega OM‐90 Series Data Logger Software is very simple. The data logger needs no special drivers since it is a USB HID device and such devices can make use of the standard drivers that come with Windows. In the Windows Start Menu launch the Omega PC Application. The front page of the GUI is an overview of the logger. Press the Configuration button to get to the next page. Revision 1.0.4 Page 4...
- Page 5 Connect the logger and you will see the connected indication changes to blue. Next fill out the configuration settings. For example:‐ C or logging start to "On Disconnection" logging interval to say 10 seconds temperature alarm enabled and thresholds set humidity alarms enabled and thresholds set Press the “Configure Button” so that the settings are updated in your logger. Please wait until the software has finished updating the logger. Disconnect the logger. You should see that logging will start automatically indicated by a 1 second green light. The green light will then flash every 6 seconds to indicate that the unit is logging. The red light will flash also in the case that the temperature or humidity goes outside of the allowed limits and triggers the alarms. If the logger becomes full then all lights will stop flashing. Revision 1.0.4 Page 5...
-
Page 6: Retrieving Data
Retrieving Data Connect your data logger. The logger red light will illuminate for 1 second indicating logging is stopping. Start the OM‐90 Series Data Logger Software and navigate to the Configuration page. Press "Read Logger Configuration/Data" to retrieve the configuration and data from the connected logger. Wait until all information is retrieved from the logger. The graph and spread sheet will be filled with the logged data. Zooming in and out of the graphs can be achieved by the following controls: • to Zoom In ‐ drag the left mouse button • to Zoom Out ‐ click the right mouse button • when zoomed in you can move around using the key‐board arrows or the mouse scroll wheel To write data and configuration to file, press the save icon. Revision 1.0.4 Page 6... - Page 7 More Advanced Topics This document has shown the most basic way to configure the data logger in order for you to get started very quickly. There are for example other logger start modes such as button press, start at a defined time and real time logging. For a more exhaustive description of all features of the logger then please consult the full OM‐90 Series User Guide included on the CD. The software is also available on the OM-90 web page for download. Revision 1.0.4 Page 7...
- Page 8 Fax: (203) 359-7700 e-mail: info@omega.com For Other Locations Visit omega.com/worldwide The information contained in this document is believed to be correct, but OMEGA accepts no liability for any errors it contains, and reserves the right to alter specifications without notice. WARRANTY/DISCLAIMER OMEGA ENGINEERING, INC.