Table of Contents
Advertisement
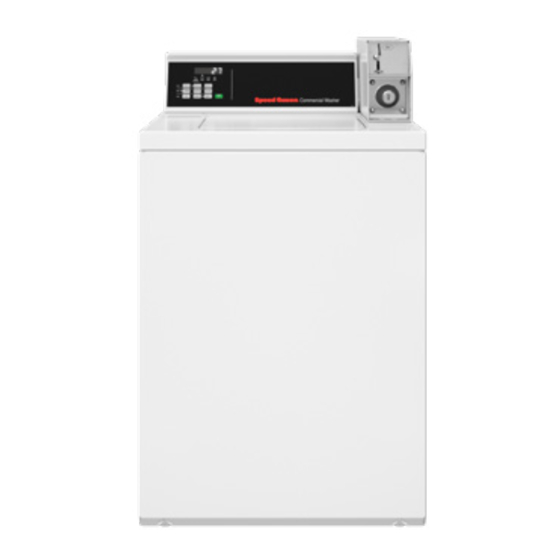
Topload Washers
Metered Commercial
TLW12C_SVG
Original Instructions
Keep These Instructions for Future Reference.
CAUTION: Read the instructions before using the machine.
(If this machine changes ownership, this manual must accompany machine.)
Part No. 205161ENR1
www.alliancelaundry.com
February 2023
Advertisement
Table of Contents

Related Manuals for Alliance Laundry Systems TV6000WN


Summary of Contents for Alliance Laundry Systems TV6000WN
- Page 1 Topload Washers Metered Commercial TLW12C_SVG Original Instructions Keep These Instructions for Future Reference. CAUTION: Read the instructions before using the machine. (If this machine changes ownership, this manual must accompany machine.) Part No. 205161ENR1 www.alliancelaundry.com February 2023...
- Page 3 Always contact the distributor, service agent, or the manufacturer about any problems or conditions you do not understand. Read all instructions before using unit. This product uses FreeRTOS V7.2.0 (www.freertos.org). © Copyright, Alliance Laundry Systems LLC - Part No. 205161ENR1 DO NOT COPY or TRANSMIT...
-
Page 4: Regulatory Statements
Users of this product are cautioned not to make modifications or firmware-limited to Channel 1 through 11. changes that are not approved by Alliance Laundry Systems, LLC. Doing so may void the compliance of this product with ap- CANADA - CAN ICES-3(B)/NMB-3(B) plicable laws and regulatory requirements and may result in the loss of the user’s authority to operate the equipment. - Page 5 The user must stop operating the device immediately should harmful interference is caused and shall not resume until © Copyright, Alliance Laundry Systems LLC - Part No. 205161ENR1 DO NOT COPY or TRANSMIT...
-
Page 6: Safety Information
This is a safety rule for all appliances. • Cleaning and user maintenance shall not be made by children without supervision. © Copyright, Alliance Laundry Systems LLC - Part No. 205161ENR1 DO NOT COPY or TRANSMIT... - Page 7 Common sense, caution and care must be exer- cised when installing, maintaining, or operating the washer. © Copyright, Alliance Laundry Systems LLC - Part No. 205161ENR1 DO NOT COPY or TRANSMIT...
-
Page 8: Table Of Contents
Select Wash Level..................21 © Copyright 2023, Alliance Laundry Systems LLC All rights reserved. No part of the contents of this book may be reproduced or transmitted in any form or by any means without the expressed written consent of the publisher. - Page 9 Laundry IQ (Select Models)............... 23 Reinstallation of Shipping Materials............... 23 Shipping Brace..................23 Shipping Plug................... 23 Motor Overload Protector................23 Troubleshooting..................25 Contact Information................27 Installer Checklist.................28 © Copyright, Alliance Laundry Systems LLC - Part No. 205161ENR1 DO NOT COPY or TRANSMIT...
-
Page 10: Dimensions
26 in. [660 mm] 0.44 in. [11 mm] 36 in. [914 mm] 41.25 in. [1048 mm] 28.75 in. [730 mm] 25.63 in. [651 mm] 30.5 in. [775 mm] © Copyright, Alliance Laundry Systems LLC - Part No. 205161ENR1 DO NOT COPY or TRANSMIT... -
Page 11: Installation
The proper order of steps must be followed to ensure correct in- stallation. Refer to the list below when installing your unit. 1. Remove the shipping brace and shipping plug. © Copyright, Alliance Laundry Systems LLC - Part No. 205161ENR1 DO NOT COPY or TRANSMIT... -
Page 12: Wipe Out Inside Of Wash Tub
[liters minute [liters per minute] per minute] per minute] 20 [138] 3.4 [12.9] 3.4 [12.9] 4.0 [15.1] 120 [827] 4.6 [17.4] 4.6 [17.4] 4.6 [17.4] © Copyright, Alliance Laundry Systems LLC - Part No. 205161ENR1 DO NOT COPY or TRANSMIT... -
Page 13: Water Supply Requirements
IMPORTANT: DO NOT cross thread or overtighten couplings. This will cause them to leak. 6. Turn water on and check for leaks. 7. If leaks are found, retighten the hose couplings. © Copyright, Alliance Laundry Systems LLC - Part No. 205161ENR1 DO NOT COPY or TRANSMIT... -
Page 14: Connect Drain Hose To Drain Receptacle
Refer to Figure 6 . NOTE: No. 562P3 Siphon Break Kit and No. 25863 Hose Coupling are not required for this type of installation. © Copyright, Alliance Laundry Systems LLC - Part No. 205161ENR1 DO NOT COPY or TRANSMIT... -
Page 15: Low Standpipe Installation
Improper installation or flexing of weak floor will cause exces- sive vibration. Do not slide washer across floor once the leveling legs have been extended, as legs and base could become damaged. © Copyright, Alliance Laundry Systems LLC - Part No. 205161ENR1 DO NOT COPY or TRANSMIT... -
Page 16: Plug In The Washer
8. 120 ± 12 V.A.C. make sure adequate electrical power is available to the washer. Figure 10 W824 When plugging in the washer: • DO NOT overload circuits. © Copyright, Alliance Laundry Systems LLC - Part No. 205161ENR1 DO NOT COPY or TRANSMIT... -
Page 17: Earth/Ground Instructions
Do not cut or Models) remove the earth/ground prong from this plug. 1. Connect machine to power source. W823 © Copyright, Alliance Laundry Systems LLC - Part No. 205161ENR1 DO NOT COPY or TRANSMIT... -
Page 18: Check Installation
W299 1. Open control panel. 2. Locate diagnostic harness on electronic control. 3. Plug connectors for “white/black” wire and “blue/red” wire together. © Copyright, Alliance Laundry Systems LLC - Part No. 205161ENR1 DO NOT COPY or TRANSMIT... - Page 19 3. 35527 No. 12 Screws 7. Remove two screws holding front panel to base of washer and install two No. 12 tamper-resistant screws, Part No. 35527. Figure 14 © Copyright, Alliance Laundry Systems LLC - Part No. 205161ENR1 DO NOT COPY or TRANSMIT...
-
Page 20: Operation
2. When washing large items such as shag rugs and bedspreads, NOTE: The NORMAL cycle is recommended for every- add several small items to balance wash load. day cottons and linens. © Copyright, Alliance Laundry Systems LLC - Part No. 205161ENR1 DO NOT COPY or TRANSMIT... -
Page 21: Set Wash Temperature
NOTE: The REGULAR wash level is recommended for everyday cottons and linens. Fabric softener should only be used when the ULTRA wash level is selected. © Copyright, Alliance Laundry Systems LLC - Part No. 205161ENR1 DO NOT COPY or TRANSMIT... -
Page 22: Start Washer
WASH is lit at the beginning of the Wash portion of the cy- cle and will remain lit until the wash step is complete. Table continues... © Copyright, Alliance Laundry Systems LLC - Part No. 205161ENR1 DO NOT COPY or TRANSMIT... -
Page 23: Maintenance
In the case that the Laundry IQ device detects a condition that re- and the motor will restart automatically. quires machine maintenance, the owner will receive a notification on https://laundryIQ.alliancelaundry.com. © Copyright, Alliance Laundry Systems LLC - Part No. 205161ENR1 DO NOT COPY or TRANSMIT... - Page 24 Maintenance If the overload protector stops motor again, remove the washer from use and call the service person to correct the problem. © Copyright, Alliance Laundry Systems LLC - Part No. 205161ENR1 DO NOT COPY or TRANSMIT...
-
Page 25: Troubleshooting
• Broken drive belt. Call the service person. • Have a qualified electrician check polarity and earth/ground. Refer to Electrical Re- quirements section. Table continues... © Copyright, Alliance Laundry Systems LLC - Part No. 205161ENR1 DO NOT COPY or TRANSMIT... - Page 26 “H” on the valve bracket) and cold faucet is connected to cold mixing valve (indicated with “C” on the valve bracket). • Make sure laundry room water heater is adjusted properly. © Copyright, Alliance Laundry Systems LLC - Part No. 205161ENR1 DO NOT COPY or TRANSMIT...
-
Page 27: Contact Information
The serial plate will be in the location shown in Figure 25 . TLW12C_SVG1 1. Serial Plate Figure 25 © Copyright, Alliance Laundry Systems LLC - Part No. 205161ENR1 DO NOT COPY or TRANSMIT... -
Page 28: Installer Checklist
Connect Laundry IQ to Drain Receptacle. Gateway (Select Mod- els). CHECK CHECK TLW2391N_SVG TLW2251N_SVG1 Position and Level Washer. CHECK TLW2201N_SVG Refer to the manual for more detailed information. © Copyright, Alliance Laundry Systems LLC - Part No. 205161ENR1 DO NOT COPY or TRANSMIT...
Need help?
Do you have a question about the TV6000WN and is the answer not in the manual?
Questions and answers
How to force stop and have the washer drain the water for a cycle that was accidentally started?
The manual does not provide specific instructions on how to force stop and drain water from the Alliance Laundry Systems washer model TV6000WN.
This answer is automatically generated