Table of Contents
Advertisement
Quick Links
Operator's Manual
Návod k obsluze
Betriebsanleitung
Instruktionsbog
Lea el Manual del operador
Käyttäjän käsikirja
Manuel de l'opérateur
Manuale d'uso
Gebruikershandleiding
Brukerhåndbok
Instrukcja obsługi
Manual do Operador
Руководство оператора
Návod na obsluhu
Instruktionsbok
Kullanıcı Kılavuzu
IKON-X
E10
Models
915331 – IKON-X 42 CE
(SN 000101 +)
915332 – IKON-X 52 CE
(SN 000101 +)
05101815
Printed in USA
™
•
10/16
Advertisement
Table of Contents

Related Manuals for Ariens IKON-X 42 CE


Summary of Contents for Ariens IKON-X 42 CE
- Page 1 ™ IKON-X Operator’s Manual Models 915331 – IKON-X 42 CE Návod k obsluze (SN 000101 +) Betriebsanleitung 915332 – IKON-X 52 CE Instruktionsbog (SN 000101 +) Lea el Manual del operador Käyttäjän käsikirja Manuel de l'opérateur Manuale d'uso Gebruikershandleiding Brukerhåndbok Instrukcja obsługi...
- Page 2 ÖVERENSSTÄMMELSE UTFÄRDAD AV TILLVERKAREN – ÜRETİCİ TARAFINDAN DÜZENLENEN EC UYGUNLUK BEYANI We the undersigned, ARIENS COMPANY, certify that: My, nížepodepsaní, ARIENS COMPANY, prohlašujeme, že: Der Unterzeichnete, ARIENS COMPANY, bescheinigt, dass: Undertegnede, ARIENS COMPANY, attesterer, at: Nosotros, los abajo firmantes, ARIENS COMPANY, certificamos que: Allekirjoittanut, ARIENS COMPANY, vakuuttaa, että: Nous, soussignés ARIENS COMPANY, certifions que: La sottoscritta società...
- Page 3 (správce technické dokumentace) / Director Product Päivämäärä – Date – Conformance & Warranty (Archivar der technischen Data – Datum – Dato – Ariens Company Akte) / Direktør for produktoverholdelse & garanti Data – Data – дата – Brillion, WI 54110-1072 USA (indehaver af teknisk fil)/ Director de conformidad de Dátum –...
-
Page 4: Table Of Contents
TABLE OF CONTENTS Check Tire Pressure ....19 WELCOME ..... . 1 Check Fasteners . -
Page 5: Welcome
WELCOME Original Instructions. Congratulations on your purchase and welcome to the Ariens family! Every machine in the Ariens lineup is designed for long-lasting and unsurpassed performance. We are confident your machine will be part of your family for many years to come. -
Page 6: Safety
The safety alert symbol above and signal penalties. Emission controls and components words below are used on decals and in this can only be adjusted by an Ariens Company manual. Read and understand all safety dealer or an authorized engine messages. -
Page 7: Safety Decals
ALWAYS replace missing or damaged safety 5. Important decals. Replacement decal part numbers are IMPORTANT: Indicates general reference found in the parts manual for your machine information worthy of special attention. and may be ordered from your dealer. See Figure 2 for safety decal locations. SAFETY DECALS The safety decals on your machine are visual reminders of the important safety information... - Page 8 Shut off engine, remove key, and read manual before Keep all guards and shields servicing or making in place. adjustments to unit. 3.2 Discharge Hazard Keep children and others Discharge Hazard - NEVER away from unit while unit is direct discharge toward in operation.
- Page 9 5. HOT PARTS! Remove key and disconnect spark plug before servicing or making adjustments to DO NOT touch parts which unit. are hot from operation. ALWAYS allow parts to cool. 3.5 Bystander Hazard DO NOT operate the unit in 6. ROTATING PARTS! the presence of bystanders.
-
Page 10: Safety Rules
Operator Age 8. CAUTION! DO NOT allow children under the age of 18 • Maximum tongue weight: to operate any outdoor power equipment. 30 lbs. Local regulations may restrict the age of the • Maximum trailer weight: operator. 300 lbs. •... - Page 11 DO NOT touch parts which are hot. Allow Before Operating parts to cool. Keep all nuts and bolts tight to be sure the DO NOT operate machine without the entire equipment is in safe working condition. grass catcher, discharge guard or other Maintain the machine to be in compliance safety devices in place and working.
- Page 12 Avoid starting, stopping, or turning on a Operating Conditions slope. If the tires lose traction, disengage Lightning can cause severe injury or death. the blade(s) and proceed slowly straight If lightning is seen or thunder is heard in the down the slope. area, do not operate the machine, see Operation on slopes may lead to loss of shelter.
- Page 13 Release any pneumatic or hydraulic when necessary. pressure from components slowly. Use only Ariens Company-recommended NEVER attempt to make any adjustments to attachments that are appropriate to your use unit while engine is running (except where and can be used safely in your application.
- Page 14 NEVER weld or straighten mower blades. NEVER make adjustments or repairs with the engine running. Mower blades are sharp. Wrap the blade or wear gloves, and use extra caution when servicing them. ALWAYS keep body and hands away from pin holes or nozzles which eject hydraulic fluid under pressure.
-
Page 15: Assembly
ASSEMBLY REQUIRED TOOLS • Adjustable wrench • Petroleum jelly or dielectric grease UNPACK UNIT 1. Disengage transmission. See Move Unit Manually on page 17. 2. Move unit from container to a level surface. 3. Remove all other pieces from shipping container. -
Page 16: Secure Operator Presence Cable
2. Remove nut from bolt on battery tray. Retain nut. See Figure 5. 3. Tilt seat up slightly so cable end reaches bolt on battery tray. 4. Install cable end onto bolt on battery tray and secure with nut removed in step 2. 1. -
Page 17: Controls And Features
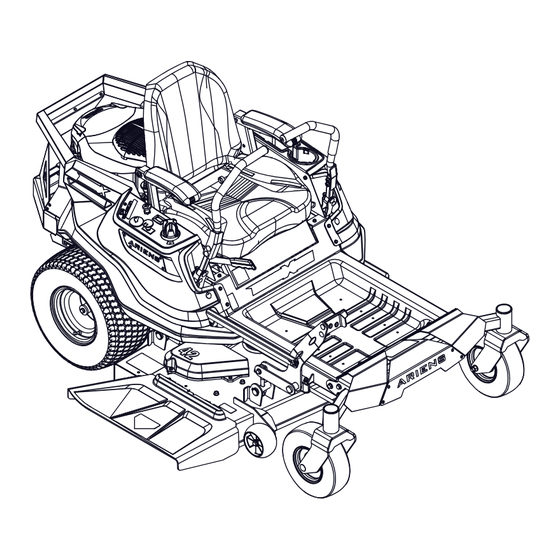
CONTROLS AND FEATURES Figure 9 1. Fuel Tank and Cap 14. Belt Guard (2) 2. Oil Filter 15. Mower Deck 3. Oil Drain 16. Steering Lever (2) 4. Engine Oil Dipstick 17. Towing / Trailer Hitch 5. Ignition Key 18. Discharge Chute 6. -
Page 18: Ignition Key
THROTTLE CONTROL LEVER WARNING: AVOID INJURY. See Figure 12. Read and understand the Controls engine speed. entire Safety section before proceeding. See Figure 9 for all controls and features locations. Fast IGNITION KEY See Figure 10. Controls power to the engine. The key cannot be removed when in run position. -
Page 19: Parking Brake Lever
Monitors the interaction of various unit System by performing the tests in Check features for operator safety. Safety Interlock System on page 18. Contact your Ariens dealer for repair if STEERING LEVERS any of the tests fail. Control the direction and speed of unit. The 5. -
Page 20: Start The Engine
OPERATE UNIT 1. Release parking brake. WARNING: AVOID INJURY. Move the steering levers slowly and keep the throttle at slow speed until you learn how to operate the unit. 2. Set throttle to slow speed. 3. Pull PTO knob up to on position. IMPORTANT: Never engage the PTO if the mower is plugged with grass or other material. -
Page 21: Stop The Engine
Your Ariens dealer can provide service and • To engage transaxles and operate unit adjustments to keep your unit operating at normally, place both bypass levers in the peak efficiency. -
Page 22: Maintenance Schedule
Check function of the Safety Interlock System Assembly by performing the tests below. Contact your Seat Switch 02754100 Ariens dealer for repair if any of the tests fail. Armrest Kit – Left 51528800 Armrest Kit – Right 51528900 Spark Plug... -
Page 23: Check Parking Brake
CHECK TIRE PRESSURE Test Steering PTO Parking Result See Specifications on page 33 for Levers Brake recommended tire pressure. Starting Interlock Neutral Engine WARNING: AVOID INJURY. starts. Explosive separation of tire Forward, On or Engine does and rim parts is possible. Neutral, not start. -
Page 24: Check Mower Blades
• Blades are bent or broken. CHECK MOWER BLADES 2. File or grind an equal amount of material Check blades for wear. Replace or sharpen from each cutting edge of the blade until as needed. sharp. DO NOT change angle of cutting edge or round the corner of the blade. -
Page 25: Check Battery
1. Remove hardware retaining L-bracket to CHECK BATTERY battery bracket and reinstall hardware into L-bracket hole nearest curved edge. WARNING: Battery posts, See Figure 22. terminals and related accessories contain lead and lead compounds, chemicals known to the State of California to cause cancer and reproductive harm. -
Page 26: Check Mower Belts
IMPORTANT: Always follow information provided on battery by battery manufacturer. Contact battery manufacturer for detailed information about charging. IMPORTANT: Ariens does not recommend jump starting your unit. Jump-starting can Figure 24 damage engine and system components. Refer to engine manual for detailed 3. - Page 27 Install Deck Drive Belt 1. Install deck drive belt. See Figure 28. IMPORTANT: Belt will not have tension until routed around drive pulley and idler arm is reinstalled. 1. Spring 2. Belt Cover Figure 26 5. Remove hardware retaining idler arm and two belt fingers from mower deck and Figure 28 remove idler arm and belt fingers.
- Page 28 Remove Ground Drive Belt IMPORTANT: Retain all parts for reinstallation. 1. Place unit in service position. See Service Position on page 18. 2. Remove deck drive belt. See Remove Deck Drive Belt on page 22. 3. Position deck at lowest cutting height. 4.
-
Page 29: Adjustments
5. Reconnect idler arm spring to eye bolt 4. Align levers side to side. See Adjust and secure bolt to unit with nut. Tighten Steering Lever Reach on page 26. until the nut is 6.1 cm (2.4") from the 5. Fully tighten hardware. threaded end of the eye bolt. -
Page 30: Adjust Unit To Track Straight
ADJUST UNIT TO TRACK 3. Adjustment Bolt STRAIGHT Figure 37 NOTICE: Reverse travel can only be adjusted by your Ariens dealer. ADJUST PARKING BRAKE Check Tire Pressure LEVER 1. Check pressure of both tires. See 1. Park unit a flat, level surface and chock Specifications on page 33 for wheels so unit cannot roll. -
Page 31: Remove And Install Mower Deck
5. Remove deck drive belt from rear drive pulley. See Figure 40. 1. Upper Jam Nut Figure 40 2. Lower Jam Nut Figure 38 See Figure 41. 6. Remove one hairpin from drag link to REMOVE AND INSTALL MOWER disconnect drag link from mower deck bracket. -
Page 32: Adjust Mower Deck
8. Remove one flange nut, one hex bolt, one flat steel washer and two sleeve bushings from deck lift lever. Retain hardware. See Figure 42. 1. Deck Lift Lever 2. Deck Link 3. 3/8 x 1/2 x 1" (Longer) Sleeve Bushing 4. - Page 33 1. Set deck to highest cutting height. Set Blade Pitch 2. Position mower blades so blade ends Pitch is the difference in blade height from point left to right across the width of the front to back. deck. IMPORTANT: Level the mower deck before 3.
-
Page 34: Troubleshooting
Connect spark plug wire(s) or replace spark plug(s) are faulty. spark plug(s). Refer to engine manual. Electrical system is faulty. Contact your Ariens dealer. Engine is faulty. Contact your Ariens dealer. Choke control knob is in on Move knob to off position. - Page 35 TROUBLESHOOTING Problem Probable Cause Correction Mower blades not level or mower Level and adjust pitch of mower deck. Poor cutting deck pitch is incorrect. See Adjust Mower Deck on page 28. quality. Mower blades are dull or faulty. Sharpen or replace mower blades. See Sharpen Blades on page 20.
-
Page 36: Storage
STORAGE ACCESSORIES See your Ariens dealer for a complete list of SHORT-TERM STORAGE compatible accessories and attachments for IMPORTANT: NEVER wash unit with high- your unit. pressure water or store outdoors. Description Part No. 1. Allow unit to cool and clean with mild soap and water. -
Page 37: Specifications
SPECIFICATIONS Model Number 915331 915332 IKON X 42 IKON X 52 Model Kawasaki FR651V Kawasaki FR691V Engine Nominal Power – kW 13.9 16.5 726.0 (44.3) Engine Displacement – cm Maximum RPM 2600 3100 Oil Capacity Refer to Engine Manual Drive Forward Maximum –... - Page 38 CE Sound and Vibration (Ref. EN ISO 5395-1: 2013) Oper. Ear Sound Pressure (Lpa) in dB(A) Uncertainty in dB(A) 3.75 3.75 Sound power level (Lwa) in dB(A) Uncertainty in dB(A) 1.11 1.22 2.85 2.95 Vibration Measure (m/s ) at Operator Hands 1.43 1.48 Uncertainty in m/s...
-
Page 39: Warranty
Register the product immediately at the time of sale. If the dealer does not register the product, the customer must complete the product registration card in the literature package and return it to the Ariens Company, or register the unit online at www.ariens.com, www.gravely.com, www.countax.com. - Page 40 Exclusions – Items Not Covered by This Warranty • Parts that are not genuine Ariens, Gravely or Countax service parts are not covered by this warranty and may void the warranty. • Damages resulting from the installation or use of any part, accessory, or attachment which is not approved by the Ariens Company for use with product(s) identified herein are not covered by this war- ranty.
- Page 42 655 West Ryan Street Brillion, WI 54110 ariensstore.com ariens.custhelp.com...
Need help?
Do you have a question about the IKON-X 42 CE and is the answer not in the manual?
Questions and answers