Table of Contents
Advertisement
Quick Links
40 V Lithium-Ion Dual Blade Mower
2507902BT
Battery (Sold Separately)
(40V, 4Ah Model # 29662)
Charger (Sold Separately)
(40V Model: 29692)
Owner's Manual
TOLL-FREE HELPLINE: 1-888-90WORKS
(888.909.6757)
www.GreenWorksTools.com
Read all safety rules and instructions carefully before operating this tool.
Advertisement
Table of Contents

Related Manuals for GreenWorks 2507902BT


Summary of Contents for GreenWorks 2507902BT
- Page 1 40 V Lithium-Ion Dual Blade Mower 2507902BT Battery (Sold Separately) (40V, 4Ah Model # 29662) Charger (Sold Separately) (40V Model: 29692) Owner’s Manual TOLL-FREE HELPLINE: 1-888-90WORKS (888.909.6757) www.GreenWorksTools.com Read all safety rules and instructions carefully before operating this tool.
-
Page 2: Table Of Contents
CONTENTS Contents ..........................2 Product specifications ......................2 Safety information ........................ 3 Symbols ..........................9 Know your lawn mower .......................11 Assembly ........................... 12 Operation ........................... 19 Maintenance ........................24 Service ..........................28 Environmentally safe battery disposal ................29 Troubleshooting ......................... 30 Warranty .......................... -
Page 3: Safety Information
SAFETY INFORMATION GENERAL SAFETY RULES READ ALL INSTRUCTIONS CAREFULLY W A R N I N G This symbol indicates important safety instructions. If these instructions are not followed, it could endanger the personal safety and/or property of the operator and others. Read and understand all instructions in this manual before attempting to operate the mower. - Page 4 SAFETY INFORMATION • For use only with Greenworks 29662/29652 battery. See instruction manual for additional battery packs. • Carefully read all instructions on the mower and in the manual before attempting to assemble and operate the mower. Keep this manual in a safe place for future reference, and consult it regularly.
- Page 5 SAFETY INFORMATION • If the mower starts to vibrate excessively, stop the motor and check for the cause immediately. Vibration is generally a warning of trouble. • Stop the motor and wait until the blade comes to a complete stop before removing the grass catcher or unclogging the chute.
- Page 6 C A U T I O N USE ONLY GREENWORKS APPROVED REPLACEMENT BATTERIES, OTHER BATTERIES MAY CAUSE INJURY OR DAMAGE TO THE MOWER. Use with GREENWORKS 40V battery. BATTERY SAFETY RULES • Battery tools do not have to be plugged into an electrical outlet; therefore, they are always in operating condition.
- Page 7 SAFETY INFORMATION • Always remove the battery pack from your tool when you are assembling parts, making adjustments, cleaning, or when not in use. Removing the battery pack will prevent accidental starting that could cause serious personal injury. • Always remove the battery pack before storing the device. When the battery becomes fully charged, unplug the charger from the power supply and remove the battery pack from the charger.
- Page 8 SAFETY INFORMATION CHARGER SAFETY RULES • Charge the mower battery in a dry area that is protected from the weather. Do not expose the mower or the charger to rain. Do not charge the battery in a wet location. Operate the battery charger in temperatures between 45°...
-
Page 9: Symbols
SYMBOLS Some of the following symbols may be used on this product. Please study them and learn their meaning. Proper interpretation of these symbols will allow you to operate the product better and safer. SYMBOL DESIGNATION/EXPLANATION Volts Amperes Hertz Watts Hours Direct Current Precautions that involve your safety. - Page 10 SYMBOLS The following signal words and meanings are intended to explain the levels of risk associated with this product. SYMBOL SIGNAL MEANING DANGER Indicates an imminently hazardous situation, which, if not avoided, will result in death or serious injury. WARNING Indicates a potentially hazardous situation, which, if not avoided, could result in death or serious injury.
-
Page 11: Know Your Lawn Mower
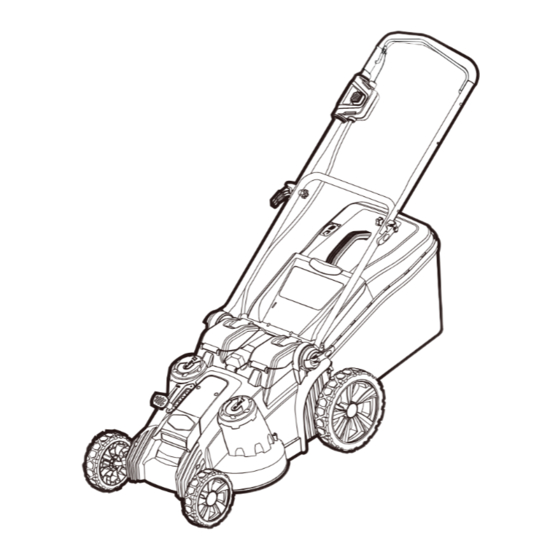
KNOW YOUR LAWN MOWER Read this operator's manual and safety rules before operating your lawn mower. Compare the illustration in Figure 1 to your lawn mower in order to familiarize yourself with the location of various controls and adjustments. Save this manual for future reference. Bail Start button Upper... -
Page 12: Assembly
ASSEMBLY INSTRUCTIONS UNPACKING • Carefully remove the product and any accessories from the box. Make sure that all items listed in the packing list are included. • Inspect the product carefully to make sure no breakage or damage occurred during shipping. •... - Page 13 ASSEMBLY INSTRUCTIONS UNFOLDING AND ADJUSTING HANDLE ASSEMBLY (See Figure 2-3) To raise handle assembly: • Open the lower handle locks. • Pull up and back on the lower handle until it is aligned with the slot between the handle locks and the mower housing.
- Page 14 ASSEMBLY INSTRUCTIONS To lower the handle assembly: • Open the upper handle locks. NOTE: If the handle lock is difficult to open, loosen the knobs on the upper handle locks by turning them counterclockwise. • Lower the upper handle. • Open the lower handle lock. •...
- Page 15 ASSEMBLY INSTRUCTIONS INSTALLING THE MULCHING PLUG (FOR MULCHING OPERATION) (See Figure 4) NOTE: When using the mulching plug, do not install the grass catcher. • Remove the battery pack. • Lift and hold the rear discharge door. • Grasp the mulching plug by its handle and insert it at a slight angle, as shown. •...
-
Page 16: Operation
ASSEMBLY INSTRUCTIONS INSTALLING THE GRASS CATCHER (FOR REAR BAGGING OPERATION) (See Figure 5-6) NOTE: When using the grass catcher, do not install the mulching plug. • Remove the battery pack. • Lift the rear discharge door. Remove the mulching plug if previously installed. •... - Page 17 ASSEMBLY INSTRUCTIONS TO INSTALL BATTERY PACK (See Figure 7) W A R N I N G Always remove the battery pack from your tool when you are assembling parts, making adjustments, cleaning, or when not in use. Removing the battery pack will prevent accidental starting that could cause serious personal injury.
- Page 18 ASSEMBLY INSTRUCTIONS TO REMOVE BATTERY PACK (See Figure 7) • Raise the battery cover. • Press and hold the battery latch button at the top of the battery pack. • Remove battery pack from the mower. W A R N I N G To avoid serious personal injury, always remove the battery pack when carrying or transporting the tool.
- Page 19 OPERATING YOUR LAWN MOWER STARTING/STOPPING THE MOWER (See Figure 8) • Raise the battery cover. • Install battery pack. • Lower the battery cover. • Press and hold the start button. Pull the bail toward the handle and release the button to start the mower.
- Page 20 OPERATING YOUR LAWN MOWER SETTING BLADE HEIGHT (See Figure 9) When shipped, the wheels on the mower are set to a low-cutting position. Before using the mower for the first time, raise the cutting position to the height best suited for your lawn. The average lawn should be between 1-1/2 in.
- Page 21 OPERATING YOUR LAWN MOWER SLOPE GAUGE (See Figure 10) W A R N I N G Slopes are a major factor related to accidents involving slips and falls, which can result in severe injury. Operating the mower on a slope requires extra caution. If you feel uneasy on a slope, do not mow it.
- Page 22 OPERATING YOUR LAWN MOWER MOWING TIPS NOTE: A sharp blade will greatly enhance the performance of the mower, especially when cutting high grass. Be sure to check the blade and to sharpen it at least once per year, as described in the Maintenance section. •...
- Page 23 OPERATING YOUR LAWN MOWER EMPTYING THE GRASS CATCHER BAG (See Figure 11-12) • Stop the mower and allow blades to completely stop. • Remove the battery pack. • Lift the rear discharge door. • Lift the grass catcher by its handle to remove from mower. •...
-
Page 24: Maintenance
MAINTENANCE REPLACING THE CUTTING BLADE (See Figure 13-14) W A R N I N G Always protect your hands by wearing heavy gloves and/or wrapping the cutting edges with rags or other materials when performing any maintenance on the blades. ALWAYS remove the battery when servicing or transporting the mower. - Page 25 MAINTENANCE Motor assembly Blade posts BLADE II BLADE I Blade insulator Blade insulator Spacer Spacer Blade nut Blade nut Fig. 14 • Replace the blade insulator and spacer, then thread the blade nut on the shaft and finger tighten. NOTE: Make certain all parts are replaced in the exact order in which they were removed. •...
- Page 26 MAINTENANCE REPLACING THE BATTERY The mower battery is designed for maximum life; however, like all batteries, it will eventually need to be replaced. Charge the new battery pack before use. To install a new battery: • Carefully unlock and remove the battery pack. •...
- Page 27 MAINTENANCE CLEANING THE MOWER W A R N I N G In order to reduce the risk of electric shock, do not expose the mower to water. The underside of the mower deck should be cleaned after each use, because grass clippings, leaves, dirt, and other debris will accumulate, which will cause rust and corrosion.
-
Page 28: Service
SERVICE • When ser vicing the mower, use only replacement par ts that are available from the manufacturer. In order to obtain replacement parts, call the toll-free helpline, at 1-888-909- 6757. The use of parts that do not meet the original equipment specifications may lead to improper performance, and may compromise safety. -
Page 29: Environmentally Safe Battery Disposal
ENVIRONMENTALLY SAFE BATTERY DISPOSAL The batteries used in this mower's battery pack contain the following toxic and corrosive material: LITHIUM-ION. W A R N I N G Toxic materials must be disposed of in a specified manner in order to prevent contamination of the environment. -
Page 30: Troubleshooting
TROUBLESHOOTING PROBLEM POSSIBLE CAUSE SOLUTION The battery is not charged. Charge the battery. Replace the switch (call the tollfree helpline, The switch is defective. at 1-888-909-6757. Grass jammed between the Remove battery; check under deck for jams. deck and blade. The mower does not start. -
Page 31: Warranty
(4) years against defects in materials, parts or workmanship. GREENWORKS™, at its own discretion will repair or replace any and all parts found to be defective, through normal use, free of charge to the customer. This warranty is valid only for... -
Page 32: Exploded View
EXPLODED VIEW... -
Page 33: Parts List
PARTS LIST ITEM NO. PART NO. DESCRIPTION 34135486 Foam grip 33310470-4 Upper handle 32207115 Washer 33323250-1 Stop sheet 3220439 Lock nut M5 32208234A Screw M5x30 31107486-1 Motor engagement box assy. 33305469-3 Motor bail 34106467-1 Knob 31102467-2 Cam lock assy. 32204113D Screw ST4.2*20-C 32201572 Screw ST4.2*14... - Page 34 PARTS LIST ITEM NO. PART NO. DESCRIPTION 34107486 Blade insulator 33309486 Spacer 3220537 Nut M10x1.25 33307486 Blade 3221037A Nut M10x1.25 36202486ZA Power switch board 34141486 Mulching plug 3221237 Lock nut M4 34127486A Rear shield 3330490-1 Wire clip 3220511D Screw M4x12 Rear baffle 34128486 33302486...
- Page 35 Greenworks Tools P.O. Box 1238 Mooresville, NC 28115 TOLL-FREE HELPLINE: 1-888-90WORKS (888.909.6757) Rev: 00 (03-02-2017) Printed in China on 100% Recycled Paper...
Need help?
Do you have a question about the 2507902BT and is the answer not in the manual?
Questions and answers