
Subscribe to Our Youtube Channel
Related Manuals for air choice A5406-8K-CH


Summary of Contents for air choice A5406-8K-CH
- Page 1 USER MANUAL PORTABLE AIR CONDITIONER MODEL: A5406-8K-CH A5406-10K-CH A5406-8K-JP A5406-10K-JP Read all the instructions carefully before setting up and operating the unit. Keep this instruction manual for future reference.
-
Page 2: Table Of Contents
Contents AIR CONDITIONER SAFETY .......................... 1 PARTS AND FEATURES ..........................8 INSATALLATION REQUIREMENTS ........................ 9 INSTALLATION INSTRUCTIONS ........................10 STEP 1 - UNPACK AIR CONDITIONER ....................10 STEP 2 - TWIST THE EXHAUST HOSE CONNECTOR ONTO EXHAUST HOSE ........10 STEP 3 - CONNECT EXHAUST HOSE TO THE AIR CONDITIONER ............ -
Page 3: Air Conditioner Safety
AIR CONDITIONER SAFETY Your safety and the safety of others are very important. We have provided many important safety messages in this manual and on your appliance. Always read and obey all safety messages. This is the safety alert symbol. This symbol alerts you to potential hazards that can hurt you and others. - Page 4 Do not pierce or burn. Be aware that refrigerants may not contain an odor. ⚫ – the maximum refrigerant charge amount: A5406-8K-CH/A5406-8K-JP-6.4Oz – the maximum refrigerant charge amount: A5406-10K-CH/A5406-10K-JP-8.1Oz The appliance shall be stored so as to prevent mechanical damage from occurring.
- Page 5 apparatus shall be at the correct rating. Replace components only with parts specified by the manufacturer. Other parts may result in the ignition of refrigerant in the atmosphere from a leak. Check that cabling will not be subject to wear, corrosion, excessive pressure, vibration, sharp edges or any ⚫...
- Page 6 Start the recovery machine and operate it i n accordance with manufacturer's instructions. Do not overfill cylinders. (No more than 80 % volume liquid charge). Do not exceed the maximum working pressure of the cylinder, even temporarily. When the cylinders have been filled correctly and the process completed, make sure that the cylinders and the equipment are removed from site promptly and all isolation valves on the equipment are closed off.
- Page 7 ⚫ Sachez que les réfrigérants peuvent ne pas contenir d'odeur. la quantité maximale de charge de réfrigérant : A5406-8K-CH/A5406-8K-JP-6.4Oz la quantité maximale de charge de réfrigérant : A5406-10K-CH/A5406-10K-JP -8.1Oz L'appareil doit être stocké de manière à éviter des dommages mécaniques.
- Page 8 ⚫ En aucun cas, des sources potentielles d'inflammation ne doivent être utilisées pour rechercher ou détecter des fuites de réfrigérant. Une torche aux halogénures (ou tout autre détecteur utilisant une flamme nue) ne doit pas être utilisée. Des détecteurs de fuites électroniques doivent être utilisés pour détecter les réfrigérants inflammables, mais ⚫...
- Page 9 parties du système. Assurez-vous que le cylindre est situé sur la balance avant de procéder à la récupération.Start the recovery machine and operate in accordance with manufacturer's instructions. Ne pas trop remplir les cylindres. (Pas plus de 80 % de volume de charge liquide). Ne pas dépasser la pression maximale de service du vérin, même temporairement.
-
Page 10: Parts And Features
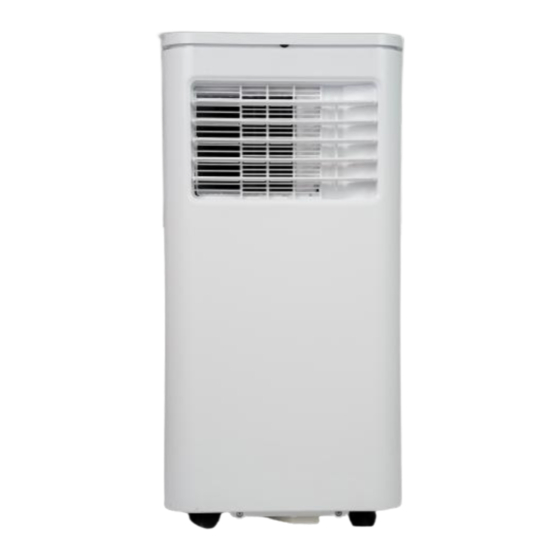
PARTS AND FEATURES Control Panel 11. Drain Port Air Outlet 12. Power supply Caster 13. Drain Cover and Plug Air Intake 14. Remote Control Filter 15. Connector Fastener 16. Exhaust Hose Air Intake 17. Adapter Handle 18. Window kits Plug Storage Area 19. -
Page 11: Insatallation Requirements
INSATALLATION REQUIREMENTS TOOLS AND PARTS Gather the required tools and parts before starting installation. TOOLS NEEDED •Flat-blade Screwdriver •Phillips Screwdriver LOCATION REQUIREMENTS Place the air conditioner on a flat and l evel surface, a location that is at least 50cm from any wall. NOTE: A minimum clearance of 50cm from the air conditioner to the wall must be maintained to ensure proper airflow. -
Page 12: Installation Instructions
If the power supply cord is damaged, please contact Customer Service. To test the power supply cord before operation: 1. Plug the power cord into a grounded 3 prong outlet. 2. Press the Test button, and then press and release the Reset button to restore power. REQUIRED GROUNDING METHOD This air conditioner must be grounded. -
Page 13: Step 4 - Install Window Panels
Slide the exhaust hose assembly from the outer air outlet to the right The assembly is completed until the convex point of the inner joint and the concave point of the air outlet are stuck. STEP 4 - INSTALL WINDOW PANELS Depending on the size of your window opening, use the main panel and one or both of the extension panels. -
Page 14: Step 5 - Complete Installation
Fasten the butterfly nut to fix the window slide set. STEP 5 - COMPLETE INSTALLATION Close the window as far as the window slide set, so this covers the window opening completely. Place the device at least 50 cm away from walls and other objects. NOTE: Some window installations may require the extension panels to be trimmed. -
Page 15: Control Panel
CONTROL PANEL BUTTONS A. TIMER BUTTON Program a time from (0-hour to 24-hours) for the air conditioner to turn Off or On. When a Time Delay is programmed, the Timer indicator light will illuminate. While the air conditioner is operating: 1. -
Page 16: Remote Control
E. MODE BUTTON Press the Mode button to toggle among the operating options. The corresponding indicator will illuminate: Cool – Cools the room to the set temperature Dehum – Reduces the humidity in the room Fan – Circulates the air in the room without cooling F. -
Page 17: Safety Protections
SAFETY PROTECTIONS 1. Water-full safety alarm and shut – off protection function When the water volume exceeds its alarm level in chassis, the warning alarm goes off automatically and water-full icon is lighting in display. You need to drain the water and re-start the unit. (For more information about how to drain, refer to the “Drainage Instruction”... -
Page 18: Drain The Internal Water
DRAIN THE INTERNAL WATER You will need a small pan to catch the water coming out of the water tank. Once the water tank is empty, the unit will resume operation within a few minutes. MANUAL DRAINAGE Once the unit shuts down upon water-full, turn off the unit and then unplug. -
Page 19: Filter Cleaning
FILTER CLEANING - Clean the filter once every two weeks, or it would influence the unit function if filter clogged with dust. - Grip the filter handle and pull it out gently in correct direction. Clean the dirty particles in filter by cleaner if it is necessary. Immerse and wash the filter gently into warm water (about 40℃) mixed with neutral cleaner, and then rinse and dry them thoroughly in the shade. -
Page 20: Troubleshooting
TROUBLESHOOTING First try the solutions suggested here to possibly avoid the cost of a service call. Trouble Cause Solution Connect the unit to a live socket and Power supply failure turn it on. Water-full and its icon lighting Drain the water stored in the unit. It is recommended to use this unit The unit fails to start up Ambient temperature too low or low high... -
Page 21: Disposal And Warranty
All the technical and specific parameters, please refer to product nameplate. Due to continuous improvement, we reserve the right to change some design without timely notice. DISPOSAL Electrical products should be properly disposed. Please recycle where facilities exist. Check with your local authority or retailer for recycling. WARRANTY The manufacturer provides warranty in accordance with the legislation of the customer's own country of residence, with a minimum of 1 year, starting from the date on which the appliance is sold to the end user. - Page 22 PACKING LIST Description Quantity User Manual Remote Control Battery Connector Exhaust Hose Adapter Window kits Window kits screw Flat screws...
Need help?
Do you have a question about the A5406-8K-CH and is the answer not in the manual?
Questions and answers
When is the best time to use the Dehumidifier on my AC , and for how long? It's been in the 90's -100 temperature range here in Detroit four the last four days.