
Related Manuals for Yard force LH C41A


Summary of Contents for Yard force LH C41A
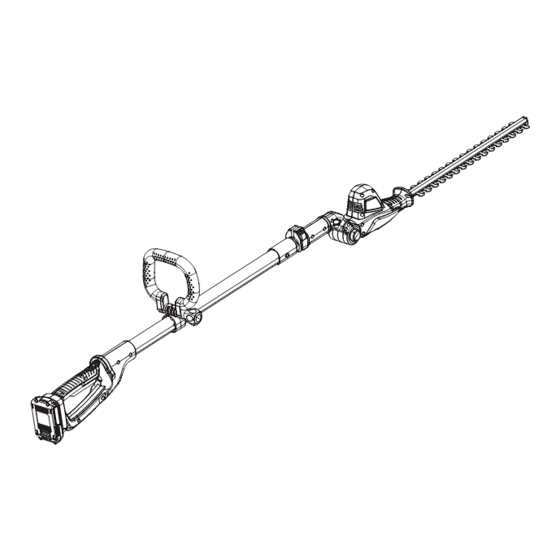
- Page 1 LH C41A Model: 20V CORDLESS POLE HEDGE TRIMMER Original Instructions READ & UNDERSTAND INSTRUCTION MANUAL Save all warnings and instructions for future reference.
-
Page 2: Table Of Contents
LH C41A Original Instruction TABLE OF CONTENTS Description of Product Parts Technical Specifications Intended Use Safety Information Assembly Operation Maintenance and Storing Troubleshooting EC Declaration of Conformity Read this manual carefully prior to assembling and operating the pole hedge trimmer. It is dangerous to operate this product without being familiar with these instructions. -
Page 3: Description Of Product Parts
DESCRIPTION OF PRODUCT PARTS DESCRIPTION OF PRODUCT PARTS Check the delivery parts Fig. 1 As shown in Fig. 2 Carefully remove the machine from its packaging and check as the following parts are complete: Fig. 2 20 V cordless pole hedge trimmer Parts List Charger As shown in Fig. -
Page 4: Technical Specifications
TECHNICAL SPECIFICATIONS TECHNICAL SPECIFICATIONS LH C41A Model Number WARNING! Voltage 20 V Depending on the actual use of the product the vibration values can differ from the Battery type Lithium-Ion declared total! Adopt proper measures to protect yourself against vibration exposures! -
Page 5: Safety Information
SAFETY INFORMATION SAFETY INFORMATION GENERAL POWER TOOL SAFETY WARNINGS Head protection. Always use safety glasses and Read all instructions. Failure to follow all instructions gloves. Use a face or dust mask whenever the listed below may result in electric shock, fire and/or operations may produce dust or flying particles. - Page 6 SAFETY INFORMATION SAFETY INFORMATION (see technical data). good condition for better and safer performance. Follow the instructions for maintenance and 10. Do not dispose of battery packs/batteries changing accessories. Keep handles and switches into household waste, fire or water. Battery dry, clean and free from oil and grease.
- Page 7 SAFETY INFORMATION SAFETY INFORMATION Never modify the plug in any way. Unmodified controls and proper use of the tool. plug sand matching outlets will reduce risk of Only use the tool in daylight or good artificial electric shock. light. Use your charger only to charge batteries Never allow children to use the tool.
- Page 8 SAFETY INFORMATION SAFETY INFORMATION hear due to the noise of the tool. Always be alert when using this product, so 17. Do not carry the tool with your hands on the that you can recognise and handle risks early. switch unless the battery has been removed. Fast intervention can prevent serious injury and 18.
- Page 9 SAFETY INFORMATION SAFETY INFORMATION DESCRIPTION OF SYMBOLS Warning symbols on the charger Warning symbols Before use, carefully read through the user manual. Warning! The product complies with the applicable The charger is for indoor use only. European directives and an evaluation method of conformity for these directives was done.
-
Page 10: Assembly
ASSEMBLY ASSEMBLY Inserting the battery pack Take off the blade sheath WARNING! Always release the On/Off switch before insert in or removal of the Slide the blade sheath off before you start the machine. battery pack. Remove the battery pack. Depress the button (A) on end of the battery pack, and then remove the pack from the tool. -
Page 11: Operation
ASSEMBLY OPERATION Switch ON/OFF The power indicator on the battery pack As shown in Fig. 7 WARNING! If any parts are missing, damaged or broken, do not operate your hedge trimmer until all damaged parts have been replaced or repaired. Failure to Press the power indicator button, the remaining power will be shown on the screen. - Page 12 OPERATION OPERATION Function of swivel head Cutting guide Note: The cutter head can be locked in 9 positions (-45°~90°). Hold the handle (D) tightly. Seasonal hedges and shrubs that lose their leaves in the winter should be trimmed in June Push the lock button (E) and then turn the cutter head (F) to the desired position.
-
Page 13: Maintenance And Storing
MAINTENANCE AND STORING TROUBLESHOOTING Maintenance Although your new cordless hedge trimmer is really easy to operate, if you do experience WARNING: Before any maintenance, always take off the battery pack and wear problems, check the following: protection gloves. Check battery pack assembly; Lubrication of the blade If trimmer will not operate For easier operation and longer life, lubricate the cutting blades before and after each use. - Page 14 Unit A&B, Escrick Business Park Escrick, York, YO19 6FD Declare that the product: Description: 20V CORDLESS POLE HEDGE TRIMMER Model No: LH C41A Charger Model: B0Q-SP06-20ZB Function: Trimming hedges, bushes and shrubs Complies with essential health and safety requirements of the following directives:...
Need help?
Do you have a question about the LH C41A and is the answer not in the manual?
Questions and answers