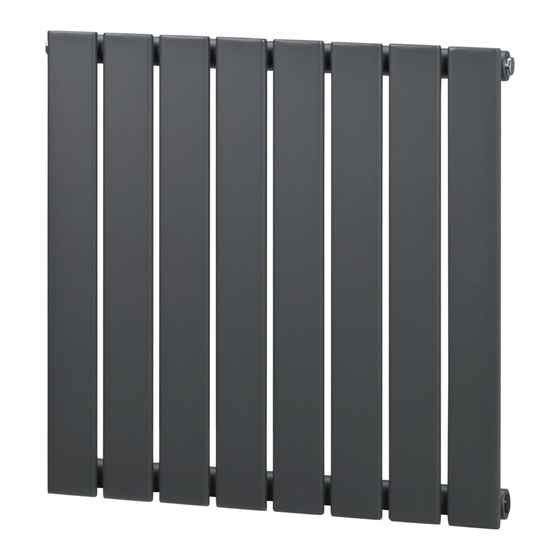
Summary of Contents for HOMCOM 820-311V00
- Page 1 INcji008_UK_DE 820-311V00 Rail Radiator IMPORTANT, RETAIN FOR FUTURE REFERENCE: READ CAREFULLY UESR’S MANUAL...
-
Page 3: Dear Customer
Dear customer, Thank you for purchasing this product. For you to protect and install this appliance properly, please read the manual thoroughly before using. Keep this manual safe for future reference. 1. Product features Pictures in this manual is for reference only – always refer to the actual product. -
Page 4: Installation Notes
3. Installation notes 1) Installation must be completed by a qualified person. 2) Dispose of all packaging in a responsible manner. 3) For installation, ensure the wall can hold the weight of this product. A brick or cinderblock type wall is suitable. 4) This product is for indoors only. - Page 5 Apply PTFE tape (not supplied) to the blanking plug – insert them into the top left threaded holes. Apply PTFE tape (not supplied) to the air vent plug – insert them into the top right threaded holes. Use a wrench to secure the blanking plug and air vent.
- Page 6 Mark the position of the wall bracket screws with a pencil, then drill 8mm holes into the marked position. Tap the masonry wall plug into the hole. Secure to the wall using a long screw, washer and spencer in that order (hole facing out).
- Page 7 After installation: ● Use a screwdriver to open the air vent, open the valve and let the water flow into the product. Check all connection points for possible leaks. ● Once the water flows from the air vent, there will be no air in the tube. ●...
- Page 9 INcji008_UK_DE 820-311V00 Badheizkörper WICHTIG - BITTE HEBEN SIE DIESE ANLEITUNG FÜR EINE SPÄTERE BEZUGNAHME AUF: SORGFÄLTIG DURCHLESEN GEBRAUCHSANWEISUNG...
-
Page 11: Sehr Geehrter Kunde
Sehr geehrter Kunde, Vielen Dank, dass Sie dieses Produkt erworben haben. Damit Sie dieses Gerät richtig schützen und installieren können, lesen Sie bitte die Bedienungsanleitung vor dem Gebrauch sorgfältig durch. Bewahren Sie diese Anleitung zum späteren Nachschlagen sorgfältig auf. 1. Produktmerkmale Die Bilder in dieser Anleitung dienen nur als Referenz - beziehen Sie sich immer auf das tatsächliche Produkt. -
Page 12: Hinweise Zur Installation
3. Hinweise zur Installation 1) Die Installation muss von einer qualifizierten Person durchgeführt werden. 2) Entsorgen Sie alle Verpackungen auf verantwortungsvolle Weise. 3) Stellen Sie bei der Installation sicher, dass die Wand das Gewicht des Produkts tragen kann. Eine Wand aus Ziegeln oder Betonsteinen ist geeignet. - Page 13 PTFE-Band (nicht im Lieferumfang enthalten) auf den Blindstopfen aufbringen und in die oberen linken Gewindebohrungen einführen. PTFE-Band (nicht mitgeliefert) auf den Entlüftungsstopfen auftragen und in die oberen rechten Gewindebohrungen einführen. Blindstopfen Entlüftung PTFE-Band (nicht mitgeliefert) Sichern Sie den Blindstopfen und die Entlüftung mit einem Schraubenschlüssel.
- Page 14 Markieren Sie die Position der Schrauben für die Wandhalterung mit einem Bleistift und bohren Sie dann 8-mm-Löcher in die markierte Position. Klopfen Sie den Mauerdübel in das Loch. Befestigen Sie ihn mit einer langen Schraube, einer Unterlegscheibe und einer Distanzscheibe in dieser Reihenfolge (mit dem Loch nach außen) an der Wand.
- Page 15 After installation: ● Use a screwdriver to open the air vent, open the valve and let the water flow into the product. Check all connection points for possible leaks. ● Once the water flows from the air vent, there will be no air in the tube. ●...
- Page 16 Einlassventil für Einlassventil für Heizkörper Heizkörperwasser Heizkörperwasser Heizkörperwass- er-Eingangsventil Dusche Heizkörperrück- Brauchwasser laufventil Heizkörper- wasserauslass Heizkörper- Heizkörperwassereingang wasserventil Kaltwasser Gaseinlassventil Gasleitung Auslassventil Heizkörperwasserauslass Spezieller Heizkörper (WC) Ablassventil Achten Sie auf die hohe Nicht zu viele Von brennbaren und explosiven Temperatur der Oberfläche Gegenstände stapeln Materialien fernhalten...


Need help?
Do you have a question about the 820-311V00 and is the answer not in the manual?
Questions and answers