jcb RENTAL Series Quick Start Manual
Hide thumbs
Also See for RENTAL Series:
- Quick start manual (30 pages) ,
- Quick start manual (27 pages) ,
- Quick start manual (28 pages)
Advertisement
Quick Links
Advertisement

Related Manuals for jcb RENTAL Series


Summary of Contents for jcb RENTAL Series
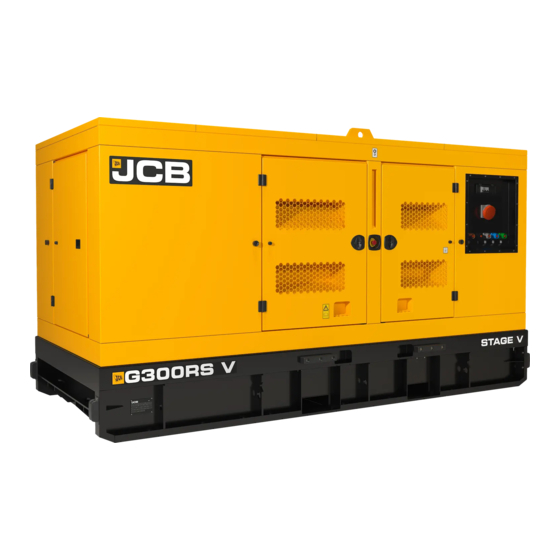
- Page 1 Quick Start Guide RENTAL SERIES STAGE V DIESEL GENERATOR G250RS V – G300RS V...
- Page 2 INDEX Disclaimer Dimensions & Volumes Key Components General Checks Control Panel Battery Isolator Multi Voltage Selection Fuel Connections Positioning Lifting Emergency Stops Maintenance Schedule Service Checks Please consult your manual for full information or consult your local dealer...
- Page 3 This machine should not be operated by any person who isn’t appropriately qualified or had the appropriate training. Operation of this machine without periodic maintenance could cause it to malfunction. For more information please contact your JCB Dealer. Please consult your manual for full information or consult your local dealer...
- Page 4 DIMENSIONS & VOLUMES MODEL G250RS V G300RS V 3 PHASE – 400V – kW/kVA (Prime Power) 3 PHASE – 400V – A L3900mm x L3900mm x DIMENSIONS – mm W1800mm x W1800mm x H2200mm H2200mm WEIGHT (OPERATING) – kg 4681 4808 AFTERTREATMENT DOC/SCR/CUC...
- Page 5 KEY COMPONENTS - ENCLOSURE A Exhaust G Rear door B Right side door H Left side door C Forklift pockets (x2) J Front door D Control panel door K Lifting points (x4) E Lifting eye (x2) L Socket box F Emergency stop button M Drag bar Please consult your manual for full information or consult your local dealer...
- Page 6 KEY COMPONENTS - GENERATOR A Control panel J Resistive load elements B Air filter K Cooling pack C Socket box L Strainer D DEF (Diesel Exhaust Fluid) tank M Fuel pre-filter E Exhaust pipe N Fuel filter F Radiator cap G DOC (Diesel Oxidation Catalyst) H SCR0F (Selective Catalytic Reduction on Filter) Please consult your manual for full information or consult your local dealer...
- Page 7 KEY COMPONENTS - ENGINE A Fuel pump E Engine control module B Dipstick F Starter motor C Alternator G Interface box D Intercooler outlet hose Please consult your manual for full information or consult your local dealer...
- Page 8 KEY COMPONENTS - ENGINE A Oil sump B Engine oil drain valve C Engine oil filter D Engine oil filling neck Please consult your manual for full information or consult your local dealer...
- Page 9 KEY COMPONENTS - SOCKETS A 125A socket B Power lock E C Power lock N D Power lock L3 E Power lock L2 F Power lock L1 Please consult your manual for full information or consult your local dealer...
- Page 10 KEY COMPONENTS - CONTROL PANEL Power available LED (Light Emitting G Earth leakage relay Diode) indicator H MCCB (Moulded Case Circuit Breaker) B Analog hour meter Earth stud C Digital controller On/Off switch K Auxiliary socket D Digital controller Basic operating instruction label E Synchronising switch M Emergency stop switch Resistor switch...
-
Page 11: General Checks
• Make sure that t the alternator windings and assembly are not damp, or dirty. Failure to do so could result in damage to the alternator windings. If windings are observed to be damp/dirty contact your JCB dealer. • Make sure that all the engine access doors are closed and secured. - Page 12 GENERAL CHECKS Checks After Running Ensure that the electrical load is switched OFF before stopping the engine. • Check that battery isolator is at 'off' position. • Fill the fuel tank. Make sure that the filler cap and the area around the filler opening are clean to avoid contamination of the fuel.
- Page 13 CONTROL PANEL – DSE 7310 A Module display B Four configurable status LED (Light Emitting Diode) C Transfer to generator - manual mode only (not used) D Generator available LED E Start button F Alarm mute and lamp test G Generator breaker LED (not used) H Auto mode J Test mode (not used) K Mains breaker LED (not used)
- Page 14 CONTROL PANEL – DSE 7310 This button is only active in the STOP/RESET mode, MANUAL mode. Pressing the Start button in Stop/Reset Mode powers up the engine’s ECU but does not start the engine. This can be used to check the status of the CAN communication and to prime the fuel system Used for navigating the instrumentation, event log and configuration screens.
- Page 15 CONTROL PANEL – DSE 8610 A Module display B Four configurable status LED C Close generator D Generator available LED E Start button F Alarm mute and lamp test G Auto mode H Generator breaker LED J Manual mode K Stop/reset button L Selected mode indication LED M Open generator (manual mode only) N Module display Menu navigation buttons...
- Page 16 CONTROL PANEL – DSE 8610 This button is only active in the STOP/RESET mode, MANUAL mode. Pressing the Start button in Stop/Reset Mode powers up the engine’s ECU but does not start the engine. This can be used to check the status of the CAN communication and to prime the fuel system Used for navigating the instrumentation, event log and configuration screens.
- Page 17 CONTROL PANEL - DSE Operation Single generator, controlled manually through its genset controller. Load is monitored by the operator. Starting Procedure Perform all the pre-start checks before starting the generator. Turn ON battery isolator 1. Make sure ALL power output supply MCCB’s are switched off. 2.
- Page 18 CONTROL PANEL - DSE Operation Single generator, controlled manually through its genset controller. Load is monitored by the operator. Stopping Procedure Perform the procedure below to stop the generator: 1. To stop the generator, remove any electrical loads. 2. Turn the main power supply MCCB to off position. 3.
-
Page 19: Battery Isolator
BATTERY ISOLATOR The battery isolator switch is used to disconnect the battery from the machine electrics. The switch must be turned to the off position if any maintenance work is to be performed on the machine. Some machine systems perform shut down cycles after the engine stops. Wait until shut down cycles are complete before setting the battery isolator switch to the off position. - Page 20 FUEL CONNECTIONS (WHERE FITTED) The optional 3-Way Fuel Valve allows the generator to be connected to feed and return to a remote bulk tank. The selection lever dictates if the engine will feed from either the base tank or bulk tank. This selection lever should be fully engaged in the chosen position.
- Page 21 LIFTING The generating set should only be lifted using the designated lifting points or the fork pockets where provided. Do not lift the unit by the alternator or engine lifting eyes. These are designed only to carry the weight of the specific unit (engine or alternator) and not for the weight of the fully assembled generating set.
- Page 22 When filling with fuel, choose a well aired and ventilated area. Important: Consult your fuel supplier or JCB dealer about the suitability of any fuel you are unsure of. 1. Open the rear right door to get access to the fuel tank filler cap.
- Page 23 DEF FILLING A DEF filler cap 1. Open the rear left door to get access to the DEF (Diesel Exhaust Fluid) tank filler cap. 2. Remove all unwanted material around the DEF cap. 3. Remove the DEF cap. 4. Add the DEF through the filler neck as necessary. 5.
-
Page 24: Emergency Stops
EMERGENCY STOPS A machine isolation button/emergency stop button is mounted externally on the canopy If pressed, all machine systems will stop completely. Use the emergency stop button in the case of an emergency or if the machine becomes unsafe and does not shutdown automatically. NOTE: Activation of either of the emergency stop buttons will put the generator into a fault mode. - Page 25 MAINTENANCE SCHEDULE - OPERATOR Interval (h) Calendar Equivalent Daily Weekly Three months Six months Yearly 1200 Eighteen months Service task can be completed by a competent operator. Details of how to complete the task are given in the operators manual We recommend that a Service Engineer completes the service task.
- Page 26 (10) Check which coolant type is installed in the machine before topping up the coolant. Mixing of different coolant types is not recommended and may result in invalidation of the warranty offered by JCB. In the event of mixing or if the coolant type is to be changed, the coolant circuit should be completely drained and flushed twice with clean water before re-filling with fresh coolant.
-
Page 27: Service Checks
SERVICE CHECKS Oil - Check (Level) Oil is toxic. If you swallow any oil, do not induce vomiting, seek medical advice. Used engine oil contains harmful contaminants which can cause skin cancer. Do not handle used engine oil more than necessary. - Page 28 SERVICE CHECKS Coolant - Check (Level) CAUTION! The cooling system is pressurised when the coolant is hot. When you remove the cap, hot coolant can spray out and burn you. Make sure that the engine is cool before you work on the cooling system. In most cases the generating set is supplied pre-filled with radiator coolant.
- Page 29 SERVICE CHECKS Air Filter - Check (Condition) Engine performance and durability will be severely affected if the quality of the air intake is poor. A dirty and blocked air cleaner element will reduce the amount of air entering the combustion chamber which can cause engine mis-firing, black smoke and low output power.
- Page 30 J C B Sales Limited, Rocester, Staffordshire, United Kingdom ST14 5JP Tel: +4 4 1889 590312 Email: salesinfo@jcb.com Download the very latest information on this product range at: www.jcb.com The J C B logo is a registered trademark of J C Bamford Excavators Ltd. ©2009 J C B Sales.
Need help?
Do you have a question about the RENTAL Series and is the answer not in the manual?
Questions and answers