Table of Contents
Advertisement
Quick Links
Advertisement
Table of Contents

Related Manuals for Tesla J1772


Summary of Contents for Tesla J1772
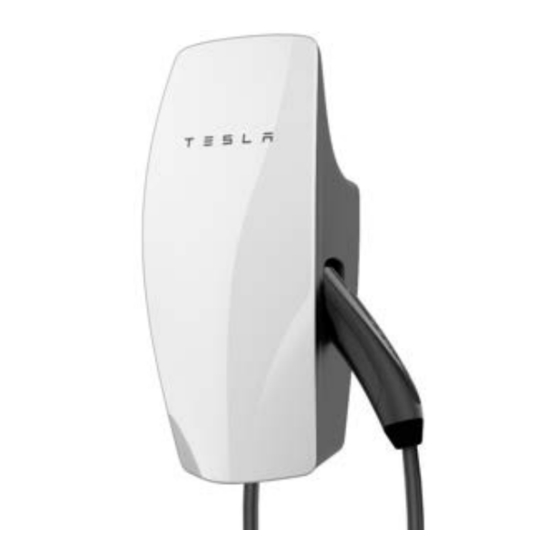
- Page 1 Gen 3 Wall Connector Manual 48A Single Phase...
-
Page 2: Table Of Contents
Important Safety Information......2 Dispute Resolution.............. 42 Product Overview..........5 Product Specifications............5 Circuit Breaker Rating / Maximum Output....6 Using Wall Connector............8 Features................... 10 Connectivity................10 Hosted Access Point............10 Local Network..............10 Ground Fault Circuit Interruption........12 Ground Assurance...............12 Thermal Monitoring............13 Power Outages..............13 Firmware Updates...............13 Wall Connector External Components......14... -
Page 3: Important Safety Information
Read all instructions before using this product. Save these instructions. Wall Connector features built-in Type B RCD . This manual contains important instructions for the Tesla Gen 3 Wall Connector that shall be followed during installation, operation, and maintenance. Please review all warnings and cautions before installing and using the Wall Connector. - Page 4 IMPORTANT SAFETY INFORMATION WARNING: Do not touch the Wall Connector’s end terminals with fingers or sharp metallic objects, such as wire, tools, or needles. WARNING: Do not insert fingers or foreign objects into any part of the Wall Connector. WARNING: Do not forcefully fold or apply pressure to any part of the Wall Connector or damage it with sharp objects.
-
Page 5: Product Overview
PRODUCT OVERVIEW This manual applies to Wall Connectors identified by part number 1457768-**-*. Product Specifications Voltage and Wiring Nominal 200-240 V AC single-phase Current Output Range 12 – 48 amps Terminal Blocks 12-4 AWG (3.5 - 25 mm ), copper only ¾... -
Page 6: Circuit Breaker Rating / Maximum Output
Commissioning Procedure on page 28 for details. NOTE: Some Tesla vehicles may draw less current than the max output. Actual charging rate depends on Wall Connector output and onboard charger in the vehicle. Branch Circuit Conductors and Ground Wire • If installing for less than maximum power, refer to local electrical code to select correct conductors and ground wire size that are suitable for the chosen circuit breaker. -
Page 7: Using Wall Connector
PRODUCT OVERVIEW Grounding Connections Wall Connector must have a ground path back to the main equipment earthing point on site. Without a proper ground connection, the Wall Connector will fault during a ground assurance test. Equipment- grounding conductor must be run with the circuit conductors and connected to the equipment-grounding terminal in the wirebox. - Page 8 PRODUCT OVERVIEW Gen 3 Wall Connector Manual...
-
Page 9: Features
Connectivity Wall Connector is equipped with Wi-Fi to communicate with local site routers, vehicles, mobile devices, other Wall Connectors, and other Tesla products. Hosted Access Point Wall Connector hosts a WPA2 password-secured, 2.4 GHz, 802.11 Wi-Fi access point network to facilitate commissioning and connecting to other devices. -
Page 10: Ground Fault Circuit Interruption
PRODUCT OVERVIEW Ground Fault Circuit Interruption Integrated ground fault circuit interruption (GFCI) protection automatically detects a current mismatch between power delivery conductors that would indicate that current is flowing through the ground (PE) conductor. If a ground fault occurs after 10 seconds of charging, Wall Connector will wait 15 minutes before automatically re-attempting to charge. -
Page 11: Thermal Monitoring
Connect Wall Connector to Wi-Fi for access to the most recent firmware update. See Commissioning Procedure on page Tesla vehicles can provide firmware updates to Wall Connectors. Wall Connector External Components "Wall Connector" refers to the product as a whole. -
Page 12: Wall Connector Internal Components
PRODUCT OVERVIEW Wall Connector Internal Components 1. RS-485 port 2. Contact blades 3. Temperature sensor 4. Conductor terminals 5. Zip tie anchor 6. Sliding contacts 7. Wirebox drainage opening (enables Type 3R protection) INSTALLATION In the Box Hex Bit (4 mm) Wirebox Mounting Main Unit Wirebox... -
Page 13: Installation
INSTALLATION Tools Required Tools NOTE: Drill bit sizes assume wood mounting surfaces. If installing on concrete or other masonry, consult with an electrician for optimal pilot hole sizes. Stud Finder Torque Driver (50 lbf . in, 5.6 Nm) Multimeter Tape Measure Bit Driver Wire Stripper Drill Bit, 1/4 in (6.5 mm) -
Page 14: Installation Considerations
INSTALLATION Installation Considerations Wall Connector may be installed on any flat, vertical surface capable of supporting its weight (e.g. wall, pedestal, etc.). Wall Connector weighs . Choosing Location Install Wall Connector in a location that allows the charge cable to reach the vehicle charge port without putting strain on the cable. - Page 15 INSTALLATION Choosing Height • Maximum height (indoor and outdoor): 60 in (1.52 m) • Recommended height: ~45 in (~1.15 m) • Minimum outdoor height: 24 in (0.6 m) • Minimum indoor height: 18 in (0.45 m) Maximizing Wi-Fi Signal Reception Wall Connectors should be connected to a local Wi-Fi network for optimal functionality.
- Page 16 INSTALLATION Wire Entry Options Wall Connector's wirebox has multiple wire entry options. Choose one entry path and follow installation instructions based on chosen entry path. 1. Top entry location 2. Rear entry locations (left or right) 3. Bottom entry location For additional installation considerations on sites that will have multiple Wall Connectors, see Considerations for Power Sharing on page...
-
Page 17: Step 1: Prepare Wirebox For Conduit Fittings And Bushings
INSTALLATION Step 1: Prepare Wirebox for Conduit Fittings and Bushings The default conduit size is 3/4 in (21 mm). 1 in (27 mm) conduit is acceptable if needed. Based on fittings and conduit size, prepare the wirebox. • For top or bottom entry: Manually remove the conduit plug. •... -
Page 18: Step 2: Prepare Mounting Surface
INSTALLATION Step 2: Prepare Mounting Surface 1. If applicable, use a stud finder to locate a wooden support stud. Plywood, or other flat wall surfaces capable of supporting the weight of the Wall Connector, may also be used. 2. Based on the chosen wire entry path, position the included cardboard mounting template onto the installation surface and use a 5/32 in (4 mm) bit to drill two pilot holes (one from the top row and one from the bottom row). -
Page 19: Step 3: Prepare Wirebox And Mount To Wall
INSTALLATION Step 3: Prepare Wirebox and Mount to Wall 1. Use a 1/4 in (6.5 mm) bit to drill two pilot holes into the wirebox that match the locations chosen on the cardboard mounting template. Drill bit, 1/4 in (6.5 mm) Top Entry Bottom Entry Bottom Left Entry... -
Page 20: Step 4: Route Wiring Through Wirebox
INSTALLATION Step 4: Route Wiring Through Wirebox 1. Route wiring into selected entry point and through the service loop channel on the right side of the wirebox. Top Entry Bottom Entry Rear Left Entry Rear Right Entry 2. Use appropriate cable glands, bushings, or fittings to secure the wiring in place and protect from water and debris intrusion. -
Page 21: Step 5: Strip And Land Wiring
INSTALLATION Step 5: Strip and Land Wiring 1. Strip insulation from wires ~1/2 in (~13 mm), route through service channel, and land each wire in its correct terminal block. NOTE: Terminals are bi-directional. 2. Secure the wiring in the service channel using the included zip tie. 3. -
Page 22: Step 6: Attach Wall Connector To Wirebox
INSTALLATION Step 6: Attach Wall Connector to Wirebox 1. Attach the main unit to the wirebox by pushing it inward. 2. Secure the main unit to the wirebox with the four included fasteners and the included 4 mm hex bit using a bit driver, applying pressure to the faceplate during the process to compress the internal seal. -
Page 23: Step 7: Energize Wall Connector
INSTALLATION Step 7: Energize Wall Connector 1. Energize the Wall Connector by turning on the upstream circuit breaker. The Wall Connector's LEDs will turn on. See Wall Connector LEDs on page 2. Proceed with commissioning. Gen 3 Wall Connector Manual... -
Page 24: Commissioning Procedure
COMMISSIONING PROCEDURE The commissioning process for Wall Connector enables easy configuration of circuit breaker size, Wi-Fi connectivity, and power sharing options. 1. Turn on Wall Connector's corresponding branch breaker to energize the unit. During startup, Wall Connector will display green LEDs for 10 seconds to indicate the maximum circuit breaker it is configured for. -
Page 25: Setting Up Access Control
◦ 'All Vehicles' This is the default option and will allow charging on all electric vehicles with a matching charge port. To charge with the older generation Tesla Roadster, you will need to pick the 'All Vehicles' option ◦ 'Only Tesla' This option blocks charging on non-Tesla EVs. -
Page 26: Power Sharing
POWER SHARING Power Sharing Overview The firmware-based power sharing feature enables up to 6 Wall Connectors installed at the same site to intelligently share the site's total available power via unit-to-unit Wi-Fi. This minimizes the need for many residential and commercial applications to have specific electrical upgrades for concurrent multi-vehicle charging. -
Page 27: Breaker And Branch Circuit Setup
POWER SHARING Breaker and Branch Circuit Setup Power sharing circuits may be installed in an electrical panel that supports other loads. If space is limited or the main power supply is far from the Wall Connectors, installing a dedicated load center may be prudent. See below for examples of Wall Connector power sharing diagrams (one with sub-panel and one without). -
Page 28: Considerations For Power Sharing
POWER SHARING Considerations for Power Sharing Wall Connector power sharing is achieved wirelessly. For optimal performance, Wall Connectors within a power sharing network should be installed within view of each other whenever possible. NOTE: Line of sight is recommended but not required. Wireless communication is capable of reaching around concrete corners but network range may degrade as a result. -
Page 29: Power Sharing Commissioning Procedure
POWER SHARING Power Sharing Commissioning Procedure 1. Identify and configure the wall connector. One Wall Connector will be the designated leader and provide the configuration and controls for all followers. Install and configure the leader first. Follow the process in the Commissioning Procedure on page 28 to connect and configure the leader. - Page 30 POWER SHARING NOTE: In the event that your leader and followers have different circuit breakers, you have to individually connect to each of the followers on different breakers via the Wi-Fi broadcast, and then set the correct breaker limit. NOTE: For example, in a four Wall Connector network with two 60 amp breakers, one 50 amp breaker and one 20 amp breaker where the leader has a 60 amp breaker, individually connect to the Wall Connectors with 50 amp and 20 amp breakers and set their current limit in the commissioning interface using the...
-
Page 31: Wall Connector Leds
WALL CONNECTOR LEDS Light Codes Startup Once energized at the circuit breaker, every LED (seven total) on the faceplate will illuminate for up to five seconds. After Startup After Wall Connector is energized at the circuit breaker, certain green LEDs (depending on the circuit breaker size) will illuminate for 10 seconds. - Page 32 WALL CONNECTOR LEDS Waiting to charge, Standby, waiting to plug SSID broadcasting, ready Charging in progress communicating with to commission vehicle Gen 3 Wall Connector Manual...
-
Page 33: Fault Codes
Tesla, record the vehicle's VIN and approximate time of the fault and contact Tesla. If the vehicle is not manufactured by Tesla, contact the vehicle's manufacturer. Gen 3 Wall Connector Manual... -
Page 34: Additional Assistance For Red Led Faults
Commissioning Procedure on page 28). If additional assistance is required, have the following information prepared before contacting Tesla: • Short video of Wall Connector LED activity during faulted state • Photo of Wall Connector's part number and serial number (located on the side label) •... -
Page 35: Warranty Information
Any Tesla manufactured and supplied connector or adapter included in the initial purchase and delivery of a Tesla vehicle by Tesla is covered under the Basic Vehicle Limited Warranty section of the New Vehicle Limited Warranty for 4 years or 50,000 miles (80,000 km), whichever comes first, subject to the terms and conditions of the New Vehicle Limited Warranty. -
Page 36: Limits Of Liability
Tesla, in its sole discretion. Tesla may occasionally offer to pay some or all of the cost of certain repairs that are not covered by this Charging Equipment Limited Warranty, either for specific models or on an ad hoc, case-by-case basis. - Page 37 Tesla will pay all AAA fees for any arbitration, which will be held in the city or county of your residence. To learn more about the Rules and how to begin an arbitration, you may call any AAA office or go to www.adr.org.
- Page 38 You may opt out of arbitration within 30 days after signing this Charging Equipment Limited Warranty by sending a letter to: Tesla, Inc.; P.O. Box 15430; Fremont, CA 94539-7970, stating your name, product, and intent to opt out of the arbitration provision. If you do not opt out, this agreement to arbitrate overrides any different arbitration agreement between us, including any arbitration agreement in a lease or finance contract.
Need help?
Do you have a question about the J1772 and is the answer not in the manual?
Questions and answers