Table of Contents
Advertisement
Quick Links
Advertisement
Table of Contents

Related Manuals for Tesla HOME CONNECTOR


Summary of Contents for Tesla HOME CONNECTOR
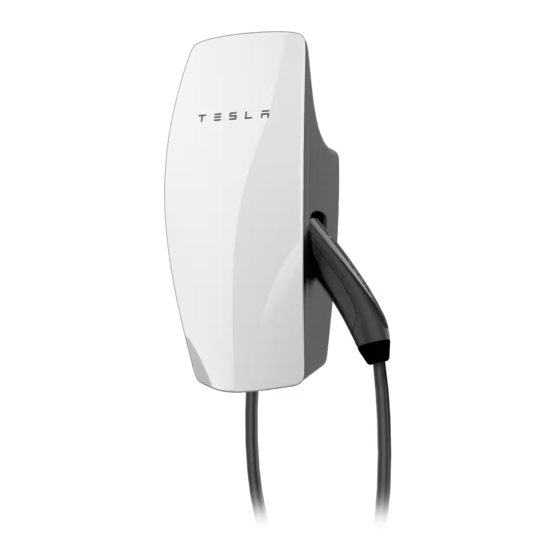
- Page 1 ClipperCreek Inc. Users Manual HOME CONNECTOR...
-
Page 2: Table Of Contents
For the service technician GFCI (CCID) trip Ground missing Part Number: 6005822 Rev AA ©2010 TESLA MOTORS INC. All rights reserved. This material may not be reproduced or copied, in whole or in part, without the written permission of Tesla Motors, Inc. -
Page 3: Safety And Regulatory Information
(2) this device must accept any maintenance of the Home Connector. could result in damage to the vehicle’s interference received, including Battery and to the Home Connector itself. interference that may cause undesired These damages will void the warranty for operation. -
Page 4: Features And Specifications
Providing the charging cable is plugged Ground monitoring circuit into the vehicle when utility power is The Home Connector features a ground restored, the Amber CHARGING light will monitoring circuit that continuously blink and the unit will delay energizing the... -
Page 5: Specifications
Features and specifications Specifications Voltage and wiring 240V AC single-phase: L1, L2, and Safety Ground (120V above ground) 208V AC 3-phase, wye-connected: Any 2 phases, and safety ground. 240V AC 3-phase, delta-connected: With center tap on one leg, use only the two phases on either side of the center tap. -
Page 6: Utility Service Connections
120V If ground is not provided by the electrical 208V IMPORTANT! Before commencing on the service, you must install a grounding stake installation of the Home Connector it is nearby. NEUTRAL (NOT USED) important you correctly identify the type The grounding stake must be connected... - Page 7 No “neutral” point is available for the required ground connection. L3 (NOT USED) Note: The Home Connector’s contactor will only close if it detects the presence of a ground wire connected to a neutral point on the transformer secondary.
-
Page 8: 230V Above Ground
IMPORTANT! Before commencing on the The grounding stake must be connected installation of the Home Connector it is to the ground bar in the main breaker important you correctly identify the type panel, and Neutral connected to Earth at of utility service connection available on that point. -
Page 9: Installing The Home Connector
Installation Installing the Home Connector Installation 2. Attach the Home Connector to the wall Note: Dimensions above are shown in studs using four 1/4” x 2 1/2” (M6) lag inches. 1 inch = 2.54 cm. screws. The length of the screws must 1. -
Page 10: Electrical Connection
Electrical connection 120V above ground Electrical connection Note: • The Home Connector requires a WARNING: Before commencing any electrical installation, always make sure that the dedicated 208/240 VAC 60 Hz, electricity supply has been isolated at the main circuit breaker panel. -
Page 11: 230V Above Ground
Electrical connection 230V above ground Note: • The Home Connector requires a WARNING: Before commencing any electrical installation, always make sure that the dedicated 230 VAC 50Hz, single-phase electricity supply has been isolated at the main circuit breaker panel. circuit, with its own 90A circuit breaker. -
Page 12: Post-Installation Testing
Post-installation testing Confirming a successful Post-installation testing Once a successful installation has been confirmed, close the Home Connector’s installation enclosure door and secure the latch. Apply utility power and observe that only Reinsert the two Torx screws on the the green READY light illuminates. -
Page 13: Operating Instructions
START button on the Home Connector’s front panel. ON (Steady) Ground monitor interrupt ON (Steady) Charging fault on vehicle The front panel on the Home Connector 1 Blink Ground fault on vehicle has four indicator lights: • 2 or more 2 or more Service needed. -
Page 14: In Case Of Difficulty
In case of difficulty Vehicle charging instructions Tesla Motors understands that you will rely For detailed information on how to charge heavily on the Home Connector to charge your Tesla Roadster, refer to the ‘Owner’s your Roadster. Therefore, should problems Manual’. -
Page 15: Maintenance, Warranty, And Service
Tesla Motors. The Home Connector requires no periodic Warranty maintenance other than the occasional The Home Connector is covered by a one cleaning. year parts and labor warranty. For a Always ensure that after charging, the detailed description of this warranty, charging cable is returned to the cable contact Tesla Motors. -
Page 16: For The Service Technician
For the service technician GFCI (CCID) trip Ground missing For the service technician If the Home Connector detects a ground When the Home Connector detects a fault, the contactor will open and the front missing Service Ground (Earth panel’s red PROTECTION light will connection), the red SERVICE light on the illuminate. - Page 17 TESLAMOTORS.COM...
Need help?
Do you have a question about the HOME CONNECTOR and is the answer not in the manual?
Questions and answers