Table of Contents
Advertisement
Quick Links
Advertisement
Table of Contents

Related Manuals for Epson EB-L770U


Summary of Contents for Epson EB-L770U
- Page 1 EB-L570U/EB-L770U/EB-L775U User's Guide...
-
Page 3: Table Of Contents
Contents EB-L570U/EB-L770U/EB-L775U User's Guide..................11 Introduction to Your Projector ......................... 12 Projector Features..........................12 Product Box Contents........................13 Additional Components ........................ 14 Additional Projector Software and Manuals ................... 15 Optional Equipment and Replacement Parts (U.S. and Canada) ..........17 Optional Equipment and Replacement Parts (Latin America)............18 Warranty and Registration Information (U.S. - Page 4 Connecting to a Document Camera ....................37 Connecting to an HDBaseT Transmitter ..................37 Connecting to External Speakers ....................38 Connecting Multiple Projectors of the Same Model................39 Multiple Projector Connection Menu Settings................40 Attaching and Removing the Cable Cover..................41 Installing Batteries in the Remote Control ..................
- Page 5 Registering a Digital Certificate on the Projector ................86 Registering Digital Certificates from a Web Browser ..............86 Digital Certificate Types......................... 87 Using Basic Projector Features ....................... 90 Turning On the Projector ........................90 Using the Home Screen......................... 92 Turning Off the Projector ........................94 Selecting the Language for the Projector Menus................
- Page 6 Projecting in Content Playback Mode....................139 Switching to Content Playback Mode ..................139 Projecting a Playlist in Content Playback Mode................141 Creating a Playlist Using Epson Web Control................142 Adding Effects to the Projected Image..................143 Adjusting Projector Features ......................... 146 Shutting Off the Picture and Sound Temporarily ................
- Page 7 Projecting Two Images Simultaneously.................... 158 Using Multiple Projectors ......................... 160 Multiple Projector Adjustment Overview ..................160 Projector Identification System for Multiple Projector Control ............161 Setting the Projector ID ......................161 Setting the Remote Control ID ....................162 Adjusting the Color Tone (Color Uniformity) ................163 Matching the Screens Manually ....................
- Page 8 Cleaning the Lens........................215 Cleaning the Projector Case......................216 Air Filter and Vent Maintenance ....................216 Cleaning the Air Filter......................217 Replacing the Air Filter......................221 Replacing the Remote Control Batteries ..................223 Transporting the Projector........................ 225 Solving Problems ............................ 226 Projection Problem Tips ........................
- Page 9 Solutions to Password Problems ....................249 Solutions When a Battery Message Appears ................249 Solving Network Problems ....................... 250 Solutions When Wireless Authentication Fails ................250 Solutions When You Cannot Access the Projector Through the Web ......... 250 Solutions When Network Alert E-Mails are Not Received............251 Solutions When the Image Contains Static During Network Projection ........
-
Page 11: Eb-L570U/Eb-L770U/Eb-L775U User's Guide
EB-L570U/EB-L770U/EB-L775U User's Guide Welcome to the EB-L570U/EB-L770U/EB-L775U User's Guide. For a printable PDF copy of this guide, click here. Note: Availability of products in this guide varies by country. -
Page 12: Introduction To Your Projector
• EB-L570U: Up to 5200 lumens of brightness (white light output and color light output) • EB-L770U and EB-L775U: Up to 7000 lumens of brightness (white light output and color light output) Note: Color brightness (color light output) and white brightness (white light output) will vary depending on usage conditions. -
Page 13: Product Box Contents
• Epson's Instant Off and Direct Power On features for quick setup and shut down • Support for Crestron Connected network monitoring systems • Network message broadcast system to project timely messages to all networked projectors (Windows only) Product Box Contents... -
Page 14: Additional Components
This allows you to mirror your smartphone or tablet screens, watch movies, and more. Contact your device manufacturer for compatible adapter options. Unless listed as available from Epson in this table, see your local computer or electronics dealer for purchase information. -
Page 15: Additional Projector Software And Manuals
Note: If you still need help after checking this manual and the sources listed here, you can use the Epson PrivateLine Support service to get help fast (U.S. and Canada only). For details, see "Where to Get Help."... - Page 16 Lets you project the computer screens of (Windows/Mac) Operation Guide users over a network. (Windows/Mac) You can download the latest software and documentation from the Epson web site. Go to epson.com/support (U.S.), epson.ca/support (Canada), or latin.epson.com/support (Caribbean) and select your projector.
-
Page 17: Optional Equipment And Replacement Parts (U.s. And Canada)
Optional Equipment and Replacement Parts (U.S. and Canada) You can purchase screens, other optional accessories, and replacement parts from an Epson authorized reseller. To find the nearest reseller, call 800-GO-EPSON (800-463-7766) in the U.S. or 800-807-7766 in Canada. Or you can purchase online at epsonstore.com... -
Page 18: Optional Equipment And Replacement Parts (Latin America)
Optional Equipment and Replacement Parts (Latin America) You can purchase optional accessories and replacement parts from an Epson authorized reseller. To find the nearest reseller, go to Or you can contact your nearest sales office as described in "Where to Get Help". -
Page 19: Warranty And Registration Information (Latin America)
• If you still need help after checking this manual and any other sources listed here, you can use the Epson PrivateLine Support service to get help fast. For details, see "Where to Get Help." Parent topic:... -
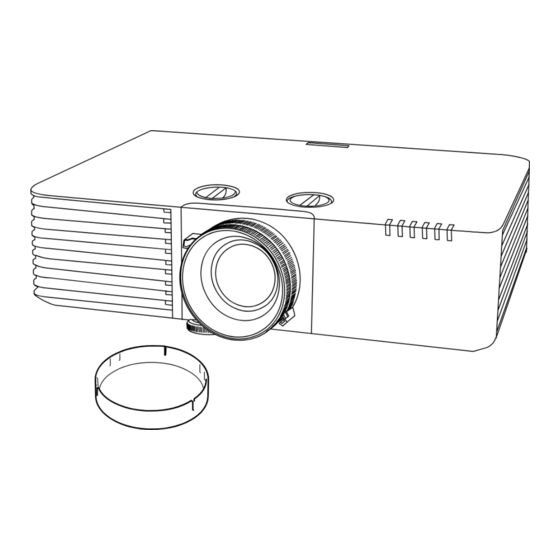
Page 20: Projector Parts - Front/Top
Projector Parts - Rear Projector Parts - Interface Ports Projector Parts - Base Projector Parts - Control Panel Projector Parts - Remote Control Parent topic: Introduction to Your Projector Projector Parts - Front/Top Air intake vent Front adjustable foot Focus ring Zoom ring Projection lens Air intake vent (air filter) -
Page 21: Projector Parts - Rear
Vertical lens shift dial Horizontal lens shift dial Remote receiver Speaker Air exhaust vent Remote receiver Parent topic: Projector Part Locations Related references Projector Light Status Projector Parts - Rear Kensington security slot AC inlet Interface ports Control panel Remote receiver Parent topic: Projector Part Locations... -
Page 22: Projector Parts - Interface Ports
Projector Parts - Interface Ports Cable holder Audio Out port RS-232 port Service port Wireless LAN module fixing screw USB-A port DC Out (2.0A) port HDMI2 port HMDI1 port HDMI Out port HDBaseT port Network LAN port Parent topic: Projector Part Locations Related tasks Attaching and Removing the Cable Cover... -
Page 23: Projector Parts - Base
Projector Parts - Base Front adjustable foot Ceiling mount attachment points (4) Safety wire carabiner attachment point Rear feet Cable cover screw points (2) Security cable attachment point Note: Do not attach the optional safety wire to this point. Air filter cover screws (2) VESA-compliant mount attachment points (4) -
Page 24: Projector Parts - Control Panel
Parent topic: Projector Part Locations Projector Parts - Control Panel Power button (turns on the projector) Source Search button (searches for connected sources) A/V Mute button (turns the video and audio on or off) Left arrow button and displays the Control Panel Lock screen Down arrow button and displays a test pattern Enter button (selects options) Right arrow button and displays the Info menu... -
Page 25: Projector Parts - Remote Control
Projector Parts - Remote Control Power button HDMI button (cycles through connected HDMI sources) - Page 26 Computer button (button is not used with these projectors) Numeric buttons Auto button (button is not used with these projectors) Num button (when held down, switches numeric buttons to number function) Menu button (accesses projector menu system) Arrow buttons (move through on-screen options) Enter button (selects options) User button (customizable for different functions) Color Mode button (selects display modes)
-
Page 27: Setting Up The Projector
Setting Up the Projector Follow the instructions in these sections to set up your projector for use. Projector Placement Projector Connections Connecting Multiple Projectors of the Same Model Attaching and Removing the Cable Cover Installing Batteries in the Remote Control Projector Placement You can place the projector on almost any flat surface to project an image. - Page 28 Front Rear Front ceiling...
- Page 29 Rear ceiling Note: Be sure to leave the following amount of space around the projector to avoid blocking the air exhaust and intake vents. 3.94 inches (10 cm) 7.87 inches (20 cm) 15.75 inches (40 cm) Note: When setting up multiple projectors, be sure to leave the following amount of space between the projectors.
-
Page 30: Projection Distance
Without a partition 59.05 inches (150 cm) With a partition Partition 7.87 inches (20 cm) 15.75 inches (40 cm) If you project from the ceiling or from the rear, be sure to select the correct Projection setting in the Extended menu. If necessary, enable the Inv Direction Button setting in the Extended > Operation > Advanced menu and adjust the OSD Rotation setting in the Extended >... - Page 31 Use the tables here to determine approximately how far to place the projector from the screen based on the size of the projected image. (Conversion figures may have been rounded up or down.) You can also use the Projection Distance Calculator here (U.S.), here...
-
Page 32: Projector Connections
16:10 Aspect Ratio Image or Screen Screen or image size Projection distance (1) Distance from center of lens to base of screen (2) Wide to Tele 70 inches 80 to 130 inches 0 to 37.1 inches (0 to 94 cm) (204 to 331 cm) 80 inches 92 to 149 inches... -
Page 33: Connecting To Computer Sources
Connecting to Computer Sources Connecting to Video Sources Connecting to a USB Device Connecting to a Streaming Media Player Connecting to a Document Camera Connecting to an HDBaseT Transmitter Connecting to External Speakers Parent topic: Setting Up the Projector Related references Projector Setup Settings - Extended Menu Connecting to Computer Sources Follow the instructions in these sections to connect a computer to the projector. -
Page 34: Connecting To Video Sources
2. Connect the other end to one of the projector's HDMI ports. Parent topic: Connecting to Computer Sources Related references Projector Setup Settings - Extended Menu Connecting to Video Sources Follow the instructions in these sections to connect video devices to the projector. Connecting to an HDMI Video Source Parent topic: Projector Connections... -
Page 35: Connecting To A Usb Device
2. Connect the other end to one of the projector's HDMI ports. Parent topic: Connecting to Video Sources Related references Projector Setup Settings - Extended Menu Connecting to a USB Device You can connect a USB device or cable to the projector's USB-A port to project images from the device. Use the USB cable supplied with the device. -
Page 36: Connecting To A Streaming Media Player
The projector displays images stored on the USB device. If you turned on the Content Playback setting in the Settings menu, you can only view images that have been added to a playlist created in Epson Projector Content Manager. Parent topic:... -
Page 37: Connecting To A Document Camera
2. If necessary, connect the streaming media player's power supply USB cable to the DC Out (2.0A) port. Connect the other end of the cable to the USB port on the streaming media player. Note: To keep supplying power to the optional streaming media player when the projector is not projecting images, select Always On as the USB Power setting in the projector's Extended menu. -
Page 38: Connecting To External Speakers
1. Turn off the projector and HDBaseT transmitter. Note: Make sure the projector and HDBaseT transmitter are turned off when connecting or disconnecting a network cable between the two devices. 2. Connect one end of the network cable to the HDBaseT port on the transmitter. 3. -
Page 39: Connecting Multiple Projectors Of The Same Model
You can also connect the projector to an amplifier with speakers. If you want to output audio from the external speakers when the projector is turned off, you need to select Always On as the A/V Output setting in the projector's Extended menu. Note: The projector's built-in speaker system is disabled when you connect external speakers. -
Page 40: Multiple Projector Connection Menu Settings
1. Connect the computer and the projectors using HDMI cables as shown. Note: If you are connecting three or four projectors, connect the projectors in a chain as shown. 2. After making the appropriate connections, you need to adjust the necessary projector menu settings accordingly. -
Page 41: Attaching And Removing The Cable Cover
Setting Projector 1 Projector 2 Projectors 3-4 Image Menu Color Mode Multi-Projection Multi-Projection Multi-Projection Multi-Projection Menu HDMI Out Setting Power On/Off Link: Power On/Off Link: On Power On/Off Link: On Terminal End: Off Terminal End: On Terminal End: Off Number of Specify the number of projectors connected in a series Projectors Order... - Page 42 1. Bundle the cables together using a band or other fastener (not provided). Caution: Do not bundle the power cord to the other cables. Otherwise, a fire may occur. 2. Place the cable cover on the projector as shown, guiding the cables through the notch on the base of the cable cover.
-
Page 43: Installing Batteries In The Remote Control
3. Tighten both cable cover screws. To remove the cover, loosen both screws and pull the cover off of the projector. Parent topic: Setting Up the Projector Installing Batteries in the Remote Control The remote control uses the two AA batteries that came with the projector. Caution: Use only the type of batteries specified in this manual. - Page 44 1. Remove the battery cover. 2. Insert the batteries with the + and – ends facing as shown. Warning: Make sure the batteries are inserted in the correct positions. If the batteries are not inserted correctly, they could explode or leak, causing a fire, injury, or damage to the product.
- Page 45 3. Replace the battery cover and press it down until it clicks into place. Warning: Dispose of used batteries according to local regulations. Do not expose batteries to heat or flame. Keep batteries out of the reach of children; they are choking hazards and are very dangerous if swallowed.
-
Page 46: Using The Projector On A Network
CD, if included, or download the software and manuals as necessary. Note: If your projector is connected via a LAN (Ethernet) cable to a network that includes a wireless access point, you can connect to the projector wirelessly through the access point using the Epson network software. -
Page 47: Connecting To A Wired Network
Connecting to a Wired Network To connect the projector to a wired local area network (LAN), use a 100Base-TX or 10Base-T network cable. To ensure proper data transmission, use a Category 5 shielded cable or higher. 1. Connect one end of the network cable to your network hub, switch, or router. 2. - Page 48 3. Select the Network menu and press Enter. 4. Select Network Configuration and press Enter. 5. Select the Basic menu and press Enter. 6. Select the following basic options as necessary: • Projector Name lets you enter a name up to 16 alphanumeric characters long to identify the projector over the network.
- Page 49 PJLink protocol for projector control. • Remote Password lets you enter a password up to 8 alphanumeric characters long for accessing the Remote or Basic Control screen in Epson Web Control. (Default user name is EPSONREMOTE; default password is guest.) •...
-
Page 50: Wireless Network Projection
You can project over a wireless network. To do this, you must set up your projector and computer for wireless projection. Note: The Epson 802.11b/g/n wireless LAN module is not included with your projector and is optional. There are two ways to connect to your projector wirelessly: •... -
Page 51: Installing The Wireless Lan Module
Additional Projector Software and Manuals Installing the Wireless LAN Module To use the projector over a wireless network, install the optional Epson wireless LAN module. Do not install any other type of wireless LAN module. Caution: Never remove the module while its indicator light is blue or flashing, or while you are projecting wirelessly. -
Page 52: Using Quick Wireless Connection (Windows)
3. Insert the wireless LAN module into the USB-A port. 4. Replace the wireless LAN module cover and secure it using the screw you removed. 5. Plug in and turn on the projector. Parent topic: Wireless Network Projection Related references Projector Light Status Using Quick Wireless Connection (Windows) You can create a Quick Wireless Connection USB Key to quickly connect the projector to a Windows... - Page 53 1. Create a Quick Wireless Connection USB Key with a USB flash drive and the Epson iProjection (Windows/Mac) software. Note: See the Epson iProjection Operation Guide (Windows/Mac) for instructions. 2. Turn on the projector. 3. Press the LAN button on the remote control.
-
Page 54: Selecting Wireless Network Settings Manually
Selecting Wireless Network Settings Manually Before you can project from your wireless network, you must select the network settings for the projector using its menu system. 1. Turn on the projector. 2. Press the Menu button. 3. Select the Network menu and press Enter. 4. - Page 55 The projector displays a random keyword that you must enter from a computer using the Epson iProjection (Windows/Mac) software or an iOS or Android device, or on a Chromebook, using the Epson iProjection app.
- Page 56 8. Select the Wireless LAN menu and press Enter. 9. Select the settings on the Wireless LAN menu as necessary for your network. 10. When you finish selecting settings, select Complete and follow the on-screen instructions to save your settings and exit the menus. After you complete the wireless settings for your projector, you need to select the wireless network on your computer, Chromebook, or iOS or Android device.
-
Page 57: Wireless Lan Menu Settings
Wireless LAN Menu Settings Setting Options Description Connection Mode Quick Selects the type of wireless connection: Advanced Quick: lets you connect to multiple smartphones, tablets, or computers directly Advanced: lets you connect to multiple smartphones, tablets, or computers via a wireless network access point Search Access Point To Search View... - Page 58 Selects whether to display the IP address on the network standby screen IPv6 Settings IPv6 Selects the IPv6 settings when you connect the projector to the Auto Configuration network using IPv6 Use Temporary Address The Epson Web Control and PJLink functions support IPv6.
-
Page 59: Selecting Wireless Network Settings In Windows
Parent topic: Selecting Wireless Network Settings Manually Selecting Wireless Network Settings in Windows Before connecting to the projector, select the correct wireless network on your computer. 1. To access your wireless utility software, access the Desktop and double-click the network icon on the Windows taskbar. - Page 60 Note: Contact your network administrator for guidance on entering the correct information. 1. If you want to set up WPA3-EAP or WPA2/WPA3-EAP security, make sure your digital certificate file is compatible with projector registration and placed directly on the USB storage device. 2.
-
Page 61: Using A Qr Code To Connect A Mobile Device
After you select the wireless network settings for your projector, you can display a QR code on the screen and use it to connect a mobile device using the Epson iProjection app. Note: Make sure you have installed the latest version of Epson iProjection on your device. Visit epson.com/iprojection (U.S.),... -
Page 62: Setting Up Projector Network E-Mail Alerts
Note: If you do not see the QR code after pressing the LAN button, press Enter to display it. 2. Start Epson iProjection on your mobile device. 3. Use the QR code reader feature to read the QR code and connect your device to the projector. Visit epson.com/iprojection... - Page 63 4. Select the Notifications menu and press Enter. 5. Turn on Mail Notification. 6. Enter the IP address for the SMTP Server setting. Note: Do not use these addresses: 127.x.x.x or 224.0.0.0 through 255.255.255.255 (where x is a number from 0 to 255). 7.
-
Page 64: Network Projector E-Mail Alert Messages
• The email address entered as the From setting • Epson Projector on the subject line • The name of the projector experiencing a problem • The IP address of the affected projector •... -
Page 65: Controlling A Networked Projector Using A Web Browser
This lets you access the projector remotely. You can also control the projector using a web browser through the Epson iProjection app on iOS or Android. Note: The web setup and control features support Microsoft Internet Explorer 11.0 or later (Windows), Microsoft Edge (Windows), Safari (Mac), and Chrome (Android) on networks that do not use a proxy server for connection. - Page 66 After the first time you enter the password, you will be prompted to change it. You see the Epson Web Control screen. Select Basic Control to control the projector remotely. Select Test Pattern to display a test pattern.
-
Page 67: Web Control Options
4. Select the option corresponding to the projector function you want to control. Web Control Options Parent topic: Using the Projector on a Network Web Control Options Basic Control Note: If the Remote Password is set to On, you need to enter your user name and password. (The default username is EPSONREMOTE and the default password is the projector's serial number. - Page 68 Returns to the Epson Web Control screen Displays the projector's setting menus Use your finger or mouse to navigate the menus Returns the projector to its default settings Returns to the previous menu Displays help topics Note: You cannot change some settings using Epson Web Control.
- Page 69 Test Pattern screen Returns to the Home screen Displays available test patterns; select to project a test pattern Turns off test pattern display...
- Page 70 Status Information screen Returns to the Home screen Displays a list of monitored settings Displays the setting status Select to view different status information...
- Page 71 Remote Camera Access screen Displays the image you captured using the Shoot button Takes a picture of the projected image using the optional external camera on the front of the projector Adjusts the image exposure Zooms in or out on the image you captured Advanced If the default Web Control Password is set, a screen prompting you to change the password appears before you can view the Advanced screen.
-
Page 72: Controlling A Networked Projector In Content Playback Mode
• HTTP port (used for Web Control; cannot use 80 [default], 843, 3620, 3621, 3625, 3629, 4352, 4649, 5357, 10000, 10001, or 41794) Opens the menus Displays the selected menu name Contains the selected projector settings Locks or unlocks the projector settings Updates the projector settings Parent topic: Controlling a Networked Projector Using a Web Browser... - Page 73 Note: You can also control the projector using a web browser through the Epson iProjection app. Note: Do not remove any USB device connected to the projector or unplug the power cord when the Playlists or USB Memory Device screen is displayed; data saved on the USB device may be damaged.
- Page 74 Using the Projector on a Network Related references Additional Projector Software and Manuals Related tasks Switching to Content Playback Mode Creating a Playlist Using Epson Web Control Adding Effects to the Projected Image Projecting a Playlist in Content Playback Mode Displaying a Test Pattern...
-
Page 75: Web Control Options In Content Playback Mode
Note: If the Remote Password is set to On, you need to enter your user name and password. (The default username is EPSONREMOTE and the default password is the projector's serial number. Enter the serial number with uppercase letters.) Returns to the Epson Web Control screen Turns the projector on or off Selects the input source... - Page 76 Adjusts the speaker volume Playlists Returns to the Epson Web Control screen Controls playback of the playlist Edits, copies, or deletes the playlist Creates a new playlist...
- Page 77 Create or Edit Playlist Edits the playlist name Enables repeat playback Adds the playlist to your favorites list Displays the images or movies in the order that they will be played Adds items to the playlist Deletes items from the playlist Opens the Switch Image screen (specifies the time before the projector switches to the next item in the playlist) Opens the Effects screen...
- Page 78 Deletes images or videos on the USB device Note: You can upload .avi, .jpeg (.jpg), .png, .bmp, or .gif files using Epson Web Control. If you want to add .mp4 or .mov files to the playlist, use the Epson Projector Content Manager software or the Epson...
- Page 79 Time Table Returns to the Epson Web Control screen Turns the time table on or off (see the online Epson Projector Content Manager Operation Guide for more information)
-
Page 80: Using Crestron Connected
Use your finger or mouse to navigate the menus Returns projector to default settings Returns to the previous menu Displays help topics Note: You cannot change some settings using Epson Web Control. Parent topic: Controlling a Networked Projector in Content Playback Mode Using Crestron Connected If you are using the Crestron Connected network monitoring and control system, you can set up your projector for use on the system. -
Page 81: Setting Up Crestron Connected
Note: You cannot use the Message Broadcasting feature in the Epson Projector Management software when you use Crestron Connected. For additional information on Crestron Connected, contact Crestron. Setting Up Crestron Connected Controlling a Networked Projector Using Crestron Connected Parent topic:... -
Page 82: Controlling A Networked Projector Using Crestron Connected
Projector Management software. 6. Start your Web browser on a computer or device connected to the network. 7. Go to the Epson Web Control screen by entering the projector's IP address into the browser's address box. 8. Select the Crestron Connected settings. See the Crestron Web site for details. -
Page 83: Setting Up Web Api
You see the Epson Web Control screen: Note: You may need to log in to access some of the options on the Web Control screen. If you see a log in window, enter your user name and password. (The default user name is EPSONWEB and the default password is the projector's serial number.) -
Page 84: Secure Http
1. Open the Epson Web Control from your Web browser. 2. Select Developer's Menu. 3. Set the Enable API setting to On. 4. Enter one of the following Web APIs to operate the projector: Supported methods Description http://<ip>/api/v01/contentmgr/remote/power/on GET/POST/PUT Turns the projector on... -
Page 85: Importing A Web Server Certificate Using The Projector Menus
Importing a Web Server Certificate Using the Projector Menus You can create your web server certificate and import it using the projector menus and a USB flash drive. Note: You can also register digital certificates from your web browser. Make sure to only register once, or the certificate may not install correctly. -
Page 86: Registering A Digital Certificate On The Projector
A message is displayed prompting you to enter the password for the certificate. 12. Enter the password and press Enter. The certificate is imported and a completion message appears. Parent topic: Secure HTTP Related references Projector Network Settings - Network Menu Registering a Digital Certificate on the Projector Follow the instructions here if you need to install a digital certificate on the projector to provide security for your presentation files. -
Page 87: Digital Certificate Types
You see a screen like this: 8. Click the Browse button, select the certificate file, and click Open. 9. Enter a password in the Password box, and click Send. 10. When you finish registering the certificate, click Apply to finalize your changes and complete the registration. - Page 88 Client Certificate (PEAP-TLS/EAP-TLS) Specification Description Format PKCS#12 Extension PFX, P12 Encryption Hashes MD5/SHA-1/SHA-256/SHA-384/SHA-512 Key length 512/1024/2048/4096 bit Password Up to 32 alphanumeric characters; required CA Certificate (PEAP/PEAP-TLS/EAP-TLS/EAP-FAST) Specification Description Format X509v3 Extension DER/CER/PEM Encryption Hashes MD5/SHA-1/SHA-256/SHA-384/SHA-512 Key length 512/1024/2048/4096 bit Encoding BASE64/Binary Web Server Certificate (Secure HTTP)
- Page 89 Specification Description Password Up to 32 alphanumeric characters; required Note: You can set a password of up to 64 characters if you use a web browser to enter the text. Parent topic: Registering a Digital Certificate on the Projector Related tasks Registering Digital Certificates from a Web Browser...
-
Page 90: Using Basic Projector Features
Using Basic Projector Features Follow the instructions in these sections to use your projector's basic features. Turning On the Projector Turning Off the Projector Selecting the Language for the Projector Menus Setting the Date and Time Resizing the Image with the Zoom Ring Focusing the Image Using the Focus Ring Setting the Screen Type Adjusting the Image Position Using Lens Shift... - Page 91 1. Connect the power cord to the projector's power inlet. 2. Plug the power cord into an electrical outlet. The projector's On/Standby light turns blue. This indicates that the projector is receiving power, but is not yet turned on (it is in standby mode). Note: With Direct Power On turned on, the projector turns on as soon as you plug it in.
-
Page 92: Using The Home Screen
Note: When Quick Startup is enabled in the projector's Extended menu, the projector becomes ready for use in several seconds the next time you press the power button. Note: If the Auto Source Search setting in the Extended menu is enabled, the projector automatically detects the input signal when you turn it on. - Page 93 2. Press the arrow buttons on the remote control or control panel to navigate the screen, and press Enter to select an option. Select the video source you want to project Display the Connection Guide Indicates the Content Playback mode Display the Help screen Display the projector's menus Select customizable menu options...
-
Page 94: Turning Off The Projector
(To leave the projector on, press any other button.) The projector beeps twice, the laser turns off, and the Status light turns off. Note: With Epson's Instant Off technology, there is no cool-down period so you can pack up the projector for transport right away (if necessary). -
Page 95: Selecting The Language For The Projector Menus
Selecting the Language for the Projector Menus If you want to view the projector's menus and messages in another language, you can change the Language setting. 1. Turn on the projector. 2. Press the Menu button. 3. Select the Extended menu and press Enter. 4. - Page 96 4. Select the Date & Time setting and press Enter. You see a screen like this: 5. Select the Date & Time setting and press Enter. 6. Select Date, press Enter, and use the displayed keyboard to enter today's date. 7.
-
Page 97: Date And Time Settings
Date and Time Settings Settings Options Description Date & Time Date Adjusts the projector's date and time settings Time Date and Time: sets the date and time Time Difference (UTC) Time Difference (UTC): sets the time difference from Coordinated Universal Time Daylight Saving Time Daylight Saving Time... -
Page 98: Focusing The Image Using The Focus Ring
2. To enlarge or reduce the image size, rotate the projector's zoom ring. Parent topic: Using Basic Projector Features Focusing the Image Using the Focus Ring You can correct the focus using the projector's focus ring. 1. Turn on the projector and display an image. Wait 20 minutes after turning on the projector before setting the focus, zoom, and lens shift for maximum accuracy. -
Page 99: Adjusting The Image Position Using Lens Shift
Note: You cannot change the Screen Type setting when the Content Playback setting is enabled. If you change the Screen Type setting, the Geometry Correction settings are initialized. 1. Turn on the projector and display an image. 2. Press the Menu button. 3. - Page 100 Follow these guidelines when using lens shift to adjust your images: • When adjusting the image height, position the image lower than where you want it to be and then move it up using the vertical lens shift dial. This helps prevent the image from moving down after adjustment.
- Page 101 2. Turn the vertical and horizontal lens shift dials on the projector to adjust the position of the projected image as necessary. Center of lens Projected image when the lens is set to the home position Maximum range: V × 50%...
-
Page 102: Adjusting The Image Position Using Screen Position
When the horizontal direction is at the maximum value: V × 12% Note: You cannot move the image horizontally when the lens is shifted vertically all the way Parent topic: Using Basic Projector Features Adjusting the Image Position Using Screen Position You can adjust the image position if there are margins between the edge of the image and the projected screen frame. -
Page 103: Adjusting The Image Height
Note: The test pattern's shape is determined by the Screen Type setting. Be sure to set the correct screen type before adjusting with the test pattern. 1. Turn on the projector. 2. Press the down arrow button on the control panel. Note: You can also display a test pattern from the menu using the remote control. -
Page 104: Image Shape
3. If the image is tilted, rotate the rear feet to adjust their height. If the projected image is unevenly rectangular, you need to adjust the image shape. Parent topic: Using Basic Projector Features Related concepts Image Shape Image Shape You can project an evenly rectangular image by placing the projector directly in front of the center of the screen and keeping it level. -
Page 105: Correcting Image Shape With H/V-Keystone
Correcting Image Shape with H/V-Keystone You can use the projector's H/V-Keystone setting to correct the shape of an image that is unevenly rectangular on the sides. Note: You cannot combine H/V-Keystone correction with other image shape correction methods. 1. Turn on the projector and display an image. 2. - Page 106 4. Select the Geometry Correction setting and press Enter. Note: You can also access the geometric adjustment screen by pressing the up arrow button on the control panel. 5. Select the H/V-Keystone setting and press Enter. Then press Enter again. You see the H/V-Keystone adjustment screen: 6.
-
Page 107: Correcting Image Shape With Quick Corner
H-Keystone H-Balance Note: To save the current image shape, select Save Memory. You can save up to three image shapes in the projector's memory. 7. When you are finished, press Esc. After correction, your image is slightly smaller. Parent topic: Image Shape Related references Projector Feature Settings - Settings Menu... - Page 108 Note: To provide the best possible image quality, adjust the projector's position to correct the image shape. If this isn't possible, use the Quick Corner setting to correct the image shape. Note: If you change the Screen Type or Screen Position settings, your image adjustments are reset. 1.
- Page 109 You see the Quick Corner adjustment screen: 6. Use the arrow buttons on the projector or remote control to select the corner of the image you want to adjust. Then press Enter. Note: To reset your adjustments, press and hold the Esc button for at least 2 seconds to display a reset screen.
-
Page 110: Correcting Image Shape With Correct Shape
Correcting Image Shape with Correct Shape You can use the projector's Curved Surface setting to correct the shape of an image that is projected on a curved or spherical surface. 1. Turn on the projector and display an image. 2. Press the Menu button. 3. - Page 111 7. Select the Correct Shape setting and press Enter. You see the Correct Shape adjustment screen: 8. Use the arrow buttons on the remote control to select the area of the image you want to adjust. Then press Enter. Note: To reset your adjustments, press and hold the Esc button for at least 2 seconds to display a reset screen.
-
Page 112: Correcting Image Shape With Point Correction
Correcting Image Shape with Point Correction You can use the projector's Point Correction feature to fine-tune the image shape using points on a grid. This is useful for adjusting overlapping areas in multiple projected images that do not line up correctly. 1. -
Page 113: Applying Saved Image Shape Settings
6. Press the arrow buttons on the projector or remote control to move to the point on the grid that you want to adjust. Then press Enter. 7. Press the arrow buttons as necessary to correct the image shape. 8. Press Esc to return to the previous screen and select another point to correct, if necessary. 9. -
Page 114: Selecting An Image Source
1. Turn on the projector and display an image. 2. Hold down the Num button on the remote control and press the number button (1, 2, or 3) that matches the number of the saved image shape setting. The saved image shape setting is applied and you are prompted to calibrate the screen. 3. - Page 115 • Press the button for the source you want on the remote control. If there is more than one port for that source, press the button again to cycle through the sources. HDMI and HDBaseT sources USB port sources (computer display or external devices) Network sources •...
-
Page 116: Remote Control Operation
Parent topic: Using Basic Projector Features Related references Projector Setup Settings - Extended Menu Related tasks Using the Home Screen Remote Control Operation The remote control lets you control the projector from almost anywhere in the room, up to 26 feet (8 m) away. -
Page 117: Projection Modes
Parent topic: Using Basic Projector Features Related references Solutions to Remote Control Problems Related tasks Replacing the Remote Control Batteries Projection Modes Depending on how you positioned the projector, you may need to change the projection mode so your images project correctly. •... -
Page 118: Changing The Projection Mode Using The Menus
2. Hold down the A/V Mute button on the remote control for 5 to 10 seconds. The image disappears briefly and reappears flipped top-to-bottom. 3. To change projection back to the original mode, hold down the A/V Mute button for 5 to 10 seconds again. -
Page 119: Image Aspect Ratio
5. Select a projection mode and press Enter. 6. Press Menu or Esc to exit the menus. Parent topic: Projection Modes Related references Projector Setup Settings - Extended Menu Image Aspect Ratio The projector can display images in different width-to-height ratios called aspect ratios. Normally the input signal from your video source determines the image's aspect ratio setting. -
Page 120: Available Image Aspect Ratios
2. Press the Aspect button on the remote control. The shape and size of the displayed image changes, and the name of the aspect ratio appears briefly on the screen. 3. To cycle through the available aspect ratios for your input signal, press the Aspect button repeatedly. -
Page 121: Color Mode
Aspect ratio setting Description Displays images at a 4:3 aspect ratio. 16:9 Displays images at a 16:9 aspect ratio. Full Displays images using the full size of the projection area, but does not maintain the aspect ratio. H-Zoom Displays images using the full width (H-Zoom) or full height (V- Zoom) of the projection area and maintains the aspect ratio of the V-Zoom image. -
Page 122: Changing The Color Mode
Changing the Color Mode You can change the projector's Color Mode using the remote control to optimize the image for your viewing environment. 1. Turn on the projector and switch to the image source you want to use. 2. If you are projecting from a DVD player or other video source, insert a disc or other video media and press the play button, if necessary. -
Page 123: Turning On Dynamic Contrast
Color Mode Description BT.709 Best for watching digital TV or Blu-ray discs; produces images that conform to the ITU-R BT.709 standard DICOM SIM Best for projecting X-ray photographs and other medical images Multi-Projection Best for projecting from multiple projectors (reduces the color tone difference between images) Note: The DICOM SIM Color Mode is for reference purposes only and should not be used to make medical diagnoses. -
Page 124: Adjusting The Hue, Saturation, And Brightness
5. Choose one of the following options and press Enter: • Normal to adjust brightness at the standard speed. • High Speed to adjust brightness as soon as the scene changes. 6. Press Menu or Esc to exit the menus. Parent topic: Using Basic Projector Features Related references... -
Page 125: Adjusting Gamma
5. Select the color you want to adjust and press Enter. • To adjust the overall hue of the color, adjust the Hue setting. • To adjust the overall vividness of the color, adjust the Saturation setting. • To adjust the overall brightness of the color, adjust the Brightness setting. 6. - Page 126 3. Select the Image > Advanced menu and press Enter. 4. Select the Gamma setting and press Enter. You see a screen like this: 5. Select and adjust the correction value. Note: If you set the Color Mode to DICOM SIM in the projector's Image menu, select the adjustment value according to the projection size.
-
Page 127: Adjusting The Image Resolution
You see a screen like this: 7. Press the left or right arrow button to select the tone you want to change, then press the up or down arrow button to adjust the tone and press Enter. 8. Press Menu or Esc to exit the menus. Parent topic: Using Basic Projector Features Related references... -
Page 128: Adjusting The Brightness
6. Select the preset option and press Enter. Note: The following settings saved in the preset option are applied to the image: • Noise Reduction • MPEG Noise Reduction • Deinterlacing • Super-resolution • Detail Enhancement 7. Adjust each setting in the projector's Image menu individually as necessary. •... - Page 129 3. Select the Settings menu and press Enter. 4. Select the Brightness Settings setting and press Enter. 5. Select the Light Source Mode setting and press Enter. 6. Select one of the following options: • Normal: Sets brightness to the maximum level (ideal for conference rooms, auditoriums, and lecture halls) •...
-
Page 130: Constant Brightness Usage Hours
9. Press Menu or Esc to exit the menus. Note: If you use the projector continuously for more than 24 hours, or regularly turn it off by shutting off the power outlet, schedule periodic Light Source Calibration events from the Extended menu. Otherwise, the Constant Brightness setting may not work properly. -
Page 131: Controlling The Volume With The Volume Buttons
Brightness level Time the projector can maintain constant brightness (approximate) Brightness Level setting Hours 6000 hours 10000 hours 14000 hours 19000 hours Note: The light source usage hours vary depending upon environmental conditions and usage. The hours listed here are an approximate and are not guaranteed. You may need to replace parts in the projector sooner than the estimated light source operation time. -
Page 132: Projecting A Pc Free Presentation
2. To lower or raise the volume, press the Volume buttons on the remote control. A volume gauge appears on the screen. Note: You can also adjust the Volume setting in the projector's Settings menu. 3. To set the volume to a specific level for an input source, use the projector menus. Parent topic: Using Basic Projector Features Related references... -
Page 133: Pc Free Precautions
PC Free Precautions Note the following precautions when using PC Free features: • You cannot use a USB key for quick wireless connection for PC Free features. • Do not disconnect the USB device while it is being accessed; otherwise, PC Free may not operate correctly. -
Page 134: Starting A Pc Free Slideshow
File type and Details extension Image (.jpg) Make sure the file is not: • CMYK format • Progressive format • Highly compressed • Above 8192 × 8192 resolution Image (.bmp) Make sure the file resolution is not above 1280 × 800 Image (.gif ) Make sure the file is not: •... - Page 135 Note: Make sure Content Playback is disabled in the projector's Settings menu. 1. Press the USB button on the projector remote control. The PC Free screen appears. 2. Do the following as necessary to locate your files: • If you need to display files inside a subfolder on your device, press the arrow buttons to highlight the folder and press Enter.
-
Page 136: Starting A Pc Free Movie Presentation
• To display a slide show of all the images in a folder, press the arrow buttons to highlight the Slideshow option at the bottom of the screen and press Enter. Note: If any file names are longer than the display area or include unsupported symbols, the file names may be shortened or changed only in the screen display. - Page 137 The PC Free screen appears. 2. Do the following as necessary to locate your files: • If you need to display files inside a subfolder on your device, press the arrow buttons to highlight the folder and press Enter. • To move back up a folder level on your device, highlight Back to Top and press Enter. •...
-
Page 138: Pc Free Display Options
Related tasks Connecting to a USB Device PC Free Display Options You can select these display options when using the projector's PC Free feature. Setting Options Description Display Order Name Order Displays files in name order Date Order Displays files in date order Sort Order In Ascending Sorts files in first-to-last order... -
Page 139: Projecting In Content Playback Mode
You can also add color or effects to the projected image. Switching to Content Playback Mode Projecting a Playlist in Content Playback Mode Creating a Playlist Using Epson Web Control Adding Effects to the Projected Image Parent topic: Using Basic Projector Features Switching to Content Playback Mode Make sure Content Playback mode is enabled before projecting images or playlists. - Page 140 3. Select the Settings menu and press Enter. 4. Select Content Playback and press Enter. 5. Select On, if necessary, and press Enter. You see a confirmation prompt. 6. Turn off the projector. 7. Turn on the projector again to enable Content Playback mode. You can press the Home button to make sure Content Playback mode is enabled.
-
Page 141: Projecting A Playlist In Content Playback Mode
Projecting a Playlist in Content Playback Mode You can project playlists that contain images and movies in Content Playback mode. 1. Create a playlist and export it to a USB device using the Epson Projector Content Manager software, Epson Web Control, and Epson Creative Projection App. -
Page 142: Creating A Playlist Using Epson Web Control
8. Select the images or movies you want to add to the playlist. Note: You cannot upload .mp4 or .mov files. If you want to add .mp4 or .mov files to the playlist, use Epson Projector Content Manager software or the Epson Creative Projection app. -
Page 143: Adding Effects To The Projected Image
You can play the playlist from the Remote or Playlist screen. If you want to specify when the playlist starts and finishes, schedule the playlist using the Epson Projector Content Manager software. See the Epson Projector Content Manager Operation Guide for details. - Page 144 6. Select the Shape Filter setting and adjust the options as necessary. • Shape: select a circle, rectangle, or other shape effect Note: You can add images as customized shapes using the Epson Projector Content Manager software. See the Epson Projector Content Manger Operation Guide for details.
- Page 145 • Position: set the shape position Note: When you use a customized shape, you cannot change the Size and Position settings. 7. Select the Color Filter setting and adjust the options as necessary. • Color Filter: select the color • Custom: adjust red, green, or blue individually 8.
-
Page 146: Adjusting Projector Features
Adjusting Projector Features Follow the instructions in these sections to use your projector's feature adjustments. Shutting Off the Picture and Sound Temporarily Stopping Video Action Temporarily Zooming Into and Out of Images Projector Security Features Projecting Two Images Simultaneously Using Multiple Projectors Running Light Source Calibration Saving Settings to Memory and Using Saved Settings Scheduling Projector Events... -
Page 147: Stopping Video Action Temporarily
Note: If you selected A/V Mute as the Release A/V Mute setting in the Extended menu, you can still control the projector while A/V Mute is enabled. Parent topic: Adjusting Projector Features Related references Projector Setup Settings - Extended Menu Stopping Video Action Temporarily You can temporarily stop the action in a video or computer presentation and keep the current image on the screen. -
Page 148: Projector Security Features
Note: This feature is unavailable if the Scale setting in the Image menu is enabled. 1. Press the E-Zoom + button on the remote control. 2. Use the following buttons on the remote control to adjust the zoomed image: • Use the arrow buttons to position the image area you want to zoom into. •... -
Page 149: Password Security Types
• Remote Camera Access password prevents anyone from changing the projector's Remote Camera Access settings in the Network menu. Note: Additional security measures are available for the Remote Camera Access feature. Contact Epson for details. Setting a Password Selecting Password Security Types... - Page 150 1. Hold down the Freeze button on the remote control for about 5 seconds or until you see this menu. 2. Press the down arrow to select Password and press Enter. You see the prompt "Change the password?". 3. Select Yes and press Enter. 4.
-
Page 151: Selecting Password Security Types
Selecting Password Security Types After setting a password, you see this menu, allowing you to select the password security types you want to use. If you do not see this menu, hold down the Freeze button on the remote control for about 5 seconds or until the menu appears. -
Page 152: Entering A Password To Use The Projector
Entering a Password to Use the Projector If a password is set up and a Power On Protection password is enabled, you see a prompt to enter a password whenever you turn on the projector. You must enter the correct password to use the projector. 1. -
Page 153: Saving A User's Logo Image To Display
• If you continue to enter an incorrect password many times in succession, the projector displays a request code and a message to contact Epson Support. Do not attempt to enter the password again. When you contact Epson Support, provide the displayed request code and proof of ownership for assistance in unlocking the projector. - Page 154 2. Press the Menu button, select the Extended menu, and press Enter. 3. Select the User's Logo setting and press Enter. 4. Select Start Setting and press Enter. 5. A prompt appears asking if you want to use the displayed image as the user's logo. Select Yes and press Enter.
-
Page 155: Locking The Projector's Buttons
Locking the Projector's Buttons You can lock the buttons on the projector's control panel to prevent anyone from using the projector. You can lock all the buttons or all the buttons except the power button. Note: The projector can still be operated using the remote control. 1. -
Page 156: Unlocking The Projector's Buttons
Unlocking the Projector's Buttons If the projector's buttons have been locked, hold the Enter button on the projector's control panel for 7 seconds to unlock them. You can also set the Control Panel Lock setting to Off in the Settings menu. Parent topic: Locking the Projector's Buttons Related references... -
Page 157: Installing A Security Cable
Note: If you lock the remote control buttons, you can still reset the Remote Receiver setting in the Settings menu to the default settings. Parent topic: Projector Security Features Related references Projector Feature Settings - Settings Menu Installing a Security Cable You can install two types of security cables on the projector to deter theft. -
Page 158: Projecting Two Images Simultaneously
Projecting Two Images Simultaneously You can use the split screen feature to simultaneously project two images from different image sources next to each other. You can control the split screen feature using the remote control or the projector menus. Note: While you use the split screen feature, other projector features may not be available and some settings may be automatically applied to both images. - Page 159 1. Press the Split button on the remote control. The currently selected input source moves to the left side of the screen. 2. Press the Menu button. You see this screen: 3. To select an input source for the other image, select the Source setting, press Enter, select the input source, select Execute, and press Enter.
-
Page 160: Using Multiple Projectors
6. To choose the audio you want to hear, select the Audio Source setting, press Enter, select an audio option, press Enter, and press Menu to exit. Note: Select Auto to hear audio from the largest screen or the left screen. 7. -
Page 161: Projector Identification System For Multiple Projector Control
4. Adjust the color balance and brightness for each screen using the Color Matching setting. 5. Adjust the Hue, Saturation, and Brightness settings for RBGCMY color components. 6. Crop and combine each projector's image area using the Scale setting. Parent topic: Using Multiple Projectors Related tasks Setting the Projector ID... -
Page 162: Setting The Remote Control Id
4. Select Projector ID and press Enter. 5. Press the arrow buttons on the remote control to select the identification number you want to use for the projector. Then press Enter. Repeat these steps for all the other projectors you want to operate from one remote control. Note: If you don't know the projector's ID, aim the remote control at the projector and press the ID button to temporarily display the projector's ID on the screen. -
Page 163: Adjusting The Color Tone (Color Uniformity)
3. Hold down the ID button on the remote control while you press the numeric button that matches the projector's ID. Then release the buttons. Note: If you select 0/All on the remote control, you can operate all projectors regardless of the Projector ID setting. - Page 164 2. Select the Extended menu and press Enter. 3. Select the Display or Multi-Projection setting and press Enter. 4. Select the Color Uniformity setting and press Enter. 5. Press Enter and select On. 6. Press Esc. 7. Select the Adjustment Level setting and press Enter. There are eight adjustment levels from white through gray, and you can adjust them individually.
-
Page 165: Matching The Screens Manually
Related references Projector Setup Settings - Extended Menu Matching the Screens Manually You can manually correct the brightness and tint for multiple projectors. 1. Press the Menu button. 2. Select the Extended menu and press Enter. 3. Select the Multi-Projection setting and press Enter. 4. -
Page 166: Adjusting Rgbcmy
Adjusting RGBCMY You can adjust the Hue, Saturation, and Brightness settings for R (red), G (green), B (blue), C (cyan), M (magenta), and Y (yellow) color components. Turn on all the projectors and select the RGBCMY setting in each projector's Extended menu so that the color tone on the combined screen becomes entirely even. -
Page 167: Scaling An Image
• To adjust the overall brightness of the color, adjust the Brightness setting. 6. Press the left or right arrow buttons to adjust the Hue, Saturation, and Brightness settings. 7. Repeat the previous three steps as necessary to adjust each color. 8. - Page 168 You see this screen: 4. Select one of the following as the Scale setting: • Auto to automatically adjust the clipped areas according to the Edge Blending and Tiling settings you selected • Manual to adjust the clipped areas manually 5.
-
Page 169: Running Light Source Calibration
• Full Display to adjust the image to the projector's screen size as you scale the image 6. Use the arrow buttons to adjust each of the following scale options as necessary: • Select – or + to scale the image horizontally and vertically at the same time •... - Page 170 • When you have used the projector continuously for over 24 hours. • When the brightness is automatically dimmed due to high temperatures. Note: To perform a light source calibration, the projector must have been on for at least 20 minutes and the projector brightness must not be automatically dimmed due to high temperatures.
-
Page 171: Saving Settings To Memory And Using Saved Settings
5. When you are finished, press the Menu button to exit the menus. Parent topic: Adjusting Projector Features Related references Projector Reset Options - Reset Menu Saving Settings to Memory and Using Saved Settings You can save customized settings for each of your video inputs and then select the saved settings whenever you want to use them. -
Page 172: Scheduling Projector Events
• Save Memory: Saves your current settings to memory (10 memories with different names are available) Note: A memory name that has already been used is indicated by a blue mark. Saving over a previously saved memory overwrites the settings with your current settings. •... - Page 173 off by shutting off the power outlet. Set Light Source Calibration events to occur only after 100 hours of usage. 1. Set the date and time in the Date & Time menu. 2. Press the Menu button. 3. Select the Extended menu and press Enter. 4.
-
Page 174: Viewing Scheduled Events
Parent topic: Scheduling Projector Events Related tasks Selecting Password Security Types Setting the Date and Time Running Light Source Calibration Viewing Scheduled Events You can view your scheduled events on the calendar displayed on the Schedule Settings screen. 1. Press the Menu button. 2. -
Page 175: Editing A Scheduled Event
The screen displays the details of the events scheduled for that day. A blue icon indicates an enabled event, a gray icon indicates a disabled event, and the icon indicates a repeating event. Parent topic: Scheduling Projector Events Editing a Scheduled Event You can edit any currently scheduled event. -
Page 176: Copying Menu Settings Between Projectors
Note: In addition to the methods covered in this section, you can also copy and transfer settings to multiple projectors over a network using the Epson Projector Management software. See the online Epson Projector Management Operation Guide for instructions. You can download the latest software and documentation from the Epson website. -
Page 177: Saving Settings To A Usb Flash Drive
Related references Projector Setup Settings - Extended Menu Projector Information Display - Info Menu Saving Settings to a USB Flash Drive You can save the projector settings you want to transfer to a USB flash drive. Note: Use an empty flash drive. If the drive contains other files, the transfer may not complete correctly. The flash drive must use the FAT format and cannot have any security features. -
Page 178: Transferring Settings From A Usb Flash Drive
The lights flash to indicate that settings are transferring to the flash drive. When the lights stop flashing, the On/Standby light turns blue and the projector enters standby mode. Caution: Do not unplug the power cord or remove the flash drive while the lights are flashing. This could damage the projector. - Page 179 2. Insert the flash drive into the USB-A port. Note: Connect the flash drive directly to the projector. Do not use a hub or your settings may not be saved correctly. 3. Press and hold the Menu button on the control panel or remote control as you connect the power cord to the projector's power inlet.
-
Page 180: Saving Settings To A Computer
Related references Projector Light Status Related tasks Connecting to a USB Device Saving Settings to a Computer You can save the projector settings you want to transfer to a computer. Your computer must be running one of the following operating systems: •... -
Page 181: Transferring Settings From A Computer
5. When all of the projector lights turn on, release the Esc button. The projector shows up as a removable disk on your computer. 6. Open the removable disk and copy the pjconfdata.bin file to your computer. 7. Once the file has copied, do one of the following: •... - Page 182 2. Connect a USB cable to your projector's Service port. 3. Connect the other end to any available USB port on your computer. 4. Press and hold the Menu button on the control panel or remote control as you connect the power cord to the projector's power inlet.
- Page 183 Caution: Do not unplug the power cord while the lights are flashing. This could damage the projector. Note: If the projector does not turn off and the lights continue flashing, see the link below for a solution. Parent topic: Copying Menu Settings Between Projectors Related references Projector Light Status Related tasks...
-
Page 184: Adjusting The Menu Settings
Adjusting the Menu Settings Follow the instructions in these sections to access the projector menu system and change projector settings. Using the Projector's Menus Image Quality Settings - Image Menu Input Signal Settings - Signal Menu Projector Feature Settings - Settings Menu Projector Setup Settings - Extended Menu Projector Network Settings - Network Menu Projector Information Display - Info Menu... -
Page 185: Image Quality Settings - Image Menu
2. Press the up or down arrow button to move through the menus listed on the left. The settings for each menu are displayed on the right. Note: The available settings depend on the current input source, resolution, or other menu settings. 3. - Page 186 Setting Options Description Color Mode Various options available Adjusts the vividness of image colors for various image types and environments Brightness Varying levels available Lightens or darkens the overall image Contrast Varying levels available Adjusts the difference between light and dark areas of the image Color Saturation Varying levels available Adjusts the intensity of the image...
- Page 187 Setting Options Description Image Enhancement 4K Enhancement You can project an image at a doubled resolution by diagonally shifting pixels Image Preset Mode Selects the settings prepared in advance as the settings for Noise Reduction , MPEG Noise Reduction, and Detail Enhancement Deinterlacing Sets whether to convert...
- Page 188 Setting Options Description Advanced Scene Adaptive Gamma Adjust the coloring according to the scene Gamma Adjusts the gamma levels of the image; select Customized to adjust the gamma while viewing the image or a graph RGBCMY Adjusts the hue, saturation, and brightness for each color Dynamic Contrast Adjusts the projected luminance...
-
Page 189: Input Signal Settings - Signal Menu
Input Signal Settings - Signal Menu Normally the projector detects and optimizes the input signal settings automatically. If you need to customize the settings, you can use the Signal menu. The available settings depend on the currently selected input source. Note: You can restore the default settings of the Position, Tracking, and Sync settings by pressing the Auto button on the remote control. - Page 190 Setting Options Description Blanking Hides an area of the projected image that you select using the Bottom arrow buttons Left Available when Content Right Playback is set to Off in the projector's Settings menu. Color Space Auto Sets the conversion system for the color space.
- Page 191 Setting Options Description Advanced Video Range Sets the video range to match the settings of the input source EDID Describes the display capabilities of the projector to HDMI or HDBaseT video sources Scale Varying levels available Adjusts the scale of the image displayed by each projector when using multiple projectors to display one image...
-
Page 192: Projector Feature Settings - Settings Menu
Projector Feature Settings - Settings Menu Options on the Settings menu let you customize various projector features. Note: Available settings depend on the current input source. - Page 193 Setting Options Description Geometry Correction Temporarily cancels the geometry correction H/V-Keystone Lets you manually correct the angles of the horizontal and vertical sides Quick Corner Select to adjust image shape and alignment Curved Surface Select to adjust image on a curved surface Corner Wall Select to adjust image on a curved...
- Page 194 Setting Options Description HDMI Link Device Connections Adjusts the HDMI Link options that allow the projector remote to control HDMI Link HDMI-connected devices that Audio Out Device support the CEC standard Power On Link Device Connections: lists the devices connected to the HDMI Power Off Link ports HDMI Out Settings...
- Page 195 Setting Options Description Lock Setting Control Panel Lock Controls projector button locking to secure the projector Full Lock: locks all buttons Partial Lock: locks all buttons except the power button Off: no buttons locked Brightness Settings Light Source Mode Selects the brightness mode of the projector Brightness Level Light Source Mode: sets a...
- Page 196 Setting Options Description Content Playback Content Playback Plays back a playlist created in the Epson Projector Content Manager Overlay Effect software USB Viewer Content Playback: turns Content Playback on or off Overlay Effect: adds color and effects to the projected image when...
-
Page 197: Projector Setup Settings - Extended Menu
Correcting Image Shape with Point Correction Displaying a Test Pattern Adjusting the Brightness Controlling the Volume with the Volume Buttons Switching to Content Playback Mode Locking the Remote Control Buttons Projector Setup Settings - Extended Menu Settings on the Extended menu let you customize various projector setup features that control its operation. - Page 198 Setting Options Description Home Screen Home Screen Auto Disp. Select various options for the projector's Home screen Custom Function 1 Home Screen Auto Disp.: Custom Function 2 controls whether the Home Screen displays automatically when the projector is turned on Custom Function 1/Custom Function 2: lets you customize the options displayed on the...
- Page 199 Setting Options Description Standby Mode Standby Mode Enable this setting to allow the following operations to occur Port when the projector is in standby mode: • Monitor and control the projector over a network • When monitoring or controlling the projector using wireless LAN, set Connection mode to Advanced Port: selects the port to use from...
- Page 200 Setting Options Description Color Calibration Color Calibration Color Calibration: enables color calibration when set to to On Start Auto Adjustment Start Auto Adjustment: starts Undo auto adjustment Redo Undo: undo the auto Color Uniformity adjustments Reset Redo: corrects the difference between the tint and brightness of each projected image Color Uniformity: adjusts the...
- Page 201 Setting Options Description Multi-Projection Projector ID Select various options when projecting from multiple Group Tiling projectors Geometry Correction Projector ID: sets the projector Edge Blending to a particular ID number which allows you to use a remote Black Level control to individually control Reset projectors Screen Matching...
- Page 202 Setting Options Description Schedule Settings Various scheduling options Lets you schedule various projector tasks Language Various languages available Selects the language for projector menu and message displays (not changed by Reset option) Selecting the Reset option resets all adjustment values on the Extended menu to their default values, except for the following settings: Screen, Color Uniformity, User's Logo, Display Background*, Startup Screen*, Projection, High Altitude Mode, Auto Source Search, Monitor Out Port, Release A/V Mute*, Inv Direction Button, Date &...
- Page 203 Setting Description Direct Power On Turns on the projector when you plug it in Sleep Mode Automatically places the projector in standby mode after an interval of inactivity Sleep Mode Timer Sets the time before the projector automatically turns off (Sleep Mode must be turned on).
- Page 204 Remote Control Type: select Normal to use the remote control that came with the projector, or Simple to use a different Epson projector remote control and disable the remote control that came with the projector Beep: controls the beep that sounds when you turn the...
-
Page 205: Projector Network Settings - Network Menu
Setting the Date and Time Related topics Copying Menu Settings Between Projectors Projector Network Settings - Network Menu Settings on the Network menu let you view network information and set up the projector for monitoring and control over a network. Note: Available settings depend on the current input source. - Page 206 Gateway Address MAC Address IPv6 Address (Manual) IPv6 Address (Auto) Display the QR Code — Displays a QR code for connecting with iOS or Android devices using the Epson iProjection app Network Configuration Accesses additional network Configures your network settings menus...
- Page 207 Remote Camera Access Remote Camera Access Displays the image taken by the optional external camera using Password the Epson Web Control Password: enter a password up to 32 alphanumeric characters long. (Do not use * : spaces.) Parent topic: Adjusting the Menu Settings...
-
Page 208: Projector Information Display - Info Menu
Projector Information Display - Info Menu You can display information about the projector and input sources by viewing the Info menu. However, you cannot change any settings in the menu. Note: Available information depends on the current input source. - Page 209 Setting Options Description Projector Info Operation Hours Displays the number of hours the projector has been used since it was turned on Source Displays the name of the port to which the current input source is connected Input Signal Displays the input signal setting of the current input source Resolution Displays the resolution of the...
-
Page 210: Event Id Code List
Setting Options Description Status Information — Displays basic status information Temp Warning Info — Displays various high temperature warning information Power On/Off History — Displays the projector's power on and power off history Event ID Code List Parent topic: Adjusting the Menu Settings Related topics Copying Menu Settings Between Projectors Event ID Code List... - Page 211 Failed to acquire DHCP address. Make sure the DHCP server is operating correctly. If you are not using DHCP, turn off the DHCP setting in the Network menus. 0899 A communication error has occurred. Contact Epson for help. 089A The EAP authentication type does not match the network. Check the wireless LAN security settings and make sure that the security certificate is installed correctly.
-
Page 212: Projector Reset Options - Reset Menu
Projector Reset Options - Reset Menu You can reset most of the projector settings if necessary. Setting Options Description Reset All Memories — Resets the saved names and settings in the Save Memory list Refresh Mode Timer Select Start to clear an afterimage that remains in the Messages projected image and turn off the... - Page 213 Setting Options Description Light Source Calibration Run Now Selects options to perform light source calibration to maintain the Run Periodically color balance of the projected Schedule Settings image Last Run Run Now: Select On to start light source calibration now. Make sure the projector has been turned on for at least 20 minutes for maximum accuracy.
- Page 214 • Color Matching • Schedule Settings • Language • Except for the following Network menus items: • Wireless LAN Power • Wireless Mode • Password • Password Protection settings Only when you set the User's Logo Protection setting to On in the Password Protection setting menu You cannot reset the following settings using the Reset All (Factory Default) option: •...
-
Page 215: Maintaining And Transporting The Projector
The only parts you should replace are the air filter and remote control batteries. If any other part needs replacing, contact Epson or an authorized Epson servicer. This projector uses a sealed laser light source which does not need servicing and cannot be replaced. -
Page 216: Cleaning The Projector Case
Filter maintenance intervals will depend on the environment. If regular maintenance is not performed, your Epson projector will notify you when the temperature inside the projector has reached a high level. Do not wait until this warning appears to maintain your projector filter as prolonged exposure to high temperatures may reduce the life of your projector or laser. -
Page 217: Cleaning The Air Filter
Parent topic: Projector Maintenance Related references Optional Equipment and Replacement Parts (U.S. and Canada) Optional Equipment and Replacement Parts (Latin America) Cleaning the Air Filter You need to clean the projector's air filter in the following situations: • The filter or vents get dusty. •... - Page 218 4. Loosen the screws and remove the air filter cover. 5. Pull the air filter out of the projector.
- Page 219 6. Tap each side of the air filter 4 to 5 times to shake off any excess dust. Caution: Do not use excessive force when tapping the air filter, or it may crack and become unusable. Do not rinse the air filter in water, or use any detergent or solvent to clean it. Do not use canned air;...
- Page 220 8. Place the air filter back in the projector as shown. 9. Replace the air filter cover and tighten the screws as shown. Parent topic: Air Filter and Vent Maintenance Related references Optional Equipment and Replacement Parts (U.S. and Canada) Optional Equipment and Replacement Parts (Latin America) Projector Light Status...
-
Page 221: Replacing The Air Filter
Related tasks Replacing the Air Filter Replacing the Air Filter You need to replace the air filter in the following situations: • After cleaning the air filter, you see a message telling you to clean or replace it • After cleaning the air filter, the projector's Filter light continues to flash orange •... - Page 222 4. Pull the air filter out of the projector. Note: Air filters contain polypropylene. Dispose of used air filters according to local regulations. 5. Place the new air filter in the projector as shown.
-
Page 223: Replacing The Remote Control Batteries
6. Replace the air filter cover and tighten the screws as shown. Parent topic: Air Filter and Vent Maintenance Related references Optional Equipment and Replacement Parts (U.S. and Canada) Optional Equipment and Replacement Parts (Latin America) Projector Light Status Related tasks Cleaning the Air Filter Replacing the Remote Control Batteries The remote control uses two AA manganese or alkaline batteries. - Page 224 1. Remove the battery cover as shown. 2. Remove the old batteries. Warning: If the battery fluid has leaked, wipe it away with a soft cloth and avoid getting the fluid on your hands. If it gets on your hands, wash them immediately to avoid injury. 3.
-
Page 225: Transporting The Projector
• When shipping the projector for repairs, place it in its original packing materials, if possible, or use equivalent materials with cushioning around the projector. Mark the box "Fragile." Note: Epson shall not be liable for any damages incurred during transportation. Parent topic:... -
Page 226: Solving Problems
• The Help option on the Home screen can display information about common problems, if the projector is operating. • The solutions in this manual can help you solve many problems. If none of these solutions help, you can contact Epson for technical support. Parent topic: Solving Problems... -
Page 227: Projector Light Status
Projector Light Status The lights on the projector indicate the projector status and let you know when a problem occurs. Check the status and color of the lights and look for a solution in the table here. WLAN (wireless LAN) light Filter light Temp (temperature) light Laser light... - Page 228 Flashing Flashing A fan or sensor has a problem. blue orange Turn the projector off, unplug it, and contact Epson for help. Flashing Orange Projector has overheated and blue turned off. Leave it turned off to cool down for five minutes.
- Page 229 • Make sure that the vents and air filter are not clogged with dust or obstructed by nearby objects. • Clean or replace the air filter. • If the problem persists, unplug the projector and contact Epson for help. Flashing Orange Low air flow through the projector.
- Page 230 Flashing blue Varies Flashing Varies Varies Laser warning. Turn the projector orange off, unplug it, and contact Epson for help. Flashing blue Varies Varies Varies Orange Low air flow through the air filter. • Make sure that the vents and air filter are not clogged with dust or obstructed by nearby objects.
-
Page 231: Viewing Projector Status Information
Related tasks Saving Settings to a USB Flash Drive Transferring Settings from a USB Flash Drive Saving Settings to a Computer Transferring Settings from a Computer Replacing the Air Filter Cleaning the Air Filter Viewing Projector Status Information You can monitor the projector's status and view error information on the projected screen. 1. - Page 232 Information Description Source Displays the source currently being used On-Screen Display Displays the settings for on-screen displays. When turned off, menus or messages are not displayed on the projected images A/V Mute Displays the A/V Mute status Intake Air Temp Displays the air intake temperature Internal Temp Lv Displays the projector's internal temperature...
- Page 233 Information Description V-Frequency Displays the vertical frequency of the current input signal Stable Time Displays the amount of operating time since the input source was determined HDCP Status Displays the HDCP status HDCP Ver Displays the HDCP version AVI VIC Displays the VIC information (AVI) of the current input signal AVI Checksum...
- Page 234 Information Description Projector Name Displays the name used to identify the projector when connected to a network Connection Mode Displays the connection mode to use when connecting the projector and a computer over a wireless LAN SSID Display Displays the SSID display settings SSID Displays the SSID DHCP...
- Page 235 Information Description Main Display the projector's firmware version information Video2 HDMI1 HDMI2 HDBaseT Pixel Shift System status information Status Description The projector is in normal operating mode Warm-up The projector is warming up Standby The projector is in standby mode Cool Down The projector is cooling down Temp Error...
-
Page 236: Using The Projector Help Displays
Status Description Temp Error FE A laser error has occurred because the laser temperature is too high Temp Warning FE A laser warning has occurred because the laser temperature is too high Parent topic: Viewing Projector Status Information Using the Projector Help Displays You can display information to help you solve common problems using the projector's Help system. -
Page 237: Solutions When No Image Appears
• If the projector does not respond when you press any buttons on the projector, an internal error may have occurred in the projector. Contact Epson for help. • Adjust the Brightness setting on the Image menu. -
Page 238: Solutions When "No Signal" Message Appears
Where to Get Help (Latin America) Projector Light Status Projector Setup Settings - Extended Menu Image Quality Settings - Image Menu Solutions When "No Signal" Message Appears If the "No Signal" message appears, try the following solutions: • Press the Source Search button and wait a few seconds for an image to appear. •... -
Page 239: Displaying From A Mac Laptop
1. Hold down the laptop's Fn key and press the key labeled with a monitor icon or CRT/LCD. (See your laptop manual for details.) Wait a few seconds for an image to appear. To display on both the laptop's monitor and the projector, try pressing the same keys again. Note: On Windows 7 or later, hold down the Windows key and press P at the same time, then click Duplicate. -
Page 240: Solutions When Only A Partial Image Appears
Related references Input Signal Settings - Signal Menu Supported Video Display Formats Solutions When Only a Partial Image Appears If only a partial computer image appears, try the following solutions: • Make sure you selected the correct Screen Type setting for the screen you are using. •... -
Page 241: Solutions When The Image Is Not Rectangular
Solutions When the Image is Not Rectangular If the projected image is not evenly rectangular, try the following solutions: • Place the projector directly in front of the center of the screen, facing it squarely, if possible. • If you are mounting the projector from the ceiling, use the adjustment controls on the mount at the time of installation. -
Page 242: Solutions When The Image Is Fuzzy Or Blurry
Related references Image Quality Settings - Image Menu Input Signal Settings - Signal Menu Supported Video Display Formats Solutions When the Image is Fuzzy or Blurry If the projected image is fuzzy or blurry, try the following solutions: • Adjust the image focus. •... -
Page 243: Solutions When Automatic Adjustments Are Not Applied Correctly
• Make sure the cable for the optional external camera is securely connected to the projector. • The optional external camera may be defective. Contact Epson for help. • If projecting from a analog input source, the changing color and brightness of the image may cause automatic adjustments to not be applied correctly. -
Page 244: Solutions To Simple Stacking Problems
• Make sure nothing is blocking the optional camera and the projected image. • If you think the optional camera is defective, contact Epson for help. • Make sure that a powerful spotlight or source of strong natural light is not shining into the projection... -
Page 245: Solutions To Simple Blending Problems
• Resize the projection size. • If you see an error message during simple stacking, make a note of the error codes and contact Epson for support. • 0302: Measurement failure • 0306: Geometry correction error • 0307/0308: The optional camera may be defective, or a communication error has occurred. -
Page 246: Solutions To Sound Problems
• If the volume for the computer is set to the minimum while the projector's volume is set to maximum, the sound level may be mixed. Turn up the computer's volume and decrease the projector's volume (when using Epson iProjection [Windows/Mac]). • Make sure the A/V Settings options are set up correctly in the Extended menu. -
Page 247: Solutions To Pc Free Problems
• If the power button on the remote control does not turn on the projector, check its batteries and make sure the Remote Receiver setting is turned on in the projector's menu, if available. • The power cord may be defective. Try another power cord. If that doesn't work, disconnect the cord and contact Epson. -
Page 248: Solutions To Remote Control Problems
• If you assigned an ID number to the remote control to operate multiple projectors, you may need to check or change the ID setting (feature not available with all projectors). • If you lose the remote control, you can purchase another from an Epson parts distributor. Parent topic:... -
Page 249: Solutions To Password Problems
• User ID: EPSONWEB • Default password: projector serial number • If you set a Remote password (in Epson Web Control) and forgot the user ID or password, try entering the following: • User ID: EPSONREMOTE • Default password: projector serial number... -
Page 250: Solving Network Problems
Related references Where to Get Help (U.S. and Canada) Where to Get Help (Latin America) Solving Network Problems Check the solutions in these sections if you have problems using the projector on a network. Solutions When Wireless Authentication Fails Solutions When You Cannot Access the Projector Through the Web Solutions When Network Alert E-Mails are Not Received Solutions When the Image Contains Static During Network Projection Parent topic:... -
Page 251: Solutions When Network Alert E-Mails Are Not Received
• If your Web browser is set up to connect via a proxy server, the Epson Web Control screen cannot be displayed. Make settings for a connection without using a proxy server. • If you set Standby Mode to Communication On in the projector's Extended menu, make sure the network device is turned on. -
Page 252: Solutions To Problems Using Content Playback
Overlay Effect setting may not be reproduced correctly. Parent topic: Solving Problems Related tasks Creating a Playlist Using Epson Web Control Projecting a Playlist in Content Playback Mode Adding Effects to the Projected Image Switching to Content Playback Mode... -
Page 253: Where To Get Help (U.s. And Canada)
FAQs and troubleshooting advice, or e-mail Epson with your questions. Speak to a Support Representative To use the Epson PrivateLine Support service, call (800) 637-7661. This service is available for the duration of your warranty period. You may also speak with a projector support specialist by dialing (562) 276-4394 (U.S.) or (905) 709-3839 (Canada). -
Page 254: Where To Get Help (Latin America)
Purchase Supplies and Accessories You can purchase screens, other optional accessories, and replacement parts from an Epson authorized reseller. To find the nearest reseller, call 800-GO-EPSON (800-463-7766) in the U.S. or 800-807-7766 in Canada. Or you can purchase online at epsonstore.com... - Page 255 Purchase Supplies and Accessories You can purchase optional accessories and replacement parts from an Epson authorized reseller. To find the nearest reseller, go to latin.epson.com. Or you can contact your nearest sales office as described in "Where to Get Help."...
- Page 256 Parent topic: Solving Problems...
-
Page 257: Technical Specifications
Technical Specifications These sections list the technical specifications of your projector. General Projector Specifications Projector Light Source Specifications Remote Control Specifications Projector Dimension Specifications Projector Electrical Specifications Projector Environmental Specifications Projector Safety and Approvals Specifications Supported Video Display Formats General Projector Specifications Type of display Poly-silicon TFT active matrix Resolution... - Page 258 White light output 5200 lumens (ISO 21118 standard) Color light output 5200 lumens Quiet/Extended power consumption mode: White light output 3640 lumens (ISO 21118 standard) EB-L770U/EB-L775U: Normal (High) power consumption mode: White light output 7000 lumens (ISO 21118 standard) Color light output 7000 lumens...
-
Page 259: Projector Light Source Specifications
Horizontal: ± 30° USB Type B port compatibility USB 2.0 compliant port for service USB Type A port compatibility USB 1.1 and 2.0 compliant port for USB device input, Epson document camera display, batch settings, or wireless LAN unit DC Out (2.0A) port USB 2.0 port for powering a streaming media player. -
Page 260: Remote Control Specifications
EB-L570U: (approximate) 18.3 lb (8.3 kg) EB-L770U/EB-L775U: 18.7 lb (8.56 kg) Parent topic: Technical Specifications Projector Electrical Specifications Rated frequency 50/60 Hz Power supply 100 to 240 V AC ±10% EB-L570U: 3.3 to 1.5 A EB-L770U/EB-L775U: 3.9 to 1.8 A... - Page 261 Power consumption Operating: (100 to 120 V) Normal power consumption mode: EB-L570U : 323 W EB-L770U/EB-L775U : 382 W Quiet power consumption mode: EB-L570U: 250 W EB-L770U/EB-L775U: 285 W Extended power consumption mode: EB-L570U: 242 W EB-L770U/EB-L775U : 275 W Standby: 0.5 W (Communication Off), 2.0 W (Communication On)
- Page 262 Power consumption Operating: (220 to 240 V) Normal power consumption mode: EB-L570U : 312 W EB-L770U/EB-L775U : 366 W Quiet power consumption mode: EB-L570U: 242 W EB-L770U/EB-L775U: 277 W Extended power consumption mode: EB-L570U: 234 W EB-L770U/EB-L775U: 268 W Standby: 0.5 W (Communication Off), 2.0 W (Communication On)
-
Page 263: Projector Environmental Specifications
Projector Environmental Specifications Temperature Single projector (up to 7500 feet [2286 m]): Operating: 32 to 113 °F (0 to 45 °C) Single projector (over 7500 feet [2286 m]): Operating: 32 to 104 °F (0 to 40 °C) Multiple projectors (up to 7500 feet [2286 m]): Operating: 32 to 104 °F (0 to 40 °C) Multiple projectors (over 7500 feet [2286 m]): Operating: 32 to 95 °F (0 to 35 °C) -
Page 264: Supported Video Display Formats
For best results, your computer's monitor port or video card resolution should be set to display in the projector's native resolution. However, your projector includes Epson's SizeWise chip that supports other computer display resolutions, so your image will be resized to fit automatically. - Page 265 Display format Refresh rate (in Hz) Resolution (in pixels) QXGA 59.95 2048 × 1536 WQHD 59.95 2560 × 1440 WQXGA 59.97 2560 × 1600 UWFHD 1920 × 720 UWQHD 3440 × 1440 SDTV (480i/480p) 59.94 720 × 480 SDTV (576i/576p) 720 ×...
-
Page 266: Notices
Binding Arbitration and Class Waiver Trademarks Copyright Notice Recycling (U.S. and Canada) Epson offers a recycling program for end of life products. Please go to this site for information on how to return your products for proper disposal. Parent topic:... - Page 267 • If an error occurs in the projector, turn off the power and unplug the projector immediately. Continuing to use the projector could result in an electric shock, fire, or visual impairment. Contact Epson support. • Do not attempt to disassemble or modify the projector. The projector contains a high-power laser component.
- Page 268 • Top As with any bright source, do not stare into the beam (RG2 IEC/EN 62471-5:2015). • Bottom The label attached on the projector varies depending on the countries and regions.
-
Page 269: Important Safety Instructions
Warning: MOUNT ABOVE THE HEADS OF CHILDREN. The use of a ceiling mount is recommended with this product to place it above the eyes of children. Complies with FDA performance standards for laser products except for conformance as a Risk Group 2 LIP as defined in IEC 62471-5: Ed. - Page 270 • Failure to install the ceiling mount and projector correctly may cause the projector to fall. After installing the specific Epson mount that supports your projector, make sure you secure the mount to all of the projector's ceiling mount fixing points. Also, secure the projector and the mounts using wire that is strong enough to hold their weight.
- Page 271 • Do not use the projector near water, sources of heat, high-voltage electrical wires, or sources of magnetic fields. • Use the type of power source indicated on the projector. Use of a different power source may result in fire or electric shock. If you are not sure of the power available, consult your dealer or power company. •...
- Page 272 • Never open any covers on the projector except as specifically explained in this manual. Never attempt to disassemble or modify the projector. Refer all repairs to qualified service personnel. • Unplug the projector from the wall outlet and refer servicing to qualified service personnel under the following conditions: if it does not operate normally when you follow the operating instructions, or exhibits a distinct change in performance;...
-
Page 273: Restriction Of Use
• Before you move the projector, make sure its power is turned off, the plug is disconnected from the outlet, and all cables are disconnected. • Do not place the source of an open flame, such as a lit candle, on or near the projector. •... - Page 274 Symbol Approved Standards Description IEC60417 Stand-by No.5009 To identify the switch or switch position by means of which part of the equipment is switched on in order to bring it into the stand-by condition. ISO7000 Caution No.0434B, To identify general caution when using the product.
- Page 275 Symbol Approved Standards Description IEC60417 Battery, general No.5001B On battery powered equipment. To identify a device for instance a cover for the battery compartment, or the connector terminals. IEC60417 Positioning of cell No.5002 To identify the battery holder itself and to identify the positioning of the cell(s) inside the battery holder.
- Page 276 Symbol Approved Standards Description IEC60417 Class II equipment No.5172 To identify equipment meeting the safety requirements specified for Class II equipment according to IEC 61140. ISO 3864 General prohibition To identify actions or operations that are prohibited. ISO 3864 Contact prohibition To indicate injury that could occur due to touching a specific part of the equipment.
-
Page 277: Fcc Compliance Statement
Symbol Approved Standards Description ISO3864 Caution, movable parts IEC60417 To indicate that you must keep away from movable parts according to No. 5057 protection standards. IEC 60417-6056 Caution (movable fan blades) To indicate that you must keep away from the blades of the movable fan according to protection standards. -
Page 278: Binding Arbitration And Class Waiver
1. DISPUTES, BINDING INDIVIDUAL ARBITRATION, AND WAIVER OF CLASS ACTIONS AND CLASS ARBITRATIONS 1.1 Disputes. The terms of this Section 1 shall apply to all Disputes between you and Epson. The term "Dispute" is meant to have the broadest meaning permissible under law and includes any dispute, claim,... - Page 279 1.3 Pre-Arbitration Steps and Notice. Before submitting a claim for arbitration, you and Epson agree to try, for sixty (60) days, to resolve any Dispute informally. If Epson and you do not reach an agreement to resolve the Dispute within the sixty (60) days), you or Epson may commence an arbitration. Notice to Epson must be addressed to: Epson America, Inc., ATTN: Legal Department, 3131 Katella Ave., Los...
- Page 280 Award in Your Favor. For Disputes in which you or Epson seeks $75,000 or less in damages exclusive of attorney's fees and costs, if the arbitrator's decision results in an award to you in an amount greater than Epson's last written offer, if any, to settle the Dispute, Epson will: (i) pay you $1,000 or the amount...
-
Page 281: Trademarks
Dispute in arbitration. Except as agreed upon by you and Epson in writing, the arbitrator shall determine the amount of fees, costs, and expenses to be paid by Epson pursuant to this Section 1.6d). -
Page 282: Copyright Notice
Seiko Epson Corporation. The information contained herein is designed only for use with this Epson product. Epson is not responsible for any use of this information as applied to other products. -
Page 283: A Note Concerning Responsible Use Of Copyrighted Materials
Seiko Epson Corporation shall not be liable for any damages or problems arising from the use of any options or any consumable products other than those designated as Original Epson Products or Epson Approved Products by Seiko Epson Corporation. This information is subject to change without notice.
Need help?
Do you have a question about the EB-L770U and is the answer not in the manual?
Questions and answers