Fri-Jado TDR 5-S User Manual
Hide thumbs
Also See for TDR 5-S:
- User manual (36 pages) ,
- Service manual (78 pages) ,
- Service manual (78 pages)

Related Manuals for Fri-Jado TDR 5-S


Summary of Contents for Fri-Jado TDR 5-S
- Page 1 TDR-S USER MANUAL – EU version TDR 5-S TDR 8-S WARNING Read the instructions before using the machine. EN (Original Instructions) 9124900 / 2309...
- Page 2 TDR-S KEEP THIS USER MANUAL FOR FUTURE USE © 2023 Fri-Jado BV, Oud Gastel, The Netherlands. We advise you to contact your supplier for the guarantee period and conditions. Further we refer to our General Terms and Conditions for Sales and Delivery that are available upon request.
- Page 3 TDR-S Empty page. 3 / 36...
-
Page 4: Table Of Contents
TDR-S CONTENTS INTRODUCTION ......................6 General ..........................6 Identification of the unit ..................... 6 Pictograms and symbols ....................6 Safety instructions ......................7 1.4.1 General ........................7 1.4.2 Moving ......................... 8 1.4.3 Outdoor use restrictions ....................8 Hygiene ..........................8 Service and technical support ................... - Page 5 TDR-S Pre-heating ........................22 While cooking ......................... 22 Adding extra time to the active program ................23 Interrupt a program ......................23 Reset alarm signal ......................23 Power down ........................23 SETTINGS ........................24 General ........................... 24 Overview main parameters (Manager) ................24 Service Menu ........................
-
Page 6: Introduction
TDR-S INTRODUCTION General This manual is intended for the user of the TDR-S (EU model). The features and controls are being described, along with directions for the safest and most efficient use, in order to guarantee a long life of the unit. All pictograms, symbols and drawings in this manual apply to all available models. -
Page 7: Safety Instructions
TDR-S Safety instructions WARNING The outside of the unit can be very hot. WARNING The maximum load on top of the unit may never exceed 50 kg. WARNING Risk of slippery floor: Spills may cause slippery surfaces, clean-up promptly WARNING See installation instructions for grounding requirements. -
Page 8: Moving
TDR-S 1.4.2 Moving When moving the unit: • Before moving the unit, first switch off the mains voltage by pulling the plug from the wall socket and empty the fat collecting drawer. After that, cool-down the unit for at least ten minutes. -
Page 9: Service And Technical Support
TDR-S Service and technical support The electrical schematics of your unit is included. In case of malfunctions you can contact your dealer/service agent. Make sure you have the following data available: • Model. • Serial number. This data can be found on the identification plate. Storage If the unit will not be used temporarily, and will be stored, follow these instructions: •... -
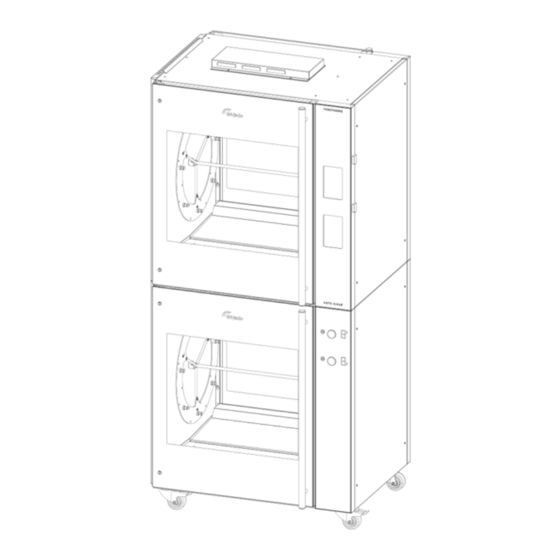
Page 10: Description Of The Unit
Communication through USB / WIFI (optional) enables easy read-out, re-work and creating of programs via a PC. For this, special software is available at Fri-Jado. Intended use The TDR has been designed for grilling meat products. -
Page 11: Installation And First Use
TDR-S INSTALLATION AND FIRST USE All packing materials used for this unit are suited for recycling. After unpacking, check the state of the unit. In case of damage, store the packing material, and contact the transporter within fifteen working days after receiving the goods. Unpacking the unit Your unit is packed in a plastic top cover, protective corners and a carton box around it. -
Page 12: Dismantling The Pallet
TDR-S Dismantling the pallet To unload the unit of the pallet without assistance of lifting equipment, it is possible to disassemble the pallet. Installation and positioning WARNING Electric shock hazard. Grounding instructions: only connect the appliance to an alternating current provided by a grounded wall socket, with a mains voltage in accordance with the information indicated on the data plate of the appliance. -
Page 13: First Use
TDR-S • The minimum free distance must be at least 250 mm. • During grilling, the glass panes will get very hot. While positioning, keep the unit out of children’s reach. • In case of a wheeled unit, the floor must be flat and leveled. •... -
Page 14: Metal Odor
TDR-S Place the bottom plates in the grilling compartment. Bottom Plates 3.4.1 Metal odor To remove the metal odor that will appear at first use, the unit must be heated at the maximum temperature (250°C) for at least half an hour. 14 / 36... -
Page 15: Operation And Use
TDR-S OPERATION AND USE Control Panel Main Functions: ON / OFF Recipes Wipe/clean touch screen (during count down) Home screen Language Help function Tap or swipe to select function or activate additional screen Step Back (when shown at upper left corner) Switching-on the unit 15 / 36... -
Page 16: Loading The Unit
Whole uncut chickens should always be grilled using the meat forks. This way their natural fat will baste each other, giving a perfectly slender cooking result. Refer to the You-Tube movie: “Fri-Jado instruction for binding and loading chicken”. 16 / 36... - Page 17 TDR-S For preparing chicken or any other poultry, you can work as follows: Insert one point of the meat fork through the chest at the position of the wings. Insert the other point through the drum sticks. Don’t forget to include the wings. Leave some space between the products, for an even exposure and browning.
-
Page 18: Loading The Rotisserie Using V-Shape Spits (Accessory)
TDR-S 4.3.2 Loading the rotisserie using V-shape spits (accessory) If you are using V-shape spits act as follows: • Place the skewer into the small outside hole on the rotor end plate on your left (as you face the oven). The back of the V-shape spit should be pointing towards you. •... -
Page 19: Loading The Rotisserie Using Two Different Accessories
Take the meat fork at its other end and take it out of the unit. Remove the products from the meat fork. Refer to the You-Tube movie: “Fri-Jado instruction for unloading chicken from a rotisserie”. 4.5.2 Taking out the V-shape spit (accessory) For taking out the V-shape spit you can use the same principle as described in section 4.5.1. -
Page 20: Taking Out The Meat Basket (Accessory)
TDR-S 4.5.3 Taking out the meat basket (accessory) When taking out the meat basket from the TDR it is best to act as follows: Slightly lift both ends of the meat basket. Move the basket towards either the left or right hand side of the unit. This action unlocks one end of the basket. -
Page 21: Operation
TDR-S OPERATION Starting a program 1. Press 2. Select the required program. The total duration of the program is shown in minutes next to the program name. 3. Press 4. Check: Change fat container. Press Continue when executed. Delayed starting time (optional) When the Delayed starting time function is activated (at manager menu), a delayed starting time can be set. -
Page 22: Pre-Heating
TDR-S Pre-heating When the pre-heat function is activated (at manager menu), the unit will start this function after selecting a program. The screen will display the actual temperature (at the top). Tap on the temperature box to see the set pre-heat temperature (approx. -
Page 23: Adding Extra Time To The Active Program
TDR-S Adding extra time to the active program During the process extra time can be added (when activated in the manager menu), by following the next steps: 1. Press 2. Set extra time. 3. Select to save setting. The display now shows the extra time, which will be added to the last cooking step. -
Page 24: Settings
TDR-S SETTINGS General The settings of the unit can be changed by using the control panel. There are three kinds of settings: • Manager • Service Select to enter the setting menu. The Manager and Service section are password protected. Press to go one level back. -
Page 25: Program
TDR-S PROGRAM General Enter the recipe menu Adding programs 1. Select 2. Enter the program name and icon. 3. Enter the preheat step (or left blank). 4. Add cooking steps (swipe additional step at the bottom of the screen upwards). 5. -
Page 26: Edit Programs
TDR-S Edit programs 1. Select recipe to edit. 2. Select 3. Make required alterations. 4. Once complete press Deleting programs Deleting of a program cannot be undone. 1. Select recipe to delete. 2. Select 3. Select 4. Select Yes. 26 / 36... -
Page 27: Cleaning And Maintenance
TDR-S CLEANING AND MAINTENANCE WARNING Appliance must be disconnected from the power supply during cleaning or maintenance and when replacing parts. Do not use aggressive or abrasive materials. These will damage the surface which will make it more difficult to remove dirt. Clean the inside, the removable parts and the accessories thoroughly with cleanser and water before putting the unit into use. -
Page 28: Weekly Cleaning
TDR-S Rotor and bottom plates • Remove the rotor and bottom plates from the unit (no tools required). • Place the detachable parts in a wide rinsing container filled with hot water and an appropriate cleaning agent. • Soak these parts for one night and clean them the next day. Fat collecting drawer •... -
Page 29: Monthly Cleaning
TDR-S Monthly Cleaning WARNING Remove the power plug from the wall socket. Clean the fan plate and the fan blade thoroughly as described below. Fan plate: • Remove the fan plate by loosening two winged nuts. This plate hinges at two points at the sides. -
Page 30: Cleaning Guidelines For Non-Stick Coated Surfaces
TDR-S Cleaning guidelines for non-stick coated surfaces Several parts of your rotisserie may have a non-stick coating surface. Abrasion and caustic chemicals reduce the life of the coating. With proper care, the non-stick coating surface should provide a long life of easy-to-clean service. DO NOT do the following: Do not use scouring pads, steel wool, Scotch-Brite pads, plastic wash pads, or other abrasive cleaning aids (abrasive pads remove the coating over time significantly reducing the life of the... -
Page 31: Malfunctions And Service
TDR-S MALFUNCTIONS AND SERVICE Before you contact your supplier/dealer in case of a malfunction, there are some items you can check yourself: • Is the power supply working properly? Check fuses and differential switch. • Has the timer clock been properly set? Item Malfunction Possible action... -
Page 32: Replace A Lamp
TDR-S Replace a lamp WARNING Remove the power plug from the wall socket. WARNING Do not touch the lamps with bare hands. Use a clean cloth or paper tissues when replacing the lamp. Remove any moisture with alcohol or methyl spirits after the lamp has cooled down. -
Page 33: Technical Specifications
TDR-S TECHNICAL SPECIFICATIONS WARNING Consult the identification plate to get the proper specifications of the unit. The electrical data may vary from country to country. The technical specifications of the different models in the TDR-S are shown in the next tables. European Models Model TDR 5... - Page 34 TDR-S Empty page. 34 / 36...
- Page 35 TDR-S Empty page. 35 / 36...
- Page 36 TDR-S Fri-Jado B.V. Fri-Jado Inc. Blauwhekken 2 1401 Davey Road, Suite 100 4751 XD Oud Gastel Woodridge IL 60517 The Netherlands Tel: +31 (0) 76 50 85 400 Tel: +1-630-633-7950 www.frijado.com 36 / 36...
Need help?
Do you have a question about the TDR 5-S and is the answer not in the manual?
Questions and answers