Table of Contents
Advertisement
Advertisement
Table of Contents

Subscribe to Our Youtube Channel
Related Manuals for MR VACUTAP RMV-II


Summary of Contents for MR VACUTAP RMV-II
- Page 1 ON-LOAD TAP-CHANGER ® VACUTAP RMV-II OPERATING INSTRUCTIONS 2159612/03 EN...
- Page 2 © All rights reserved by Maschinenfabrik Reinhausen Dissemination and reproduction of this document and use and disclosure of its content are strictly prohibited unless expressly permitted. Infringements will result in liability for compensation. All rights reserved in the event of the granting of patents, utility models or designs.
-
Page 3: Table Of Contents
Table of contents Table of contents Introduction......................... 6 Validity .............................. 6 Manufacturer............................ 6 Completeness............................. 6 Safekeeping............................ 6 Notation conventions .......................... 7 1.5.1 Hazard communication system .......................... 7 1.5.2 Information system.............................. 8 1.5.3 Instruction system .............................. 8 Safety.......................... 10 Appropriate use .......................... 10 Fundamental safety instructions ....................... 11 Personnel qualification........................ - Page 4 Table of contents Transportation, receipt and handling of shipments................ 29 Unpacking shipments and checking for transportation damages ............. 30 Things to note when putting back into storage ................. 30 Fitting on-load tap-changer on transformer .............. 31 Preparatory work .......................... 31 Fitting the on-load tap-changer......................
- Page 5 Table of contents Actuating motor-drive unit with hand crank .............. 52 Monitoring during operation ................... 53 15.1 Annual checks .......................... 53 15.1.1 Checking oil quality ............................. 53 15.1.2 Checking motor-drive unit ........................... 54 15.1.3 Checking return to starting position........................ 54 15.2 Occasional visual checks........................ 54 Fault elimination .......................
-
Page 6: Introduction
1 Introduction 1 Introduction This technical file contains detailed descriptions on the safe and proper in- stallation, connection, commissioning and monitoring of the product. In addition, this file contains technical data for selecting the appropriate product for a respective application. It also includes safety instructions and general information about the prod- uct. -
Page 7: Notation Conventions
1 Introduction 1.5 Notation conventions This section contains an overview of the symbols and textual emphasis used. 1.5.1 Hazard communication system Warnings in this technical file are displayed as follows. 1.5.1.1 Warning relating to section Warnings relating to sections refer to entire chapters or sections, sub-sec- tions or several paragraphs within this technical file. -
Page 8: Information System
1 Introduction Pictograms warn of dangers: Pictogram Meaning Warning of a danger point Warning of dangerous electrical voltage Warning of combustible substances Warning of danger of tipping Table 2: Pictograms used in warning notices 1.5.2 Information system Information is designed to simplify and improve understanding of particular procedures. - Page 9 1 Introduction Multi-step instructions Instructions which consist of several process steps are structured as follows: Aim of action ü Requirements (optional). 1. Step 1. ð Result of step (optional). 2. Step 2. ð Result of step (optional). ð Result of action (optional). ®...
-
Page 10: Safety
2 Safety 2 Safety This technical file contains detailed descriptions on the safe and proper in- stallation, connection, commissioning and monitoring of the product. ▪ Read this technical file through carefully to familiarize yourself with the product. ▪ This technical file is a part of the product. ▪... -
Page 11: Fundamental Safety Instructions
2 Safety In the standard version, the on-load tap-changer is designed for sinusoidal 50/60 Hz AC current with a curve form symmetrical to the zero axis and can switch twice the rated through-current I at its rated step voltage U Exceeding the rated step voltage U for a short period by up to 10% is per- mitted if the rated through-current I... - Page 12 2 Safety Limit step capacity and limit switching capacity Tap change operations with currents of more than twice the rated through- current I can lead to personal injuries and damage to property. The limit step capacity is the largest step capacity that can be switched safely. The on-load tap-changer can switch twice the rated through-current I at the rated step voltage U...
-
Page 13: Personnel Qualification
2 Safety Auxiliary materials and operating materials Auxiliary materials and operating materials not approved by the manufac- turer can lead to personal injury, damage to property and malfunctions of the product. ▪ Only use conductive and grounded hoses, pipes, and pump equipment that are approved for flammable liquids. -
Page 14: Personal Protective Equipment
2 Safety Operator The operator uses and operates the product in line with this technical file. The operating company provides the operator with instruction and training on the specific tasks and the associated potential dangers arising from im- proper handling. Technical Service We strongly recommend having maintenance, repairs and retrofitting carried out by our Technical Service department. - Page 15 2 Safety Special personal protective equipment for particular environments Safety glasses To protect the eyes from flying parts and splash- ing liquids. Visor To protect the face from flying parts and splash- ing liquids or other dangerous substances. Hard hat To protect from falling and flying parts and mate- rials.
-
Page 16: Product Description
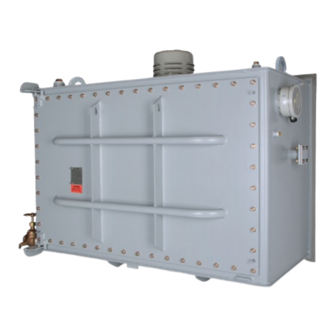
3 Product description 3 Product description This chapter contains an overview of the design and function of the product. 3.1 Scope of delivery The product is packaged with protection against moisture and is delivered as follows: ▪ Oil compartment with in-built on-load tap-changer, tap selector and change-over selector ▪... - Page 17 3 Product description The diagram below shows a typical winding arrangement with the on-load tap-changer in operating position 16L: Figure 1: Typical winding arrangement of on-load tap-changer (example: operating position 16L) A, B Main switching contacts of change-over selector (example: revers- ing change-over selector) Central position contact 3, 4, …...
- Page 18 3 Product description The example below shows the process when changing the operating posi- tion from 16L to 15L: Figure 2: Tap changes from position 16L to position 15L The tap changer is operated using a motor-drive unit. When moving from one tap position to the next, firstly a by-pass switch (in the example P ) opens, while the second (P ) stays closed, routing the cur-...
-
Page 19: On-Load Tap-Changer Design
3 Product description 3.2.2 On-load tap-changer design The RMV-II on-load tap changer is a three-phase on-load tap-changer with full insulation between phases and to ground. The on-load tap-changer com- prises: ▪ Tank with tap selector and change-over selector (reversing change-over selector connection or coarse/fine selector connection) ▪... - Page 20 3 Product description One vertical insulating plate per phase is permanently mounted on the top of the on-load tap-changer oil compartment. The vacuum interrupter is mounted vertically on the front of the insulating plate. Figure 4: Vacuum interrupter The by-pass switch is located on the opposite (rear) side of the insulating plate from the vacuum interrupter and is driven by the same drive shaft.
- Page 21 3 Product description Each phase of the on-load tap-changer also consists of a tap selector and change-over selector, which are fitted on the rear of the on-load tap-changer oil compartment on an epoxy terminal board. Figure 6: Terminal board Depending on the operating voltage of the on-load tap-changer, there are two different terminal board models.
-
Page 22: Protective Devices
3.2.3.1 Pressure relief device MPreC® On request, MR will supply a pre-fitted MPreC® pressure relief device in place of the rupture disk. This device responds to a defined overpressure in the oil compartment of the on-load tap-changer. -
Page 23: Motor-Drive Unit
3 Product description 3.3 Motor-drive unit The brief description provided in this chapter is no substitute for the motor- drive unit's operating instructions. For detailed operation and safety informa- tion please read carefully through the operating instructions for the MD-III motor-drive unit. -
Page 24: Protective Devices In The Motor-Drive Unit
3 Product description Figure 9: View of MD-III motor-drive unit without doors Motor protective switch 8-2 Hand lamp Miniature circuit breaker (optional) Voltage regulator (optional) VIM-OK signal lamp (86GL) Monitoring circuit board Alarm signal lamp (86RL) Transmission-gear cover plate LOCAL/REMOTE/AUTO rotary Nameplate switch RAISE/LOWER control switch... -
Page 25: Monitoring System (Vim)
3 Product description 3.4 Monitoring system (VIM) The monitoring system is also known as the VIM module (Vacuum Inter- rupter Monitoring-Module). A brief description of the monitoring system can be found in this chapter. This chapter is no substitute for the detailed information provided in the sep- arate operating instructions. -
Page 26: Monitoring System Displays And Controls
3 Product description 3.4.2 Monitoring system displays and controls Figure 10: Monitoring system (VIM) displays and controls 1 Green TEST push-button 3 1 yellow and 1 red LED per phase for signaling errors 2 Green Power LED 4 Red RESET push-button The following displays and controls of the monitoring system (Vacuum Inter- rupter Monitoring VIM) are located behind the motor-drive unit's door: ▪... - Page 27 3 Product description By way of an option, we recommend using the maintenance-free MTraB® DB 100 dehydrating breather from Maschinenfabrik Reinhausen GmbH. Upon delivery The breather is supplied dismantled with the drying agent placed in separate containers. ® Maschinenfabrik Reinhausen GmbH 2019 2159612/03 EN VACUTAP RMV-II...
-
Page 28: Packaging, Transport And Storage
4 Packaging, transport and storage 4 Packaging, transport and storage 4.1 Packaging The products are sometimes supplied in a sealed packaging and sometimes in a dry state depending on requirements. A sealed packaging surrounds the packaged goods on all sides with plastic foil. -
Page 29: Transportation, Receipt And Handling Of Shipments
4 Packaging, transport and storage 4.2 Transportation, receipt and handling of shipments WARNING Danger of death and damage to property! Danger of death and damage to property due to tipping or falling load. ► Only transport the crate when closed. ►... -
Page 30: Unpacking Shipments And Checking For Transportation Damages
4 Packaging, transport and storage packaged goods as per the operating instructions, or contact the manu- facturer to agree on how to proceed. Failure to do so may result in dam- age to the packaged goods. ▪ Identify the damaged parts. Hidden damage When damages are not determined until unpacking after receipt of the ship- ment (hidden damage), proceed as follows: ▪... -
Page 31: Fitting On-Load Tap-Changer On Transformer
5 Fitting on-load tap-changer on transformer 5 Fitting on-load tap-changer on transformer This chapter describes how to fit the on-load tap-changer to a transformer. 5.1 Preparatory work Perform the work stated below before fitting the on-load tap-changer to the transformer: ▪... -
Page 32: Connecting The Tap Winding And On-Load Tap-Changer Take-Off Lead
5 Fitting on-load tap-changer on transformer 5.3 Connecting the tap winding and on-load tap-changer take- off lead NOTICE Damage to the on-load tap-changer! Connecting leads that place mechanical strain on the on-load tap-changer will damage the on-load tap-changer. ► Establish connections carefully. ►... -
Page 33: Fitting Motor-Drive Unit
6 Fitting motor-drive unit 6 Fitting motor-drive unit 6.1 Preparatory work WARNING The motor-drive unit may be started by accident if the motor protective switch is not tripped! Risk of injury from starting the motor-drive unit by accident! ► Trip motor protective switch before starting to fit the drive shafts! NOTICE Damage to on-load tap-changer and motor-drive unit due to in- correct operation! - Page 34 6 Fitting motor-drive unit Checking neutral position Check the on-load tap-changer's neutral position with the door open as fol- lows: 1. Both change-over selector contacts are in the top position. Figure 11: Change-over selector contacts ® VACUTAP RMV-II 2159612/03 EN Maschinenfabrik Reinhausen GmbH 2019...
- Page 35 6 Fitting motor-drive unit 2. The adjustment markings on the by-pass switch are aligned to one an- other. Figure 12: Adjustment markings on the by-pass Check the motor-drive unit's neutral position as follows: 1. The tap position indicator is at neutral. 2.
-
Page 36: Fitting Motor-Drive Unit To On-Load Tap-Changer
6 Fitting motor-drive unit Assembly variants When assembling the motor-drive unit, a distinction is made between 2 vari- ants: 1. Standard assembly means that the motor-drive unit is fitted directly be- neath and secured to the on-load tap-changer. 2. Offset assembly (assembly on the floor) means that there is a gap be- tween the motor-drive unit and the on-load tap-changer beneath which it is fitted and that the motor-drive unit is secured to the transformer on the main tank. -
Page 37: Checks After Assembly
7 Checks after assembly 7 Checks after assembly Please contact Reinhausen Manufacturing if any aspect of the tests is not clear. 7.1 Manual check For the manual check, open the on-load tap-changer oil compartment and motor-drive unit. Three insulating material plates are arranged vertically next to one another in the front of the on-load tap-changer oil compartment. -
Page 38: Checking Motor-Drive Unit And Monitoring System
7 Checks after assembly The same check now has to be performed in the other switching direction. 1. Use hand crank to switch from operating position N to 1R. Again check how the on-load tap-changer undertakes the tap change: ð First the by-pass switch P and then the vacuum interrupter must open. -
Page 39: Carrying Out The Transformer Ratio Test
7 Checks after assembly NOTICE Damage to motor-drive unit! Too many tap-change operations in succession will damage the motor! ► Perform no more than 120 tap-change operations in succession to avoid damaging the motor. 7.3.1 Carrying out the transformer ratio test We recommend carrying out a transformer ratio test before the transformer is dried. -
Page 40: Drying The On-Load Tap-Changer
► Remove on-load tap-changer accessories, such as dehydrating breather and pressure relief devices, before drying and filling with oil. A prerequisite for the dielectric values assured by MR for the on-load tap- changer is a minimum drying procedure performed following the instructions below and that the on-load tap-changer is treated as pat of the transformer during the drying process. -
Page 41: Filling On-Load Tap-Changer With Oil
9 Filling on-load tap-changer with oil 9 Filling on-load tap-changer with oil Before applying operating voltage, the on-load tap-changer oil compartment must be filled with oil to the corresponding mark under a vacuum. To do so, proceed as follows: 1. Make the oil input and vacuum connections to the oil compartment. Re- move ¼"... -
Page 42: Fitting Accessories
10 Fitting accessories 10 Fitting accessories 10.1 Fitting dehydrating breather Figure 14: Mounting dehydrating breather ® VACUTAP RMV-II 2159612/03 EN Maschinenfabrik Reinhausen GmbH 2019... - Page 43 10 Fitting accessories To mount the dehydrating breather, proceed as follows: 1. Fill chamber of dehydrating breather with dry drying agent through flange opening on top (approx. 2.2 lb (1 kg)). 2. Place flange gasket on flange and position retaining plate. The tapped hole and flange opening must be in line.
-
Page 44: Pressure Relief Device Mprec
10 Fitting accessories 5. Remove the clear plastic oil compartment by squeezing the retaining brackets. Fill it with clean transformer oil until the oil level is between the two fill level lines on the compartment. Carefully place the filled oil com- partment back onto the dehydrating breather housing bottom. -
Page 45: Commissioning At The Transformer Manufacturer's Site
11 Commissioning at the transformer manufacturer's site 11 Commissioning at the transformer manufacturer's site WARNING Danger of death or severe injury! Danger of death or severe injury from explosive gases in the on-load tap- changer, in the pipework system, at the dehydrating breather opening and from flying parts and hot oil splashing! ►... -
Page 46: Performing Trial Tap-Change Operations
11 Commissioning at the transformer manufacturer's site 11.2 Performing trial tap-change operations Before energizing the transformer, test tap change operations must be car- ried out to check the mechanical functions of on-load tap-changer and mo- tor-drive unit after drying and filling with oil. Follow the description provided in the operating instructions for the motor-drive unit. - Page 47 11 Commissioning at the transformer manufacturer's site ▪ Disconnect external connections to electronic components in the motor- drive unit to prevent damage from overvoltage. ▪ When connecting the motor-drive unit's supply voltage, only use the holes in the protective housing base intended for lead insertion. ▪...
-
Page 48: Transporting Transformer To Installation Site
12 Transporting transformer to installation site 12 Transporting transformer to installation site WARNING Danger of death and severe injury! Danger of death or severe injury from explosive gases in the on-load tap- changer, in the pipework system, at the dehydrating breather opening and from flying parts and hot oil splashing! ►... -
Page 49: Commissioning The Transformer At The Operating Site
13 Commissioning the transformer at the operating site 13 Commissioning the transformer at the operating site WARNING Danger of death or severe injury! Danger of death or severe injury from explosive gases in the on-load tap- changer, in the pipework system, at the dehydrating breather opening and from flying parts and hot oil splashing! ►... -
Page 50: Safety Current Circuits
13 Commissioning the transformer at the operating site 13.1 Safety current circuits WARNING Danger of death or severe injury! An energized transformer and energized on-load tap-changer components could cause death or serious injuries during connection work! ► Connections and associated checks may only be undertaken by trained electricians. -
Page 51: Switching On Transformer
13 Commissioning the transformer at the operating site 13.3 Switching on transformer WARNING Danger of death or severe injury due to the on-load tap-changer overloading! Inrush current impulses can be significantly greater than the transformer rated current and may lead to current paths with asymmetrical or non-sinu- soidal curve shapes and, as a result, overload the on-load tap-changer dur- ing the diverter switch operation. -
Page 52: Actuating Motor-Drive Unit With Hand Crank
14 Actuating motor-drive unit with hand crank 14 Actuating motor-drive unit with hand crank WARNING Danger of death and severe injury! An energized transformer and energized on-load tap-changer components could cause death or serious injuries during hand crank operation! ► Switch off and lock transformer to prevent unintentional restart. ►... -
Page 53: Monitoring During Operation
15 Monitoring during operation 15 Monitoring during operation WARNING Danger of death or severe injury! Danger of death or severe injury from explosive gases in the on-load tap- changer, in the pipework system, at the dehydrating breather opening and from flying parts and hot oil splashing! ►... -
Page 54: Checking Motor-Drive Unit
15 Monitoring during operation 15.1.2 Checking motor-drive unit A detailed description of how to check the switching functions and mechani- cal end stop can be found in the operating instructions for the motor-drive unit. 15.1.3 Checking return to starting position Check whether the on-load tap-changer goes back to its starting position in the event of an error. -
Page 55: Fault Elimination
16 Fault elimination 16 Fault elimination 16.1 General information WARNING Danger of death or severe injury! Danger of death or severe injury from explosive gases in the on-load tap- changer, in the pipework system, at the dehydrating breather opening and from flying parts and hot oil splashing! ►... -
Page 56: Fault Elimination Overview
16 Fault elimination 16.2 Fault elimination overview The table below is intended to assist with detecting and, where possible, remedying faults. Contact Reinhausen Manufacturing for assistance if needed. Error pattern Action ▪ Tripping of pressure relief device or ▪ Have on-load tap-changer and trans- other protective devices (for example former checked by trained personnel MPreC®) -
Page 57: Monitoring System Displays And Controls
16 Fault elimination In the event of faults on the on-load tap-changer and motor-drive unit, which cannot be easily and immediately corrected on site, or if a protective device has been tripped, please inform your authorized Reinhausen Manufacturing representative, the transformer manufacturer or contact us directly at: Reinhausen Manufacturing Inc. -
Page 58: Overview Of Monitoring System Operating Statuses
16 Fault elimination ▪ 3 yellow LEDs (1 per phase) indicate the loss of the current-transformer signal – The monitoring system repeats this check after every 2 tap-change op- erations for network applications and after every 32 tap-change opera- tions for industrial applications. ▪... -
Page 59: Maintenance
MR or are otherwise suitably qualified to carry out the work. In such cases, we would ask you to forward to us a report on the mainte- nance performed so we can update our maintenance files. -
Page 60: Taking On-Load Tap-Changer Out Of Service
17 Maintenance 17.2 Taking on-load tap-changer out of service 1. Switch off and lock transformer to prevent unintentional restart. 2. Make sure everything is de-energized. 3. Visibly connect all transformer terminals to ground (grounding leads, grounding disconnectors) and short circuit them. 4. -
Page 61: Checking Contact Erosion Indicator
17 Maintenance 2. Check the condition of the flexible connector for broken strands. ð If damage is visible, contact Reinhausen Manufacturing. 17.4.2 Checking contact erosion indicator The vacuum interrupter is rated for one million operations at full load. The contact erosion indicator can be found behind a viewing window in the cover plate of the drive mechanism for the vacuum interrupters. -
Page 62: Replacing Vacuum Interrupter
17 Maintenance 2. When the on-load tap-changer is opened for the first time and during sub- sequent checks: check the indicator so that contact wear can be evalu- ated. ð By observing the position of the pointer on the scale and the number of actual tap-change operations, a rough estimate of the remaining life can be made. -
Page 63: Maintaining Motor-Drive Unit
17 Maintenance Figure 20: Measuring the by-pass switch arcing tip thickness ► With the contact closed, measure the total thickness of the two arcing tips. ð The thickness should not be less than 10.5 mm. ð If it is less than 10.5 mm, the by-pass switch contacts must be replaced. Contact Reinhausen Manufacturing for more information. -
Page 64: Maintaining Dehydrating Breather
17 Maintenance 17.8 Maintaining dehydrating breather If the oil pressure in the dehydrating breather exceeds the difference in pres- sure between the on-load tap-changer's gas space and the atmosphere, the breather permits in- and out-breathing. The drying agent is protected from the ambient humidity by the oil in the dehydrating breather which also serves to trap any particles in the air during in-breathing. -
Page 65: Preparing The On-Load Tap-Changer For Service
17 Maintenance 17.9 Preparing the on-load tap-changer for service Once the maintenance work described above has been performed, proceed as follows: 1. Wipe down walls and insulating surfaces in on-load tap-changer oil com- partment, removing contaminated oil, carbon deposits, metallic debris and condensate. -
Page 66: Technical Data
18 Technical data 18 Technical data In addition to the technical data provided here, also note the documents pro- vided with the order confirmation and the information in the Intended use section. The RMV-II on-load tap-changer meets the requirements of IEC 60214-1:2003 and ANSI/IEEE C57.131:2012. - Page 67 18 Technical data On-load tap-changer type RMV-II 600-26,4 1000-26,4 1500-26,4 2000-26,4 Operating voltage [kV] 26.4 26.4 26.4 26.4 Nominal power of transformer (3 phase) [kVA] 14,400 24,000 36,000 48,000 Maximum rated through current of on-load 1000 1500 2000 tap-changer [A] Maximum circulating current of preventive auto transformer [A] Rated short-circuit current (peak) [kA]...
- Page 68 18 Technical data On-load tap-changer type RMV-II 1500-72,5 2000-72,5 2500-72,5 Operating voltage [kV] 72.5 72.5 72.5 Nominal power of transformer (3 phase) [kVA] 72,000 96,000 120,000 Maximum rated through current of on-load tap- 1500 2000 2500 changer [A] Maximum circulating current of preventive auto transformer [A] Rated short-circuit current (peak) [kA] 56.25...
-
Page 69: General Data
18 Technical data 18.1 General data Parameter Conditions Design 3-phase, preventive auto transformer (reactor) switching concept (to break load current by vacuum interrupters) Tank No limitation on use with full vacuum (± 15 psi) Tank dimensions 66 x 32 x 50" for 72.5 kV design (L x W x H) 66 x 29 x 43"... -
Page 70: Appendix
19 Appendix 19 Appendix 19.1 Limit values for dielectric strength and water content of on- load tap-changer oil The following table provides the limit values for dielectric strength (measured in accordance with IEC 60156) and water content (measured in accordance with IEC 60814) of the on-load tap-changer oil for VACUTAP®... - Page 72 Maschinenfabrik Reinhausen GmbH Falkensteinstrasse 8 93059 Regensburg +49 (0)941 4090-0 +49(0)941 4090-7001 sales@reinhausen.com www.reinhausen.com ® 2159612/03 EN - VACUTAP RMV-II - F0209303 - 08/19 - Maschinenfabrik Reinhausen GmbH 2019 THE POWER BEHIND POWER.
Need help?
Do you have a question about the VACUTAP RMV-II and is the answer not in the manual?
Questions and answers