
Related Manuals for GQ Electronics GMC-510


Summary of Contents for GQ Electronics GMC-510
-
Page 1: Table Of Contents User Guide
GQ GMC-510/GMC-520/ GMC-520+ Geiger Counter/Air Quality Monitor with Wifi/GPS/GPRS User Guide GQ Electronics LLC Revision 1.0... - Page 2 Document Revision History: Re.1.00 ,Jun-2018...
-
Page 3: Table Of Contents
Table of Contents User Guide ........................... 1 Table of Contents ........................... 3 Overview ..............................5 Packing List: ............................ 5 Caution ..............................6 Software setup ..........................7 Verify USB driver installation in Windows ..................... 8 S1 key ............................. 9 S2 key ............................. 9 S3 key ............................. - Page 4 Timed Count ..........................28 Set a schedule ..........................29 Set Timed Count Duration ......................29 Start a Timed Count ........................30 GPS ............................... 30 SMS and Call (GPRS) ........................31 CO2 and HCHO ..........................31 About ............................32 Model information Firmware version ..................
-
Page 5: Overview
The analog data port can be connected to any third party device application as data input. The GMC-510/GMC-520/GMC-520+ installed a WiFi module; user is able to log the data via WiFi wirelessly. also installed GPRS and GPS module. With GPRS module user is able to send data via cellphone network. -
Page 6: Caution
Specifications: GMC-510 GMC-520 GMC-520 Plus CO2 Automatic Calibration Carbon Dioxide Range 400-32768ppm 400-5000ppm Carbon Dioxide Accuracy +/- 150ppm +/- 75ppm TVOC 0 - 32768ppb CO2/TVOC Warm Up Time 20minutes 2minutes HCHO GPRSS module (call and text feature) GPS module (Latitude, Longitude, Altitude) -
Page 7: Software Setup
Software setup Before connecting the GMC-510/GMC-520/GMC-520+ Geiger Counter to a computer, download the application software and install the USB driver. Download these from: http://www.gqelectronicsllc.com. 1. The unit needs an USB driver in order to communicate with the application software. -
Page 8: Verify Usb Driver Installation In Windows
Verify USB driver installation in Windows Once the GMC-510/GMC-520/GMC-520+ is connected to a computer, from the device manger, you should see which COM port is assigned to the unit. See the example below. Windows assigned COM3 to the GMC- 510/GMC-520/GMC-520+ unit in this example. -
Page 9: S1 Key
GQ GMC Geiger Counter Multi-Function Keys The multi-function keys S1, S2, S3 and S4 explained: Vertical Display Mode Horizontal Display Mode These keys’ function will be reassigned dynamically based on the context of the current (sub-) menu being displayed. S1 key 1. -
Page 10: Popup Windows
Popup Windows The Popup Windows will show the current status/value of selected features. The current status/value can be changed only when it is displayed in the Popup Window and the currently displayed status/value will be stored when the Popup Window has timed out after 3 seconds if no key has been pressed. Graphic User Interface (GUI) Graphic Icons: Graphic ZOOM factors: 0.5, 1.0, 2.0, AUTO... - Page 11 Current graphic ZOOM factor Current CPM reading History CPM reading Total count since power on OR reset/clear. Average CPM of a specific time frame. Maximum CPM since power on. Current radiation level is normal. Current radiation level is medium. Current radiation level is high.
-
Page 12: Dual Display Modes
Dual Display Modes GMC-510/GMC-520/GMC-520+ supports two display formats to fit user’s display preferences: Vertical Display and Horizontal Display. With the Horizontal Display, the user can select one information screen from: Text, Graphic, Large Font, Carbon Dioxide, Environment or Menu. The Vertical Display Mode displays Large Font mode. - Page 13 Horizontal Displays GMC-520 / GMC-520+ GMC-520 / GMC-520+ GMC-520 / GMC-520+ GMC-520 Only GMC-520 / GMC-520+...
-
Page 14: Display Modes
Display Modes There are five ways to display the information, Text Mode, Large Font Mode, Graphic Mode and Timed Count Graphic Mode: Current radiation level reading in CPM format (Counts Per Minute) CPS(Count Per Second) in last 60 seconds. Navigation keys: S1: Text/Graphic Display/Large font/CO2/Enviromnment Mode Selection S2: Change graph mode S3: Change zoom factor... -
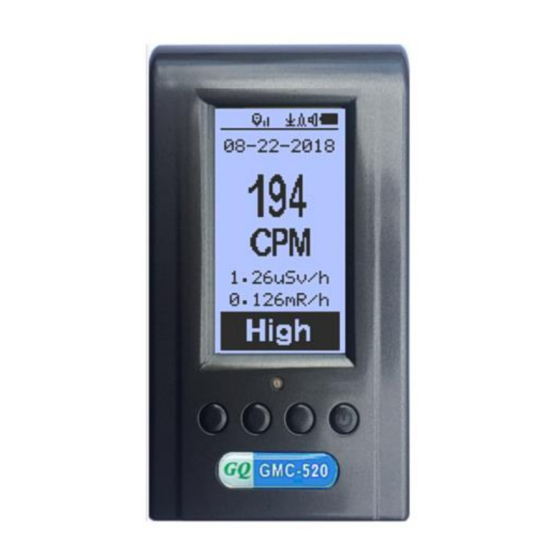
Page 15: Large Font Mode
Current date and time (Press S3 for toggling between date and time) Current radiation level reading in CPM Current radiation level in µSv/h or format mR/h Total count Total cumulated radiation dose in mR since power on. Total cumulated radiation dose in uSv since power on. - Page 16 Carbon Dioxide Mode: Navigation keys: S1: Text/Graphic Display/Large font/CO2/Environment Mode Selection S2: Toggle between Min/Max value and Average value. S3: Toggle between 5 minutes time duration and average duration. S4: Menu Environment Mode: Navigation keys: S1: Text/Graphic Display/Large font/CO2/Environment Mode Selection S2: Toggle between Fahrenheit (F) and Celsius (C).
-
Page 17: User Option
Menu Display Main Menu Navigation keys: S1: Back S2: Up S3: Down S4: Select/Enter User Option Navigation keys: S1: Back S2: Up S3: Down S4: Select/Enter Alarm Set Currently the CPM alarm mode is selected The audio alarm will be triggered once the radiation level reaches the preset alarm threshold. -
Page 18: Date And Time Setting
Date and Time setting Navigation keys: S1: Back/Exit S2: Increase value by 1 (or hold the key down) S3: Decrease value by 1 1 (or hold the key down) S4: Select setting mode between Year, Month, Date, Hour, Minute and Second. Each key press will change the mode to be set. -
Page 19: Threshold Data Saving Setting
Selecting this item will turn on/off the real time data saving from followings: OFF -> Every Second ->Every Minute -> Every Hour->Every Second Threshold->Every Minute Threshold NOTE: The history data memory will be used as a ring buffer. Once the end of the memory is reached, the oldest data will be over written. -
Page 20: Note/Location Input
Note/Location Input The cursor indicates the position of current character input. Navigation keys: S1: Backspace and erase S2: Move cursor right S3: Move cursor left S4: Exit & Store Erase Saved History Data Use S2 and S3 to select Yes or No on the screen to confirm the request. After about 3 seconds with Yes confirmation, the unit will start to erase entire saved history data. -
Page 21: Wifi Setup And Check
WiFi Setup and Check The WiFi tested with 802.11 n , 802.11 g/n, ,802.11 b/g/n under WPA2-PSK (AES), WEP, WPAWPA2- PSK (TKIP/AES) and Open security modes. Select WiFi On/Off item will turn the WiFi connection On/Off Make sure the WiFi SSID and Password have been set. Note: All WiFi settings available from GQ GMC Data Viewer Windows software for easier and faster setup. -
Page 22: Internet Data Server Setting
Internet Data Server Setting This menu setup is mainly for a data logging server. The unit data can be logged to a server automatically via WiFi internet HTTP connection. Here is the default website server setup for: www.gmcmapcom Website server User is able to change the server name to point to another http server. -
Page 23: Website Server Geiger Counter Id
Website server Geiger Counter ID Each data submission has a Geiger Counter ID. The Geiger Counter ID is a unique ID in data server database. It will send to server with the data to log. This is an example Geiger Counter ID from www.gmcmap.com WiFi Data Logging Period The default data-logging period is 2 minutes. - Page 24 Auto Send Data User can choose between the option: send data automatically or not.
-
Page 25: Calibrate The Reading
Calibrate the reading You do not need to do the calibration if you just want to qualitatively detect radiation. However, if you have standard radiation sources with known µSv/h value, you may calibrate the instrument to get accurate readings. The factory default calibration value is for general in-door and out-door measurements. Calibration Select Calibrate form the Main Menu. -
Page 26: Factory Reset
Factory reset Select Factory Reset to reset the unit to the factory default settings. Note: The reset will erase all user settings and recorded history data. Procedure: Select Factory Reset menu item and change the popup Windows message to Yes. Wait for popup message window’s timeout to confirm the reset request. -
Page 27: Motion Detection
Pressing any key will active the LCD backlight again. The unit movement does not weak up the unit if the motion detection is OFF. Motion Detection GMC-320 has motion detection feature. It can detect unit movement, upside down, single tap and double tap. -
Page 28: Reverse Display
This Geiger counter serial communication baud rate is selectable from following value: 1200,2400,4800,9600,14400,19200,28800, 38400,57600,115200. Press S4 key changes baud rate. The new baud will take immediate effect. The new value also be saved and used on next power up. Reverse Display Contrast Adjustment Use S2 and S3 to adjust the contrast level. -
Page 29: Set A Schedule
Set a schedule This example shows the schedule is set to 2 minute. Navigation keys: S1: Back/Exit S2: Increase the cursor position value S3: Decrease the position value. S4: Move the cursor to input data type between Day, Hour, Minute and Second. Set Timed Count Duration There are 5 preset durations from menu: 1 minutes, 10 minutes, 100 minutes, 12 Hours and 24 Hours. -
Page 30: Start A Timed Count
Start a Timed Count If no Schedule set, then the Timed Count starts immediately after the duration set. If the Schedule is set, then the Timed Count will be started after a scheduled time period passed. This is useful if a testing target is not ready immediately. Once the Timed Count schedule is active, the Timer icon will be showed on the top icon area. -
Page 31: Sms And Call (Gprs)
In the GPS submenu, you can turn on/off the GPS feature. You can also check the GPS location information in the GPS submenu, such as GPS status, Satellites used, Latitude, Longitude, Altitude and Accuracy. GPS feature is already installed on this device. The GPS function works best outside and under a clear sky. -
Page 32: About
About This menu item is used to gather information about the instruments model number, firmware revision and serial number. Model information Firmware version Unit serial number SIM Card installation The SIM card slot is in the upper layer of battery compartment. The SIM card can be pushed in to the slot. - Page 33 GQ GMC GPRS Cellular Message Text Command The GMC-510/GMC-520/GMC-520+ support GPRS Cellular Text Message command. User is able to send command via text message from user’s cell phone to the GMC unit, the unit will replay with the requested result via text message.
-
Page 34: Gq Gmc Data Viewer Software
GQ GMC Data Viewer Software The GQ MGC Data Viewer software is utility software comes with the GMC-510/GMC-520 package. Main features: Download the history data from GMC-510/GMC-520 /GMC-520+ Real time monitoring with graphic when it connected with GMC-510/GMC-520 /GMC-520+ Save the history data in .bin OR .csv MS Excel format. - Page 35 Settings->Other menu dialogue. Read From Geiger Counter button reads the current device setting and display it. Write to Geiger Counter button write all fields of software into device.
- Page 36 GQ Terminal The GQ Terminal provides an immediate access interface to the GMC-510/GMC-520 communication protocol. Followings are click to send commands in software, for not listed commands user can type into the command box of software: GETVER, GETSERIAL, GETCPM, KEY0, KEY1, KEY2, KEY3, SPEAKER0, SPEAKER1, ALARM0, ALARM1,...
-
Page 37: Online Geiger Counter World Map
2. GQ Geiger Counter Data Viewer (works on GMC-300, GMC-320 series Geiger Counters) Both software can be found and downloaded from GQ Electronics LLC download page The GMC-510/GMC-520/GMC-520+ are able to submit the data via internal WiFi/GPRS connection without other software. -
Page 38: Applications
Auto submit data url format: http://www.GMCmap.com/log.asp?id=UserAccountID+GeigerCounterID+CPM+ACPM+uSV At least one reading data has to be submitted. Here: 1. UserAccountID: user account ID. This ID is assigned once a user registration is completed. 2. GeigerCounterID: a global unique ID for each registered Geiger Counter. 3. CPM: Count Per Minute reading from this Geiger Counter. -
Page 39: Other Technical Details You May Want To Know
Select the battery type to none rechargeable battery from the unit menu. Third party software developers The GMC-510/GMC-520/GMC-520+ is an open application protocol product. Users are able to develop their own software based on the published GQ-RFC1201 protocol. We encourage you to share your generic software with other users.
Need help?
Do you have a question about the GMC-510 and is the answer not in the manual?
Questions and answers