
Related Manuals for GQ Electronics EMF-360V2


Summary of Contents for GQ Electronics EMF-360V2
- Page 1 GQ EMF-360V2/360+V2/380V2/390V2 EMF Multi-Field/Multi-Function Meter User Guide GQ Electronics LLC Seattle WA, USA Revision 1.90 Aug-2020...
- Page 2 Document Revision History: Re.1.90, Aug-2020, Revised pictures of RF Spectrum section Re.1.80, Mar-2020, Updated RF Spectrum Analyzer Frequency Bands for New Hardware Version Re.1.70, Mar-2020, Revised USB driver section Re.1.60, Jun-2019, Revised pictures Re.1.50, Jan-2019, Rewriting for clarity (contribution by François Planque) Re.1.41, Dec-2018, Content update for EMF-390 USB driver section...
-
Page 3: Table Of Contents
Table of Contents Overview ………………………………………………………………………………………………………………………………………………………4 4 USB Port/Battery Charging …………….…………….…………….…………….…………….…………….…………….…………….……..4 Specification …………….…………….…………….…………….…………….…………….…………….…………….…………….………………..5 Model Selection Guide …………….…………….…………….…………….…………….…………….…………….…………….………………6 Package List …………….…………….…………….…………….…………….…………….…………….…………….…………….………………….6 Caution …………….…………….…………….…………….…………….…………….…………….…………….…………….………………………..7 Location of the Sensors …………….…………….…………….…………….…………….…………….…………….…………….……………..7 Hold and Position of the Meter …………….…………….…………….…………….…………….…………….…………….………………..7 Hardware Setup …………….…………….…………….…………….…………….…………….…………….…………….…………….………….8 GQ EMF Meter Multi-Function Keys …………….…………….…………….…………….…………….…………….…………….………..9 Pop-up Windows …………….…………….…………….…………….…………….…………….…………….…………….………………………9 Dual Display Modes …………….…………….…………….…………….…………….…………….…………….…………….…………….…..10 Vertical EMF/EF Display Layout …………….…………….…………….…………….…………….…………….…………….……………..11... -
Page 4: Overview
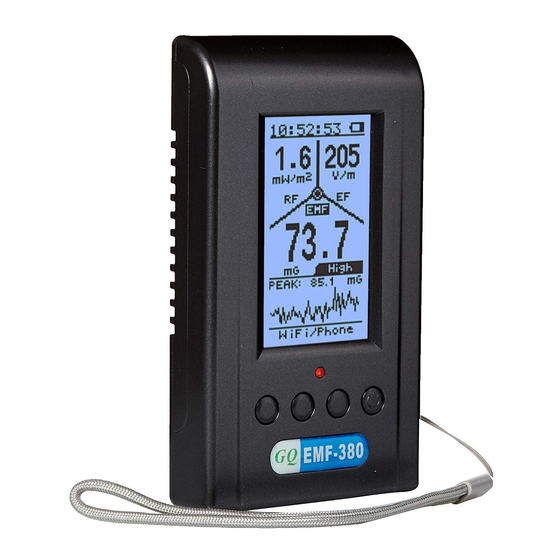
The GQ EMF-360V2 / EMF-360+V2 / EMF-380V2 / EMF-390 advanced multi-function digital EMF meter is designed and developed by GQ Electronics, Seattle, USA. It is designed to be a portable and convenient device. It can be used as regular EMF, EF and RF radiation detection. This high sensitivity meter lets you check EMF/RF radiation easily. -
Page 5: Specification
possible. Using an external power source, you will not have to worry about the battery’s charge condition or any data loss. When the device is connected to a PC, in addition to charging, the free companion PC software can be used •... -
Page 6: Model Selection Guide
The spectrum analyzer relies on 3 specific hardware sensors which cover the 6 bands above. This is limited in order to contain the cost of the unit. • Battery life: ~24 hours continually monitoring (on a full charge) • Internal flash memory for data logging (EMF-390 only): 1 Mbyte •... -
Page 7: Caution
Caution 1. Avoid measuring when battery low. (The unit will stop working if the battery voltage falls below 3.3V, which may happen before the battery level shows 0%) Do not get the meter wet. Use a sealed plastic bag if measuring in the rain. 2. -
Page 8: Hardware Setup
You can hold the meter at the lower part of the meter, or just simply place the meter to the location where is close to the target source. Hardware setup 1. Pressing the power key (S4) for 1 second will show the battery level. Charge the battery fully before the first use. -
Page 9: Gq Emf Meter Multi-Function Keys
GQ EMF Meter Multi-Function Keys The multi-function keys S1, S2, S3 and S4 explained: Vertical Display Mode Horizontal Display Mode These keys’ function will be reassigned dynamically based on the context of the current screen displayed. Pop-up Windows The Popup Windows will show the current status/value of selected features. The current status/value can be changed only when it is displayed in the Popup Window and the currently displayed status/value will be stored when the Popup Window has timed out after 3 seconds if no key has been pressed. -
Page 10: Dual Display Modes
Dual Display Modes The device supports multiple display formats to fit user’s display preferences. The Vertical Display Mode can be used in these modes: Basic (EMF-360/+ only), All-in-one, vertical EMF mode and RF mode. The Horizontal Display Mode can be used in these modes: All-in-one, Table, RF Graph, EMF Graph and Spectrum Analyzer. -
Page 11: Vertical Emf/Ef Display Layout
Vertical EMF/EF Display Layout Electromagnetic Field Display Electric Field Display Basic Display (EMF-360, EMF-360+ only) -
Page 12: Main Menu
Table Mode RF Power top 5 list (EMF-360+V2, EMF-380V2, EMF-390 Only) RF Power Graph (Except EMF-360) Information shown on this graph: Average (top left): -86dbm Frequency checked scope (bottom line, left and right): 2.400GHz – 2.504GHz Channel step: 405 kHz Channel bandwidth: 812 kHz User cursor position: 2.452Ghz, -87dBm Current peak: 2.436 Ghz, -61dBm... -
Page 13: User Option
User Option Navigation keys: S1: Back S2: Up S3: Down S4: Select/Enter Here you can set your personal preferences for your EMF device: 1. The Speaker ON/OFF for all audio alarms. 2. The alarm Beep volume. 3. The alarm related settings. 4. -
Page 14: Initial Setup
RF Setting Navigation keys: S1: Back S2: Up S3: Down S4: Select/Enter 1. RF sensitivity selection. The RF standard mode provides a standard average reading. The RF sensitivity mode provides a aggressive high sensitivity reading. The reading may be higher than standard mode. 2. -
Page 15: Factory Reset
Factory Reset Select Factory Reset to reset the unit to the factory default settings. Note: The reset will erase all user settings and recorded history data. Select Factory Reset menu item and change the popup Windows message to Yes. Wait for popup message window’s timeout to confirm the reset request. -
Page 16: Battery
In order to set the zero-reading reference, you need to select Yes and then wait for about 10 seconds to allow device to detect the lowest reading value as the zero-reading reference during that period. This feature only works when the EMF reading less than 10mG. Battery The battery submenu shows the information about the battery level: percentage and the voltage. -
Page 17: Display Modes
Model information Firmware version Unit serial number Display Modes (EMF-380V2/EMF-390 only) EMF-360V2 EMF-360+ V2 You can access display modes list by pressing S1 in any of the display modes. -
Page 18: All-In-One Mode
All-in-one Mode The All-in-one display mode provides an overall picture of all main readings in one screen. The device will auto rotate into vertical or horizontal mode based on the position of the device. The reading displayed in the largest font is the main data type. It can be changed to a different data type by pressing the S3 key at any time. -
Page 19: Vertical Large Font Mode (Rf) (Emf-380/390 Only)
If more than one kind of source are identified at same time, then the device will display the possible source as “Mixed”. When there are 4 dashes (“----”) in the possible source field, it means the measured data is not sufficient to identify a specific source. -
Page 20: Digital Rf
S4: Main Menu The top left displays peak value in this period. The top right displays the latest value. The triangle in graph is the location of peak value. The lower PEAK indicates the peak reading since in this mode in both units. Press S2 to change the graph period Press S3 to change the format Digital RF... -
Page 21: Date Logging/Saving
Data Logging/Saving The EMF-390 model has data logging/saving into internal flash memory feature. User is able to download the history data into .csv format from a Windows PC via USB connection. Upon the data saving been enabled from menu, the device will automatically save the EMF, EF and RF data into internal flash memory every second. -
Page 22: Emf Graphs (Emf/Ef)
Table Mode (EMF/EF) (EMF-380, EMF390 only) Navigation keys: S1: Display mode selector S2: Toggle between EMF/EF and RF mode S3: Toggle between EMF/EF and RF mode S4: Main Menu X, Y, Z: the EMF value (in mG) in three mutually orthogonal directions, in a X, Y, Z configuration. Hz: The approximate frequency based on the Y value. -
Page 23: Emf X-Y-Z Graphs
EMF X-Y-Z Graphs The graph displays EMF past 45 seconds level changes in three-axis. Navigation keys: S1: Display mode selector S2: Toggle between EMF/EF and EMF-XYZ mode S3: Toggle between EMF/EF and EMF-XYZ mode S4: Main Menu... -
Page 24: Rf Spectrum (Not On Emf-360)
RF Spectrum (Not on EMF-360) The graph shows the detailed power at specific frequency spectrum. Example: Average signal strength in current range. Chn: (Channel Step) 405 kHz. Channel Bandwidth: 812 kHz. User cursor (2.451GHz, -91dBm): The user cursor (the solid triangle with vertical line) pointed frequency and the power strength at the specific position/channel. -
Page 25: Rf Spectrum Example
Below shows the unit automatically adjusting the bandwidth (from 2.447GHz-2.460GHz to 2.453GHz2.466GHz) when the user cursor reaches the boundary. By pressing S3 and hold for 1 second, you can zoom in the current cursor channel for detailed information. Note that there are two zoom levels. To reach zoom 2 level, you have to do zoom 1 first, and press S3 and hold for 1 second again. - Page 26 (EMF-380 V2, EMF-390 Models) (EMF-360+ V2 Model) RF Spectrum Analyzer (Except EMF-360) From above screens: Total power: 458 picowatte Peak: -57dBm @ 2.402GHz Minimum: 0.398 picowatte Frequency checked scope: 2.400GHz – 2.504GHz Channel step: 405 KHz Channel bandwidth: 812KHz At user cursor location: -90dBm @ 2.459GHz Lowest power detected @ -93dBm...
-
Page 27: Rf Spectrum Analyzer And Rf Browser (Common Question)
RF Spectrum and RF Browser (Common Question) Some may be confused between the function of RF Browser and RF Spectrum Analyzer of GQ EMF-390. A quick answer would be the RF Browser is to detect the total amount of RF radiation, from all sources that have the frequency bands between 0.01GHz to 10GHz. -
Page 28: Usb Driver (Windows & Mac)
Windows does not need to install the USB driver. For other Windows version you need to download and install the Windows USB driver. You can download the USB driver from GQ Electronics website download page. OR from following link: http://www.gqelectronicsllc.com/download/CH341SER.EXE... -
Page 29: Gq Emf Pro Software
GQ EMF Pro Software The GQ EMF-Pro Data Viewer software is utility software comes with the EMF device package. You are able to use software request the real-time data from device and then log it into a data file in .csv format. -
Page 30: Troubleshooting
You can use the EMF-Pro software to get EMF data and RF data. EF/EMF real-time graph for 60 seconds RF real-time graph for 60 seconds Troubleshooting 1. Remember to press the Auto button to make sure the COM port is opened and connected. 2. -
Page 31: Download History Data
Download History Data 1. Turn on the Save Data feature on the EMF-390 and wait for a while to save enough data to be downloaded. 2. Run the EMF-PRO from Windows. The software will automatically scan and detect the EMF-390. The Auto button is used to detect the EMF-390 again. -
Page 32: Gq Emf Communication Protocol
GQ EMF Communication Protocol Note: The updated protocol GQ-RFC1701 document can be found from GQ Electronics website download page. Serial Port configuration Baud: 115200 Data bit: 8 Parity: None Stop bit: 1 Control: None Command format A valid command start with ASCII '<‘ and ended with ASCII '>>'. Both command and parameters are in between '<' and '>>'. - Page 33 5. Get an EF reading Command: <GETEF>> Return: Gets the current EF reading in ascii 9 bytes e.g.: EF = 33.9 6. Get the current RF band data (Used in RF Graphs mode) Command: <GETBANDDATA>> Return: Returns all the 128 channels dBm in text/string/ascii separated by commas -88,-88,-89,-88,-89,-87,-87,-89,-88,-87,-87,-86,-87,-87,-87,-86, -87,-88,-88,-86,-87,-87,-87,-92,-88,-86,-87,-87,-87,-87,-85,-87, -85,-86,-86,-87,-87,-86,-87,-93,-86,-88,-87,-87,-86,-87,-89,-87,...
- Page 34 13. get serial number Command: <GETSERIAL>> Return: serial number in 7 bytes. 14. Power OFF Command: <POWEROFF>> Return: none 15. Reload/Update/Refresh Configuration Command: <CFGUPDATE>> Return: 0xAA 16. Set realtime clock year command: <SETDATEYY[D0]>> D0 is the year value in hexdecimal Return: 0xAA 17.
- Page 35 25. Get year date and time command: <GETDATETIME>> Return: Seven bytes data: YY MM DD HH MM SS 0xAA 26. Get gyroscope data command: <GETGYRO>> Return: Seven bytes gyroscope data in hexdecimal: BYTE1,BYTE2,BYTE3,BYTE4,BYTE5,BYTE6,BYTE7 Here: BYTE1,BYTE2 are the X position data in 16 bits value. The first byte is MSB byte data and second byte is LSB byte data.
Need help?
Do you have a question about the EMF-360V2 and is the answer not in the manual?
Questions and answers