
Subscribe to Our Youtube Channel
Related Manuals for GQ Electronics GMC-300E Plus


Summary of Contents for GQ Electronics GMC-300E Plus
- Page 1 GQ GMC-300E Plus Geiger Counter User Guide GQ Electronics LLC Revision 2.12 Oct-2017...
- Page 2 Document Revision History: Re.1.00 ,Jan-2014 GQ Electronics LLC. Initial release for firmware 3.15 Re.1.01 ,Feb-2014 GQ Electronics LLC. Revised for firmware 3.18 Re.2.00 ,Jan-2015 GQ Electronics LLC. Revised for firmware 4.00 Re.2.10 Sep-2016 GQ Electronics LLC. Content Revised Re.2.11 Sep-2017 GQ Electronics LLC. Content Revised...
- Page 3 Table of Contents User Guide ........................... 1 Table of Contents ........................3 Overview ........................... 5 Specifications: ........................5 Packing List: ........................6 Hardware setup ....................... 7 Software set up ........................ 7 Verify USB driver installation in Windows ................8 GQ GMC Geiger Counter Multi-Function Keys ..............9 S1 key ..........................
- Page 4 Tube recovery time ....................... 23 Extend battery operating time ..................23 Third party software developers ................. 24...
-
Page 5: Overview
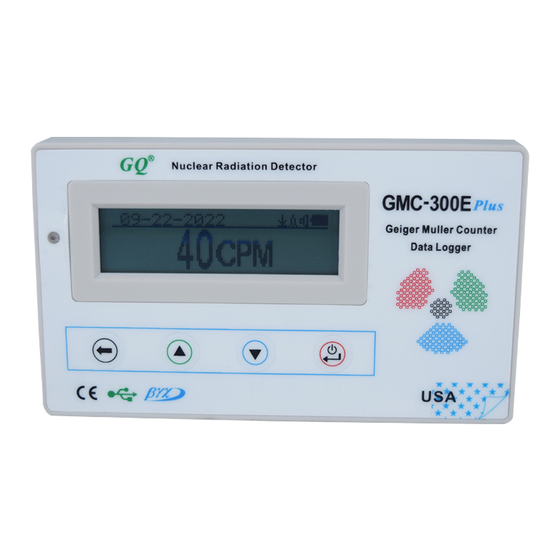
Overview The GQ GMC-300E Plus digital Geiger Muller Counter is designed to be a portable and convenient device. It can be used as industrial, commercial maintenance, research, evaluation, simulation and other analytical or scientific applications in areas such as industrial plants, public utilities, hospitals, universities, laboratories, and electronic repair shops. -
Page 6: Packing List
Power: Supply 3.7V Li-ion battery / USB power from mains or car DC adapter Packing List: 1. GMC-300E Plus main unit. 2. USB cable 3. Quick start guide 4. Download link for SoftGeigerCounter software and USB driver for Windows 32 and... -
Page 7: Hardware Setup
Note: There is a transparent protective sheet covering the units surface. Users need to remove it to get better view of the LCD display and the unit surface. Software set up Before connecting the GMC-300E Plus Geiger Counter to a computer, download the application software install driver. -
Page 8: Verify Usb Driver Installation In Windows
Verify USB driver installation in Windows Once the GMC-300E PLUS is connected to a computer, from the device manger, you should see which COM port is assigned to the GMC-300E Plus. See the example below. Windows assigned COM3 to the GMC-300E PLUS unit in this example. -
Page 9: Gq Gmc Geiger Counter Multi-Function Keys
GQ GMC Geiger Counter Multi-Function Keys The multi-function keys S1,S2,S3 and S4 explained: These key’s function will be reassigned dynamically based on the context of the current (sub-) menu being displayed. S1 key 1. There are three display modes: Text, Large Font and Graphic mode. Pressing the S1 key toggles between these modes. -
Page 10: Popup Windows
Popup Windows The Popup Windows will show the current status/value of selected features. The current status/value can be changed only when it is displayed in the Popup Window and the currently displayed status/value will be stored when the Popup Window has timed out after 3 seconds if no key has been pressed. - Page 11 Average CPM of a specific time frame. Maximum CPM since power on.
-
Page 12: Graphic Mode
Graphic Mode: Current radiation level reading in CPM format (Counts Per Minute) Change of radiation the last 60 seconds. Text Mode: Current date and time (Press S3 for toggling between date and time) Current radiation level reading in CPM Current radiation level in µSv/h or format mR/h Total count and... -
Page 13: Large Font Mode
Large Font Mode: Current date and time (Change it in Text Mode) S2 key toggles between CPM, µSv/h and mR/h mode Navigation keys: S1: Text/Graphic/Large Font Display Mode Selection S2: µSv/h, mR/h, CPM selection S3: µSv/h, mR/h, CPM selection S4: Menu NOTE: Large Font Mode is available in firmware Ver. -
Page 14: Reset Total Count
Reset Total Count Select Yes to clear/reset the total count to o from text mode screen. This is used to do a cumulative measurement on a low level test. Date and Time setting Navigation keys: S1: Back/Exit S2: Increase value by 1 S3: Decrease value by 1 S4: Select setting mode between Year, Month, Date, Hour, Minute and Second. -
Page 15: Add Note Or Add Location For Data Saving
Selecting this item will turn on/off the real time data saving: OFF -> Every Second ->Every Minute -> Every Hour NOTE: The history data memory will be used as a ring buffer. Once the end of the memory is reached, the oldest data will be over written. Carefully select the data saving interval to save memory space. -
Page 16: Erase Saved History Data
This is the date and time stamp of the recorded data point. (S) indicates that data has been recorded every second (M) indicates that data has been recorded every minute. (H) indicates that data has been recorded every hour. Searching data in text mode The first symbol indicates this is saved history data, to distinguish from real time data display. -
Page 17: Calibrate The Reading
Pressing the S4 key will cycle between: Normal -> Swivel modes In the Swivel mode, the display will be rotated by 180° . Calibrate the reading You do not need to do the calibration if you just want to qualitatively detect radiation. However, if you have standard radiation sources with known µSv/h value, you may calibrate the instrument to get accurate readings. -
Page 18: Factory Reset
Factory reset Select Factory Reset to reset the unit to the factory default settings. Note: The reset will erase all user settings and recorded history data. Procedure: Select Factory Reset menu item and change the popup Windows message to Yes. Wait for popup message window’s timeout to confirm the reset request. -
Page 19: Power Saving Mode
The LCD back light will be off during the power saving mode. Pressing any key will active the LCD backlighting again. LED Indicator GMC-300E PLUS has a LED indicator on the front panel. Turn on of off the LED from this menu item. Reset Total Count The Reset Total Count menu item let user to clear the total count on main text mode screen. -
Page 20: Reverse Display
Reverse Display Contrast Adjustment Use S2 and S3 to adjust the contrast level. The contrast level will be saved and it will be used when the unit is ON. Timed Count The Timed Count can be started with a schedule OR without a schedule. When it started with a schedule, the Timed Count will be started after a scheduled time period passed. -
Page 21: Set Timed Count Duration
Set Timed Count Duration There are 5 preset durations from menu: 1 minutes, 10 minutes, 100 minutes, 12 Hours and 24 Hours. If the duration is not listed, then you can set a new duration (1 second to 256 days) from menu Other duration: This example shows a 2 days duration is set for Timed Count. -
Page 22: About
About This menu item is used to gather information about the instruments model number, firmware revision and serial number. Model information Firmware version Unit serial number... -
Page 23: Applications
Turn off the speaker if it is not necessary. If a fully charged battery run-out in less than 5 operating hours, then the battery needs to be replaced. The GMC-300E Plus will operate normally when a non-rechargeable battery is installed. Set the battery type to None-Rechargeable. - Page 24 Third party software developers The GMC-300E PLUS is an open application protocol product. Users are able to develop their own software based on the published GQ-RFC1201 protocol. We encourage you to share your generic software with other users. Please contact support@gqelectronicsllc.com...
Need help?
Do you have a question about the GMC-300E Plus and is the answer not in the manual?
Questions and answers