Table of Contents
Advertisement
Quick Links
Lite Series
|
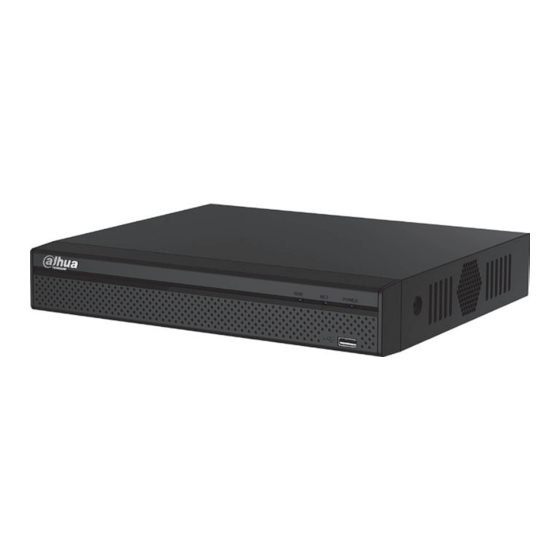
DHI-XVR4104/08/16HS-S2
DHI-XVR4104/08/16HS-S2
System Overview
HDCVI/AHD/TVI/CVBS/IP Auto-detect
( XVR4108/16HS-S2 )
Coaxial Audio/Upgrade/Alarm
· Support
HDCVI/AHD/TVI/CVBS/IP
· Support 1 SATA HDD, up to 8TB
Lite
Series
Smart Fan
Smart Search
Perfect Image Quality
P2P
www.dahuasecurity.by
www.PadVokam.by
1080p
H.264
4/8/16CH
HDMI / VGA
Plug&Play
P2P
Advertisement
Table of Contents

Related Manuals for Dahua Lite DHI-XVR4104/08/16HS-S2


Summary of Contents for Dahua Lite DHI-XVR4104/08/16HS-S2
- Page 1 Lite Series DHI-XVR4104/08/16HS-S2 DHI-XVR4104/08/16HS-S2 www.PadVokam.by · Support HDCVI/AHD/TVI/CVBS/IP · Support 1 SATA HDD, up to 8TB Lite 1080p System Overview H.264 4/8/16CH Series HDMI / VGA Plug&Play Smart Fan Smart Search HDCVI/AHD/TVI/CVBS/IP Auto-detect Perfect Image Quality ( XVR4108/16HS-S2 ) Coaxial Audio/Upgrade/Alarm www.dahuasecurity.by...
- Page 2 Lite Series | DHI-XVR4104/08/16HS-S2 www.PadVokam.by HDCVI Camera AHD Camera TVI Camera CVBS Camera 4+1: IP Camera Input 8+2/16+2: 1/1, RCA H.264 eSATA 2 USB 2.0 DC12V/2A Interface 1 HDMI ,1 VGA Interface Certifications 128 users Smart Phone www.dahuasecurity.by...
- Page 3 www.PadVokam.by | DHI-XVR4104/08/16HS-S2 Rear Panel DHI-XVR4104HS-S2 DHI-XVR4104HS-S2 4/8/16 DHI-XVR4108HS-S2 DHI-XVR4116HS-S2 5 6 7 8 DHI-XVR4108HS-S2 5 6 7 8 DHI-XVR4116HS-S2 5 6 8 USB Interface AUDIO OUT, RCA Connector HDMI Interface VGA Interface www.dahuasecurity.by...
- Page 4 300m(1080P)/450m(720P) via UTP cable.* *Actual results verified by real-scene testing in Dahua's test laboratory. Simplicity HDCVI technology inherits the born feature of simplicity from traditional analog surveillance system, making itself a best choice for investment protection.
- Page 5 Lite Series DH-HAC-HDW1000R Certifications Technical Specification Camera CE (EN55032, EN55024, EN50130-4) Certifications FCC (CFR 47 FCC Part 15 subpartB, ANSI C63.4-2014) UL (UL60950-1+CAN/CSA C22.2 No.60950-1) Image Sensor 1/4" CMOS 1280(H)×720(V), 1MP Interface Effective Pixels Scanning System Progressive Audio Interface PAL: 1/25~1/100000s Eelectrical Electronic Shutter Speed NTSC: 1/30~1/100000s...
- Page 6 Accessories Optional: PFA152 PFM820 PFA122 Pole mount UTC Controller Junction box Junc on Mount Pole Mount PFA122 PFB122 + PFA152 Dimensions (mm/inch) Rev 001.001 © 2016 Dahua. All rights reserved. Design and specifications are subject to change without notice. www.dahuasecurity.com...
- Page 7 Quick Installation Guide Attention: Please make sure the installation surface is thick enough to sustain at least 3X weight of the camera. Note: If you want to install in the wood surface, expansion bolts are not necessary. The screw depth shall reserve 8mm-10mm to secure the bracket. Please refer to Figure 1-1 for installation of Model A.
- Page 8 Please refer to Figure 1-3 for the installation of Model C. Figure 1-3 Please refer to Figure 1-4 for the installation of Model D. Figure 1-4 Please refer to Figure 1-5 and 1-6 for the installation of Model E.
- Page 9 Figure 1-5 Figure 1-6 Please refer to Figure 1-7 for the installation of Model F.
- Page 10 Figure 1-7 Note This manual is for reference only. Please visit our website or contact your local service engineer for more information.
- Page 11 HDCVI Camera User’s Manual Version 1.0.2...
-
Page 12: Table Of Contents
Table of Contents General Introduction ........................1 Overview ........................1 Features ......................... 1 Device Framework ........................2 Installation ........................... 5 Installation for Model A ....................5 Installation for Model B ....................6 ... - Page 13 Welcome Thank you for purchasing our HDCVI camera! This user’s manual is designed to be a reference tool for your system. Please read the following safeguard and warnings carefully before you use this series product! Please keep this user’s manual well for future reference! Important Safeguards and Warnings Electrical safety All installation and operation here should conform to your local electrical safety codes.
- Page 14 It is recommended to use the device with thunder proof device in order to improve thunder proof effect. The grounding holes of the product are recommended to be grounded to further enhance the reliability of the camera. Do not touch the CCD (CMOS) optic component directly. You can use the blower to clean the dust or dirt on the lens surface.
-
Page 15: General Introduction
1 General Introduction 1.1 Overview This series HDCVI camera conforms to the HDCVI standard. It supports video signal high- speed long distance transmission without any delay. It can be controlled by the HCVR conforming to the HDCVI. 1.2 Features High-performance CMOS image sensor, megapixel definition. -
Page 16: Device Framework
2 Device Framework See Figure 2-1 for the dimension of model A. Figure 2-1 See Figure 2-2 for the structure components of model A. Figure 2-2 See Figure 2-3 for the dimension of model B. Figure 2-3 See Figure 2-4 for the structure components model B. - Page 17 Figure 2-4 See Figure 2-5 for the dimension of model C. Figure 2-5 See Figure 2-6 for the structure components of model C. Figure 2-6 See Figure 2-7 for the dimension of model D. Figure 2-7 See Figure 2-8 for the structure components of model D.
- Page 18 Figure 2-8 See Figure 2-9 for the dimension of model E. Figure 2-9 See Figure 2-10 for the structure components of model E. Figure 2-10...
-
Page 19: Installation
3 Installation Dome camera mainly uses ceiling installation; installation surface includes ceiling and wall. Attention: Please install the device in time after it is taken apart, which is to avoid the camera module being exposed to damp environment for too long. ... -
Page 20: Installation For Model B
of the installation surface; insert the self-tapping screws into the expansion bolts and fasten them firmly to fix the pedestal on the installation surface (if it is top outlet, pull the cable through the outlet hole on the installation surface after the pedestal is fixed firmly). Step 5 Rotate the decoration ring and fix it slightly, rotate the enclosure and dome body to a proper monitoring location;... -
Page 21: Installation For Model C
Figure 3-3 Step 2 Confirm the installation location and dig holes on the installation surface. Step 3 Use tools to insert expansion bolts into the installation holes and fix them firmly. Step 4 Adjust pedestal location (if it is side cable outlet, then pull the cable through the side outlet cable slot). -
Page 22: Installation For Model D
Step 1 Hold the decoration ring tightly and unscrew the pedestal anticlockwise. Step 2 Confirm the installation location and dig holes on the installation surface. Step 3 Use tools to insert expansion bolts into the installation holes and fix them firmly. Step 4 Adjust pedestal location (if it is side cable outlet, then pull the cable through the side outlet cable slot). -
Page 23: Installation For Model E
Step 1 Rotate the enclosure to align the arrow on the enclosure edge with the arrow on the pedestal edge; press inward according to the arrow location of the enclosure and meanwhile push outward according to the arrow location of the pedestal to separate the concave; pull the enclosure to make it break away from the pedestal. - Page 24 Step 1 Loosen locking screws anticlockwise and remove the pedestal. Step 2 Confirm the installation location and dig holes on the installation surface. Step 3 Use tools to insert expansion bolts into the installation holes and fix them firmly. Step 4 Adjust pedestal location (if it is side cable outlet, then pull the cable through the side outlet cable slot).
-
Page 25: Menu
4 Menu 4.1 HCVR Settings This HDCVI camera series can adjust OSD menu via coaxial control. After connected the camera to the HDCVI series HCVR, from Main Menu->Setting->System->PTZ, you need to select the channel number for access and set control mode as HDCVI and the protocol as HD- CVI. - Page 26 Figure 4-3 See Sheet 4-1 for the details of button functions. Button Function Open menu Select menu item 、 Select menu value 、 Sheet 4-1 If there is “ ”, click the “Confirm” button in “Menu Operation” interface to go to the 2nd menu. Click “Return”...
Need help?
Do you have a question about the Lite DHI-XVR4104/08/16HS-S2 and is the answer not in the manual?
Questions and answers