
Related Manuals for Caliber MCD 365


Summary of Contents for Caliber MCD 365
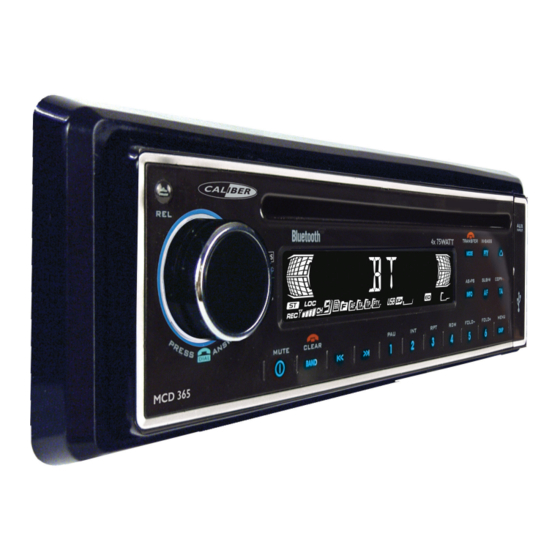
- Page 1 MCD 365 INSTRUCTION MANUAL BLUETOOTH SUPPORT USB/SD/MMC INTERFACE CAR CD/MP3/WMA PLAYER/RECEIVER...
- Page 2 MUTE BAND DISP This unit is equipped with the most advanced “TOUCH SENSE PANEL ” which is easy and convenient to use. Tips And here is some tips on how to use this touch sense panel: The pressing or activating of each button actually all you need is a very light touch, even not really necessary to “PRESS”...
-
Page 3: Note Of Discs
1. NOTE OF DISCS MOISTURE CONDENSATION On a rainy day or in a very damp area, moisture may condense on the lenses inside the unit. Should this occur, the unit will not operate properly. In such a case, remove the disc and wait for about an hour until the moisture has evaporated. -
Page 4: Installation
2. INSTALLATION Before finally installing the unit, connect the wiring temporarily and make sure it is all connected up properly and the unit and system work properly. Use only the parts included with the unit to ensure proper installation. The use of unauthorized parts can cause malfunctions. -
Page 5: Din Rear-Mount (Method B)
Removing the unit a. Frame b. Insert fingers into the groove in the front of frame and pull out to remove the frame. (When re-attaching the frame, point the side with a groove down wards and attach it.) c. Insert the levers supplied with the unit into the grooves at both sides of the unit as shown in figure until they click. -
Page 6: Detachable Control Panel (D.c.p .)
3. DETACHABLE CONTROL PANEL (D.C.P .) Removing The Detachable Control Panel (D.C.P .). 1. Turn the power off 2. Press the D.C.P . release button 3. Remove the D.C.P . PANEL RELEASE BUTTON Attaching the DCP 1. Attach the panel at the right side first, with point B on the main unit touching point A on the D.C.P . -
Page 7: Wiring Diagram
4. WIRING DIAGRAM ANTENNA ANTENNA EXTENDER JACK CABLE FUSE 20-PIN AUDIO/POWER HARNESS (See Figure 1) RCA-TO-RCA CABLES WHITE (not supplied) GREY REAR LINE OUT WHITE BLACK FRONT LINE OUT WARNING Connecting the ISO Connector The pin arrangement for the ISO connectors depends on the type of vehicle you drive.Make sure to make the proper connections to prevent damage to the unit. -
Page 8: Basic Operations
6. BASIC OPERATIONS 3) PANEL RELEASE BUTTON (REL) Press this button to remove the control panel. 1) POWER ON/OFF BUTTON ( Long press POWER/MUTE button or any other button on the front of the radio to turn the unit on. And Long press POWER /MUTEbutton again to turn the unit off. 1) MUTE BUTTON (MUTE) Short Press the mute button momentarily to mute the audio volume, and "Mute"... -
Page 9: Menu Operation
7.MENU OPERATION 18) MENU FUNCTION LIST (MENU) Press DISPLAY/ MENU for more than 3 seconds to access the menu. Will appear in the display momentarily. Navigate the menu by pressing DISPLAY/ MENU momentarily to move forward to the next option. The menu can also be navigated by using the Tuning Up or Tuning Down Button to move to the next or previous option. - Page 10 Programmable Turn-on Volume ( P-VOL ) This option allows selection of the volume level the radio will automatically assume when first turned on. "VOL PGM 12 " is the default setting, which will turn the radio on at the volume level selected when the unit was last turned off. To program a specific volume level for the radio to turn on at, rotate the volume control to select "VOLUME LEVEL ”.
-
Page 11: Audio Operation
8. AUDIO OPERATION Audio Menu Long Press “AUDIO button to access the Audio Menu. User can navigate thru the Audio Menu ” items by pressing the / “AUDIO” button repeatedly, or by pressing the Tuning Up or Tuning Down Button. Once the desired menu item appears on the display, adjust that option by using the Volume Up or Down button within 5 seconds. -
Page 12: Tuner Operation
9. TUNER OPERATION 7) BAND BUTTON (BAND/SEARCH) Press BAND to change between FM bands and AM(MW) bands. 20-21) TUNING UP/DOWN BUTTON ( Manual Tuning Press the Up Tuning or Down Tuning button for more than 3 seconds to move the radio frequency number up or down one step. -
Page 13: Rds Operation
10. RDS OPERATION RDS functions The unit is equipped with the following RDS function: - AF Alternative Frequencies - CT Clock Time - EON Enchanced other Network - PI Program identifications - PS Program service name - PTY Program Type - REG Regional Change - TA Traffic Announcement - TP Traffic program... -
Page 14: Cd/Mp3/Wma Operation
11. CD /MP3/WMA OPERATION INSERT AND EJECT CD Insert a CD label-side up with the unit turned on, and the disc will begin to play. Press the Eject button to stop CD play and eject the CD. The unit does not have to be turned on to eject the CD. - Page 15 Up to 200 characters can be displayed in the long file name format. For a list of available characters, see the instruction manual of the writing software and the section “Entering File and Folder Names” below. The media reproducible on this unit has the following limitations: Maximum number of nested folders: 8 Maximum number of files per disc: 999 Maximum number of files per media device: 2000...
- Page 16 Files Playing Order When selected for play, Folder Search, File Search or Folder Select, files and folders are accessed in the order in which they were written by the PC writer. Because of this, the order in which they are expected to be played may not match the order in which they are actually played.
- Page 17 File/Folder Repeat play : Press M3 button more than 3 seconds during playing MP3/WMA disc for “repeat play” all files of the current folder. And keep on repeat playing the current folder until “repeat play” is disabled. To disable current folder “repeat play”, long press M3 button more than 3 seconds Press M3 button less than 3 seconds to “repeat play”...
- Page 18 1 . USB OPERATION The unit can support USB Host Function. It can playback MP3 and WMA Audio format which are stored into USB Memory Stick or USB interface Music Player. Please read below before you start the operation of USB HOST Function. Inserting and Removing USB Drive Warning: Always remove the USB stick before detach...
-
Page 19: Memory Card Operation
13. MEMORY CARD OPERATION The unit can support playback MP3 and WMA Audio format which are stored into SD and MMC Memory Card . Pls read below before you start the operation of Memory Card Inserting and Removing a SD or MMC card on the main unit Face Click Insert the Memory Card... -
Page 20: Music Files Copying / Transferring
14. MUSIC FILES COPYING / TRANSFERRING Thanks for the most useful and convenient files transferring function of this unit, user can easily transfer music files between USB Stick, SD or MMC Memory card and on the CD Disc. Please read below for the details operation of this function: TRANSFERABLE MEDIA Files are transferable within the following media: Removable USB Stick... - Page 21 TRANSFER MP3 OR WMA MUSIC FILES BETWEEN MEDIA DEVICES Select a device by mode button and playback the music file need to be transfer: 1.Long press the COPY button to activate the transfer mode. 2.The LCD will display as default, Rotate the encoder volume knob to navigate thru >...
-
Page 22: Music Files Erasing
15. MUSIC FILES ERASING You can erase files from the USB Stick or Memory Card Please read below for the details operation of this function: ERASABLE MEDIA USB Stick and Memory Card. Music files which are on the CD Disc is NOT ERASABLE By this unit. ERASING MUSIC FILES ON THE MEDIA There are THREE different methods for erasing files;... - Page 23 3.Erase under Files NAVIGATE search mode You can select a Music file want to erase by files Navigate Search mode After selected the music file want to erase by files navigate search, Long press BAND button to activate the ERASE mode. The LCD will display Short Press the AUDIO button to enter into the ERASE mode Once Enter into the ERASE mode, user can rotate the encoder to select “...
-
Page 24: Files Manager
16. FILES MANAGER The advance “File Management.” System of this unit can help to well you organize all the music files just like a PC . Pls read below for details: FOLDERS MANAGEMENT This unit will automatically self-create the below default folders onto any USB /SD / MMC media device, once these devices are inserted into the unit. -
Page 25: Blue Tooth Hand Free Operation
17.BLUE TOOTH HAND FREE OPERATION User Guide For Blue Tooth Operation 1. When user use our Blue tooth HEAD UNIT, please make sure the mobile phone you use must / does support Blue tooth functions (Headset or Handsfree profiles or both) 2. - Page 26 Bluetooth Mobile Phone Compatibility List This unit can support bluetooth specification v1.2 or higher, and compatible with bluetooth profiles such as handsfree or headset profiles. however the functionality may be limited due to some phones' own dedicated interfacing specification. This list is only updated to the time this list is being printed. This list gives an example of bluetooth mobile phone available on the market, if your bluetooth mobile phone is not on the list, please try it out in practice or try your phone at the local dealer or consult with the local dealer in case it is not mentioned in the list.
- Page 27 2. Nokia 6600 8910 6230 7600 Features Caller ID Pairing Pairing Pairing cancel In-Band Ring Tone Ringing Talk Reject Audio Transfer Talking Volume up/down Hang up Audio Transfer Dialing Volume up/down Redial last call 6230i 7380 6111 Features Caller ID Pairing Pairing Pairing cancel...
- Page 28 3. Motorola V600 E398 V501 Features Caller ID Pairing Pairing Pairing cancel In-Band Ring Tone Ringing Talk Reject Audio Transfer Talking Volume up/down Hang up Audio Transfer Dialing Volume up/down Redial last call 4. Panasonic & Sharp Panasonic X88 GX-T15 GX-T71 Features Caller ID...
- Page 29 5. Siemens & BenQ Features Caller ID Pairing Pairing Pairing cancel In-Band Ring Tone Ringing Talk Reject Audio Transfer Talking Volume up/down Hang up Audio Transfer Dialing Volume up/down Redial last call 6. Dopod & MIO & Blackberry A700 8700 Features Caller ID Pairing...
- Page 30 7. Samsung & LG D528 KG320 D508 Features Caller ID Pairing Pairing Pairing cancel In-Band Ring Tone Ringing Talk Reject Audio Transfer Talking Volume up/down Hang up Audio Transfer Dialing Volume up/down Redial last call E - 30...
- Page 31 PAIRING Pairing The Blue Tooth System Between User’s Mobile Phone & The Unit Access into MENU - PAIRING mode to activates the operation of Pairing . Please see MENU Operation for more details of how to access into MENU mode . Once the is appearing on the LCD Display, press the AUDIO button to activate the Pairing mode.
-
Page 32: Answering An Incoming Call
The unit will be Auto Re-Connection by following operation . Every time turn the ignition key from off to on, the unit will Auto re-connect with the Mobile Phone. Dis-Connection of the Blue Tooth System The unit have a option function for user to disconnect the Blue tooth system with the unit. The unit can be Dis-connected by the following methods. -
Page 33: Outgoing Call
OUTGOING CALL Making An Outgoing Call User can use his / her Mobile Phone to dial and make an outgoing call. Once the user has completed the dialling, the display should show “ ”. The audio output of the present mode will ONLY be muted after pressing the “PHONE” button as a confirmation to dial the outgoing call. - Page 34 Bluetooth Audio Streaming A2DP (Advanced Audio Distribution Profile) User can listen to music files on an audio device on this unit if the audio device supports A2DP (Advanced Audio Distribution Profile) of Bluetooth Technology. Please read the below instruction before operating the Bluetooth Audio streaming function on this unit.
- Page 35 Operating an audio device with this unit AVRCP ( Audio Video Remote Control Profile ) This unit can perform the following operations with the connecting Audio device which supports AVRCP (Audio Video Remote Control Profile) & only if the Audio device does support AVRCP.
-
Page 36: Specifications
18.SPECIFICATIONS CD PLAYER Compact disc audio system System Compact disc Usable disc 44.1KHz Sampling frequency 1bit No of quantization bits 5-20,000Hz Frequency 2 stereo Number of channels 70dB S/N Ratio MEDIA SECTION USB Host Host 1.1 compatibles 2.0 Memory Card Support Type of Memory Card SD and MMC RADIO SECTION... -
Page 37: Troubleshooting
19.TROUBLE SHOOTING Before going through the check list, check wiring connection. If any of the problems persist after check list has been made, consult your nearest service dealer. Symptom Cause Solution The car ignition is not on. No power If the power supply is properly connected to the car accessory terminal, switch the ignition key to “ACC”...
Need help?
Do you have a question about the MCD 365 and is the answer not in the manual?
Questions and answers