Table of Contents
Advertisement
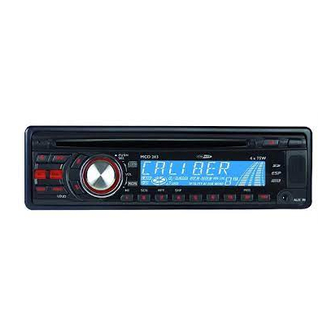
CD/MP3 CAR RADIO WITH RDS FUNCTION
DISP
EQ
AMS
MOD
BAND
LOUD
MCD-263
Instruction Manual
PUSH
<
MCD263
SEL
VOL
R
SCN
RPT
1
2
3
FM Stereo Radio
PLL Synthesizer Tuner
RDS (Radio Data System) Function
Anti-Shock Mechanism
USB Port & SD/MMC Card Slot
LCD Digital Display
Telephone Mute Function
AUX IN & RCA Output Socket
Remote Control
Full Detachable Front Panel
4
x
70W
High Power Output
ISO Connectors for Power Supply
and Speaker Outputs
CAR CD/MP3 PLAYER
SHF
4
5
TA
ST
REG
AF
PTY
AUX IN
Advertisement
Table of Contents

Related Manuals for Caliber MCD-263


Summary of Contents for Caliber MCD-263
-
Page 1: Instruction Manual
CD/MP3 CAR RADIO WITH RDS FUNCTION MCD-263 Instruction Manual PUSH < CAR CD/MP3 PLAYER MCD263 DISP BAND LOUD AUX IN FM Stereo Radio PLL Synthesizer Tuner RDS (Radio Data System) Function Anti-Shock Mechanism USB Port & SD/MMC Card Slot LCD Digital Display Telephone Mute Function AUX IN &... -
Page 2: Table Of Contents
Page CONTENTS Contents Installation Using the detachable front panel Wiring Diagram Operations Location and Function of Keys Using the Remote Control General Operations Radio Operations RDS (Radio Data System) Operations CD/MP3 Disc Operations Mixed-CD Operations AUX in Operations SD/MMC Card Operations USB Device Operations Disc Notes Specifications... -
Page 3: Installation
Take Out Screw Before Installation Installation Before install the unit, please remove the two screws. Notes: - Choose the mounting location where the unit will not interfere with the normal driving function of the driver. - Before finally installing the unit, connect the wiring temporarily and make sure it is all connected up properly and the unit and the 1. - Page 4 10. Reconnect the cable to the vehicle 6. Mount the sleeve by inserting the sleeve into the opening of the dashboard and bend battery's negative (-) terminal. Then open the tabs located around the sleeve replace the outer trim ring and install the with a screwdriver.
-
Page 5: Using The Detachable Front Panel
Using The Detachable Front Panel 2. DIN REAR-MOUNT (Method B) REMOVING THE FRONT PANEL If your vehicle is a Nissan, Toyota, follow this mounting instruction. Use the screw 1 Press the release button on the holes marked T (Toyota), N (Nissan) front panel located on both sides of the unit to fasten the unit to the factory radio mounting... -
Page 6: Wiring Diagram
Wiring Diagram White to Front Lch RCA output White to Rear Lch RCA output Antenna Socket FUSE ISO CONNECTOR Red to Rear Rch RCA output Red to Front Rch RCA output ORANGE TO TEL.MUTE YELLOW TO MEMORY B+ BLACK BLUE GND B- TO ANTENNA POWER B+... -
Page 7: Operations
Operations Location and function of keys Front panel : PUSH < CAR CD/MP3 PLAYER MCD263 DISP BAND LOUD AUX IN The front facet after removing the front panel: Descriptions of Function Controls Power( ) Button (16) 9 / UP ( ) Button LCD display Tune up, Seek up, track up, fast forward... -
Page 8: General Operations
When TP information gets lost at the General Operations current station for retune time, the beep Switching on/off the unit sound is out-putted. Switch on the unit by pressing any button When newly tuned station has not RDS (except button and button) or inserting signal, “PI SEEK”... - Page 9 searches AF. The unit doesn't search this - In case of receiving a non RDS station AF (DIP) for few minutes. In the case of the In radio mode: “NO CLOCK” ->FREQ- AF of NO RDS signal with high field >”NO PTY”...
-
Page 10: Radio Operations
2. When the call ends Radio Operations Hang up the phone. 'TEL CALL' disappears from the display. SWITCHING TO RADIO MODE The original source (i.e. the one used Press MODE button to select radio mode, before the phone call) is returned to the radio mode appears on the LCD display automatically and the volume restored together with the memory band and... -
Page 11: Rds (Radio Data System) Operations
M1. POP M, ROCK M RDS (Radio Data System) Operations M2. EASY M, LIGHT M M3. CLASSICS, OTHER M Setting RDS mode M4. JAZZ, COUNTRY Press the AF/REG button and release M5. NATION M, OLDIES immediately to switch on or off RDS mode. M6. - Page 12 mute sound for a while. radio is switched back to current station The RDS digital data includes the again. In above operation, a customer following: listens to a wrong program or mute sound for a while. Program Identification EON TA LOCAL mode Code for identifying programs When the filed strength level of EON Program Service Name...
-
Page 13: Cd/Mp3
Searching file and directory CD/MP3 Disc Operations Press the AS/PS AMS/MP3 repeatedly to cycle through the following search mode: Switching to CD/MP3 mode Searching by track number 1. If there is no CD/MP3 disc inserted in the Searching by directory or file name player: Searching from root directory Gently insert a CD/MP3 disc with the... -
Page 14: Mixed-Cd Operations
shown “ D-DIR Rotate the volume knob ”. Mixed-CD Operations list all files, then press the BAND button play the selected file. * Repeat above steps if the selected title is If available, the unit can play the mixed- a directory again CD disc (the disc contains both CD audio tracks and MP3 files). -
Page 15: Sd/Mmc Card Operations
SD/MMC Card Operations USB Device Operations This unit equipped with a memory card slot. The unit is equipped with a USB port on the front panel of the unit, you can connect a Using the SD/MMC card: USB stick through the USB port. When you insert a SD/MMC card into the memory card slot, the player will reading Using the USB stick:... -
Page 16: Disc Notes
D. Handling and Cleaning Disc Notes - Dirt, dust, scratches and warping discs will cause disoperation. A. Notes on discs: - Do not place stickers or make scratches 1. Attempting to use non-standard shape on discs. discs (e.g. square, start, and heart) may - Do not warp discs. -
Page 17: 7 Specifications
Specifications E Preparing New Discs with Rough Spots A new disc may have rough edges on its 1. GENERAL inside and outside edges. If a disc with Power Supply Requirements rough edges is used, the proper setting will DC 12 Volts, Negative Ground not be performed and the player will not play the disc. -
Page 18: Trouble Shooting
Trouble Shooting The following chart will help in solving most problems that may occur. If you still have questions after going through the checklist, please consult your local customer service representative. Before going through this check list, refer the wiring and operating procedures. Symptom Cause Solution...
Need help?
Do you have a question about the MCD-263 and is the answer not in the manual?
Questions and answers