Table of Contents

Subscribe to Our Youtube Channel
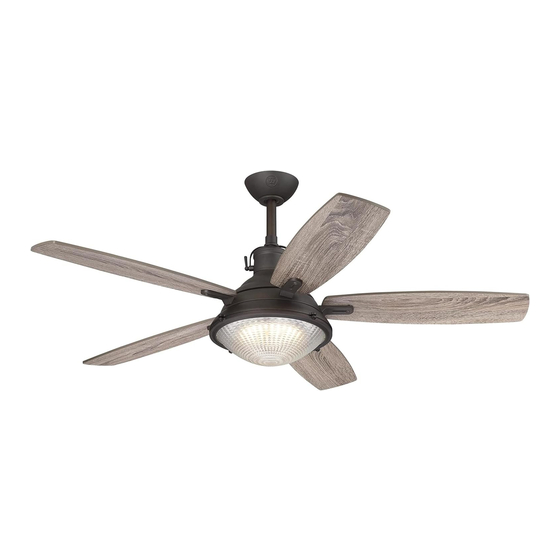
Related Manuals for Westinghouse Oyster Bay


Summary of Contents for Westinghouse Oyster Bay
- Page 1 CETL-EF-Oyster Bay-WH21 OWNER'S MANUAL GUIDE D’UTILISATION Oyster Bay Please write model number here for future reference: Veuillez noter le numéro de modèle aux fins de référence ultérieure: Net Weight: 23.38 LBS Poids Net: 10.63 KGS...
-
Page 2: Safety Tips
CETL-EF-Oyster Bay-WH21 SAFETY TIPS OBSERVE THE FOLLOWING: READ AND SAVE THESE INSTRUCTIONS WARNING: TO REDUCE THE RISK OF FIRE, ELECTRIC SHOCK, OR PERSONAL INJURY, MOUNT TO OUTLET BOX MARKED ' A CCEPTABLE FOR FAN SUPPORT OF 35 LBS (15.9 KG) OR LESS' AND USE MOUNTING SCREWS PROVIDED WITH THE OUTLET BOX AND/OR SUPPORT DIRECTLY FROM BUILDING STRUCTURE. -
Page 3: Consignes De Sécurité
CETL-EF-Oyster Bay-WH21 CONSIGNES DE SÉCURITÉ VEUILLEZ LIRE ET CONSERVER CES INSTRUCTIONS. MISE EN GARDE - AFIN DE RÉDUIRE LES RISQUES D'INCENDIE, D'ÉLECTROCUTION OU DE BLESSURES, IL FAUT RACCORDER LE VENTILATEUR UNIQUEMENT À UNE BOÎTE DE SORTIE DE COURANT PORTANT LA MENTION (POUVANT SUPPORTER UN VENTILATEUR DE 15,9 KG[35 LB] OU MOINS) ET UTILISER LES VIS DE FIXATION FOURNIES AVEC LA BOÎTE DE SORTIE DE COURANT, ET/OU LE FIXER DIRECTEMENT À... - Page 4 CETL-EF-Oyster Bay-WH21 FEATURES CARACTÉRISTIQUES DOWNROD INSTALLATION TIGE DE SUPPORT SUSPENDU For normal ceilings COMBO-BLADE Combo-Blades feature two high quality finishes on one blade. Select the one that best complements Pour plafonds standard your decor, or change the style with just a flip of the blade.
- Page 5 CETL-EF-Oyster Bay-WH21 PREPARING FOR INSTALLATION PRÉPARATION À L’INSTALLATION .(Use metal outlet box suitable for fan support (must support 35 lbs Before attaching fan to outlet box, ensure the outlet box is securely fastened by at least two points to a structural ceiling member (a loose .(box will cause the fan to wobble...
- Page 6 CETL-EF-Oyster Bay-WH21 MOUNTING BRACKET INSTALLATION INSTALLATION DU SUPPORT DE MONTAGE Loosen but don’t remove the screws at the bottom of canopy; remove the Install mounting bracket to outlet box in ceiling using the screws and mounting bracket from the canopy (if applicable).
- Page 7 CETL-EF-Oyster Bay-WH21 NORMAL DOWN ROD OPTION MONTAGE NORMAL SUR TIGE Place down rod assembly into canopy (1), canopy cover ring (2) and coupling cover (3). Feed motor wires through the down rod assembly (4). Note: To avoid scratching the down-rod, wrap the end of the down rod with paper and please align...
- Page 8 CETL-EF-Oyster Bay-WH21 DOWN ROD INSTALLATION INSTALLATION AVEC TIGE Loosen (but do not remove) the set screws from the down rod coupling (1). Insert down rod into down rod coupling. Make sure to align hole in down rod with the hole in coupling. Install yoke cross pin (2) through yoke and down rod.
- Page 9 CETL-EF-Oyster Bay-WH21 MOUNTING SAFETY CABLE MONTAGE CÂBLE DE SÉCURITÉ Lift the fan assembly and attach the safety cable directly to the building structure using the 3” screw provided. Before proceeding to the next step make sure that the cable is properly installed and will support the fan weight. Make sure the screw, Carefully lift fan assembly onto mounting bracket.
- Page 10 CETL-EF-Oyster Bay-WH21 WIRING OPTIONS OPTIONS DE RACCORDEMENT DES FILS Black White Bare Copper or Green Noir Blanc Cuivre dénudé ou Vert Black White Noir Blanc White Red or Black Blue Green Green Blanc Rouge et Noir Bleu Vert Vert White...
- Page 11 CETL-EF-Oyster Bay-WH21 SECURE TO CEILING ATTACHEZ AU PLAFOND Align the keyholes on the canopy with the protruding screw heads from the mounting bracket. Lift the canopy up and rotate clockwise until the screwheads engage the key slots fully. Aligner les trous servant à verrouiller le couvercle avec les têtes de vis en saillie sur l'équerre de montage. Soulevez le couvercle afin d’assembler les deux parties et tourner...
- Page 12 CETL-EF-Oyster Bay-WH21 SECURE TO CEILING ATTACHEZ AU PLAFOND The inside canopy cover ring (1) has two keyhole slots that allow it to be mounted onto the screw heads on the two protruding screws from the mounting bracket. Slide the canopy cover ring up the down rod and allow the two protruding screw heads from the mounting bracket to go into the keyhole slots on the canopy cover ring. Once engaged, twist the canopy cover ring to lock it onto the screw heads.
- Page 13 CETL-EF-Oyster Bay-WH21 BLADE INSTALLATION INSTALLATION DES LAMES Insert the blade bracket through the slots on the decorative motor housing as shown, attach the blade bracket onto the pre-installed bracket on the motor, align the both holes and use the provided screws with the spring washers to tighten both brackets.
- Page 14 CETL-EF-Oyster Bay-WH21 LIGHT FIXTURE INSTALLATION INSTALLATION DE L’APPAREIL D’ÉCLAIRAGE Carefully insert the lead wires through the center hold of the converting plate (1). The con- verting plate has 2 keyhole slots, align the slots to the protruding screws from support plate (2).
- Page 15 CETL-EF-Oyster Bay-WH21 LIGHT FIXTURE INSTALLATION INSTALLATION DE L’APPAREIL D’ÉCLAIRAGE Remove two (2 ) of the three screws on the converting plate (1), and loosen, (do not remove) the other one. Then wiring by connect the wire plugs between the fan and light kit, white to white, and blue to black.
- Page 16 CETL-EF-Oyster Bay-WH21 LIGHT FIXTURE INSTALLATION INSTALLATION DE L’APPAREIL D’ÉCLAIRAGE Using the four screws pre-installed on the light kit shade (1), attach the light kit shade to the converting plate (2) as shown. Tighten screws to secure the light kit shade.
- Page 17 CETL-EF-Oyster Bay-WH21 HOW TO OPERATE YOUR CEILING FAN COMMENT FAIRE FONCTIONNER VOTRE VENTILATEUR DE PLAFOND Mount the transmitter holder onto the wall using screws provided. Place the transmitter into the holder. Montez au mur le porte-émetteur à l'aide des écrous fournis. Placez l'émetteur dans son support.
- Page 18 CETL-EF-Oyster Bay-WH21 HOW TO OPERATE YOUR CEILING FAN COMMENT FAIRE FONCTIONNER VOTRE VENTILATEUR DE PLAFOND Restore electrical power to the outlet box by turning on the electricity at the main fuse box. To make the fan operational, open battery door by pressing and sliding down the battery door.
- Page 19 CETL-EF-Oyster Bay-WH21 HOW TO OPERATE YOUR CEILING FAN COMMENT FAIRE FONCTIONNER VOTRE VENTILATEUR DE PLAFOND Rétablir l'alimentation électrique de la boîte de sortie en allumant l'électricité à la boîte à fusibles principale. Pour rendre le ventilateur opérationnel, retirer le cache pile de la télécommande. Installez deux piles AAA 1.5V (incluses) dans la télécommande (si elle n'est pas utilisée pendant longtemps,...
- Page 20 CETL-EF-Oyster Bay-WH21 HOW TO OPERATE YOUR CEILING FAN COMMENT FAIRE FONCTIONNER VOTRE VENTILATEUR DE PLAFOND The remote buttons function as follows: (1) Fan speed: = High speed = Medium-high speed = Medium Speed = Low Speed Button: Turn the fan off - Light On/Off –...
- Page 21 CETL-EF-Oyster Bay-WH21 Appendix for alternate installation options EXTENDED DOWNROD OPTION (from page# 22) Annexe pour les options d'installation alternatives INSTALLATION SUR TIGE RALLONGEE (à partir de la page n° 22)
- Page 22 CETL-EF-Oyster Bay-WH21 EXTENDED DOWNROD OPTION INSTALLATION AVEC TIGE LONGUE Loosen downrod ball (1) from downrod (2) by removing set screw (3). Slide down rod ball (1) off of down rod and remove pin (4). Desserrer la boule (1) de la tige (2) en retirant la vis de pression (3). Sortir la boule (1) de la tige et retirer la goupille (4).
- Page 23 CETL-EF-Oyster Bay-WH21 EXTENDED DOWNROD OPTION INSTALLATION AVEC TIGE LONGUE Re-install pin into extended down rod, and slide down rod ball up to the top of the down rod. Re-install set screw to secure ball to downrod. Note: Some extended down rods have a pre-drilled set-screw hole.
-
Page 24: Operation And Maintenance
CETL-EF-Oyster Bay-WH21 OPERATION AND MAINTENANCE Operation Turn on the power and check operation of fan. Speed settings for warm or cool weather depend on factors such as room size, ceiling height, number of fans and so on. The slide switch controls direction, forward or reverse. -
Page 25: Utilisation Et Entretien
CETL-EF-Oyster Bay-WH21 UTILISATION ET ENTRETIEN Utilisation Mettez le ventilateur sous tension et vérifiez-en le fonctionnement. Le réglage de la vitesse en fonction du temps chaud ou du temps frais dépend de divers facteurs comme la taille de la pièce, la hauteur du plafond, le nombre de ventilateurs, etc. -
Page 26: Troubleshooting Guide
CETL-EF-Oyster Bay-WH21 If you have difficulty operating your new ceiling fan, it may be the result of incorrect assembly, installation, or wiring. In some cases, these TROUBLESHOOTING GUIDE installation errors may be mistaken for defects. If you experience any faults, please check this troubleshooting chart. If a problem cannot be remedied, please consult with your qualified electrician and do not attempt any electrical repairs yourself. -
Page 27: Guide De Dépannage
CETL-EF-Oyster Bay-WH21 Si vous éprouvez des difficultés à faire fonctionner votre nouveau ventilateur de plafond, ceci peut être causé par un assemblage, une installation GUIDE DE DÉPANNAGE ou des connexions incorrects. Dans certains cas, on pourrait méprendre ces erreurs d'installation pour des défauts de fabrication. -
Page 28: Warranty
Cette garantie remplace toute autre garantie, explicite ou implicite. Westinghouse Lighting s'engage à remplacer les pièces nécessaires ou à remplacer le ventilateur de plafond si la défaillance est imputable à un défaut de pièces ou de main-d'œuvre. Années 1 & 2 - Westinghouse Lighting remplace ce ventilateur de plafond. - Page 29 CETL-EF-Oyster Bay-WH21 PARTS LIST LISTE DE PIÈCES Description 1 ..Mounting Bracket (assembled with Canopy) 2 ..Blade (qty 5) 3 ..Glass shade & Cage 4 ..Remote control 5 ..Capacitor 6 ..Hardware pack 7 ..Down Rod Assembly (includes down rod ball, cross pins, clamp pin) 8 ..
- Page 30 CETL-EF-Oyster Bay-WH21...
- Page 31 CETL-EF-Oyster Bay-WH21...
- Page 32 CETL-EF-Oyster Bay-WH21 Westinghouse Lighting, Philadelphia, PA 19154-1029, U.S.A. www.westinghouselighting.com and Westinghouse are trademarks of Westinghouse Electric Corporation. Used under license by Westinghouse Lighting. All Rights Reserved. Made in China...
Need help?
Do you have a question about the Oyster Bay and is the answer not in the manual?
Questions and answers