Table of Contents
Advertisement
Available languages
Available languages
Advertisement
Chapters
Table of Contents

Related Manuals for Westinghouse WSFTYFE3608


Summary of Contents for Westinghouse WSFTYFE3608
- Page 1 36" Digital Tower Fan with Remote Control / Ventilateur Vertical 36 pouces Numérique avec Télécommande Instruction Manual / Manuel d’instructions WSFTYFE3608 WSFTYFE3608_Tower Fan_EN-FR_V3.indd 1 WSFTYFE3608_Tower Fan_EN-FR_V3.indd 1 9/14/2022 3:58:47 PM 9/14/2022 3:58:47 PM...
- Page 2 WSFTYFE3608_Tower Fan_EN-FR_V3.indd 2 WSFTYFE3608_Tower Fan_EN-FR_V3.indd 2 9/14/2022 3:58:47 PM 9/14/2022 3:58:47 PM...
-
Page 3: Table Of Contents
CONTENT SAFETY INFORMATION IMPORTANT SAFEGUARDS ............... 4 POLARIZED PLUG ..................7 POWER SUPPLY ..................... 7 HOW TO USE DESCRIPTION OF PARTS ................9 BEFORE FIRST USE ..................10 OPERATING INSTRUCTIONS..............12 CLEANING AND CARE ................ DISPOSAL ....................INFORMATION AND SERVICE ............WSFTYFE3608_Tower Fan_EN-FR_V3.indd 3 WSFTYFE3608_Tower Fan_EN-FR_V3.indd 3 9/14/2022 3:58:47 PM... -
Page 4: Safety Information
SAFETY INFORMATION DANGER WARNING CAUTION DANGER – Immediate hazards WARNING – Hazards or unsafe CAUTION – Hazards or unsafe which WILL result in severe practices which COULD result in practices which COULD result in personal injury or death severe personal injury or death minor personal injury WARNING When using electrical appliances, basic safety precautions... - Page 5 SAFETY INFORMATION maintenance should not be carried out by children unless they are older than 8 years old and supervised. WARNING! Always supervise children when they are near the appliance and keep it out of their reach. The appliance is not a toy.
- Page 6 SAFETY INFORMATION 17. Do not let the cord hang over the edge of a table or counter. 18. Do not place the cord under soft furnishings such as carpets, rugs, throws or runners, furniture or appliances. Arrange the cord in a location where it cannot be easily caught on or tripped over.
-
Page 7: Polarized Plug
SAFETY INFORMATION POLARIZED PLUG The appliance has a polarized plug (one blade is wider than the other). To reduce the risk of electric shock, this plug is intended to fit into a polarized outlet only one way. If the plug does not fit fully into the outlet, reverse the plug. - Page 8 SAFETY INFORMATION Do not expose batteries to heat sources such as sunlight or naked flames. Keep at room temperature. 8. If the battery compartment does not close correctly, stop using the appliance and keep it out of children’s reach. 9. Remove the batteries when you are not using the appliance for a long time.
-
Page 9: How To Use
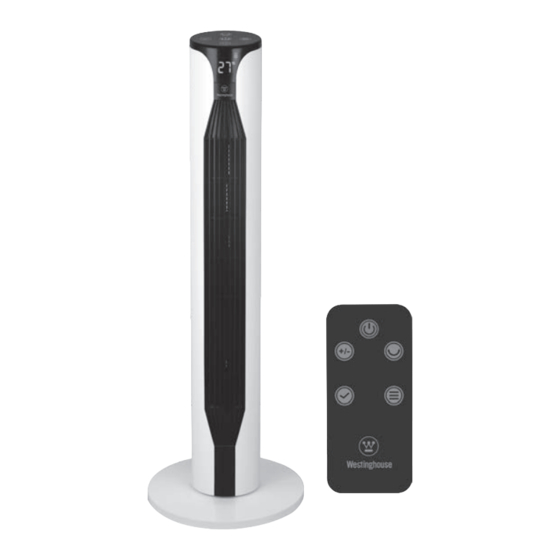
HOW TO USE DESCRIPTION OF PARTS Infrared sensor TIMER button 2. Display screen 8. POWER button 3. Air inlet (on the back) 9. OSCILLATION button 4. Base 10. MODE button 5. Control panel 11. SPEED button 6. Air outlet WSFTYFE3608_Tower Fan_EN-FR_V3.indd 9 WSFTYFE3608_Tower Fan_EN-FR_V3.indd 9 9/14/2022 3:58:48 PM 9/14/2022 3:58:48 PM... -
Page 10: Before First Use
HOW TO USE NOTE: All images shown are for illustrative purposes only and may not be an exact representation of the product model. BEFORE FIRST USE • Unpack and remove all packaging materials from the appliance. • Check for damage that may have occurred during transport. If any parts are damaged or missing, do not use the appliance and return it to your retail outlet immediately. - Page 11 HOW TO USE Picture 1 Picture 2 Picture 3 Picture 4 Picture 5 Picture 6 IMPORTANT: Make sure that the power cord passes through the guides on the rear half of the base. SETTING UP THE REMOTE CONTROL Pull the plastic film from the battery compartment. Operating the remote control: Point the remote control at the infrared sensor making sure there are no obstacles.
-
Page 12: Operating Instructions
HOW TO USE OPERATING INSTRUCTIONS NOTE: The remote control buttons are the same as the control panel buttons. Place the fan on a dry, level and stable surface. 2. Insert the plug into a 120 V AC / 60 Hz outlet. A beep will sound, and the current temperature will display. -
Page 13: Cleaning And Care
HOW TO USE Touch the OSCILLATION button to swing the fan through 70 degrees. The oscillation icon will turn on. Touch it again to stop the fan oscillating. The oscillation icon will turn off. 8. When you are not using the fan, touch the POWER button to turn it off and unplug the appliance to disconnect it completely from the power supply. -
Page 14: Disposal
In line with our policy of continuous product development, we reserve the right to change the product, packaging and documentation specifications without prior notice. Model: WSFTYFE3608 Voltage: 120V AC 60Hz Power: 55W WSFTYFE3608_Tower Fan_EN-FR_V3.indd 14 WSFTYFE3608_Tower Fan_EN-FR_V3.indd 14... - Page 15 TABLE DES MATIÈRES CONSIGNES DE SÉCURITÉ CONSIGNES DE SÉCURITÉ IMPORTANTES ........16 PRISE POLARISÉE ..................19 SOURCE D’ALIMENTATION ................ 19 UTILISATION DESCRIPTION DES PIÈCES ................ 21 AVANT LA PREMIÈRE UTILISATION ............22 INSTRUCTIONS D'UTILISATION ............... 24 NETTOYAGE ET ENTRETIEN .............. MISE AU REBUT ..................
-
Page 16: Consignes De Sécurité
CONSIGNES DE SÉCURITÉ DANGER AVERTISSEMENT MISE EN GARDE DANGER – Danger immédiat AVERTISSEMENT – Dangers ou pratiques MISE EN GARDE – Dangers ou dangereuses POUVANT provoquer des pratiques peu sécuritaires POUVANT quiCAUSERA des blessures graves ou la mort. blessures graves, voire mortelles. causer des blessures légères. - Page 17 INFORMATIONS SUR LA SÉCURITÉ manquent d'expérience et de connaissances, à moins qu'elles n'aient été supervisées ou n'aient reçu des instructions concernant l'utilisation de l'appareil par une personne responsable de leur sécurité. Le nettoyage, le branchement de l'appareil et l'entretien ne doivent pas être effectués par des enfants, sauf s'ils ont plus de 8 ans et s'ils sont surveillés.
- Page 18 INFORMATIONS SUR LA SÉCURITÉ 13. L'appareil ne doit pas être utilisé au moyen d'un interrupteur à minuterie externe ou d'un système de télécommande séparé autre que la télécommande fournie avec l'appareil. 14. Ne tentez en aucun cas de démonter ou de réparer l'appareil. Pour tout entretien ou réparation, contactez le point de vente, le fabricant ou un centre de service agréé.
-
Page 19: Prise Polarisée
INFORMATIONS SUR LA SÉCURITÉ 25. Ne faites pas fonctionner l’appareil en dehors de la plage de température ambiante de 32 °F à 104 °F (0 °C à 40 °C). Cet appareil est classé dans la classe II. L'appareil a une isolation renforcée et il n'est pas nécessaire de le brancher à... - Page 20 INFORMATIONS SUR LA SÉCURITÉ 3. Des piles qui fuient ou qui sont endommagées peuvent brûler la peau. Utilisez un chiffon ou des gants de protection pour retirer les piles. Si vous avez de l'acide de piles sur votre peau, lavez-vous immédiatement avec du savon et de l'eau. Neutralisez l’acide avec du jus de citron, du vinaigre ou un autre acide doux.
-
Page 21: Utilisation
UTILISATION DESCRIPTION DES PIÈCES Capteur infrarouge Bouton TIMER (MINUTEUR) 2. Écran d'affichage 8. Bouton POWER 3. Entrée d’air (à l’arrière) (ALIMENTATION) 4. Base 9. Bouton OSCILLATION 5. Panneau de commande 10. Bouton MODE 6. Sortie d’air 11. Bouton SPEED (VITESSE) WSFTYFE3608_Tower Fan_EN-FR_V3.indd 21 WSFTYFE3608_Tower Fan_EN-FR_V3.indd 21 9/14/2022 3:58:50 PM... -
Page 22: Avant La Première Utilisation
UTILISATION REMARQUE : Toutes les images présentées sont à titre indicatif uniquement et peuvent ne pas être une représentation exacte du modèle du produit. AVANT LA PREMIÈRE UTILISATION • Déballez et retirez tous les matériaux d'emballage de l'appareil et de ses accessoires. •... - Page 23 UTILISATION Schéma 1 Schéma 2 Schéma 3 Schéma 4 Schéma 5 Schéma 6 IMPORTANT : Assurez-vous que le cordon d'alimentation passe par les guides situés sur la moitié arrière de la base. CONFIGURATION DE LA TÉLÉCOMMANDE Retirez le film plastique du compartiment des piles. Fonctionnement de la télécommande : Pointez la télécommande vers le capteur infrarouge en vous assurant qu'il n'y a aucun obstacle.
-
Page 24: Instructions D'utilisation
UTILISATION INSTRUCTIONS D'UTILISATION REMARQUE : Les boutons de la télécommande sont les mêmes que ceux du panneau de commande. Placez le ventilateur sur une surface sèche, plane et stable. 2. Insérez la fiche dans une prise de 120 V CA / 60 Hz. Un signal sonore retentit et la température ambiante s'affiche. -
Page 25: Nettoyage Et Entretien
UTILISATION Touchez le bouton OSCILLATION pour faire osciller le ventilateur de 70 degrés. L'icône d'oscillation s'allume. Appuyez à nouveau sur ce bouton pour arrêter l'oscillation du ventilateur. L'icône d'oscillation s'éteint. 8. Lorsque vous n'utilisez pas le ventilateur, appuyez sur le bouton POWER pour l'éteindre et débranchez l'appareil pour le déconnecter complètement de l'alimentation électrique. -
Page 26: Mise Au Rebut
Conformément à notre politique de développement continu des produits, nous nous réservons le droit de modifier les spécifications du produit, de l’emballage et de la documentation sans préavis. Modèle : WSFTYFE3608 Tension : 120 V CA, 60 Hz Puissance : 55 W WSFTYFE3608_Tower Fan_EN-FR_V3.indd 26... - Page 27 WSFTYFE3608_Tower Fan_EN-FR_V3.indd 27 WSFTYFE3608_Tower Fan_EN-FR_V3.indd 27 9/14/2022 3:58:51 PM 9/14/2022 3:58:51 PM...
- Page 28 WSFTYFE3608_Tower Fan_EN-FR_V3.indd 28 WSFTYFE3608_Tower Fan_EN-FR_V3.indd 28 9/14/2022 3:58:51 PM 9/14/2022 3:58:51 PM...
- Page 29 WSFTYFE3608_Tower Fan_EN-FR_V3.indd 29 WSFTYFE3608_Tower Fan_EN-FR_V3.indd 29 9/14/2022 3:58:51 PM 9/14/2022 3:58:51 PM...
- Page 30 ¼ and Westinghouse are trademarks of Westinghouse Electric Corporation, a USA company. Used under license by Westinghouse Homeware (HK) Co. All Rights Reserved. WSFTYFE3608 • 09/22 WSFTYFE3608_Tower Fan_EN-FR_V3.indd 30 WSFTYFE3608_Tower Fan_EN-FR_V3.indd 30 9/14/2022 3:58:51 PM 9/14/2022 3:58:51 PM...
Need help?
Do you have a question about the WSFTYFE3608 and is the answer not in the manual?
Questions and answers
how do i clean the filter