Launch Creader Professional 123X - OBD2 Scanner Diagnostic Tool Quick Start Guide
- User manual (41 pages) ,
- User manual (38 pages) ,
- Quick start manual (2 pages)
Advertisement
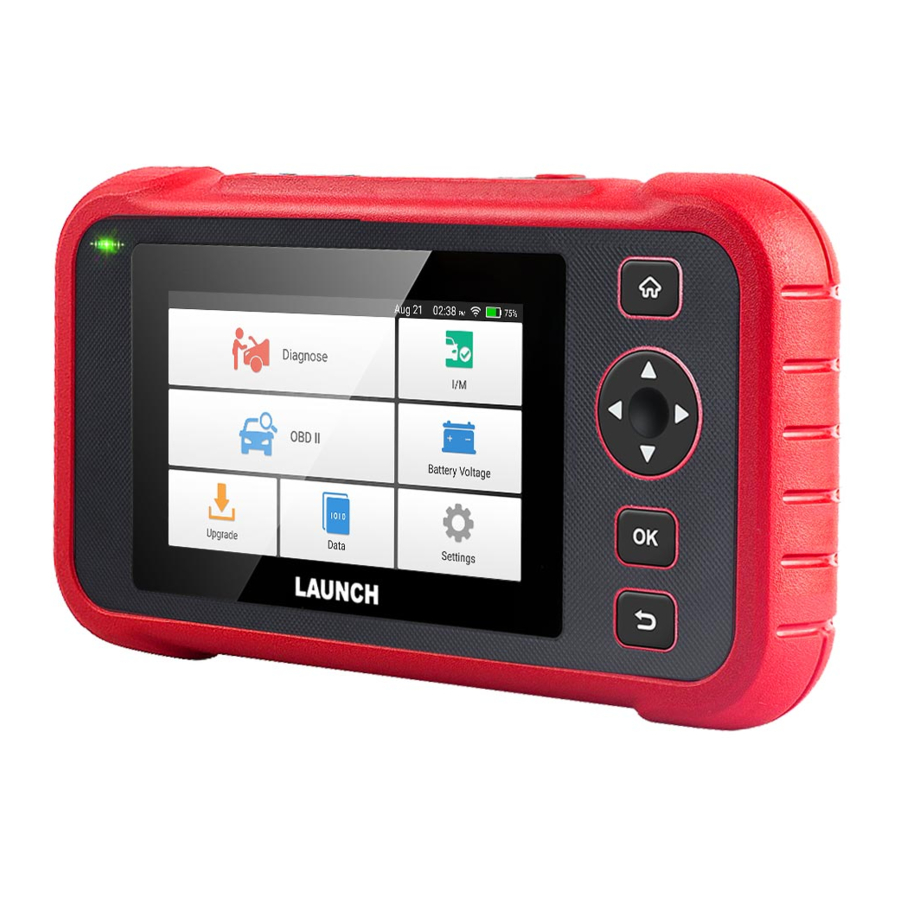
Display Tablet

- DB-15 Diagnostic Connector
(To connect to vehicle's DLC (Data Link Connector) via diagnostic cable.) - 5V Charging Port
(To connect to external DC power for charging the tool.) - Charging LED
(Red: Charging. Green: Fully charged.) - OK Button
- Return Button
- 5" Touch Screen
- Selection Buttons
- Power/Screen Lock Button
- HOME Button
Charging & Turning On
There are two charging methods available:
Via Charging Cable: Plug one end of the included charging cable into the 5V charging port of the tool, and the other end to the external DC power.
Via Diagnostic Cable: Insert one end of the diagnostic cable into the DB-15 connector of the tool, and the other end to the vehicle's DLC.
Once the charging LED illuminates solid green, it indicates that the battery is fully charged.
Press the [Power] button to power it on.
Getting Started
If it is the first time you have used this tool, you need to make some system settings and keep the diagnostic software synchronized with the latest version.
Follow the steps below to proceed.

Preparation
- Turn the ignition off.
- Locate vehicle's DLC: It provides standard 16 pins and is generally located on driver's side, about 12 inches away from the center of dashboard. See Figure DLC Location. If DLC is not equipped under dashboard, a label indicating its position will be given.

In case no DLC is found, please refer to Automobile Repair Manual. - Plug one end of the diagnostic cable into the DB-15 connector of the tool, and tighten the captive screws. Connect the other end to the vehicle's DLC.

*Note: The tool ONLY works with the 12V passenger cars equipped with standard OBD-II diagnostic socket. - Turn the ignition key on.


Start Diagnostics
AutoDetect and manual diagnosis are supported. If the AutoDetect fails, you can choose to input the VIN manually or exit the AutoDetect session to switch to manual diagnosis mode.
*Note: If "Automatic detection on connect" in "Settings" is set as ON, this step can be ignored.

+86 755 8455 7891
overseas.service@cnlaunch.com

Documents / ResourcesDownload manual
Here you can download full pdf version of manual, it may contain additional safety instructions, warranty information, FCC rules, etc.
Download Launch Creader Professional 123X - OBD2 Scanner Diagnostic Tool Quick Start Guide
Advertisement


Need help?
Do you have a question about the Creader Professional 123X and is the answer not in the manual?
Questions and answers