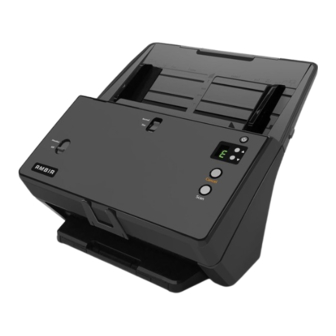
Summary of Contents for Ambir nScan 1060
- Page 1 1060 nScan High-Speed ADF Scanner Installation and Setup Guide Installation and Setup Guide...
-
Page 2: Box Contents
Box Contents: 1. Scanner 2. USB Cable 3. AC Adapter 4. Paper Chute 5. Quick Start Guide 6. Cleaning and Replacement Guide 7. Calibration Sheet 8. Cleaning Cloth... -
Page 3: Installation And Setup
Installation and Set-up: https://www.ambir.com/1060-setup Visit Important: Ensure you download the correct drivers for your scanner model. 3. Attaching the Paper Chute Open the scanner door and snap the paper chute into the holes in the bottom of the ADF. 1. Connecting the scanner to the computer... -
Page 4: Loading Documents
1. Plug the AC adapter into the scanner’s power receptor. 2. Plug the other end of the AC adapter into a standard AC power outlet. 3. Plug the square end of the included USB cable to the USB port at the rear of the scanner. 4. - Page 5 3. Adjust the Paper Width Sliders so they are gently touching both sides of the document in the feeder. Important: Do not adjust the Paper Width Sliders by pushing the spring-loaded paper guides. You must adjust the Paper Width Sliders by pushing the lower portion of the guides as shown below. Note: Load business cards, ID Cards, Drivers Licenses and Plastic cards horizontally (landscape orientation) in the center of the ADF and adjust the Paper Width Sliders...
-
Page 6: Scanning Using Twain
The procedure for your scanning program may be slightly different but similar to the steps listed below. Select the correct scan source by going to File> Select Source and selecting the Ambir ImageScan Pro scanner from the list of sources. - Page 7 Scanning using the buttons on the scanner: Load the documents or cards into the scanner (refer to the Loading Documents section above for document and card loading instructions). Check current button settings by viewing the sticker on the scanner or the AmbirScan Button Configuration screen.
- Page 9 Follow the steps below to edit the button settings: 1. Open the Button Configuration window by using one of the following methods: Double-click the icon in the Windows system tray. Right-click the icon in the Windows system tray, and then choose Button Configuration in the pop-up menu that opens.
-
Page 10: Maintenance And Troubleshooting
Note: If you lose the calibration sheet or the calibration sheet is damaged, contact Ambir support. Use the included calibration sheet to calibrate the scanner. The calibration sheet is marked with arrows on the long edges and is specifically designed for calibrating your scanner. - Page 11 The approximate use of the Friction ROl is 20,000 scans. A replacement pad module is provided and should be saved. Additional pads are available for purchase at https://www.ambir.com/consumables/ 1. Open the ADF cover by pulling the cover open lever. 2. Remove the friction roller by pinching both sides of the pad module and pull it out.
-
Page 12: Clearing Paper Jams
Checking the Roller Count Utility To access the Roller Count Utility on the scanner, do the following: Right click on the ADF icon in the system tray Click Scanner Utility Once open, click the Counter Utility tab Clearing Paper Jams If a paper jam occurs, do the following: Remove any unjammed documents in the ADF. - Page 13 AmbirScan ADF is not running. The scanner may or may No Display not be connected to the computer. Start AmbirScan ADF by clicking on Start> All Programs> Ambir ImageScan Pro> AmbirScan ADF Status LED The front panel LED indicates the scanner status.
-
Page 14: Warranty
The standard warranty period for this scanner is two years. A one-year warranty extension is available for purchase, thus bringing the total warranty period to three years. Visit https://www.ambir.com/1060-setup/ for more information. Need help? We are pleased to provide comprehensive U.S. based phone and online chat support as a resource to serve our customers. - Page 15 17-07-3DA5100-C IG-DS820ix-DS830ix-1.1 Installation and Setup Guide...


Need help?
Do you have a question about the nScan 1060 and is the answer not in the manual?
Questions and answers