Table of Contents
Advertisement
Quick Links
Download this manual
See also:
Administrator's Manual
Advertisement
Table of Contents

Subscribe to Our Youtube Channel
Related Manuals for Ambir nScan 915i


Summary of Contents for Ambir nScan 915i
- Page 1 User Guide © 2016 Ambir Technology, Inc. All rights are reserved. No portion of this document may be reproduced without permission. All trademarks and brand names mentioned in this publication are property of their respective owners.
-
Page 2: Table Of Contents
Table of Contents ....................... 4 NTRODUCTION Conventions of This Guide ..................5 Safety Precautions ....................6 Scanner Overview ..................... 7 Network Environment ....................8 I. I ................9 HAPTER NSTALLING THE CANNER Installing and Setting up the Scanner ................ 9 Step 1. - Page 3 III. C ............... 125 HAPTER ARE AND AINTENANCE Cleaning the Scanner .................... 125 Cleaning Materials..................... 125 Cleaning the ADF ....................126 Replacing Consumables ..................128 Replacing the Pad Module ................128 Replacing the Feed Roller ................. 130 IV. T ................134 HAPTER ROUBLESHOOTING Clearing Paper Jams .....................
-
Page 4: Introduction
NTRODUCTION EFORE YOU BEGIN Ambir has created comprehensive resources to assist you in your pre-installation planning and installation of nScan. Visit www.ambir.com/nScan-setup to find the following additional resources: Installation Planning Guide – Steps for planning your nScan installation and an overview of the setup and installation process. -
Page 5: Conventions Of This Guide
The Introduction section of this manual describes the box contents. Before you start installing your scanner, check the box contents to make sure all parts are included. If any items are damaged or missing, please contact the vendor where you purchased your scanner or Ambir customer service. -
Page 6: Safety Precautions
4. Damaged wire could cause fire or electrical shock. Keep the power cord straight and without being twists or bends. Contact Ambir support if the wire or power adapter is damaged. 5. Unplug this device if it will not be used for long periods of time. -
Page 7: Scanner Overview
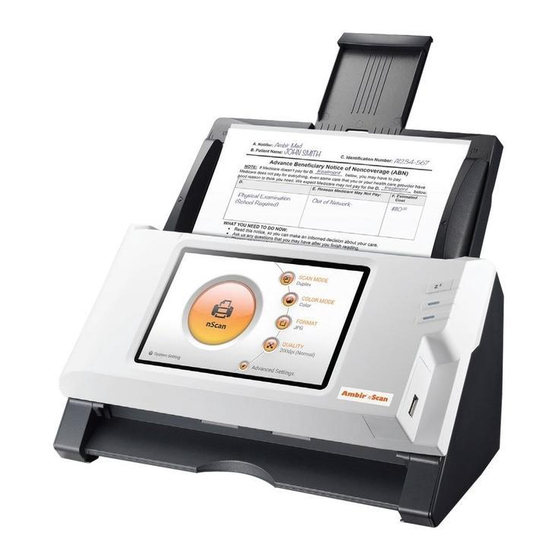
CANNER VERVIEW 1. STACKER—Catches paper after it is scanned. 2. PANEL UNIT—ADF cover with the touch panel. 3. TOUCH PANEL—Use this touch panel to operate the scanner. 4. PANEL UNIT OPEN LEVER— Opens the panel unit. Pull it to open the panel unit when you need to clear paper jam or clean the scanner. -
Page 8: Network Environment
13. POWER SWITCH—Use this to turn the scanner ON or OFF. 14. POWER RECEPTOR—Connects the scanner to standard power by using the included AC adapter. 15. ETHERNET PORT—Connects the scanner to a port on the Ethernet hub, switch or router. ETWORK NVIRONMENT ... -
Page 9: Chapter I. Installing The Scanner
I. I HAPTER NSTALLING THE CANNER NSTALLING AND ETTING UP THE CANNER Please follow the step-by-step procedures described below to install the scanner. Choose a Proper Site First! Always place your scanner on a level, smooth and strong surface before installing or using the scanner. -
Page 10: Step 1. Installing The Paper Feeder
Step 1. Installing the Paper Feeder 1. Open the front panel unit by pressing the grey button. Panel unit open button Panel unit 2. Install the paper feeder by aligning and inserting the tabs of the paper feeder into their slots on the scanner and snap the paper feeder into place. -
Page 11: Step 2. Connecting The Scanner
Step 2. Connecting the Scanner Please make sure the scanner is turned OFF before you plug or unplug the scanner power Attention adapter. 1. Plug the AC adapter into the scanner’s power jack 2. Plug the other end of the AC adapter into a standard AC power outlet. 3. -
Page 12: Configuring The System
ONFIGURING THE YSTEM Tap System Settings to access configuration settings. System Settings includes the following configuration menus: • Downloads • General Settings • Scan Settings • Sending Settings 12 of 142: UG-NS915-1.3... -
Page 13: Downloads
USB flash drive. The nScan Client application is also available for download from the www.ambir.com/nScan-setup web page. When installing the nScan Client on Windows systems, Windows will prompt you to allow nScan Client to communicate on your network. - Page 14 Using the nScan Client (Windows & Mac) In the nScan Client interface, you can modify the User Name, select the desired file Folder and determine the action after the file is downloading. Mac: 14 of 142: UG-NS915-1.3...
-
Page 15: General
General The General section includes the following items: About, Wi-Fi, Calibration, Power Saving and History. About Set the system language, static IP address and update the system software on this page. You can also configure nScan to function as a Hotspot Access Point (AP) here. 15 of 142: UG-NS915-1.3... - Page 16 Tap Language to open the Language setting dialog, select the desired language and then tap the OK button to confirm the setting. The system will automatically restart. to enter the nScan Settings page, where you may configure advanced system related settings, such as, the Networks setting, enabling nScan as an Access Point (AP), set a security code for the nScan, enable/disable touch sounds, the brightness of the display and much more.
- Page 17 Setting nScan as an Access Point You may set nScan as an Access Point (AP), so that your mobile devices can connect to a wired network via nScan. Tap Networks, Tethering & Portable Hotspot and Setup Wi-Fi hotspot to setup nScan as a hotspot.
- Page 18 Static IP Settings Tap Ethernet and Static IP Settings to configure static IP settings. Select the Use static IP option and enter the IP address, Gateway, Netmask, DNS 1 and/or DNS 2. Contact your network administrator for assistance. Tap SAVE in the upper-right corner to save the settings and Tap Exit on the left column to exit this dialog.
- Page 19 To set up a screen lock password, tap Security. You can set screen lock by pattern or by password. WARNING: DO NOT FORGET YOUR SCREEN LOCK PIN/PASSWORD ! If you forget this PIN/Password, you will need to send the scanner to Ambir for repair. Service charges will apply to reset the scanner. 19 of 142: UG-NS915-1.3...
-
Page 20: Wi-Fi
Wi-Fi Tap Wi-Fi to enable Wi-Fi instead of the RJ45 Ethernet port. Slide the Wi-Fi switch to ON, tap the Wi-Fi network you will connect to and enter the network password when prompted. Test your Wi-Fi connection by tapping the globe icon. nScan does not automatically connect to newly discovered Wi-Fi networks. -
Page 21: Calibration
Calibration Calibrate the scanner when image quality degrades, if colors appear in areas that should be white, or original document varies in color or brightness from the scanned image. Insert the special calibration sheet into the ADF of the scanner, as shown in the diagram below. Tap the Start button to start the calibration process. -
Page 22: Power Saving
Power Saving We recommend enabling the screen timeout function to reduce energy usage and extend the Attention life of the display. The scanner will enter a low-power mode and turn off the display when the inactivity period set in Screen Timeout is reached. You can manually put the scanner into power saving mode or wake the scanner by pressing the Zz button on the front panel. -
Page 23: History (Autofill)
History (Autofill) Enable/Disable History (Autofill) to store account information, such as, e-mail addresses, FTP server addresses, FTP user accounts and cloud user accounts. When History is enabled, users are presented with a drop-down list of previously entered values when entering information into fields. -
Page 24: Scan Settings
Scan Settings The Scan Settings section includes the following items: File Name and Initial Settings that allow you to set a file name prefix and initial scan settings. File Name This screen defines the file name format for scanned documents. You can add fixed Prefix, Date, Time, and/or Sequential Number to the saved files. - Page 25 Enable Date by sliding the switch to the ON position. Tap Date and select the desired date format. Enable Time by sliding the switch to the ON position. Tap Time and select the desired time format. 25 of 142: UG-NS915-1.3...
-
Page 26: Initial Settings
Enable Serial Number by sliding the switch to the ON position. Tap Serial Number and select the desired format. Initial Settings Initial Settings are used to set the default scan settings. Users will have the option to select additional settings through the Advanced Settings on the main screen. (Please refer to the Advanced Settings section for more detail). - Page 27 Color Mode You can set two color mode options for the Main Menu Color Mode shortcut key . Users will have the option to select additional settings through the Advanced Settings (refer to the Advanced Settings section for more detail). Select the desired Color Mode tap the OK button to confirm the settings or tap Cancel to exit this dialog.
- Page 28 Format You can set two file format options for the Main Menu Format shortcut key . Users will have the option to select additional settings through the Advanced Settings (refer to the Advanced Settings section for more detail). Select the default file format in the popup dialog. Available file formats: PDF, JPG, TIFF, PNG, Multi-Page PDF and Multi-Page TIFF.
- Page 29 PDF/A PDF/A is an ISO-standardized version of the Portable Document Format (PDF) that is designed for digital preservation and archiving of electronic documents. PDF/A documents differ from standard PDF documents because they prohibit features that are not suitable for digital preservation and archiving.
- Page 30 Quality You can set two quality options for the Main Menu Quality shortcut key . Users will have the option to select additional settings through the Advanced Settings (refer to the Advanced Settings section for more detail). Select the desired QUALITY in the popup dialog. Available dpi values: 100dpi (Lower), 200dpi (Standard), 300dpi (Good), 400dpi (Better), and 600dpi (Best).
- Page 31 Scan Mode Sets the default values for the Main Menu Scan Mode shortcut key . Simplex only scans the front of documents and Duplex scans both sides at the same time. Compression Sets the default Compression level for saved files. Lower compression results in slightly higher quality scans but larger files.
- Page 32 Density Set the default brightness, contrast and gamma levels for images. You can also make these adjustments on the Main Menu under Advanced Settings. 32 of 142: UG-NS915-1.3...
- Page 33 Watermark Settings Watermark adds a text or graphic watermark to all scanned images. Enable Watermark by sliding the Watermark Switch to the ON position. Typical uses may include marking a scanned document as DRAFT or CONFIDENTIAL or RUSH. Note: The watermark must be activated before scanning a document by tapping Advanced Settings Watermark on the Main Menu.
- Page 34 For Image Watermarks: Tap Use Image Insert a thumb drive with a watermark image that is no larger than 800x800 pixels (Recommended: 600x200 pixels) in PNG format. Tap the button to upload the watermark image then select the watermark image and tap OK.
- Page 35 The color of the image overlay will correspond to the scan color mode. You may need to adjust the transparency of the watermark image accordingly. Note: When scanning in Black & White, we recommend setting the watermark transparency to 150%. For Text Watermarks: Tap Use Text as the Watermark, enter the desired text, select the desired position, and adjust the Transparency, Text Size and Text Angle.
- Page 36 Tap Position to select the desired position. There are 9 positions to choose from. Tap the OK button to confirm the settings or tap Cancel to exit this dialog. Tap Transparency to adjust the transparency. Tap the OK button to confirm the settings or tap Cancel to exit this dialog.
- Page 37 Tap Text Size to adjust the text size. Tap the button to increase or decrease the values. Tap the OK button to confirm the settings or tap Cancel to exit this dialog. Tap Text Angle to adjust the text angle. Tap the button to increase or decrease the values.
- Page 38 Punch Hole Removal Punch Hole Removal removes the hole marks found on scanned documents when scanning paper used in three ring or multi ring binders. Set the default value for Punch Hole Removal to ON or OFF. 38 of 142: UG-NS915-1.3...
- Page 39 Blank Page Removal Settings Blank Page Removal deletes blank pages from scanned documents. Slide the Blank Page Removal switch to the ON position to enable Blank Page Removal. Pages with hole punches may cause Blank Page Removal to fail to detect blank pages. We recommend that Punch Hold Removal and Blank Page Removal are both enabled when removing blank pages from documents that have punched holes.
- Page 40 Blank Page Split Blank Page Split enables you to split a stack of pages in the scanner ADF to individual documents by inserting a blank page between documents. Enable Blank Page Split and insert a blank page between the pages where you want the file break to occur. Blank Page Split can only be used with Multi-Page PDF and Multi-Page TIFF formats.
-
Page 41: Sending
Sending The Sending section includes the following item: Sending Settings, Custom App (Optional) and Clear All Settings. Sending Settings Activate only the scanning destinations you will use. You can enable up to six destinations. Available options are: USB, PC, Mobile, Mail, FTP, FTP / SFTP, Network and Clouds. Slide the USB switch to the ON position to enable sending scanned files to any USB-connected storage device such as a flash drive or external hard disk. - Page 42 Note: To use the PC function, the PC or Macintosh must have the Ambir nScan Client software installed. This software is available to download from www.ambir.com/nScan-setup. The nScan 915i scanner and the PC must be on the same network and must be on and active (not in sleep or energy saver mode).
- Page 43 Mobile Slide the Mobile switch to the ON position to enable sending scanned files to an iOS or Android mobile device. The nScan 915i scanner and the target device must be on the same network segment. Note: Download mobile apps by visiting the correct app store (iTunes or Google Play) and searching for Ambir nScan.
- Page 44 Mail Slide the Mail switch to the ON position to enable sending scanned files to e-mail. Tap the button to configure the mail server. Enter Server, Port, Account, Password and select Authentication method, and then tap the OK button to test the mail server setting.
- Page 45 nScan contains an internal address book that holds up to 20 e-mail addresses. to add and edit e-mail addresses. Enter the Name and the Email address, then tap to save. Note: You can manage and edit the Address Book on the Save to mail page that is displayed during a scan to Email.
- Page 46 Email Server Settings: You must configure the Outgoing Mail Server before you scan to Email. The following examples show how to setup iCloud and Gmail mail servers iCloud SMTP Mail Server Settings • Server: smtp.mail.me.com • Port: 587 • SMTP Authentication Required: Yes If you receive errors when using SSL/TLS, try using StartTLS instead.
- Page 47 Gmail SMTP Mail Server Settings Important: You must enable 2-Step Verification or Allow Less Secure Apps in your Google account Sign-in & Security settings before you setup Gmail. See: https://myaccount.google.com/security • Server: smtp.gmail.com • Port: 25 or 465 (with SSL/TLS), 587 (with StartTLS) •...
- Page 48 Slide the FTP switch to the ON position to enable sending scanned files to FTP sites. button to configure the FTP server. Enter Server, Port, Account and Password, tap OK to test the connection to the FTP server. If the connection is successful, the FTP server information will display on the top of the page. Tap the Folder field to select the target folder.
- Page 49 Clouds Slide the Clouds switch to the ON position to enable sending scanned files to cloud storage providers. Important: Configuration of cloud storage providers Box, Dropbox, Evernote and Google Drive is a two-step process if you are using more than one cloud storage provider. If you are using a single cloud storage provider and a single destination folder, follow the instructions below.
- Page 50 To setup a default cloud provider as your only cloud destination, turn Select and set up a default cloud ON. In the Cloud Settings dialog, tap to select the desired cloud server. 1. Enter Server and Port if necessary. 2. Enter Account and Password. 50 of 142: UG-NS915-1.3...
- Page 51 3. Tap the OK button to test the cloud server setting. If the connection is successful, the cloud server information will display on the top of the page. Tap the Folder field to select the desired destination folder or tap Clouds to exit this dialog. Tap Yes to confirm the settings or tap Cancel to exit this dialog.
- Page 52 Setting up Dropbox as the cloud server Tap Dropbox to select Dropbox as the cloud server. Tap the button to login to Dropbox. 52 of 142: UG-NS915-1.3...
- Page 53 When the Dropbox login dialog appears, enter the email address and the password then tap Sign in. Tap Allow to allow the ScanToCloud (nScan) to communicate with Dropbox. Tap Connect and then tap Folder to select a folder if necessary. Tap Okay, I understand.
- Page 54 Create and enter the secondary Password or leave all fields blank and tap OK (you can setup the password at a later time). Enter the Password when prompted. Enter the password again in Confirm Password to confirm. 54 of 142: UG-NS915-1.3...
- Page 55 IMPORTANT: Scans saved to Dropbox are found in the following path: Dropbox/Apps/ScanToCloud Folders must also be placed in this path. 55 of 142: UG-NS915-1.3...
- Page 56 Setting up Google Drive as the cloud server Important: You must enable 2-Step Verification or Allow Less Secure Apps in your Google account Sign-in & Security settings before you setup Gmail. See: https://myaccount.google.com/security Tap the Google Drive to select Google Drive as the cloud server. Tap the button to log into Google Drive.
- Page 57 When the Google login dialog appears, enter your account then tap Next. Enter your password then tap Sign in. 57 of 142: UG-NS915-1.3...
- Page 58 Tap the screen in the lower right corner, hold and drag as shown until the Allow button is displayed. Tap Allow to enable nScan to communicate with the Google Drive. 58 of 142: UG-NS915-1.3...
- Page 59 Tap Okay, I understand. 59 of 142: UG-NS915-1.3...
- Page 60 Important: nScan allows you to store multiple accounts for Dropbox and Google Drive. If more than one person is using this nScan, we recommend that you setup a secondary password that is only used on nScan to prevent unauthorized access to your cloud storage account. You will be prompted to create and enter this secondary password in the Cloud Settings screen.
-
Page 61: Clear All Settings
Clear All Settings Tap Clear All Settings to clear all user data and reset all settings to factory settings. This resets email SMTP settings, cloud settings, FTP settings, user logons and all scan settings. Tap OK button to confirm or tap Cancel to exit this dialog. 61 of 142: UG-NS915-1.3... -
Page 62: Chapter Ii. Scanning
II. S HAPTER CANNING REPARING OCUMENTS Proper document preparation prior to scanning will prevent paper feed errors and document damage. Checking Document Condition Jogging Documents Checking Document Condition Make sure the size and paper weight of your documents is within the specified range. Refer to “Appendix A: Specifications”... -
Page 63: Loosening Documents
Do not scan documents if they meet any of the following conditions: Paper lighter than 40 g/m (12 lb.) or heavier than 157 g/m (40 lb.) Paper with clips or staples attached Paper with inconsistent thickness (e.g. envelops) ... -
Page 64: Loading Documents
OADING OCUMENTS 1. Load documents, headfirst and face down, in the center of the ADF paper feeder and all the way into the ADF until touching the bottom. Load the documents face down so that the side to be scanned faces towards the paper feeder. -
Page 65: Loading Cards
3. Adjust the paper width slider for the paper size you are using. The paper width slider should be gently touching both sides of the documents. DO NOT load more than 50 sheets of paper (70 g/m , 18 lb.) to the ADF. ... -
Page 66: Scanning Documents
CANNING OCUMENTS 1. Tap the button to toggle the SCAN MODE. 2. Tap the button to toggle the COLOR MODE. 3. Tap the button to toggle the FORMAT. 4. Tap the button to toggle the QUALITY. 5. If necessary, tap to adjust Advanced Settings. - Page 67 Advanced Settings The following Advanced Settings are available from the Main Menu. Any of the following settings can be set as defaults by going to System Settings >Scan Settings > Initial Settings and setting it as a default. Scan Mode Select the desired Scan Mode in the popup dialog.
- Page 68 Color Mode Select the desired Color Mode in the popup dialog. Select from Color, Gray or Black & White (also known as bitonal). Format Available file formats are: PDF, JPG, TIFF, PNG, Multi-Page PDF and Multi-Page TIFF. If you are scanning documents with multiple pages and would like to merge the scanned pages into one file, select Multi-Page PDF or Multi-Page TIFF.
- Page 69 Quality Available resolution/Quality values are: 100dpi (Lower), 200dpi (Standard), 300dpi (Good), 400dpi (Better), and 600dpi (Best). Note: Higher resolution results in a higher quality scans with larger file sizes and slower scanning and sending speeds. Size Available paper sizes are: Auto, A4, A5, B5, Letter (8.5” x 11”), Legal (8.5” x 14”), Invoice (5.5”...
- Page 70 Compression Lower compression results in higher image quality and larger file sizes and slower sending speeds. Adjust the Compression quality in the popup dialog. Tap the OK button to confirm the settings or tap Cancel to exit this dialog. Density Adjust the brightness and contrast levels to improve the quality of the scanned image if necessary.
- Page 71 Watermark Watermark adds a text or image watermark to each scanned page. Slide the switch to the ON position to enable. You must setup the watermark before you use it. Go to System Settings > Scan Settings > Initial Settings and switch on and configure the Watermark. See Watermark Settings on page 30 for details.
-
Page 72: Editing Scanned Documents
Blank Page Split Switch on or off the Blank Page Split function. Switch this function ON to split scanned documents into separate files by inserting a blank page in between the documents. This function can only be used with Multi-Page PDF and Multi-Page TIFF formats. Reset to Default Tap this button to reset the scan settings to your initial settings. - Page 73 When you select a scanned image on the screen, shortcuts allow you to delete or rotate the selected image. On the main editing screen, you can rearrange the page order by touching, holding and dragging the image to the desired location. 73 of 142: UG-NS915-1.3...
- Page 74 Tap the button to go to the first page, tap the button to go to the page above it (For example: from page 7 to page 3), tap the button to go to the page below it (for example: from page 2 to page 6) and tap the button to go to the last page.
- Page 75 Tap the button to add additional pages to the scan. The following dialog prompts you to select where to insert the new scanned image. Tap the button to select all the scanned images, the shortcuts allow you to delete or rotate all files at the same time.
- Page 76 Double-tap on an image to enter the image-editing window and view a larger image. Zoom into the scanned image by pinching two fingers away from each other, or zoom out on the scanned image by pinching two fingers towards each other. Tap the button on the upper-right corner to exit the image-editing window.
- Page 77 If necessary, the scanned image can be adjusted by tapping the buttons on the left side of the screen. Button Function Rotate the image counterclockwise by 90º. Rotate the image clockwise by 90º. Adjust the brightness and contrast levels of the image. Crop the image.
-
Page 78: Saving Scanned Documents
AVING CANNED OCUMENTS In the Save As dialog, you can rename the scanned document by tapping the File Name field. Select the destination by tapping the desired destination under Select a Destination (destinations are enabled in System Settings> Sending Settings). After the scan is successfully sent, tap the Back button to return to the editing page, or tap the Finish button to quit the scanning procedure. -
Page 79: Save To Usb
Save to USB Insert a flash drive in the USB port. Tap the USB button to save the scanned document to the USB flash drive. When you see the following dialog, the scanned document was saved to the USB flash drive. Tap Continue button to save the scanned document to another destination, or tap the Finish button to complete the scanning procedure. - Page 80 If this is a scan job that you will use frequently, you can create a single touch scan job. Tap Assign as a new job button and save this scan job as a single touch scan job button. Enter the Name and tap Save to save the job. Enter a Group name if you have more than one job button groups.
-
Page 81: Save To Pc
Save to Download the nScan Client software from System Settings > Downloads > nScan Attention Client page or http://ambir.com/nScan. In the nScan Client software, you can modify User Name, destination Folder or select to print the document. - Page 82 When the Save to PC dialog opens, tap Select a PC to select the destination computer from the list. In the Select a PC dialog, tap the target PC. If the target computer is not listed, tap refresh the list or use the Search PC field to search for the target computer. 82 of 142: UG-NS915-1.3...
- Page 83 to send the scanned document to the target computer. When you see the following dialog, the scanned document was saved to the PC. Tap Continue button to save the scanned document to another destination, or tap the Finish button to complete the scanning procedure.
- Page 84 If this is a scan job that you will use frequently, you can create a single touch scan job. Tap Assign as a new job button and save this scan job as a single touch scan job button. Enter the Name and tap Save to save the job. Enter a Group name if you have more than one job button groups.
-
Page 85: Save To Mobile Device
The scanner and the mobile device must be on the same network subnet. For iOS devices, download and install the Ambir nScan app from the Apple App Store. Start the Ambir nScan app on your mobile device before you Save to Mobile. - Page 86 Tap Select a mobile device field to select the target mobile device from the list. In the Select a mobile device dialog, tap the target device. If the desired device is not listed, to refresh the list or use the Search mobile device field to search for the target mobile device.
- Page 87 to send the scanned document to the target mobile device. When you see the following dialog, the scanned document was saved to the mobile device. Tap Continue button to save the scanned document to another destination, or tap the Finish button to complete the scanning procedure.
- Page 88 If this is a scan job that you will use frequently, you can create a single touch scan job. Tap Assign as a new job button and save this scan job as a single touch scan job button. Enter the Name and tap Save to save the job. Enter a Group name if you have more than one job button groups.
-
Page 89: Save To Mail
Save to Mail Important: You must configure an Email server before sending to Email. See page 44, Mail. Tap Mail to send the scanned documents to an e-mail address. 89 of 142: UG-NS915-1.3... - Page 90 You can also change the name in the nScan scanners email address field. This is useful for identifying the person sending the email. It adds an identifier to the scanners email address: Adding Andy Ambir to the top text box in the Save to mail dialog box results in a From address that looks like: From Andy Ambir <nscanscanner@domain.com>...
- Page 91 to select or save an e-mail address. Enter the Name and the Email address, then to save the e-mail address. You can save up to 20 e-mail addresses in this address book. to add, edit or delete the email signature. Enter text in the blank area. to clear the text.
- Page 92 Note: This text will be sent with all emails until it is cleared. to send the scanned document to the entered e-mail address. 92 of 142: UG-NS915-1.3...
- Page 93 When you see the following dialog, the scanned document was sent to the email address. Tap Continue button to save the scanned document to another destination, or tap the Finish button to complete the scanning procedure. If this is a scan job that you will use frequently, you can create a single touch scan job. Tap Assign as a new job button and save this scan job as a single touch scan job button.
-
Page 94: Save To Ftp
Save to FTP/SFTP Tap FTP/SFTP to save the scanned document to a FTP or SFTP server. If you have already setup a FTP/SFTP server in the System Settings, you will not need to complete the steps below. The scanned document will be saved to the preset FTP/SFTP server as soon as FTP/SFTP is tapped. - Page 95 Tap OK on the Upload Sending Success screen. Exit FTP/SFTP by tapping 95 of 142: UG-NS915-1.3...
- Page 96 When you see the following dialog, the scanned document was sent to the FTP/SFTP server. Tap Continue button to save the scanned document to another destination, or tap the Finish button to complete the scanning procedure. If this is a scan job that you will use frequently, you can create a single touch scan job. Tap Assign as a new job button and save this scan job as a single touch scan job button.
- Page 97 Save to FTP Tap FTP to save the scanned document to a FTP server. If you have already setup a FTP server in the System Settings page, you will not have to go through the steps below. The scanned document will be saved to the preset FTP server as soon as FTP is tapped. Enter the FTP address, username, password and if necessary, the Port number.
- Page 98 to select the target folder on the FTP server. to save the scanned document to the FTP server. 98 of 142: UG-NS915-1.3...
- Page 99 When you see the following dialog, the scanned document was sent to the FTP server. Tap Continue button to save the scanned document to another destination, or tap the Finish button to complete the scanning procedure. If this is a scan job that you will use frequently, you can create a single touch scan job. Tap Assign as a new job button and save this scan job as a single touch scan job button.
-
Page 100: Save To Clouds
Save to Clouds (Google Drive, Dropbox, Box, SharePoint, Evernote) Tap Clouds to save the scanned document to a cloud server. If you have already setup a Cloud server in the System Settings page, you do not have to complete the steps below. The scanned document will be saved to the preset Cloud server as soon as Clouds is tapped. - Page 101 Enter Server and Port if necessary (SharePoint only). Enter the email address or username and the password for the selected cloud server. Tap to connect to the cloud server. to select the target folder on the cloud server. 101 of 142: UG-NS915-1.3...
- Page 102 to save the scanned document to the cloud server. When you see the following dialog, the scanned document was sent to the Cloud server. Tap Continue button to save the scanned document to another destination, or tap the Finish button to complete the scanning procedure.
- Page 103 If this is a scan job that you will use frequently, you can create a single touch scan job. Tap Assign as a new job button and save this scan job as a single touch scan job button. Enter the Name and tap Save to save the job. Enter a Group name if you have more than one job button groups.
-
Page 104: Selecting Dropbox As The Cloud Server
Selecting Dropbox as the cloud server Tap Dropbox to select Dropbox as the cloud server. to login to Dropbox. 104 of 142: UG-NS915-1.3... - Page 105 When the Dropbox login screen is displayed, enter the email address and password then tap Sign in. Tap Allow to allow ScanToCloud to access the Dropbox account. 105 of 142: UG-NS915-1.3...
- Page 106 Tap Okay, I understand button on the privacy attention dialog. Important: nScan allows you to store multiple Dropbox accounts. If more than one person is using this nScan, we recommend that you setup a secondary password that is only used on nScan to prevent unauthorized access to your cloud storage account.
- Page 107 to select an account if you have already logged into Dropbox from nScan. Enter the secondary password you set in the previous dialog if necessary. Tap to connect to Dropbox. to select the destination folder. 107 of 142: UG-NS915-1.3...
- Page 108 to save the scanned document to the specified folder on Dropbox. 108 of 142: UG-NS915-1.3...
- Page 109 When you see the following dialog, the scanned document was sent to Dropbox. Tap Continue button to save the scanned document to another destination, or tap the Finish button to complete the scanning procedure. If this is a scan job that you will use frequently, you can create a single touch scan job. Tap Assign as a new job button and save this scan job as a single touch scan job button.
-
Page 110: Selecting Google Drive As The Cloud Server
Selecting Google Drive as the cloud server You must enable 2-Step Verification or Allow Less Secure Apps in your Google account Sign-in & Security settings before you setup Google Drive. See: https://myaccount.google.com/security for details. Tap the Google Drive to select Google Drive as the cloud server. Tap the button to login to the Google Drive for the first time by using the nScan. - Page 111 The Google login dialog appears. Enter your account then Tap Next. Enter your password then Tap Sign in. 111 of 142: UG-NS915-1.3...
- Page 112 Tap the screen, hold and scroll to the bottom, then tap Allow to enable communications between nScan and Google Drive. Tap Okay, I understand button for the privacy attention dialog. 112 of 142: UG-NS915-1.3...
- Page 113 Important: nScan allows you to store multiple Google Drive accounts. If more than one person is using this nScan, we recommend that you setup a secondary password that is only used on nScan to prevent unauthorized access to your cloud storage account. You will be prompted to create and enter this secondary password in the Cloud Settings screen.
- Page 114 to select an account if you have already logged into Google Drive from nScan. Enter the secondary password you set in the previous dialog if necessary. to connect to Google Drive. to select the target folder on Google Drive. 114 of 142: UG-NS915-1.3...
- Page 115 to save the scanned document. When you see the following dialog, the scanned document was sent to Google Drive. Tap Continue to save the scanned document to another destination, or tap Finish to complete the scanning procedure. 115 of 142: UG-NS915-1.3...
- Page 116 If this is a scan job that you will use frequently, you can create a single touch scan job. Tap Assign as a new job button and save this scan job as a single touch scan job button. Enter the Name and tap Save to save the job. Enter a Group name if you have more than one job button groups.
-
Page 117: Save To Network
Save to Network Folder Network saves files to SMB shared folders on Network Attached Storage devices, Windows, Apple OSX, Linux, UNIX, or any server or PC that supports the SMB protocol. This feature allows nScan to send files to a destination without loading any special software on a PC or that device. - Page 118 Select the target device, by tapping on the device name from the alphabetical ordered list on the bottom of the screen, or enter the device's IP address. 1. Enter the Username and Password for the selected device. Check Save password if necessary.
- Page 119 Your server, login and folder settings are automatically saved in the favorites list If you would like to remove saved settings from favorites, tap then tap to delete the network device's name. 119 of 142: UG-NS915-1.3...
- Page 120 When you see the following dialog, the scanned document was sent to the network share. Tap Continue button to save the scanned document to another destination, or tap the Finish button to complete the scanning procedure. If this is a scan job that you will use frequently, you can create a single touch scan job. Tap Assign as a new job button and save this scan job as a single touch scan job button.
- Page 121 The next time you need to scan a document to this destination, tap on the upper-right corner of the main screen, load your documents, and tap the scan job you just created. 121 of 142: UG-NS915-1.3...
-
Page 122: Scanning Using Job Buttons
Scanning using job buttons Job buttons are ideal for automating repeated scanning jobs. With a job button, you simply load the document in the feeder and touch one button. The document is scanned and sent to the pre- programmed destination. You are prompted to create jobs after each scan. - Page 123 To initiate a scan job, tap on the upper-right corner of the main screen display the scan jobs. Load the documents in the scanner. Tap the desired job button. The document is scanned and sent to the destination. Tap the Home button on the upper-right corner to return to the main screen if necessary.
- Page 124 Job Groups Job groups are helpful when you have different departments using the scanner or you have more than 12 scan jobs. You can configure an unlimited number of job groups and each group can have 12 jobs. To scan to a job in a group, load the document in the feeder. Select a job group by tapping the Group button in the right corner of the jobs screen, in this example , and select a group from the list.
-
Page 125: Chapter Iii. Care And Maintenance
III. C HAPTER ARE AND AINTENANCE Your scanner is designed for low maintenance. However, routine care and maintenance maximizes image quality and minimizes issues. LEANING THE CANNER Paper powder, dust, ink and toner from paper being scanned can make the ADF dirty. This leads to poor image quality or document-feeding errors. -
Page 126: Cleaning The Adf
Cleaning the ADF 1. Open the panel unit by pushing the Panel Release Button. Panel Release Button Panel unit 2. Gently wipe the following areas with the cloth dampened with the cleaner. Be careful NOT to scratch their surfaces. Feed Roller: Wipe the Feed Roller from side to side and then rotate it. - Page 127 Pad Module: Wipe the Pad Module from top to bottom (in the direction of arrow shown in below picture). Be careful not to damage the pick springs of the pad. ADF Glass: Do not spray cleaner directly onto the scanner glass.
-
Page 128: Replacing Consumables
4. Close the panel unit by pushing it back down until it snaps back into place. EPLACING ONSUMABLES As a guideline, it is recommended to replace the pad module after 50,000 sheets of letter sized paper scans, and it is recommended to replace the feed roller after 300,000 sheets of letter sized paper scans. - Page 129 2. To remove the pad module, pinch both sides of the pad module and pull it out. 3. Install the new pad module by inserting the tabs on the module onto their slots and snapping the pad module into place. 4.
-
Page 130: Replacing The Feed Roller
Replacing the Feed Roller 1. Open the panel unit by pushing the Panel unit open lever in. Panel unit open lever Panel unit 2. Remove the paper feeder by pinching both sides of the beige tabs on the sides of the paper feeder to remove it. - Page 131 4. Remove the feed roller by pulling the tabs straight up when they are perpendicular to the transport. 5. Install the new feed roller by inserting the roller so the tab on the shaft aligns with the slot on the right side of the drive mechanism. 6.
- Page 132 7. Install the paper feeder by aligning and inserting the tabs of the paper feeder into their slots on the scanner and pushing the feeder back until it snaps into place. 132 of 142: UG-NS915-1.3...
- Page 133 8. Close the panel unit by pushing down until it snaps back into place. 133 of 142: UG-NS915-1.3...
-
Page 134: Chapter Iv. Troubleshooting
IV. T HAPTER ROUBLESHOOTING If you encounter problems with your scanner, please review the installation and scanning instructions in this guide. LEARING APER 1. Remove all documents in the ADF feeder. Do not try to pull jammed or half-scanned documents out of the ADF without first opening the panel unit. - Page 135 3. Remove jammed documents from the ADF. Try to avoid creasing or wrinkling the documents. 4. Close the panel unit by pushing it back down until it snaps back into place. 135 of 142: UG-NS915-1.3...
- Page 136 ONNECTIVITY AND SAGE SSUES Resolving Google Drive and Gmail issues Either Allow Less Secure Apps or Two Step Authentication must be enabled on the target Google account. When Two Step Authentication is enabled, you must generate a new app password for nScan. Two Step Authentication and App Passwords: https://support.google.com/accounts/answer/185833?hl=en Allowing Less Secure Apps to access your Google account:...
- Page 137 Troubleshooting Save Failed Errors Most Save Failed errors are caused by: • nScan not connected to the network and/or internet. • Destination is not enabled to accept files from the nScan. Testing network and internet connectivity • On the Home screen tap System Settings> Wrench •...
- Page 138 Network Shares • Navigate to the server by tapping on the letters of the alphabet in the lower part of the SMB screen. • If you cannot see the server on your network, enter the IP address of the server in the Computer field.
-
Page 139: Appendix A: Specifications
A: S PPENDIX PECIFICATIONS Image Sensor CIS (Contact Image Sensor) x 2 Light Source LED (Light Emitting Diode) Optical Resolution 600 dpi Hardware Resolution 600 x 600 dpi 50 sheets (70 g/m², 18 Lbs.) ADF Capacity Note: Maximum ADF capacity varies, depending upon paper weight. -
Page 140: Appendix B: Customer Service And Warranty
Support is available from 8:00 a.m. – 7:00 p.m. Eastern Time Monday-Friday by dialing (630) 530-5400, option 3. For all Ambir scanners you can speak directly to a technical support representative or leave a message for a call back. You will be connected to a highly trained, friendly and professional support agent who will work with you to resolve your issue. - Page 141 Host computer operating systems, application programs or hardware configurations are not covered. For customer service or further warranty information please email or call Ambir directly. Please provide product model name and number, place and date of purchase, your name, daytime telephone number and a description of the difficulty you are experiencing. You will normally receive a written email response or call-back within one (1) business day.
- Page 142 FCC Radio Frequency Statement This equipment has been tested and found to comply with the limits for a Class B digital device, pursuant to part 15 of the FCC rules. These limits are designed to provide reasonable protection against harmful interference in a residential installation. This equipment generates uses and can radiate radio frequency energy and, if not installed and used in accordance with the instructions, may cause harmful interference to radio communications.
Need help?
Do you have a question about the nScan 915i and is the answer not in the manual?
Questions and answers