Advertisement
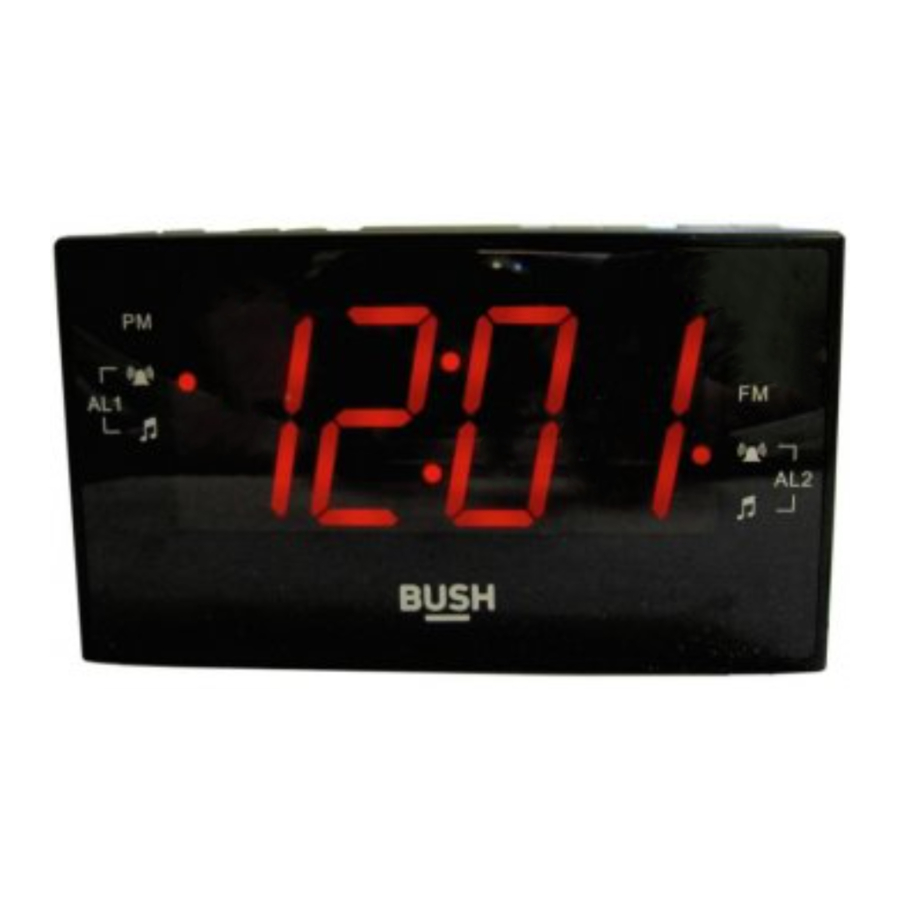
KNOW YOUR MACHINE

- ON / OFF/ BAND
- TIME / PRESET
- PRESET -
- PRESET +
- SNOOZE / SLEEP / DIMMER
- ALARM 1 / VOLUME –
- ALARM 2 / VOLUME +
- HOUR / TUNE –
- MINUTE / TUNE +
- FM Indicator
- ALARM 2 BUZZER INDICATOR
- ALARM 2 RADIO INDICATOR
- PM INDICATOR
- ALARM 1 BUZZER INDICATOR
- ALARM 1 RADIO INDICATOR
GETTING STARTED
POWER SOURCE
TO USE AC HOUSE CURRENT
- Please check carefully that the voltage indicated on your set corresponds to the voltage of your local area.
- Plug the AC cord into the standard household electrical socket.
BATTERY BACKUP
This unit has a backup battery facility, which provides power in the event of a power cut.
- Remove battery door.
- Insert 2 new AAA size batteries (not included) with the correct polarity.
- Refit the battery door.
If there is a power failure, the time setting, alarm setting and all the memory setting will maintain due to the DC power supply by the battery. The LED display will not be illuminated to save power. After AC power resumes, the unit can function properly immediately according to the setting before the power failure.
Note: When you are not going to use the unit for a long period of time, disconnect the AC power cord from AC outlet and remove the battery,
OPERATION
RADIO OPERATION
- Press the ON/OFF/BAND button (1) once to turn on the radio. The radio is receiving in FM band with the FM indicator (10) turned on and the LED is showing the frequency. (fig. 1)
![]()
- Press the ON/OFF/BAND button (1) once again to alternate the radio band that the radio is receiving. No indicator will be turned on in case AM band is chosen. After 3 seconds, the LED will change back to show the time. (fig. 2)

- Press HOUR/TUNE+ (9) or MINUTE/TUNE- (8) to turn into the desire station by either of the following methods: (fig. 3)

Manual Tuning: Press either of the 2 tuning button, HOUR/TUNE+ (9) or MINUTE/TUNE- (8), repeatedly until the desired station is reach.
For AM tuning, the radio can tune starting from 522 KHz to 1620 KHz, each pressing of HOUR/TUNE- button (8) can tune down by 9 KHz and each pressing MINUTE/TUNE+ button (9) can tune up by 9KHz.
For FM tuning, the radio can tune starting from 87.5 MHz to 108 MHz, each pressing of HOUR/TUNE- button (8) can tune down by 0.1 MHz and each pressing of MINUTE/TUNE+ button (9) can tune up by 0.1 MHz.
Auto Tuning: Press and hold either of the 2 tuning button, HOUR/TUNE- button (8) or MINUTE/TUNE+ (9) for more than 2 seconds and auto tuning will be performed. Tuning will stop automatically until a clear radio signal is found.
Repeat the same procedure by using the same button until your desired station is found.
To stop auto tuning, press any button once.
Note: In some area where the radio signal is not strong enough, the auto tuning process may not be able to stop automatically in the desired station. In such case, please use the Manual Tuning method to tune to the desired station according to instruction above. The may happen more probably when tuning the radio in AM band. - Press ALARM 2/VOLUME+ button (7) or ALARM1/VOLUME- button (6) to increase or decrease the volume to the desired level. The volume level ranges from 0 to 16, and the LED will show the volume level during volume adjustment. (fig. 4)
![]()
- Press and hold the ON/OFF/BAND button (1) to turn off the radio. (fig. 5)
![]()


Note 1: The current station (either AW or FM) and also the current volume level will be memorized at the time when the radio is turned off. Once you turn on the radio again, the memorized station will broadcast with the memorized volume level.
Note 2: For the best FM reception, extend the FM antenna wire to its full length and vary the direction to capture the strongest signal. Do not connect the FM antenna wire to an outdoor antenna.
Note 3: For MW reception, a ferrite-bar antenna is built-in. Since this antenna is direction oriented, turn the unit to a direction at which the reception becomes optimal.
PRESETTING YOUR FAVOURITE STATION
You can preset up to 10 stations in 10 memories for each band. These 10 memories are indicated as preset numbers P01, P02, P03, P04, P05, ... up to P10.
- During the radio operation mode, follow step 4 in "Operating the radio" and tune the radio into the station that you wish to preset.
- Press and hold the TIME/PRESET button (2) for more than 1 second until the number after last memorized preset number appears and flashes. (fig. 6)
![]()
- You can then choose the preset number that you want to memorize this station by pressing PRESET- (3) to step down the sequence, or by pressing PRESET+ button (4) to step up the sequence. (fig. 7)
![]()
- Once the preset number is chosen, it will keep flashing for 5 seconds. Press TIME/PRESET button (2) once within these 5 seconds, then the tuned station will be memorized in this chosen preset number and the LED will stop flashing and change to show the frequency, then change to show the time after 5 seconds. (fig. 8)
![]()
- If the TIME/PRESET button (2) is not pressed within this 5 seconds period, then the LED will jump back to show frequency, and the memory storing will not succeed. (fig. 9)
- If the chosen preset number is already memorized with a station, the above procedure will allow the newly tuned station to supersede the originally memorized station.
- In following the above steps, you can memorize your 10 most favorite stations of each band into the 10 preset stations.


PRESETTING BY AUTO SCANNING
This radio can automatically search all stations in each band and stored the 1st searched 10 stations into memory location. Please follow the following step:
- Turn on the radio, and select the waveband.
- Press the TIME/PRESET button (2) for more than 5 seconds, then the LED will change from showing the PRESET number to showing the frequency. Consequently, the radio will start to scan up from the currently tuned station, and store the 1st 10 searched stations into the memory location. (fig. 10)
- If the scanning reaches the high end, e.g. 108MHz for FM band, but all the 10 memories locations are not yet used up, then the scanning will start again from the low end, i.e. 87.5 MHz until all the 10 memories location are filled up.
- After the scanning is completed, the radio will be Tuned to the station stored in the PRESET number P01.
TUNING INTO A PRESET STATION
- When the radio is on (either AM or FM), press Preset-button (3) or Preset+ button (4) to choose the PRESET number, in which your desired station is stored. (fig. 11)
![]()
- Radio is then tuned to the stored station. The preset number will be shown for 3 seconds, then change to show the radio frequency. After 5 seconds, the LED will switch to show the time again.

TIME SETTING
- When the unit is first plugged into the AC mains, "0:00" will appear with the 1st 0 digit flashing, indicating that the TIME is ready to be set.
- Press HOUR/TUNE- button (8) repeatedly to choose the correct HOUR. (fig.12) In case if the time is set to afternoon time, the PM indicator (13) will be turned on.

- Press HOUR/TUNE+ button (9) repeatedly to choose the correct MINUTE. (fig.12)
- After setting to the correct time, either press TIME/PRESET button (2) once, or just leave 5 seconds, then the display stop flashing, and the clock will start run from the set time. (fig.13)
![]()
- To change the current time, switch off the radio. Press and hold TIME/PRESET button (2) for 2 seconds until the display flashes, then follow the same steps as point 2, 3 & 4 above to set the new time. (fig. 13)


DUAL ALARM FUNCTION
This product allows the user to set to dual alarm function. Each alarm function can be set independently, either wake to radio, or wake to buzzer. When any one of the set alarm is wake to radio, please be reminded to select the desired band, station and volume level before turning off the radio.
ALARM SETTING
- To set the alarm time, the radio must be turned off.
- Press ALARM 1/VOLUME- button (6), the LED digits will flash, indicating that alarm time of ALARM 1 is ready to be set with either ALARM 1 Buzzer indicator (15) is turned on. (fig.14)

- Press HOUR/TUNE- button (8) repeatedly to choose the correct HOUR. Please make sure PM indicator (13) is turned on if the set alarm time is in PM session. (fig.15)
![]()
- Press MINUTE/TUNE+ (9) repeatedly to choose the correct MINUTE. (fig.16)
![]()
- After setting the desired alarm time, either press ALARM 1/VOLUME- button (6) again, or simply wait for 5 seconds, then the display will return to the current time and the set alarm time is confirmed. (fig.17)
![]()
- Now ALARM 1/VOLUME- button (6) repeatedly to choose the alarm function status. The status appears in following sequence: (fig.17)
- Alarm wake to buzzer is set with Alarm1 Buzzer indicator (14) is ON. (fig.18)
![]()
- Alarm wake to radio is set with Alarm1 Radio indicator (14) is ON. (fig.19)
![]()
- Alarm off is set with no indicator on. After the desired status is chosen, the display will change to show the current time.
After the desired status is chosen, the display will change to show the current time.
- Alarm wake to buzzer is set with Alarm1 Buzzer indicator (14) is ON. (fig.18)
- When you set the Alarm 2, just follow the above step 2 to 6 by using the ALARM2/VOLUME+ button (7) instead of ALARM 1/VOLUME- button (6).
Subsequently, the wake to buzzer status of alarm 2 will be indicated by Alarm 2 Buzzer indicator (11). The wake to radio status of alarm 2 will be indicated by Alarm 2 Radio indicator (12). (fig.20)
![]()
- When the Alarm is turned on, either:
- Press ON/OFF/BAND button (1) once to switch off the alarm. You can see that the alarm indicator is still on, implying the Alarm function is still activated and turned on again after 24 hours. (fig.21)
![]()
- Press the SNOOZE/SLEEP/DIMMER button (5), the alarm sounds will stop temporarily for 9 minutes and will sound again after. (See SNOOZE SETTING below)
- If no button is pressed after the alarm sounds, the alarm will keep turned on and then turned off in 1 hour after alarm time.
- To disable the alarm function, press ALARM 1/VOLUME- button (6) or ALARM2/VOLUME+ button (7) until their indicators (radio or buzzer) disappear on the display. (fig.22)

- Press ON/OFF/BAND button (1) once to switch off the alarm. You can see that the alarm indicator is still on, implying the Alarm function is still activated and turned on again after 24 hours. (fig.21)


Notes
- The ALARM 1 (or 2) indicator flashes in the display when the alarm sounds.
- If a later alarm starts to sound when the earlier alarm still sounds, then the later alarm takes priority.
- If a later alarm sounds when the earlier alarm is under SNOOZE period, then the later alarm takes priority and will cancel the SNOOZE function of the earlier alarm automatically.
- If the same time is set for both alarm (ALARM1 or 2), the ALARM 2 takes priority.
SNOOZE SETTING
Once the alarm is activated, the snooze function can be used to stop the alarm temporarily for about 9 minutes and then alarm will sound again.
- Once alarm (either Alarm 1 or Alarm 2) sounds, press the SNOOZE/SLEEP/DIMMER button (5), the buzzer or radio alarm sounds will stop and will sound again after about 9 minutes. The SNOOZE function can maintain within 1 hour from the set alarm time.
- During the time when SNOOZE function is activated, the alarm indicator will flash.
- To switch off the SNOOZE function, simply press ON/OFF/BAND button (1) once. You can then see the alarm indicator stop flashing, and the alarm will not sound again after the snooze period elapse. (fig. 23)
![]()

SETTING THE SLEEP TIMER
The sleep function allows the radio to play in Blocks of 10,20, 30, 40, 50, 60, 70, 80, or 90 minutes, and then being turned off automatically, thus, you can enjoy falling asleep when listening the radio.
- Turn on the radio.
- Press the SLEEP/SNOOZE/DIMMER (5) button, then the radio is turned on with the display showing 90 (for 90 minutes) (fig.19)
- Press the SLEEP/SNOOZE/DIMMER (5) button repeatedly until the display shows the desired SLEEP time period. The time period is shown on the display in sequence as 90>80>70>60>50>40>30>20>10>0 (OFF). (fig.24)
![]()
- In 2 seconds after the desired SLEEP period is chosen, the display will change to show the radio frequency, and then the current time. The radio will play for the SLEEP time duration you have set and then be turned off automatically.
- Press the SLEEP/SNOOZE/DIMMER (5) button again during SLEEP mode, the LED, will show the remaining time of the SLEEP period, and the SLEEP time can be set again b pressing the SLEEP/SNOOZE/DIMMER (5) button. (fig.24)
- To turn off the radio during the SLEEP mode, simply press and hold ON/OFF button (1) once and the radio will be turned off immediately. (fig. 25)
![]()


HIGH/LOW DIMMER FOR LED DISPLAY
Once can adjust the brightness of the LED display to cope with requirement due to different environment. Turn off the radio and press SNOOZE/SLEEP/DIMMER button (5) once, the LED will change to brighter or dimmer. (fig. 26)

TECHNICAL DATA
Power Source: 230V~50Hz
Frequency Range: FM 87.5-108 MHz
AM 522KHz-1620KHz
Speaker: 57 mm, 8, 0.5 W
Power consumption: 5W
DC Battery for back up: 3V, 2 x AAA size batteries (not included)
Connecting to Power
Check that the voltage marked on the product corresponds with your supply voltage.
This product is fitted with a 3A plug complying with BS1363. If the plug is unsuitable or needs to be replaced, please note the following:
Plug Replacement
If you need to replace the fitted plug, refer to the notes below:

Never connect live or neutral wires to the earth terminal of the plug.
Only fit an approved 14 Amp BS1363/A plug and the correct rated fuse.
If in doubt, consult a qualified electrician.

The wires in this mains lead are coloured as follows:
Blue - Neutral
Brown - Live

As the colours of the wires in the mains lead of this apparatus may not correspond with the coloured markings identifying the terminals in your plug, proceed as follows:
The wire which is coloured blue must be connected to the terminal, which is marked with N or coloured blue. The wire which is coloured brown must be connected to the terminal which is marked L or coloured brown. Always ensure that the plug cord grip is fastened correctly. If a 13A (BS1363) fused plug is used it must be fitted with a 3A fuse conforming to BS1362 and be ASTA approved. If in doubt contact a qualified electrician.

WASTE ELECTRICAL PRODUCTS SHOULD NOT BE DISPOSED OF WITH HOUSEHOLD WASTE. PLEASE RECYCLE WHERE FACILITIES EXIST. CHECK WITH YOUR LOCAL AUTHORITY FOR RECYCLING ADVICE.

Documents / ResourcesDownload manual
Here you can download full pdf version of manual, it may contain additional safety instructions, warranty information, FCC rules, etc.
Advertisement


Need help?
Do you have a question about the CR-828P and is the answer not in the manual?
Questions and answers